Functionality, Security & Maintenance
Return to category.
Go to categoryYou're sitting on the sofa in the evening, every window is shut, yet you feel an almost imperceptible icy draught sweeping through the room. If you hold your hand against the joints - where the casement meets the frame, or where one sliding sash overlaps another - you'll feel air flowing in freely. The cause isn't the aluminium itself; it's the worn-out sealing materials that have reached the end of their life. This is the most common cause of energy loss in older aluminium windows.
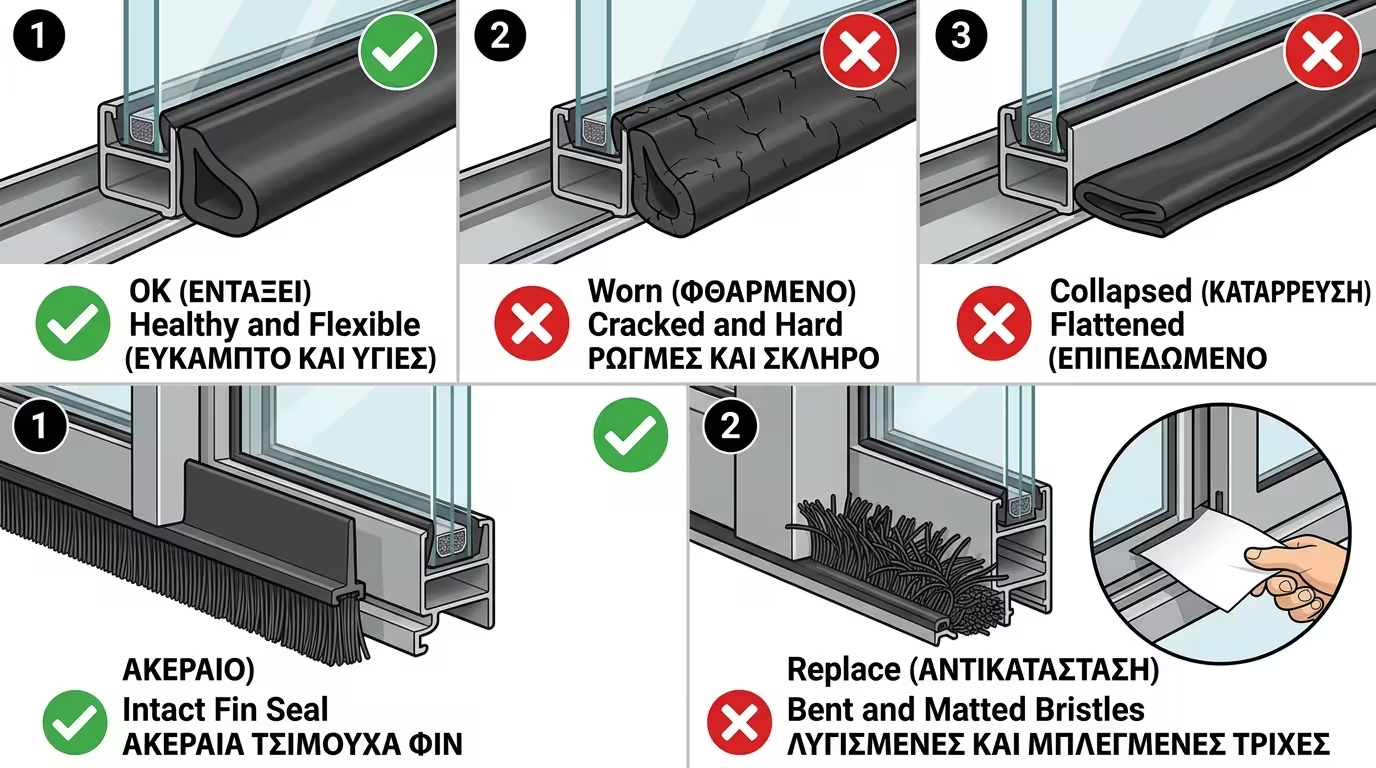
In windows aged 15-20+ years, the rubber gaskets (EPDM) have dried and shrunk, while the brush strips have literally shed their fibres, leaving huge gaps. The good news? Replacing them is a pure DIY job costing just a few euros that will resurrect the insulation of your entire home. Let's see how to do it properly and avoid the most common mistakes.
Casement (hinged) windows: Use exclusively EPDM rubber gaskets. One gasket runs around the sash, and often a second sits on the frame. When you close the window, the two compress together creating an airtight seal. If they're dry or cracked, air passes through freely, causing draughts and heat loss throughout the cold months.
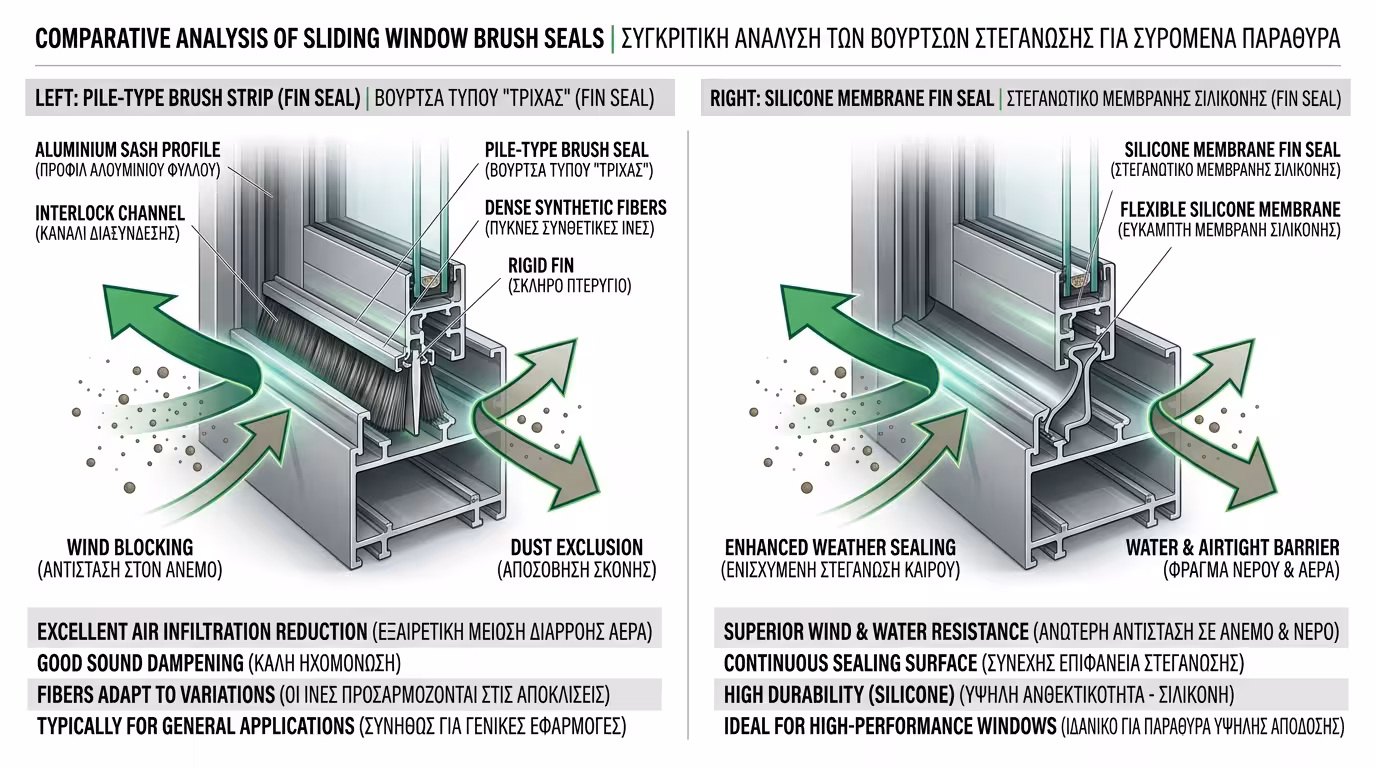
Sliding windows: Mainly use brush strips (a fuzzy fibre material). A rubber gasket would create enormous friction, making it impossible to slide the door. Brush strips sit in the top, bottom and side tracks. After years of daily use, the fibres snap and break off, leaving gaps that let both air and fine dust pour through your home.
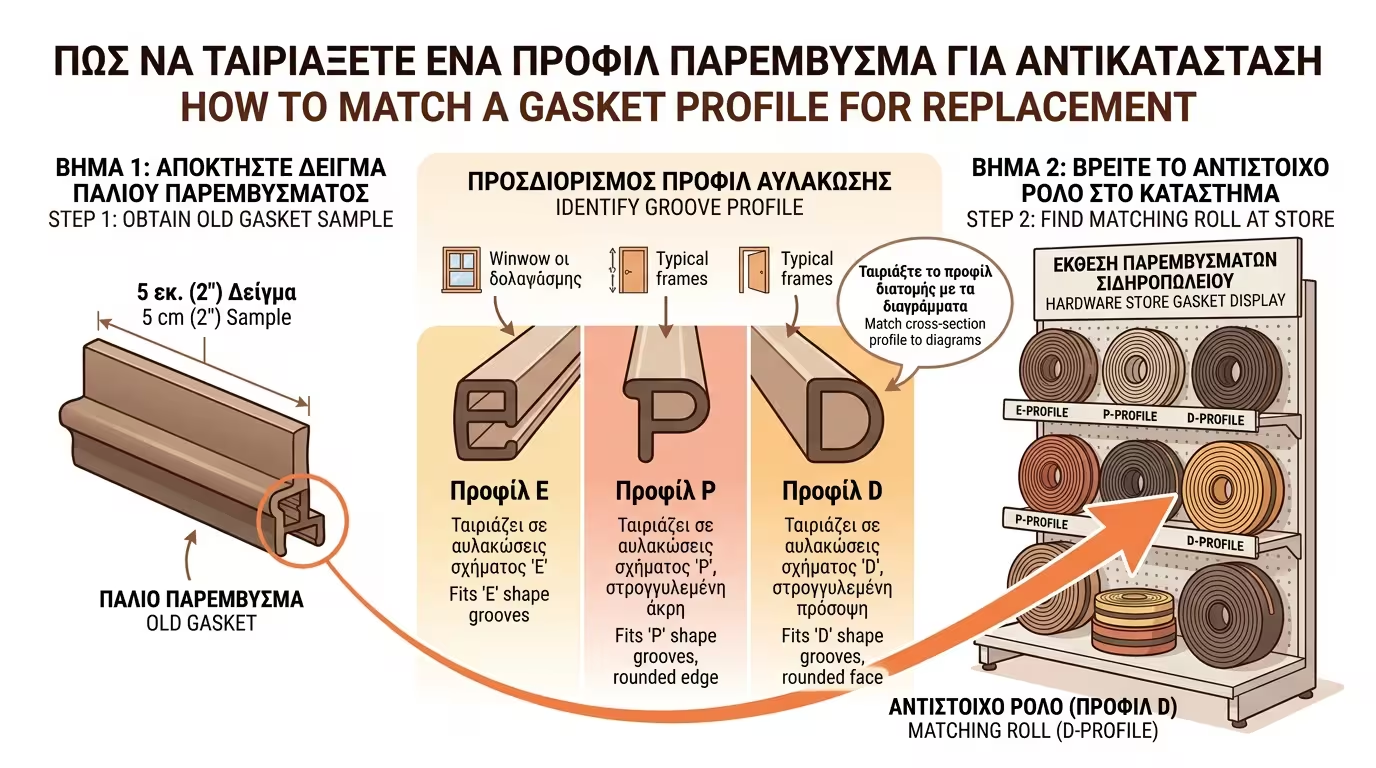
Do NOT go to a general hardware store asking for "any rubber for aluminium windows." There are literally hundreds of different profiles on the market - different bases, thicknesses and cross-sections. If you buy the wrong size, it either won't fit the groove or will be too thick, preventing the door from closing properly. Either way you'll waste money and time for nothing.
Step by step: Open the window, find the edge of the old gasket or brush strip, pull it out of the groove with pliers, cut a 5 cm sample, and take it to a specialist aluminium hardware shop (not a regular paint store) to get an exact match by the metre.
Pro-Tip for brush strips: Ask for a "fin seal" brush strip. It has an invisible vertical plastic membrane running through the centre of the bristles that blocks air 100% more effectively than a plain brush strip, for just a small price premium.
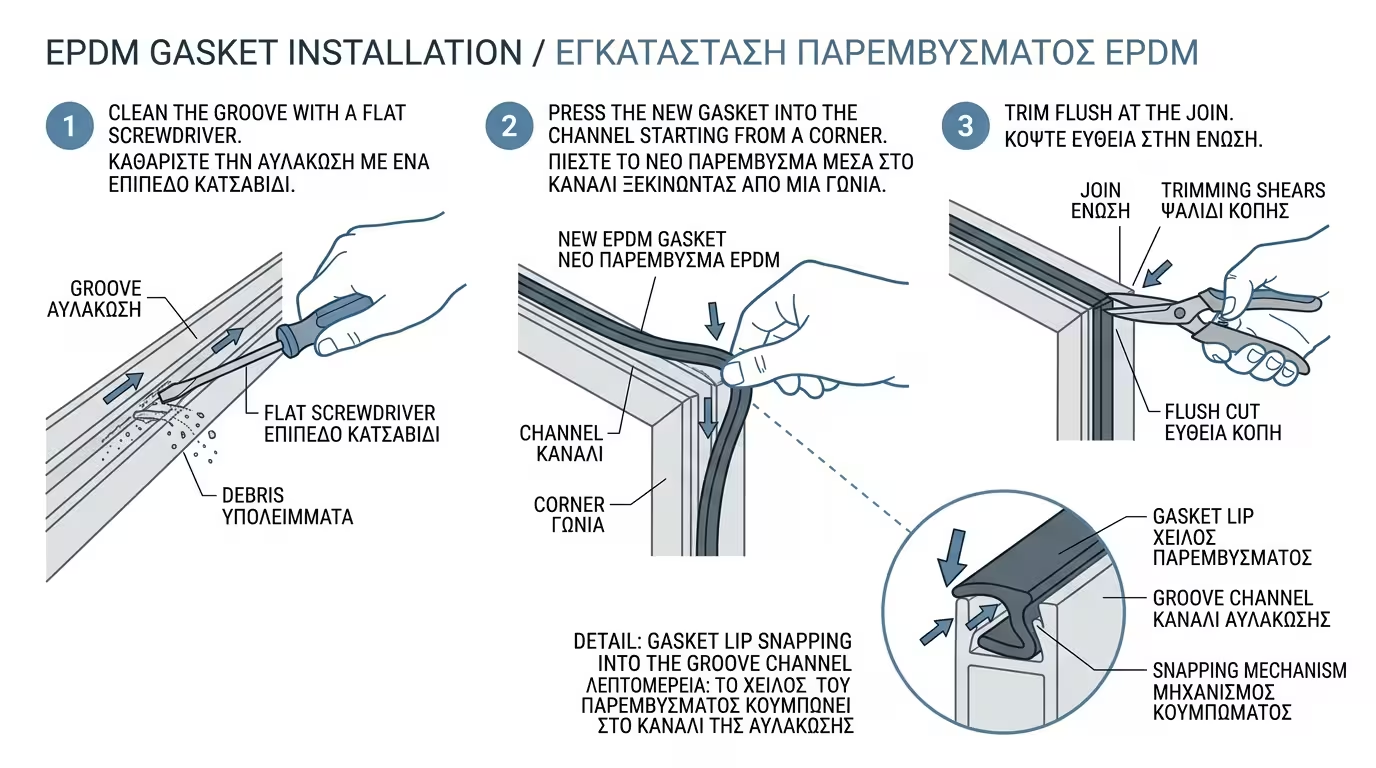
Pull the old gasket out completely and clean the groove with a damp cloth. Start pressing the new gasket in with your thumb, beginning from the top centre of the window frame.
The Stretch Rule: Never pull and stretch the gasket! EPDM has shape memory. If you stretch it during installation, within two weeks it will shrink back and leave a 5 cm gap in the corner. Press it in loosely, even compressing it slightly inwards as you go. When you complete the full circuit, cut leaving 1 cm extra (slack) and wedge the end tightly against where you started. Work patiently, especially at each corner, to prevent shrinkage.
Brush strips have a hard plastic base that slides into the groove like a drawer. Pull the old strip out from one end (you may need to slide it upwards or sideways). Thread the new strip into the track; if it sticks, apply a drop of washing-up liquid or silicone spray to the groove to help it slide smoothly. Cut to length with wire cutters once it reaches the end.
💡 Conclusion: Why freeze in winter and pay a fortune in heating bills because of worn seals? With less than €20-30 and a free afternoon, you can replace all the gaskets and brush strips in your home - the smartest, most cost-effective "micro-renovation" before you commit to a full window replacement!
Return to category.
Go to categoryReturn to the central guide.
Go to guide