Functionality, Security & Maintenance
Return to category.
Go to categoryIt's a scene from thousands of homes: you grab the handle of your balcony sliding door, pull with all your might, your face turns red, and the door barely moves with a terrible metallic screech. The issue is especially bad on cold winter mornings when grime has hardened and the broken roller has seized up. If your sliding door demands a gym workout just to open, don't rush to condemn it - the problem isn't the aluminium itself.
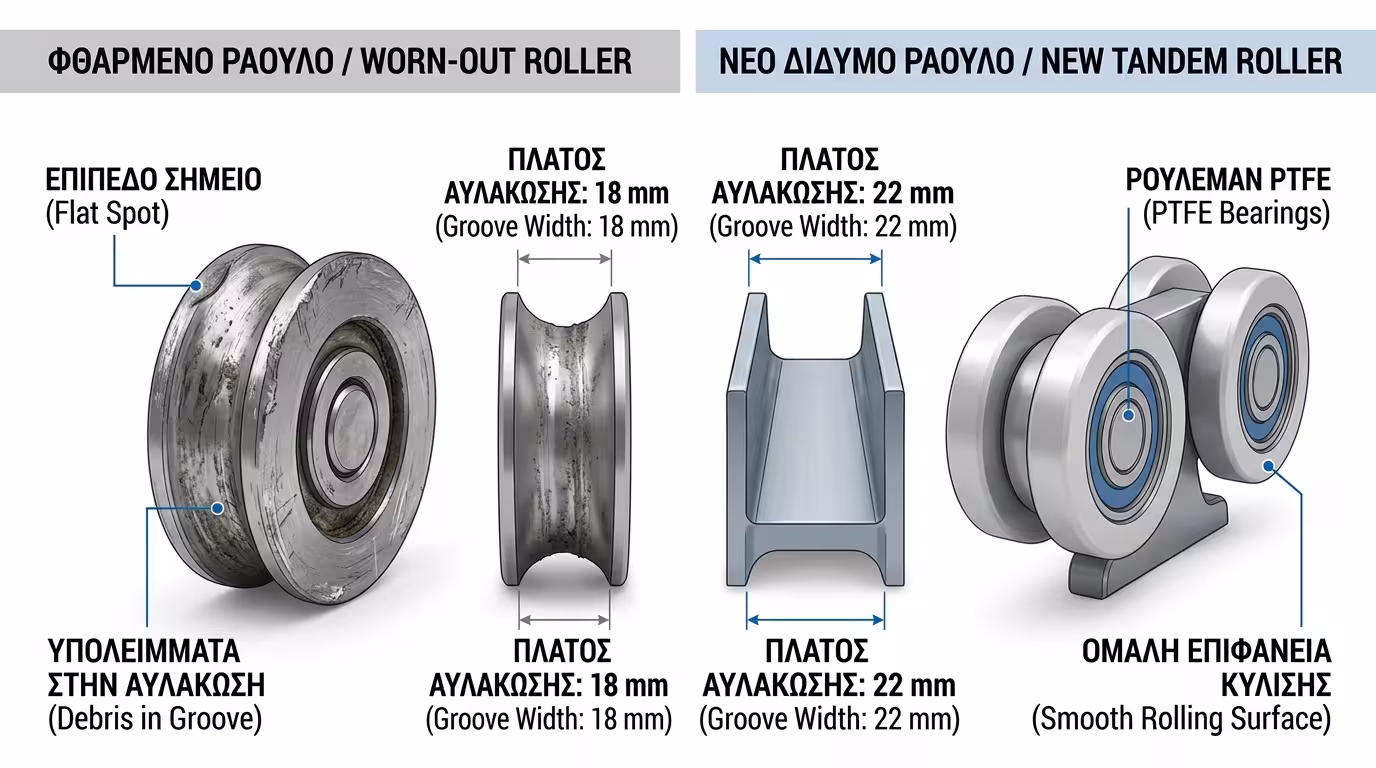
The culprit is hiding at the bottom of the door: the rollers (sliding wheels). After 15-20 years of daily use, the bearings crack, the plastic or Teflon melts, and the door no longer rolls but scrapes along the track. The fix? A DIY repair costing just €10-20 in parts and about an hour of personal labour that will have your door gliding with a single finger once again!
You will need a Phillips screwdriver, an Allen key (3 mm or 4 mm), a vacuum cleaner, a cloth and a helper. Double-glazed sashes are extremely heavy - never attempt to remove a balcony door on your own or you risk serious injury.
Open the door halfway, grip it firmly on both sides, lift it firmly upwards so the top edge pushes deeper into the upper track, then pull the bottom towards you. Lower it carefully and lay it flat on an old blanket to avoid scratching the aluminium or the floor. Important: always hold the sash by the frame edges, never by the glass panels, for safety. The entire process takes just a few minutes with two people working together.
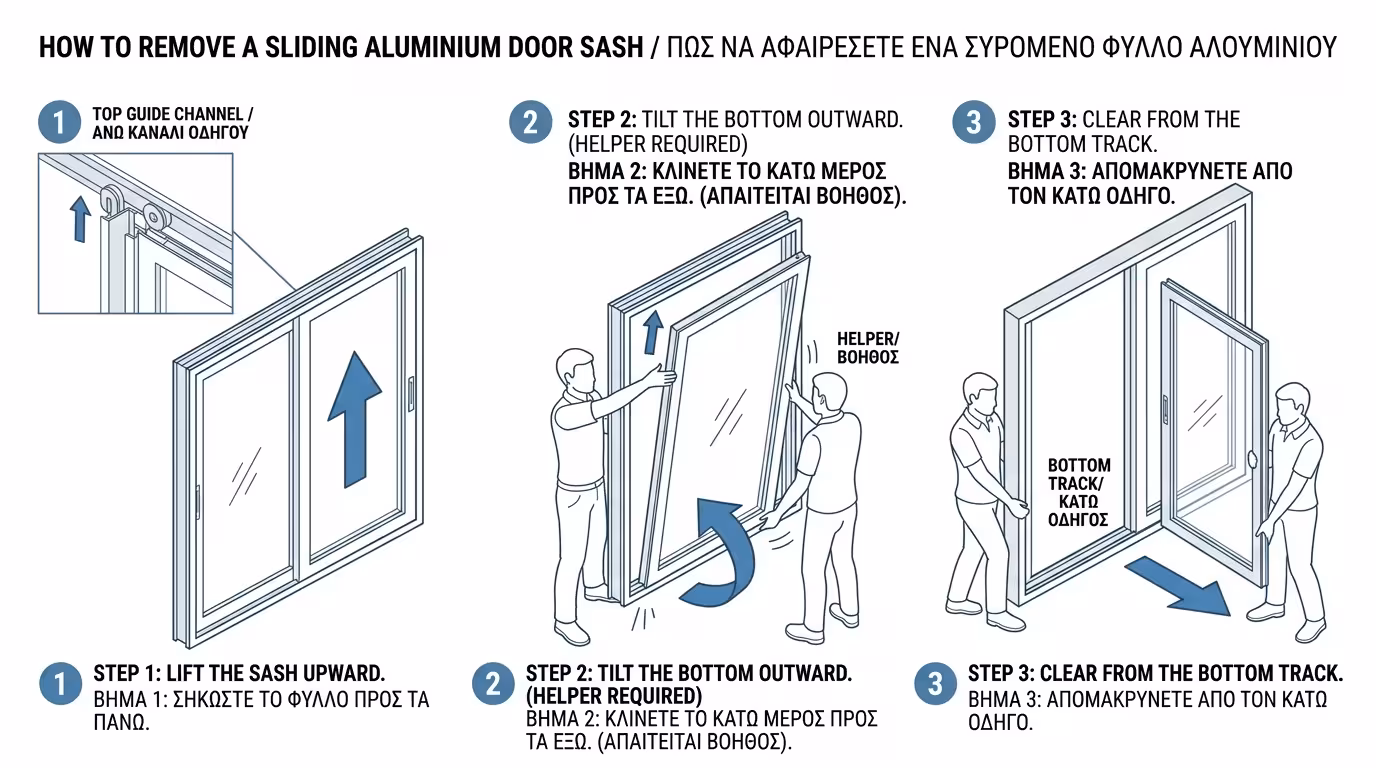
Look at the bottom of the door. In each corner you will see a built-in roller, usually held by 1-2 screws. Unscrew them and pull the old roller out.
The Golden Rule: Do NOT buy rollers before removing the old ones! There are dozens of aluminium series (Europa, Alumil, Aluminco, etc.) and each takes a specific roller (single or double wheel). Take the worn roller in your hand, visit a specialist aluminium hardware shop, and ask for the exact same model in size and type. Cost: about €5-10 per pair - a tiny price compared to the daily frustration you'll be eliminating and the track damage you'll be preventing.
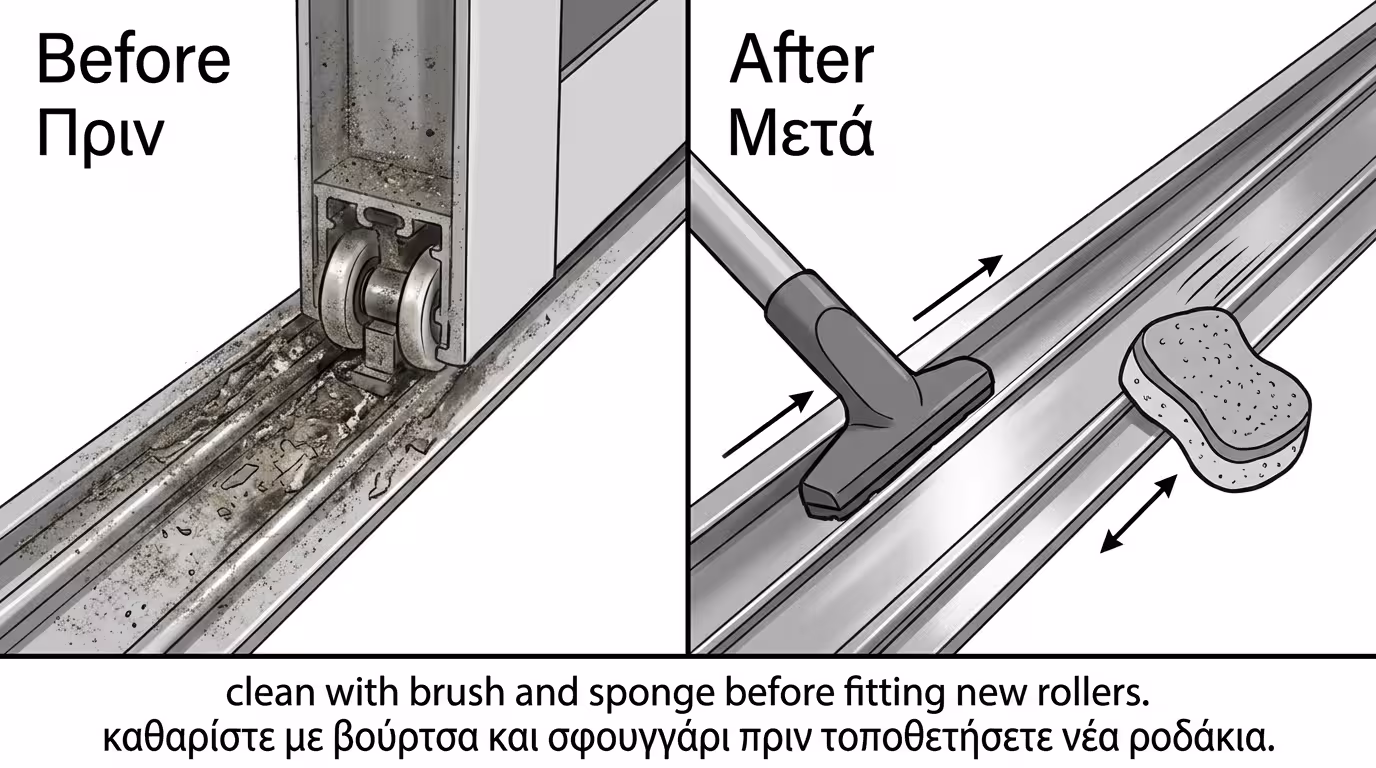
While the door is out, seize the opportunity: the bottom track is almost certainly packed with hard black grime, dust and fragments from the broken old roller. If you fit new rollers on a dirty track, they will be destroyed again in no time. This is the most underrated maintenance step for sliding doors, yet it makes a huge difference.
First, vacuum out the loose debris and large particles. Then scrub the rail with a damp sponge and a little neutral soap until the metal surface shines. If the grime is stubborn, use a plastic scraper (never metal) to avoid scratching the rail. Wipe dry with a clean cloth and let it air-dry completely before you put the door back in - a perfectly clean track is the secret to long-lasting, smooth rolling.
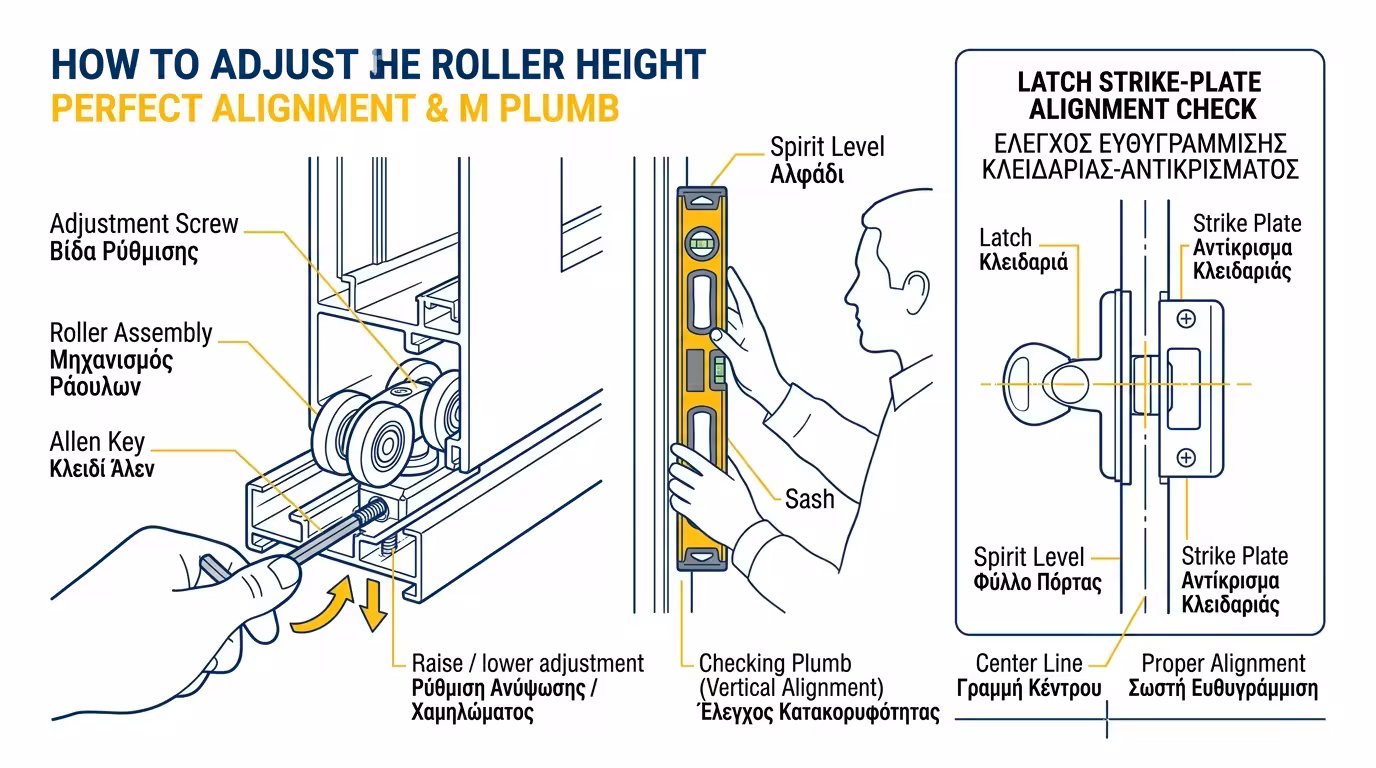
Push the new rollers into their slots and tighten the screws firmly. With your helper, lift the door: insert the top edge into the upper track first, push upwards, then let the bottom rollers settle gently onto the rail. Try sliding it - the difference will feel magical!
Final adjustment (levelling): Each roller has a small hole for an Allen key or screwdriver. Turning the tool raises or lowers the door millimetre by millimetre. Adjust both sides until the door closes perfectly parallel to the frame, the lock engages smoothly, and the sash glides silently as if it were brand new.
💡 Conclusion: Replacing rollers is one of the most satisfying DIY jobs you can do at home. With minimal cost and about an hour of work, you eliminate daily frustration and extend the life of your sliding doors for many more years!
Return to category.
Go to categoryReturn to the central guide.
Go to guide