Functionality, Security & Maintenance
Return to category.
Go to categoryYou've just finished a beautiful renovation. The walls are painted in modern, bright tones, you've swapped the furniture, added recessed lighting. And then your eye falls on the windows - those dark brown (or bronze) aluminium frames from the 1990s that scream "outdated" and darken the entire space, undoing all your hard renovation work.
Tearing them all out and fitting new ones (say, in white or modern anthracite) seems prohibitively expensive. So the next logical thought is: "Can't I just paint them myself?" Online, you'll find wildly conflicting advice. The truth? Painting aluminium by hand is absolutely feasible, provided you forget everything you know about painting walls or wood. Let's bust the myths and look at the correct, professional process step by step.
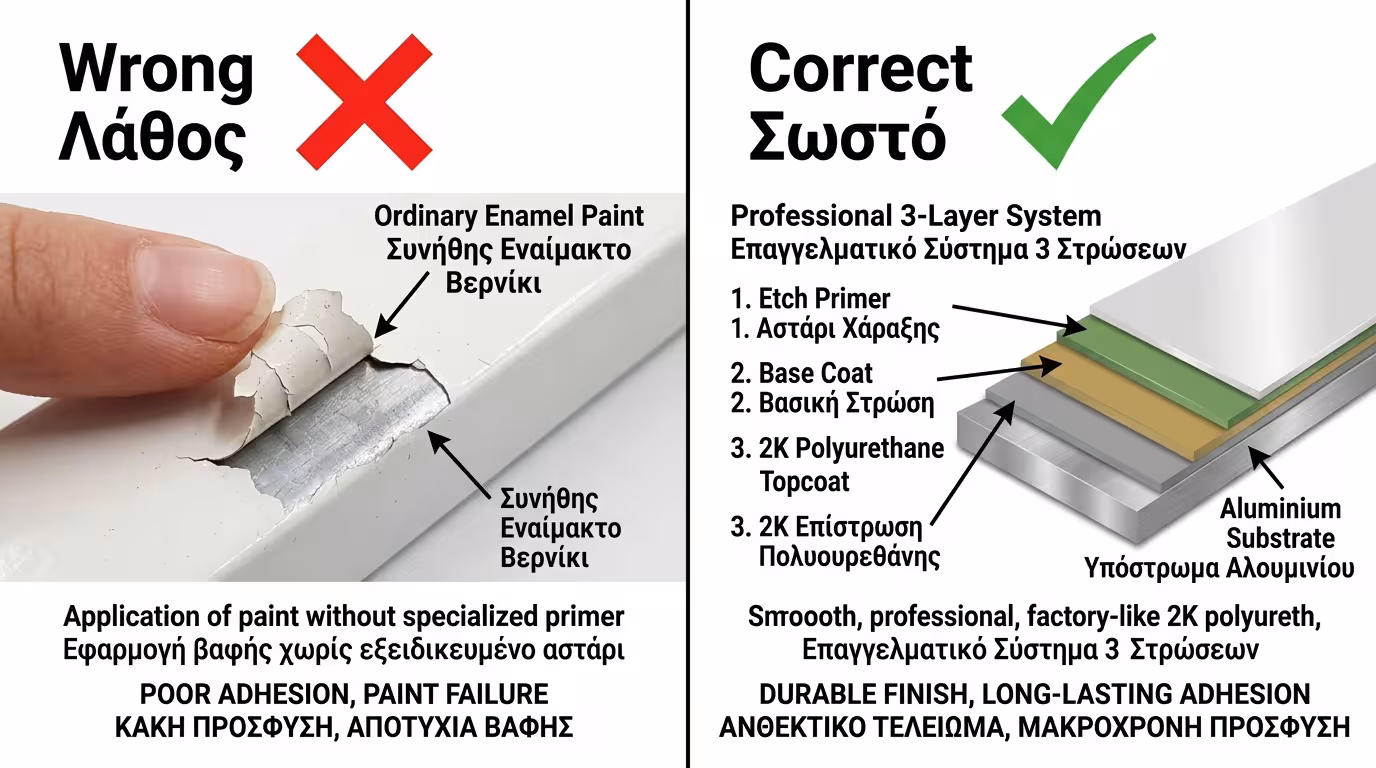
If you walk into a hardware store, buy an ordinary enamel paint (the kind used for railings) and start painting your aluminium, you'll have committed the ultimate construction crime. Aluminium - especially factory-finished with electrostatic powder coating - has an extremely smooth, non-porous surface. Ordinary paint has nothing to "grip" onto. The surface is so glossy that the paint just "sits" on top without any real adhesion.
Once it dries, it will look great, but with the first scratch - or even a light scrape with your fingernail - it will peel off like sunburnt skin. The solution? You need chemistry: three strict steps that guarantee proper adhesion of the new paint to the aluminium surface, ensuring a durable result that will last for many years.
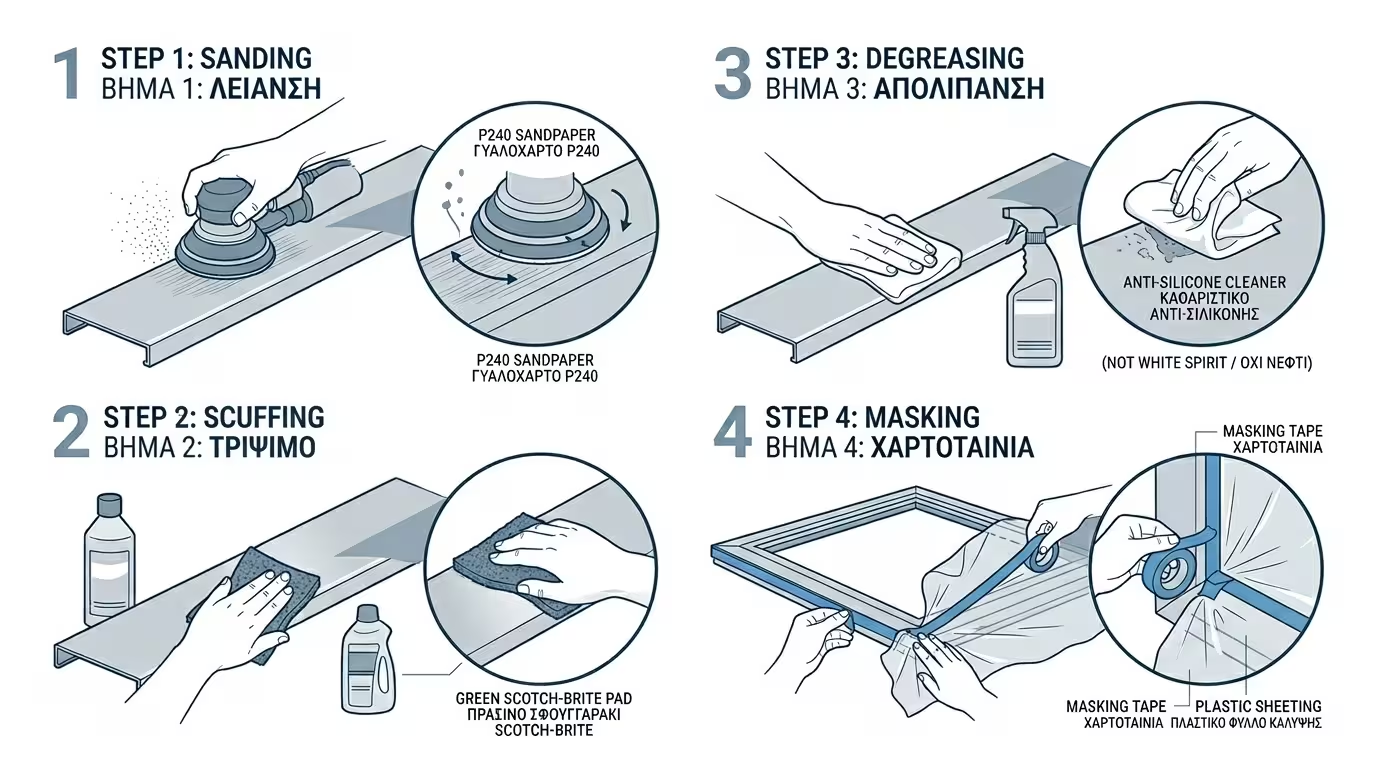
The secret to success lies in preparation. You need to create microscopic scratches on the old finish so the new material can bond effectively:
1. Sanding: Go over all aluminium surfaces with fine sandpaper (P240 or P320) or a Scotch-Brite matting sponge. You don't want to strip down to bare metal, just dull the gloss. 2. Thorough Cleaning: Wipe off the dust, then clean with a silicone remover solvent (not white spirit - it leaves an oily residue that ruins adhesion). 3. Masking: Meticulously mask the glass panes, rubber seals and handles with painter's tape and plastic sheeting.
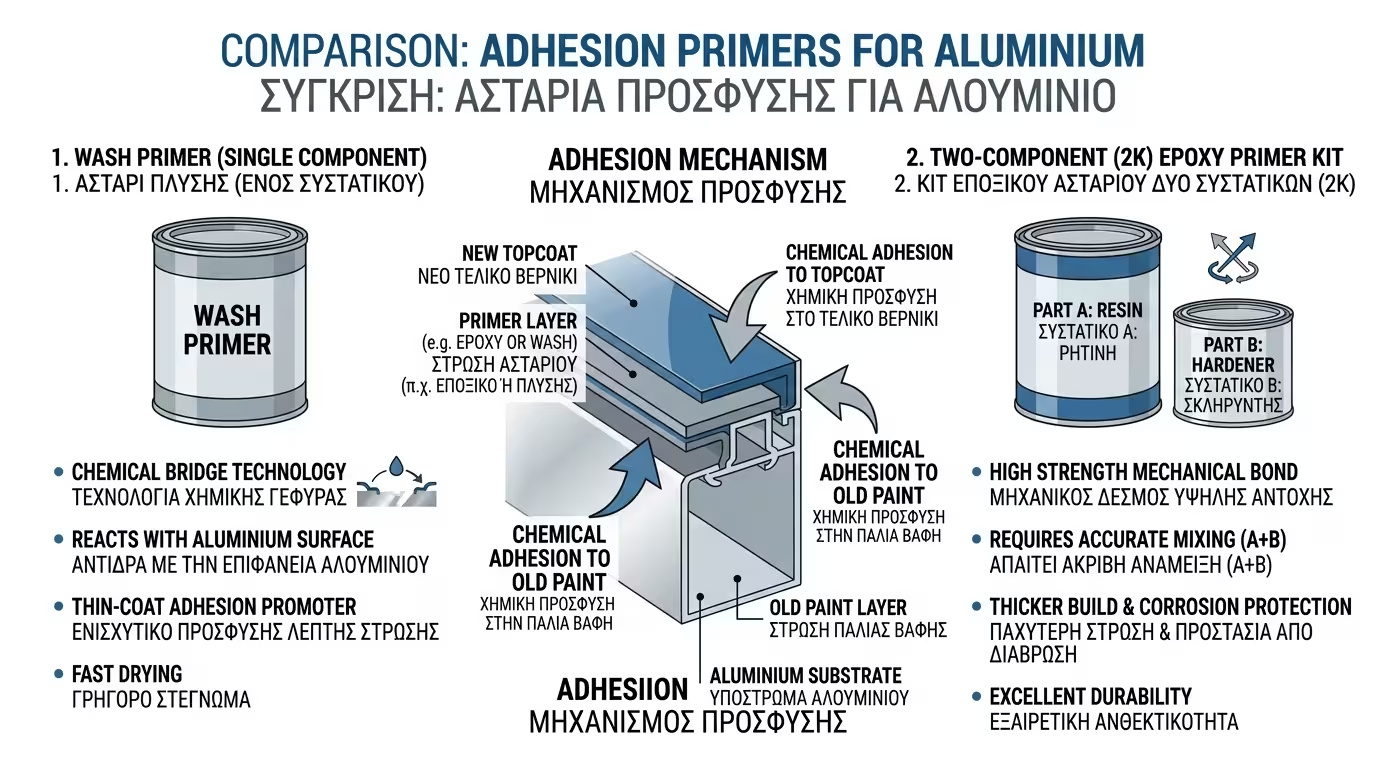
This is the step that separates the amateur from the professional. Aluminium requires a specialist primer that creates a chemical bridge between the old finish and the new paint. Ask for an Aluminium Adhesion Primer (Wash Primer) or a 2-Component Epoxy Primer.
Apply a thin, even coat with a small foam roller or spray gun. The primer chemically "bites" into the old surface, creating the ideal, roughened base for the final colour. Let it dry according to the manufacturer's instructions (typically 4-6 hours before recoating). Important: if you skip the primer, absolutely no topcoat will adhere to aluminium - it's the single most critical step in the entire process.
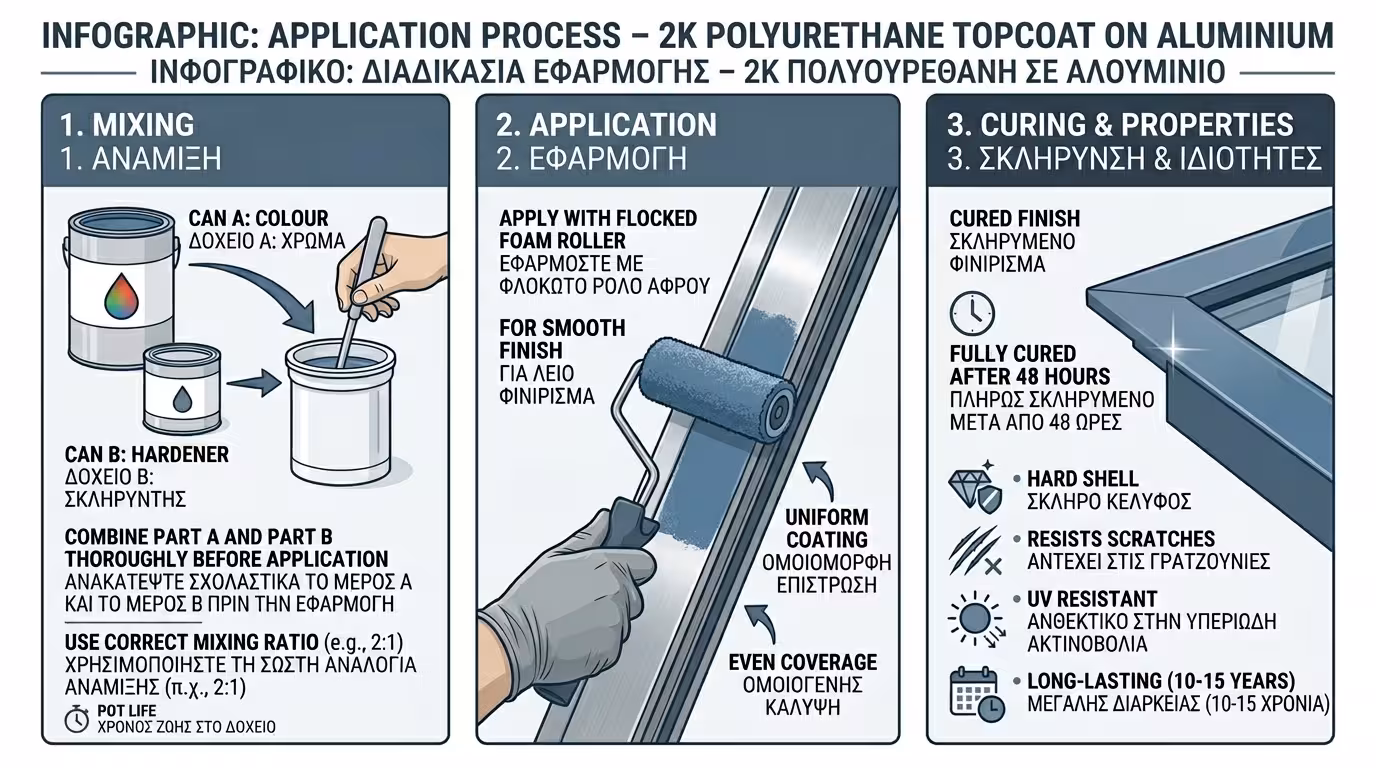
Forget emulsions and acrylics. To withstand the scorching Greek sun, thermal expansion/contraction and everyday knocks, you need 2-Component Acrylic Polyurethane (2K) - the same paint used on boats and cars! Mix component A (colour) with component B (hardener) and a chemical reaction begins, producing an incredibly hard, UV-resistant and durable finish that rivals the original factory coat.
Application: The best method is a spray gun for a flawless, factory-like finish. If you lack the equipment, a high-quality flocked foam roller will give you a very smooth result without the ugly brush marks left by a standard paintbrush. Once cured, the polyurethane forms a tough plastic "shell" that won't yellow or scratch easily for years on end.
💡 Is it worth the effort? It's not a one-hour job - it demands sanding, masking, solvent fumes and good ventilation (use a protective mask for fumes). But if you follow the golden rule of "Clean → Epoxy Primer → Polyurethane", your dark windows will turn white or anthracite, completely transforming your home's look for 10-15 years at a fraction of the replacement cost! The total materials cost for an entire home typically runs to just €100-200.
Return to category.
Go to categoryReturn to the central guide.
Go to guide