Replacing the Strap (Cord) on an Old Manual Roller Shutter: A Complete
Step-by-Step Guide
The strap (or "cord") is perhaps the most wearable component of a manual
roller shutter. After years of daily use, it frays, wears thin and
eventually snaps - leaving the shutter trapped in whatever
position it was in.
The good news: replacing the strap is one of the few shutter repairs you can do yourself, even without much technical experience. You don’t need to pay €40 or
€50 to a tradesman for something so straightforward. Put on some old
clothes, grab your tools and let’s fix it!
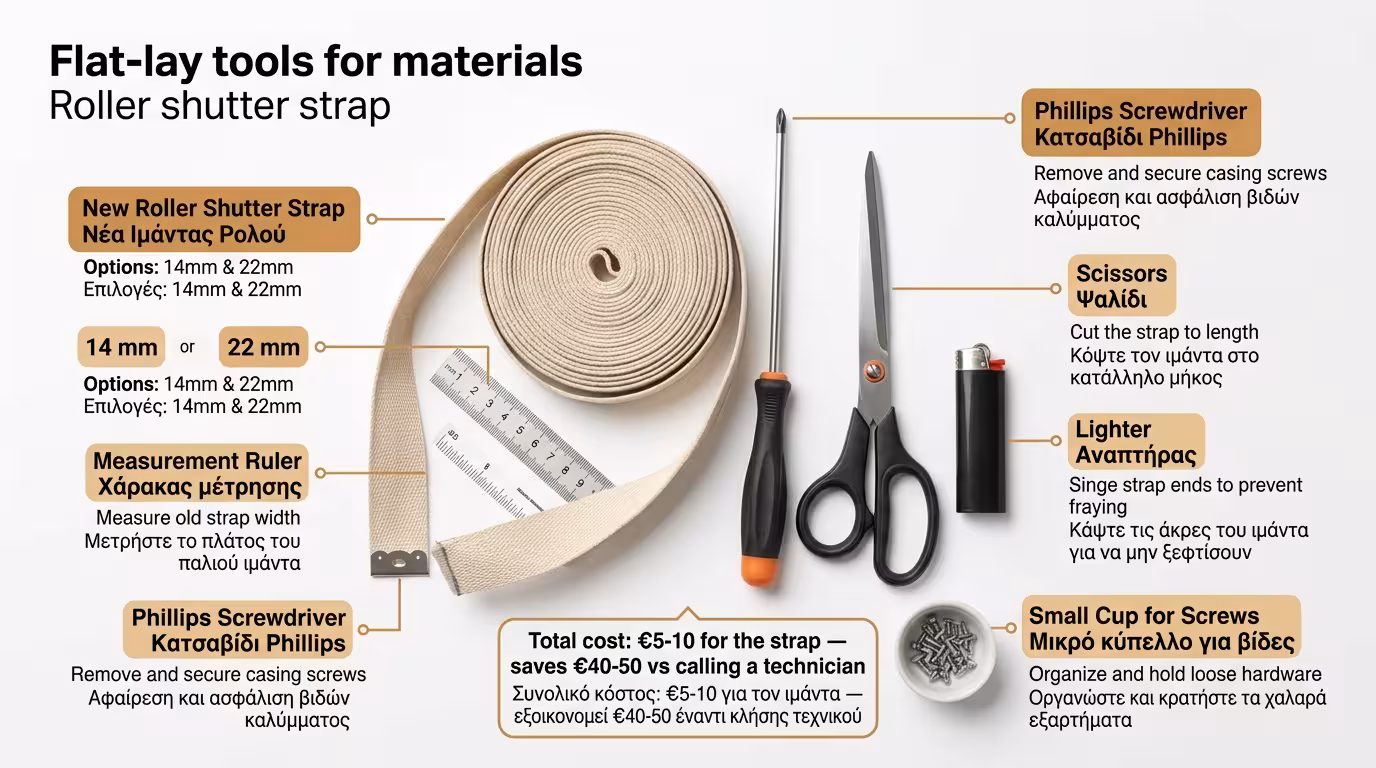
1. What You'll Need (Tools & Materials)
Before you start, gather the following:
🛒 The New Strap
Buy a strap of the same width (14 mm or 22 mm - measure
the old one before going to the shop). Sold by the metre at any hardware
or paint store. You’ll typically need around 4 to 5 metres for a standard
balcony door - get 50 cm more than you think. Colours are usually grey,
beige or white.
🔧 Tools
Phillips screwdriver (or flathead, depending on cover
screws), scissors or a sharp knife, lighter or candle (to seal the cut ends so they don't fray).
⏱️ Time + Ladder
Allow 30–45 minutes if it’s your first time. An experienced
technician does it in 10–15 minutes. You’ll also need a ladder to reach the upper shutter box.
2. The Procedure Step by Step
Follow these steps in order. Don't rush - your safety comes first.
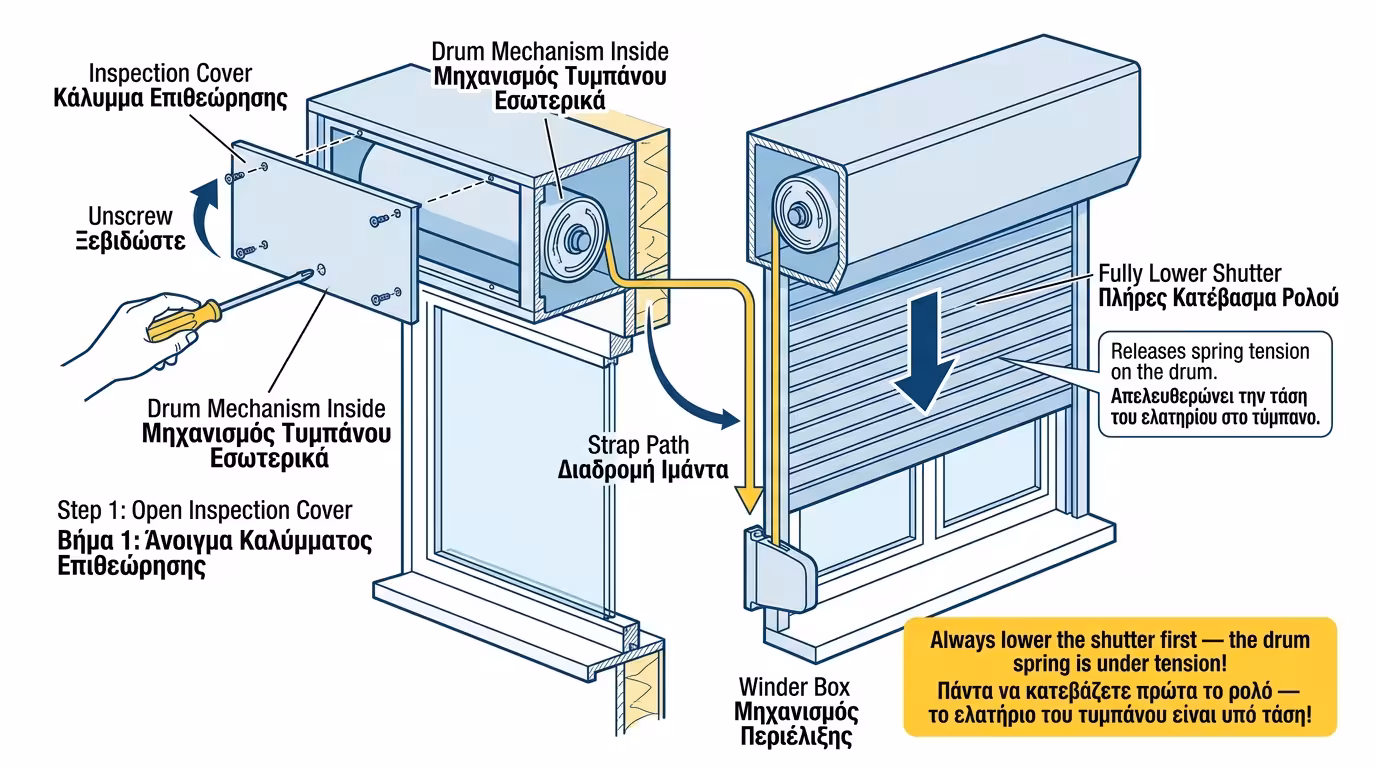
1️⃣ Lower the Shutter Fully
If the strap hasn't snapped completely yet, lower the shutter all the way down. This unloads the drum spring, making the job safer. If the strap
has already broken, the shutter will already be down (if it was
released).
2️⃣ Open the Inspection Cover
Find and remove the screws or clips holding the cover on the
interior side (above the window). Keep the screws in a cup. You can
now see the drum (the cylinder around which the strap winds).
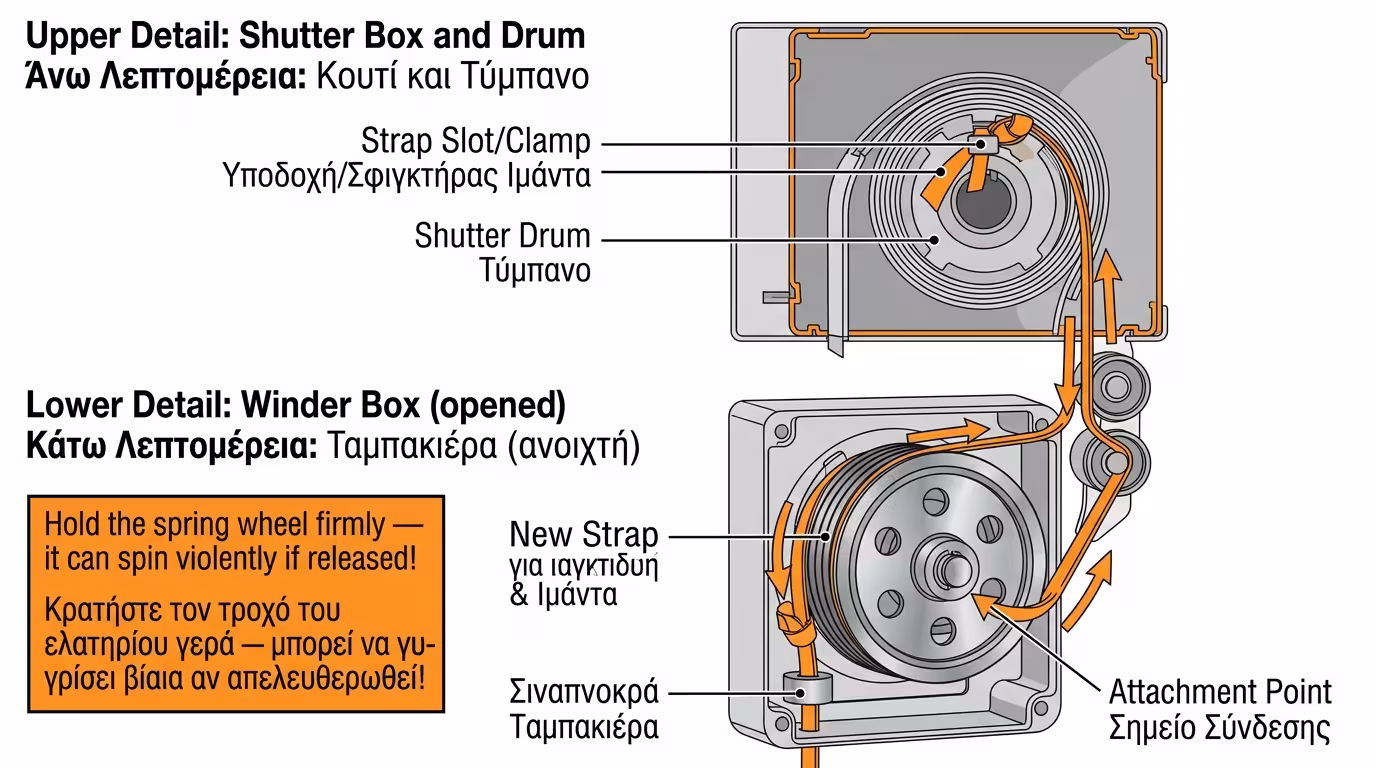
3️⃣ Remove the Old Strap (Top) + Open the Winder (Bottom)
On the drum you'll see a small slot or clamp holding
the strap. Pull it out or unscrew it; remove the old strap entirely. Keep
it as a length reference. Next, go to the lower wall and unscrew the strap winder box (the casing that collects the strap). ⚠️ Caution: Inside
there is a metal wheel with a very strong spring.
If it's still wound up, hold the wheel firmly with one hand and let
the spring unwind slowly and in a controlled manner.
4️⃣ Tie and “Wind” the New Strap
Cut the new strap to the correct length (measure the old one + 10 cm
extra). Seal the ends with the lighter. Thread one end into the
winder box, tie it to the wheel and wind the mechanism
(turn the wheel in reverse until the spring tightens). Then take the other
end, thread it through the guide rollers and tie it to the upper pulley (inside the box) exactly where the old one was. ⚡ Pull the strap so
it sits relatively taut between the upper pulley and the lower winder.
5️⃣ Wind and Test
Manually wind the strap around the drum 2-3 times. Close the cover
temporarily and test: pull the strap to raise the shutter, let it
return. If it operates smoothly, screw the cover on permanently.
3. Common Mistakes to Avoid
Strap replacement is a simple job, but a few points can trip you up:
❌ Wrong Strap Width
If you buy the wrong width, it won't fit through the wall slot or
onto the drum. ALWAYS measure the old strap before buying.
❌ Letting the Drum Spin Uncontrollably
If you haven't fully lowered the shutter, the drum may be under
spring tension. If released, it can spin violently and
injure fingers or damage the shutter.
❌ Strap Too Short
If the strap is too short, the shutter won't lower fully. Always
leave 10-15 cm extra length for wrapping on the drum.
❌ Not Sealing the Ends
A fabric strap frays immediately if you don't seal the cut ends. Use
a lighter to gently melt the fibres together.
💡 Tip: If the strap keeps snapping every 2-3 years, the
drum or guide rail is probably wearing it. Consider upgrading to a motorised
system - the investment pays off over time.