Anti-Vibration Tape (Acoustic Profiles): The Essential Material Under Drywall Runners

In dry construction (plasterboard), the wall frame always starts with the installation of a U-shaped metal profile on the floor and a matching one on the ceiling. These profiles are called runners. The vertical studs clip into them and the heavy plasterboards are screwed on.

If the builder takes the metal runner and screws it directly onto bare concrete or tiles, they have just created the perfect Acoustic Bridge.

The Problem of Flanking Transmission

What happens if the metal frame touches the floor directly? When someone walks in the room (or the neighbour below drags a chair), the impact vibration travels through the concrete slab.

When the vibration meets the runner metal, it climbs straight up into the plasterboard frame. Your expensive new soundproofing wall starts vibrating and transmitting noise into your room! This is called Flanking Transmission - the sound bypasses the wall and travels through the building skeleton.

Flanking transmission: vibration climbs from the floor into the metal runner

The Solution: The €5 "Cushion"

To cut this path, we use Anti-Vibration Tape (Acoustic Foam Tape).

  • What it is: A self-adhesive tape of closed-cell polyethylene foam (or special elastomeric rubber). It is typically 3 to 5 mm thick and comes in widths that match the metal profiles exactly (50mm, 75mm etc.).
  • How it goes on: The builder flips the metal runner over and sticks the tape along the entire length of its "back". Then places the runner on the floor and screws it down.
  • How it works: The metal now "floats" on an elastic cushion. When floor (or ceiling) vibrations hit the tape, the foam compresses slightly and absorbs the energy, breaking the sound bridge.
Anti-vibration tape stuck to the back of a metal runner

Perimeter Application: Everywhere!

Important: This tape must be applied on every perimeter contact. On the floor runner, the ceiling runner, and on the edge studs touching the side walls.

The new frame must NOT have any "bare" contact with the rest of the building. Every point of metal-to-hard-surface contact is a sound bridge waiting to happen.

Tape on every contact: floor runner, ceiling runner, edge studs

The Experiment in Our Model (The Detail in the 4×4)

Experiment: Scenario A (bare metal, creaking) vs Scenario B (tape, silence)

We are building the soundproofing wall that separates us from the neighbouring flat. Our floor is tiled.

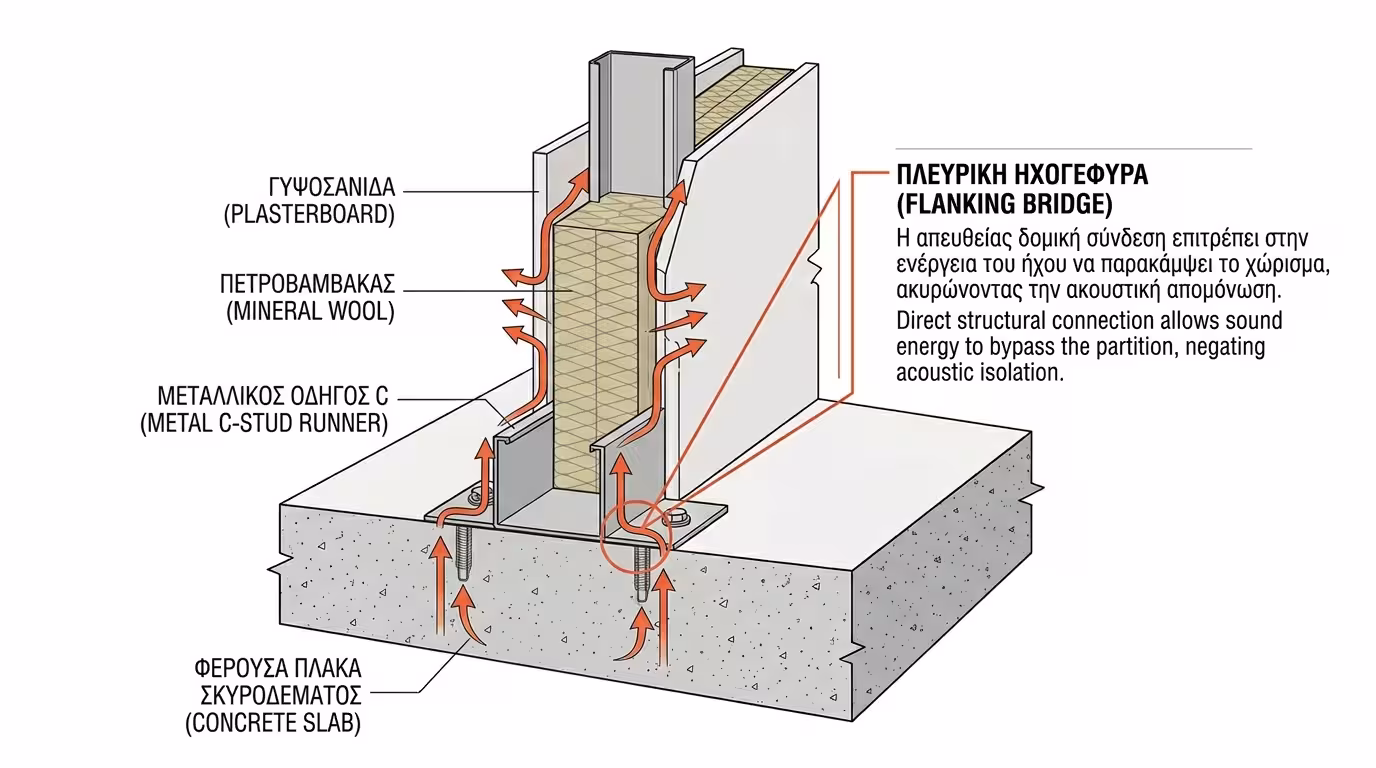
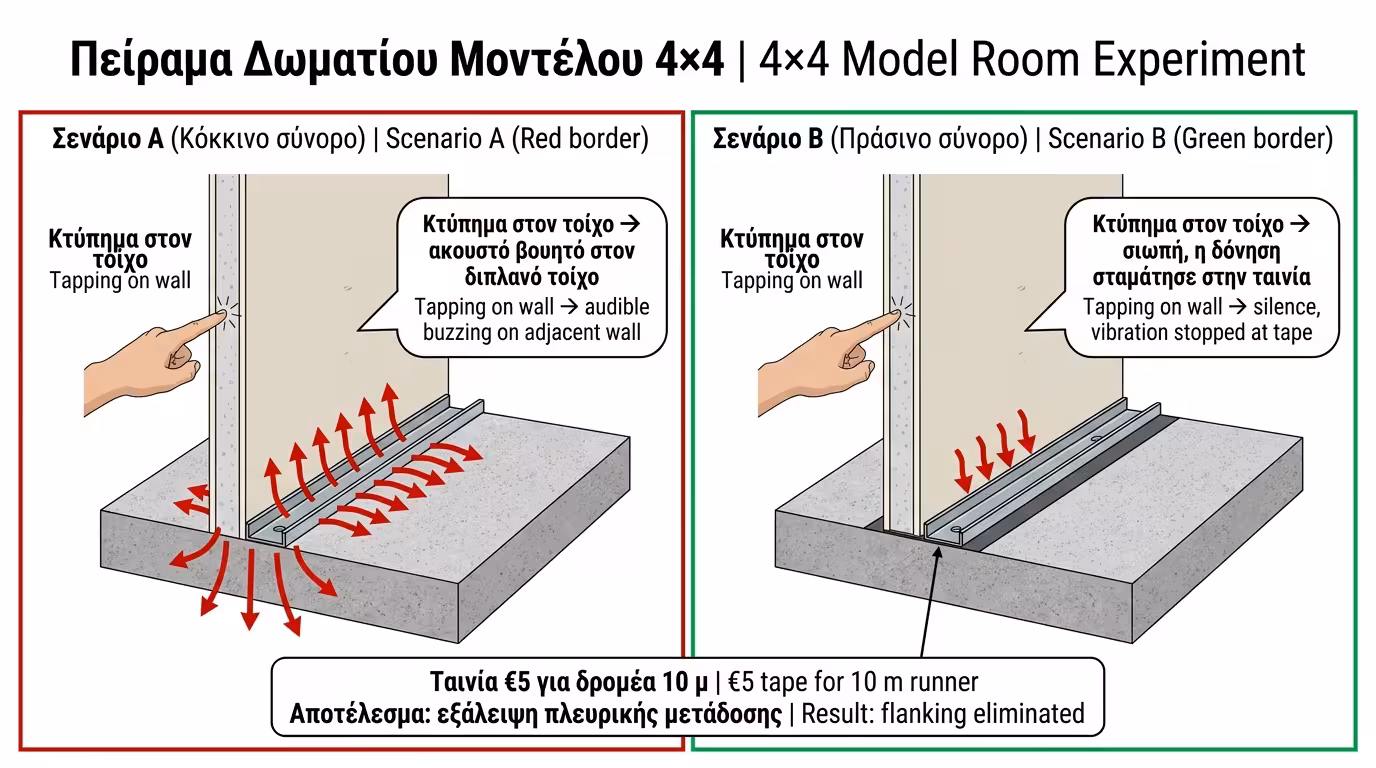
❌ Scenario A (The Builder's Rush)

The builder is in a hurry. He skips the tape ("come on, 3 mm of sponge won't make a difference", he says). He screws the metal straight onto the tiles. That evening, the neighbour doesn't speak, but walks in heels. The vibration travels from their tiles to our wall. Our wall "creaks" and emits a hollow thud with every step.

✅ Scenario B (By the Book)

We spend €5 on a roll of tape. We supervise the builder as he sticks it to every perimeter metal. The frame sits softly. That evening, the neighbour walks. The vibration reaches the base of our wall, finds the foam tape and "dies" there. Our wall remains absolutely dead and silent.

The Final Conclusion: In soundproofing, the chain always breaks at its weakest link. Never allow anyone to screw bare metal onto a hard surface. The €5 "sticker" is the difference between a wall that insulates and a wall that… transmits!

Related Articles

Sound Insulation: Silence and Noise Protection

Return to category.

Go to category

Preview