1️⃣ The Perforated Pipe
At the lowest point of the excavation, right next to the foundation footing, a special plastic pipe is laid. This pipe isn't sealed - it's full of small slits across its entire surface. Groundwater enters through these slits.
Even the most expensive waterproofing and thickest XPS can't fight tonnes of standing water forever. The golden rule of construction says: Don't just try to block the water. Give it an easy escape route!
This is exactly where the drainage system comes in. It's an invisible underground pipe network installed around the foundation base, acting like a "vacuum cleaner" that sucks away pooling groundwater.
Drainage installation happens just before the final backfill and consists of 4 inseparable components. If even one is missing, the system will clog and become useless:
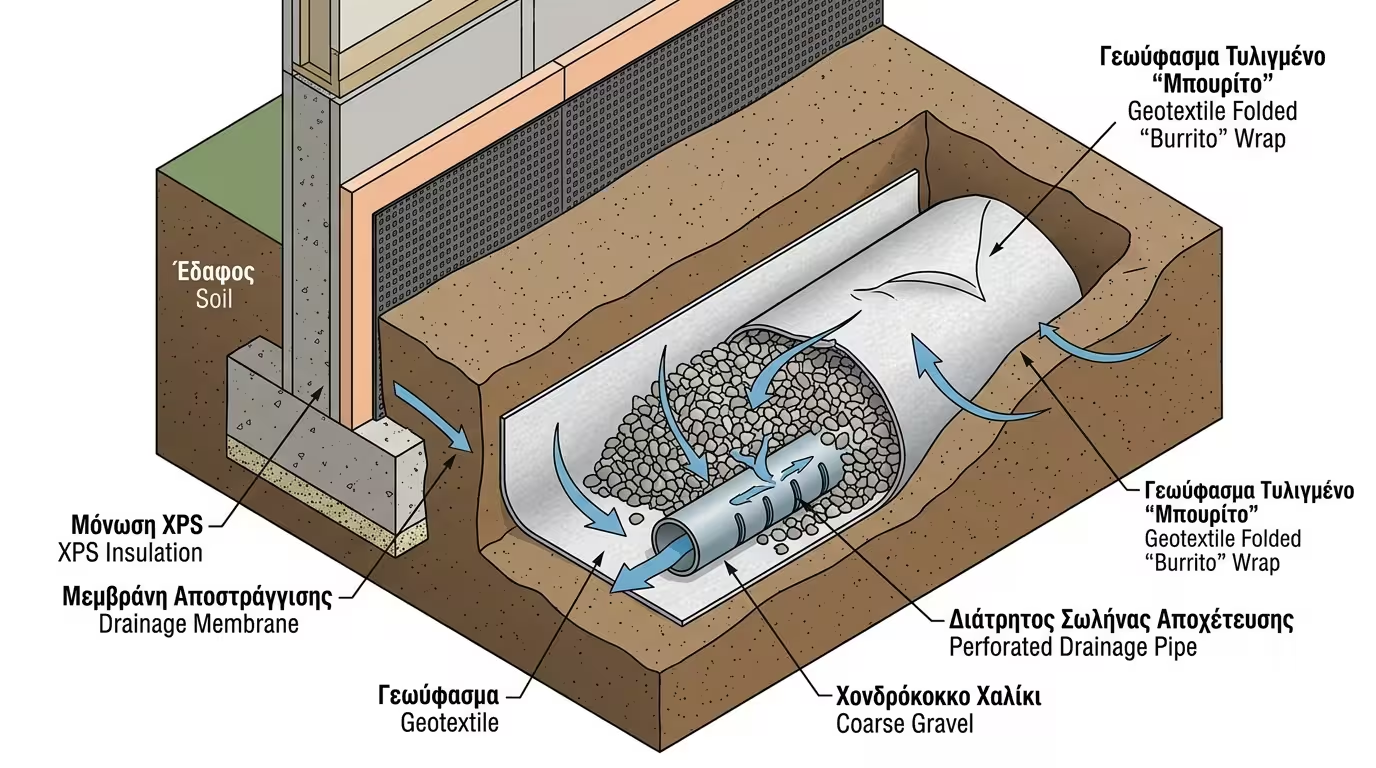
At the lowest point of the excavation, right next to the foundation footing, a special plastic pipe is laid. This pipe isn't sealed - it's full of small slits across its entire surface. Groundwater enters through these slits.
The pipe is never placed bare in soil. If it were, mud would enter the slits and clog it after the first rain. We spread a large synthetic fabric (geotextile) in the trench, like a bedsheet.
On the geotextile, we pour clean, coarse gravel. The perforated pipe is "buried" inside this gravel. Gravel works perfectly because the large gaps between stones let water rush to the pipe at lightning speed.
After the pipe is placed and covered with gravel, we fold the geotextile edges over the top (like wrapping a burrito). Now we can safely backfill with soil!
Rainwater descends, passes through the soil, gets filtered by the geotextile (leaving mud outside), runs through the gravel and ends up in the pipe.

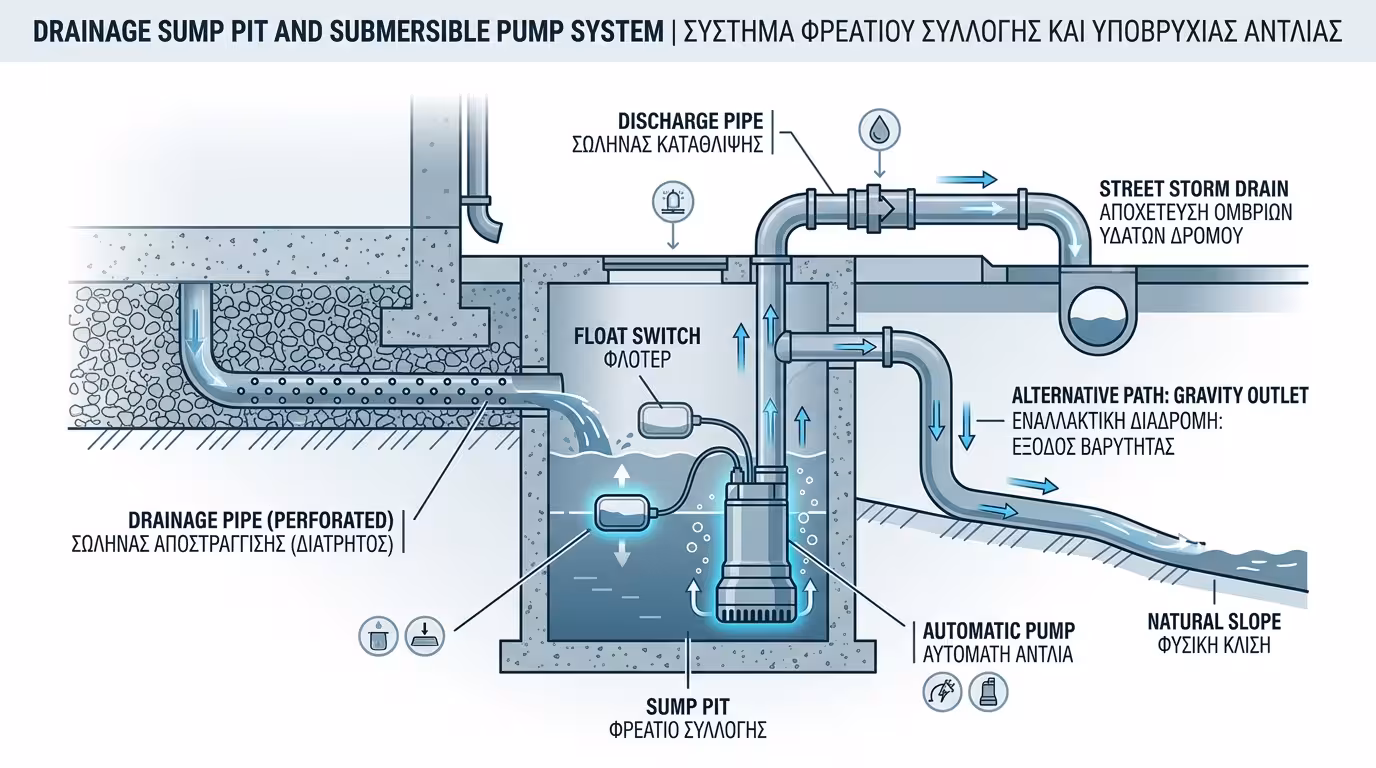
The perforated pipe must have a slight downhill gradient (just like the flat roofs we saw earlier). The water is directed either to the natural slope of the plot (if one exists) or to a collection sump pit.
Inside the sump is a submersible pump (motor). When the sump fills, the pump kicks in automatically and pumps the water away to the street's surface-water drainage network.
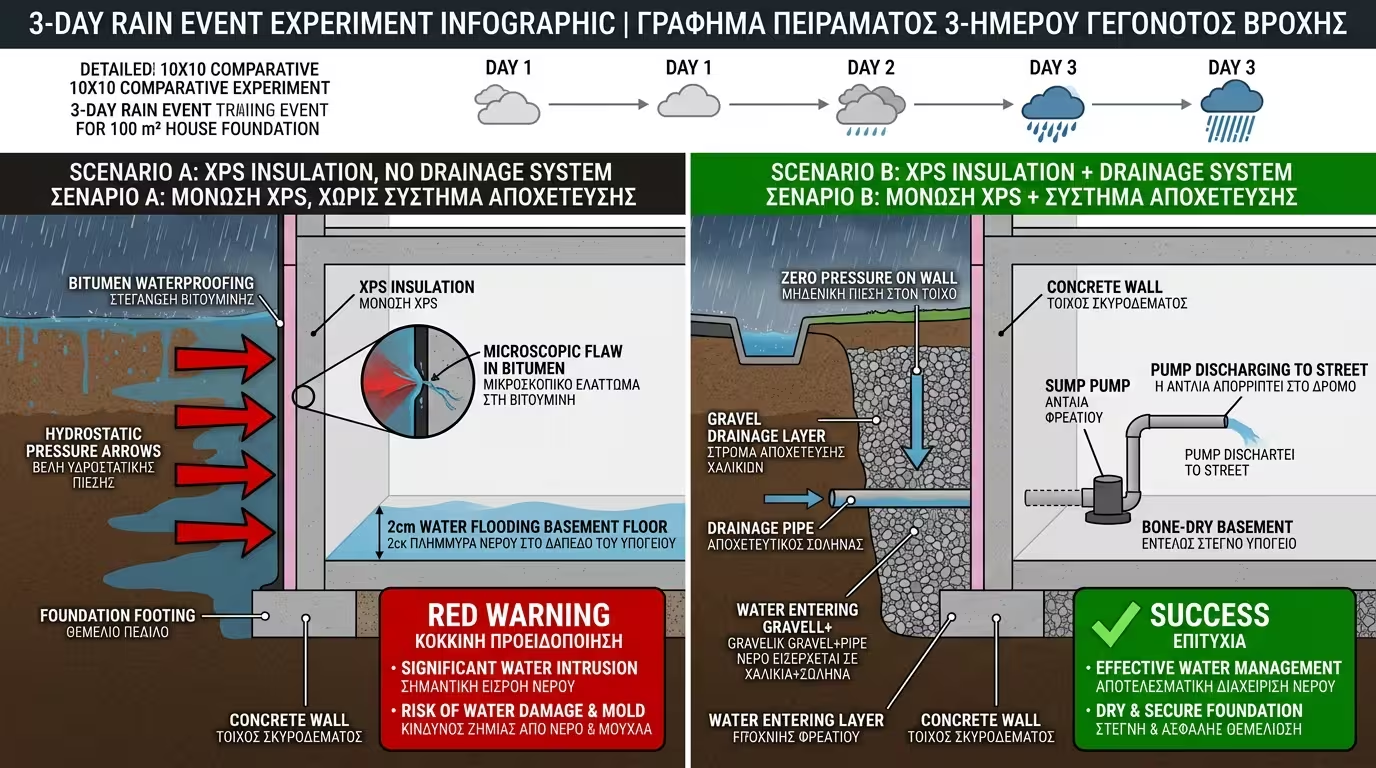
It rains non-stop for 3 days. The water table rises and the soil around the basement turns to swamp.
Water accumulates outside the wall. Hydrostatic pressure is enormous (hundreds of kilograms per square metre). It pushes against the waterproofing. One microscopic flaw in the bituminous coating and water surges through. The basement floods with 2 cm of water.
Water descends through the soil but as soon as it reaches the foundations it's "sucked" by the gravel and the perforated pipe. The pipe sends it to the sump, and the pump discharges it to the street. Water pressure on the insulated wall is… absolutely zero! The XPS isn't stressed at all and the basement stays bone dry.
The Final Conclusion: Laying a drainage pipe, some gravel and a geotextile while the trench is still open costs literally "peanuts" compared to the total build budget. But if you skip it and the basement leaks 5 years later, the cost of re-excavating the garden, the pavements and reaching the foundations will feel nightmarish. Don't risk it!
Return to category.
Go to categoryReturn to the central guide.
Go to guide