❌ No "Cookie Dough" Dabs
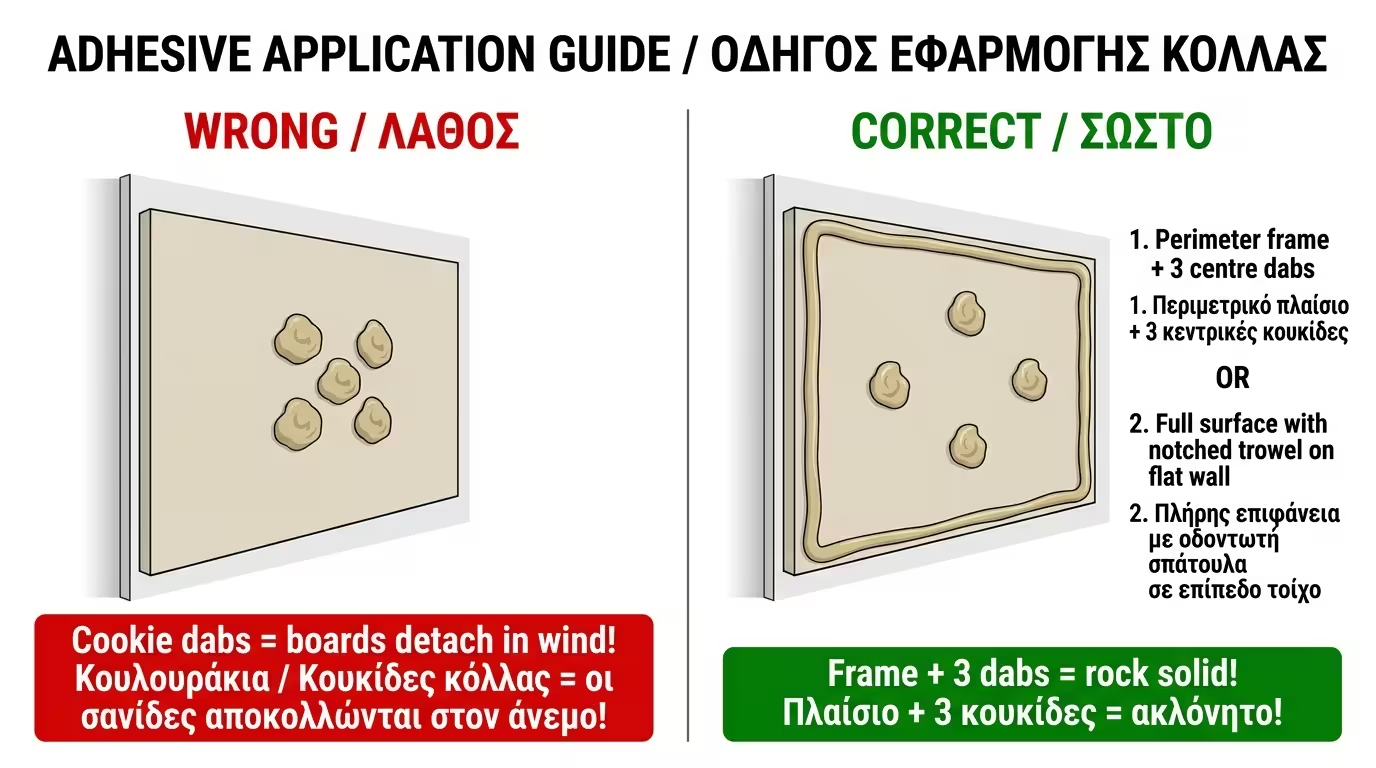
Is he applying adhesive with just 4-5 blobs in the centre, leaving edges bare? WRONG.
One of the biggest worries of any homeowner proceeding with an energy upgrade is the reliability of the crew. In construction, there is a saying: "A good worker shows his quality before the render goes on". Once the mesh and render cover the polystyrene, everything looks perfect and defects hide.
To ensure your money is well spent, you don't need to become an engineer. Just make 5 targeted "visits" to the site and check the following 5 points.
Visit the site on the first day the scaffolding goes up.
Stand beside the worker as he applies adhesive to the board (EPS/XPS).
Is he applying adhesive with just 4-5 blobs in the centre, leaving edges bare? WRONG.
Adhesive must go around the entire perimeter of the board (like a frame) plus 3 dabs in the centre. Or, if the wall is perfectly flat, spread over the entire surface with a notched trowel.
Look at the wall from a distance, after enough boards are bonded, but before fixings go in.

In the first 30-50cm above ground, did they install the hard (coloured) XPS, or did they run the soft white EPS all the way down? If the latter, moisture will destroy you.
Did they install thin insulation (2-3cm) inside the window opening or leave the wall bare to save time? Did they apply self-expanding tape (Compriband) between the EPS and the aluminium?
How much does quality change?
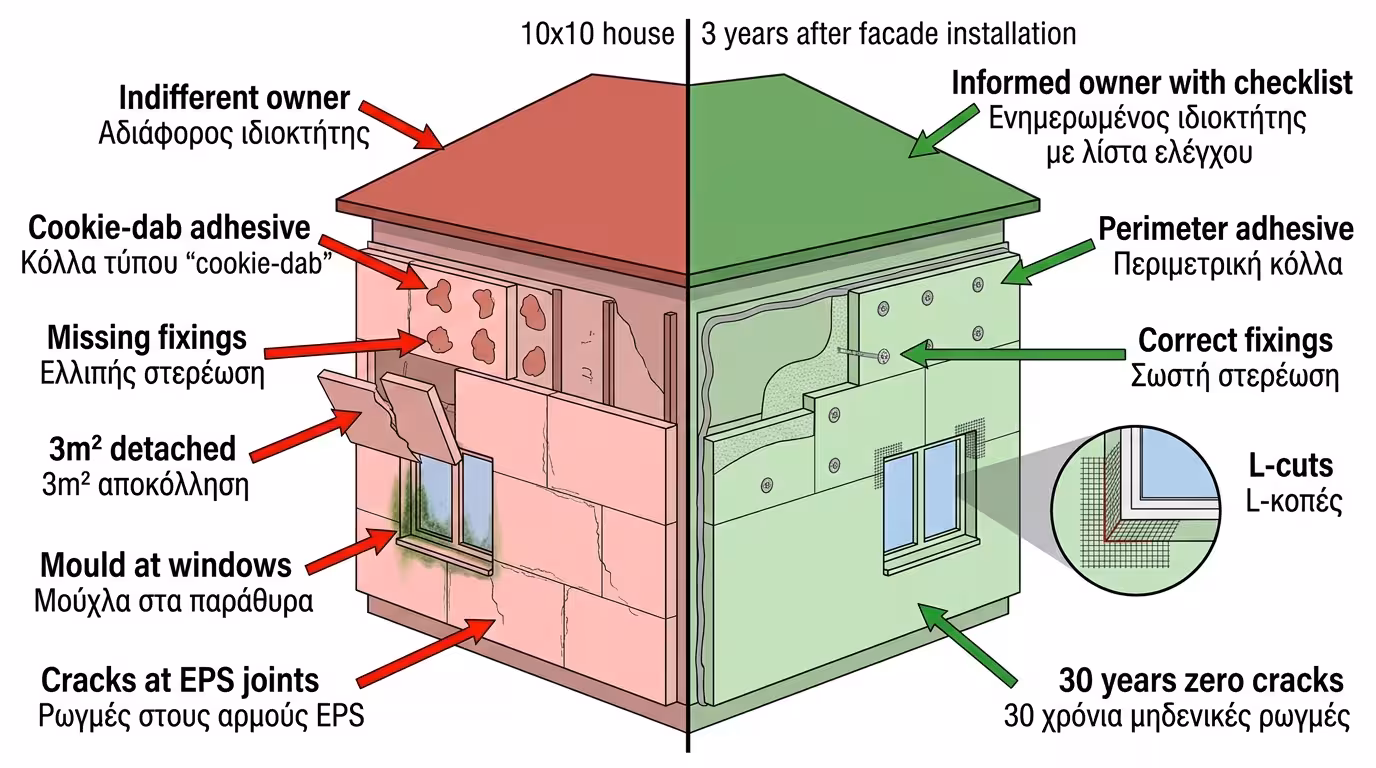
Agrees on the price, hands over the keys and goes on holiday. The crew works fast. They apply adhesive in dabs ("cookies"), skip fixings to save money and leave gaps. They render. The owner returns, the house looks stunning and he pays. At the first strong north wind, the wall leaks cold, 3 square metres detach and mould appears at the windows.
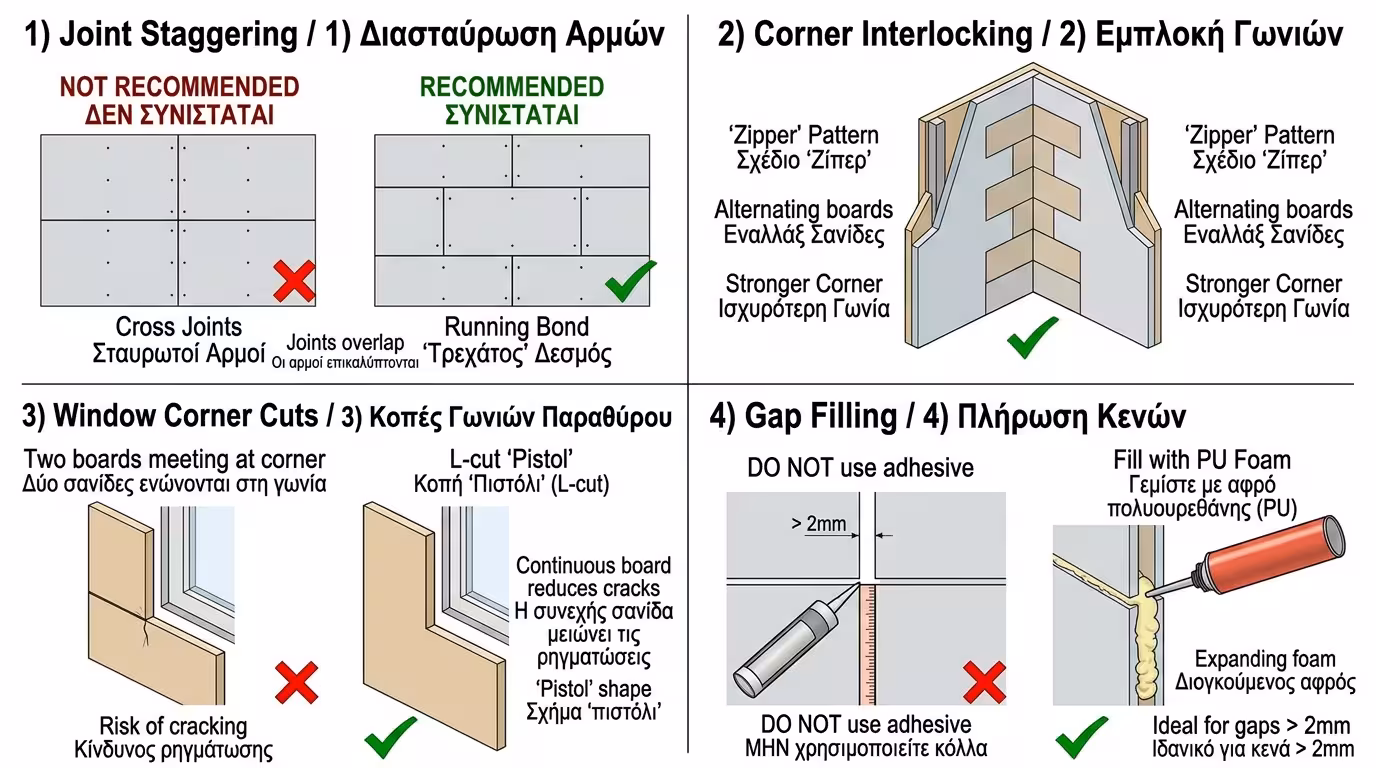
Prints this checklist. On the first day he sees the worker applying adhesive wrong. He shows him the manufacturer's datasheet and insists on perimeter bonding. He checks the "L" cuts at the windows. The crew realises the client "knows" and works exactly to specification. The thermal facade lasts 30 years without the slightest crack.
The Final Conclusion: Good professionals are not annoyed when the homeowner asks questions. On the contrary, they are pleased because their quality work is recognised. Use this checklist not as a "policing" tool, but as a quality guide to protect the biggest investment you make in your home.
Return to category.
Go to categoryReturn to the central guide.
Go to guide