1️⃣ Shock Absorber
Absorbs the floor's thermal expansion.
Underfloor heating works by turning your entire floor into a giant, invisible radiator. Below the tiles or wood, a special heat-conducting screed is poured, embedding hundreds of metres of plastic pipe carrying hot water.
The big challenge is directing the heat. To prevent precious energy escaping downward (to the slab below or the soil), the pipe never rests directly on bare concrete. It sits on a specialised insulation layer (EPS or polyurethane) that "blocks" the heat from escaping and forces it to rise exclusively into your living room.
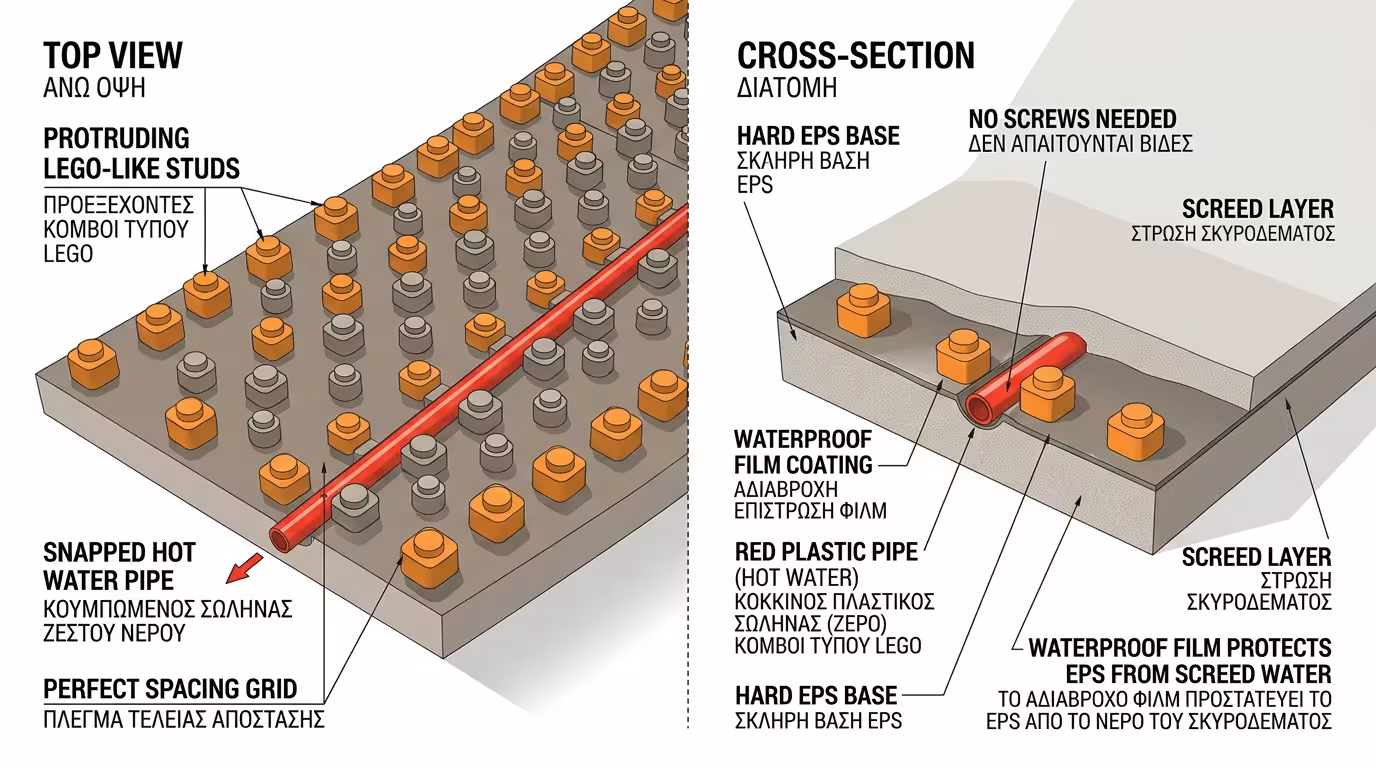
The most popular and practical system. These are square hard EPS (expanded polystyrene) panels whose top surface is not flat. They have built-in "bumps" (studs) that look like giant Lego bricks. They are also coated with a hard, waterproof film.
The advantage: The installer (plumber) simply threads the plastic pipe between the studs. The studs "embrace" and lock the pipe with absolute precision - no screws, no brackets. The system is built extremely fast and the pipe spacing is always perfectly calculated.
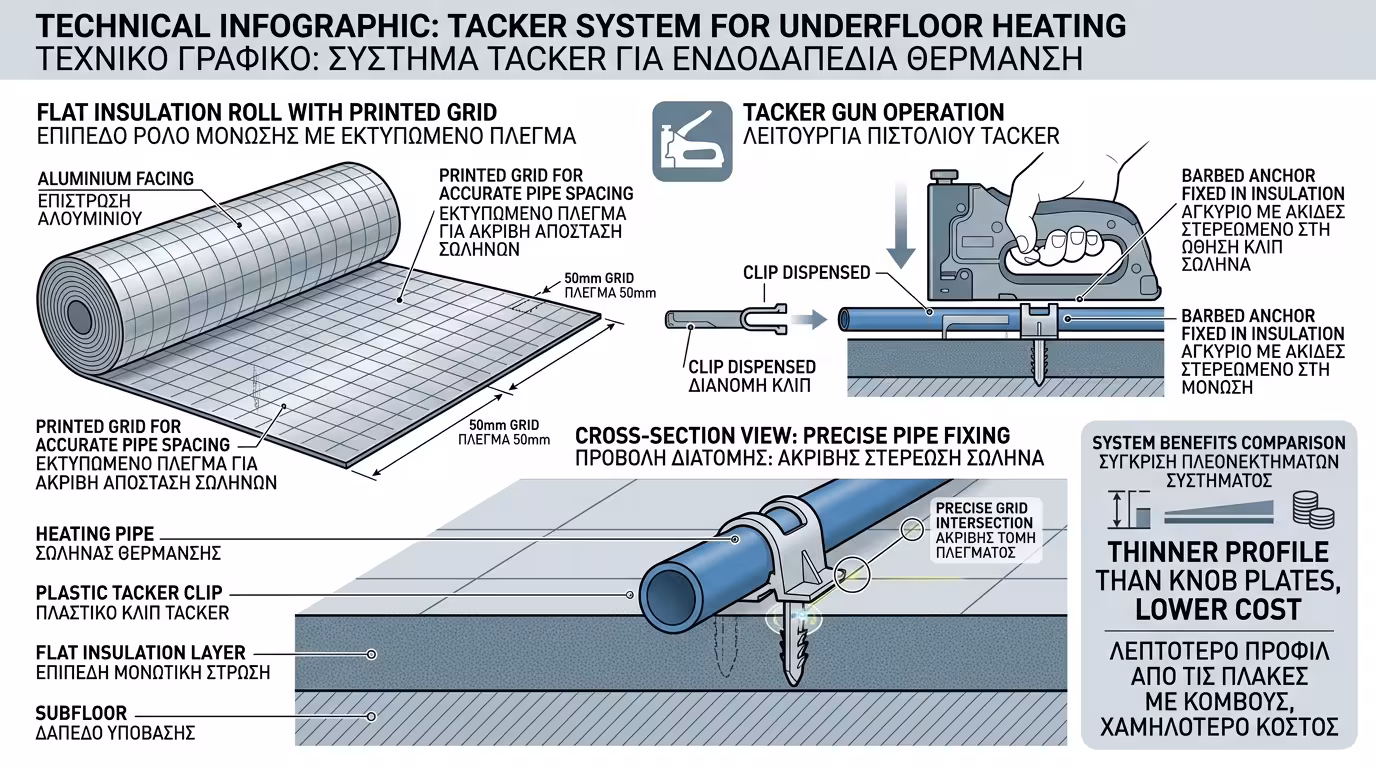
If you have limited floor height or are looking for a slightly more economical option, the Tacker system is the alternative. No studs here. Instead, a large flat insulation roll (or panel) with a strong aluminium or plastic sheet on top, printed with a guide grid (squares).
How the pipe goes in: The plumber unrolls the pipe on the flat panel, following the grid lines, and "pins" it into the insulation with a special tool and plastic tacker clips.
If you install perfect insulation under the floor but forget this tiny, dirt-cheap component, your floor risks "popping" and lifting the tiles.
When the heated screed warms up from the pipes, it expands. If the concrete meets the hard room wall directly, the pressure cracks the tiles. So before the screed is poured, the worker bonds a foam edge strip (typically 8-10mm thick) around all walls at floor level. This strip has a dual role:
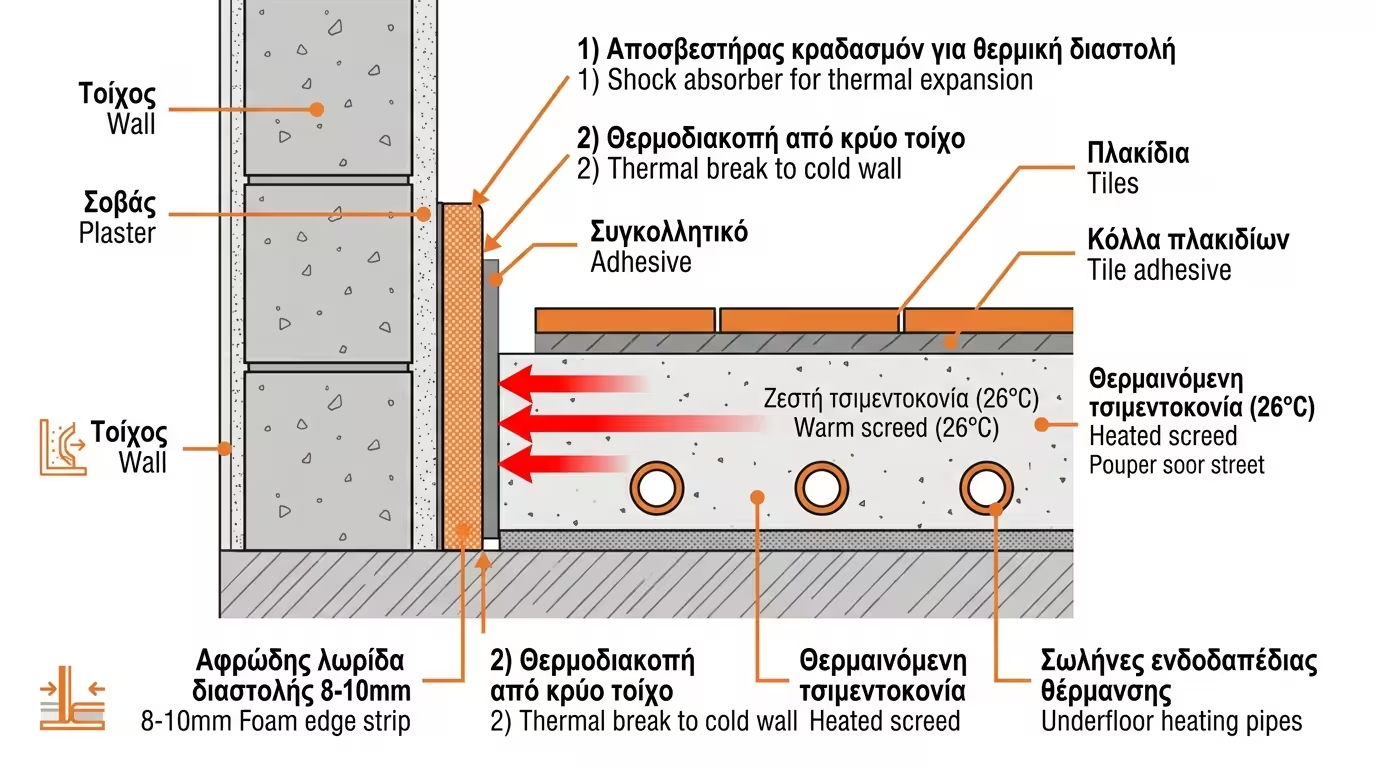
Absorbs the floor's thermal expansion.
Prevents the floor's heat from "escaping" to the cold external walls.
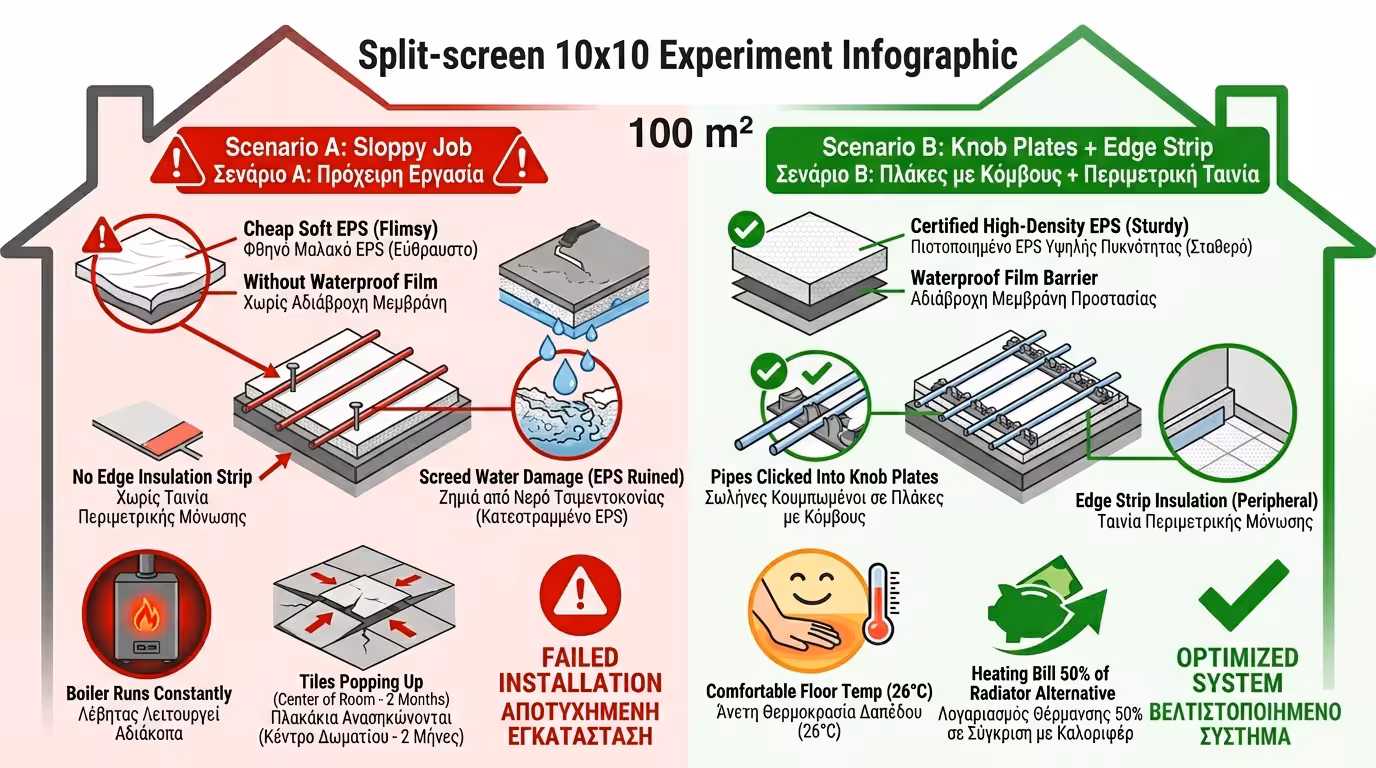
Ground floor 10x10 with underfloor heating.
The contractor lays cheap, soft retail EPS (no film), pins the pipes with makeshift nails and forgets the edge strip. He pours the screed. The concrete water passes through the EPS and destroys its insulating ability. In winter, the boiler burns non-stop but the house takes forever to warm because heat is lost to the slab below. After two months, the tiles in the centre of the living room "pop up" because the floor expanded and hit the wall.
Edge strip is bonded to all walls. We lay the special EPS knob plates (with waterproof film). The pipes "click" in perfectly. The screed is poured safely. In winter, all thermal energy "bounces" off the insulation and shoots upward. The floor is delightfully warm (26°C ), the tiles are safe, and the heating bill is 50% of what conventional radiators cost!
The Final Conclusion: The underfloor system is an expensive investment buried under cement and tiles. There is no room for "discounts" on the insulation panel. Whether you choose Knob Plates or Tacker, insist on certified high-density materials and demand the edge strip. It is the "life insurance" of your floor!
Return to category.
Go to categoryReturn to the central guide.
Go to guide