Thermal Facade & Obstacles: What to Do with Downpipes and Cables?

External Thermal Insulation (ETICS) installation is the perfect opportunity for a "facelift" of your home's exterior. Besides thermal protection, you can hide all those ugly cables and pipes that have been hanging in disarray on the walls for decades.

But beware: the laws of physics and mechanics forbid hiding everything. There are strict rules about what gets "buried" and what stays on the surface.

1. Cables (The Opportunity to Hide Them)

Power cables, telephone lines, fibre optics or security camera conduits can (and aesthetically must) be hidden inside the thermal facade.

The Right Way: The worker cuts a "channel" (groove) in the back of the EPS board using a hot-wire tool. The cable passes through this channel. Ideally, the cable should sit inside a protective conduit so that if it breaks or needs replacing in future, the electrician can pull new cable without demolishing the insulation!

The Fatal Mistake: Many workers glue the cable to the external face of the EPS (directly under the render). This is disastrous! The cable expands and contracts differently from the render and within months a long, straight crack will appear along the entire cable path.

Cables hidden in a channel inside the EPS

2. Downpipes (The Danger of Burying)

Many homeowners, seeing the thick plastic downpipes running down the wall, ask the contractor to "bury" them inside the thick EPS so they are invisible. This is one of the biggest risks you can take.

If a downpipe (which carries massive volumes of water) blocks with leaves or cracks from frost, water will start running inside the facade system. The insulation will be destroyed internally and you will not realise until the render starts falling off in chunks.

The Right Way: Downpipes must be removed before insulation and re-installed externally, on top of the finished render. To support them safely, special long brackets (threaded rods) are used that drill through the EPS and screw deep into the brick. These brackets feature a special thermal break (plastic ring) to prevent them acting as thermal bridges.

Downpipe buried in EPS - blockage risk

3. Heavy Objects (Air Conditioners, Awnings, Lights)

Once the thermal facade is complete, your external wall will be covered with 8cm of… foam. You cannot simply grab a drill, insert a standard wall plug and hang the outdoor air conditioning unit or the awning! The weight will crush the polystyrene.

The Fixing Cube Solution: Before the EPS goes up, at the exact points where you know you will hang something heavy (air conditioner, camera, large light), the worker bonds special high-density polyurethane fixing cubes to the wall.

These cubes are as hard as wood yet offer the same thermal insulation as polystyrene. So, once the render is finished, the HVAC technician or awning installer screws the bracket onto these hard cubes. The object is supported with absolute safety and the insulation remains intact.

Polyurethane fixing cubes for air conditioner
10x10 experiment - buried downpipe vs correct installation

We want to install a heavy 24,000 BTU air conditioner and a vertical downpipe.

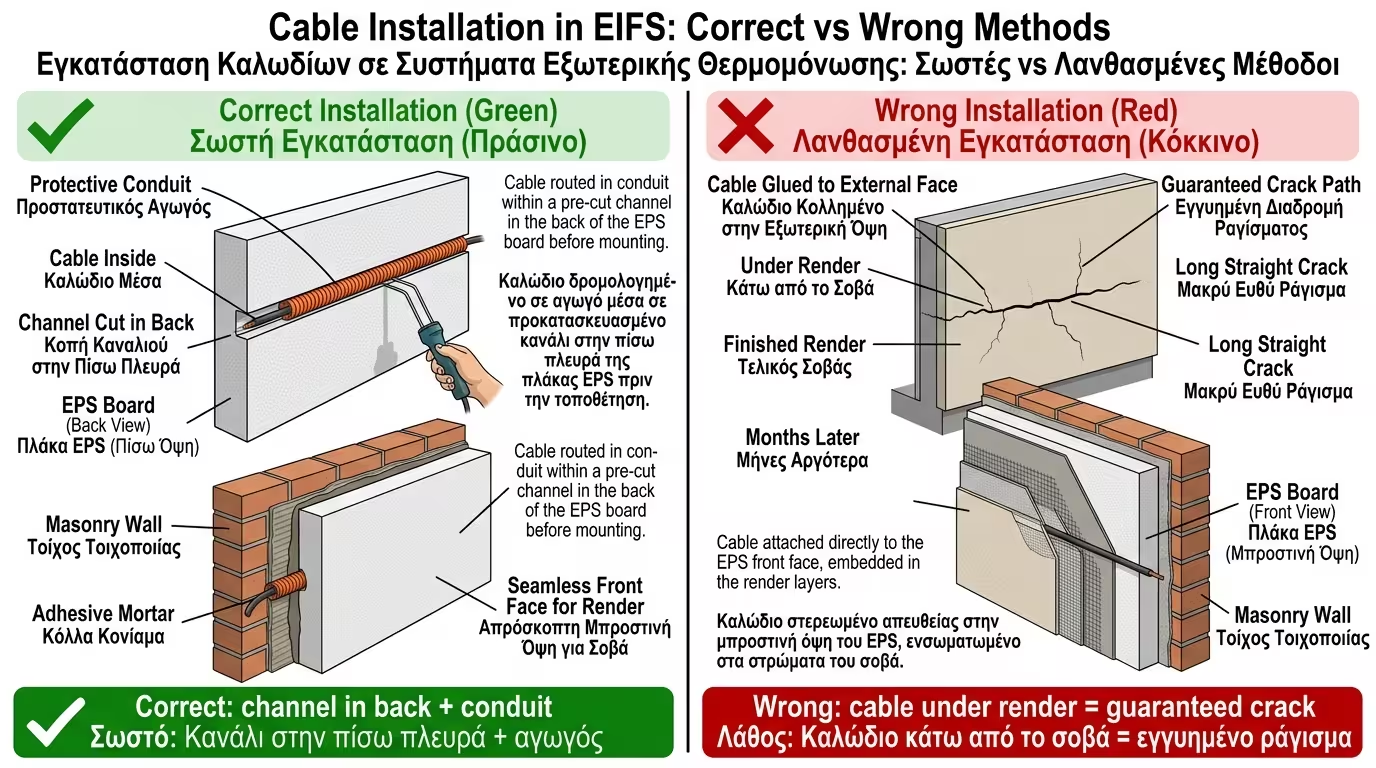
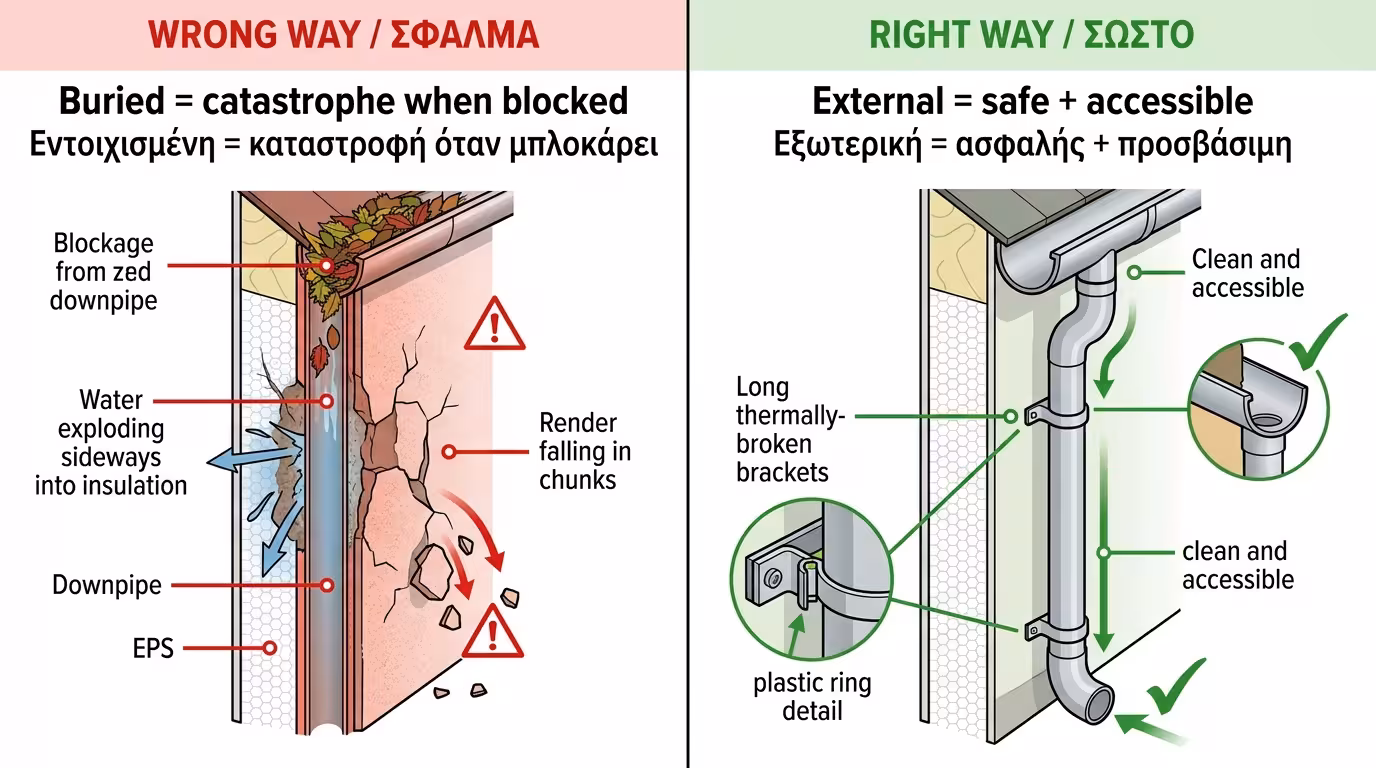
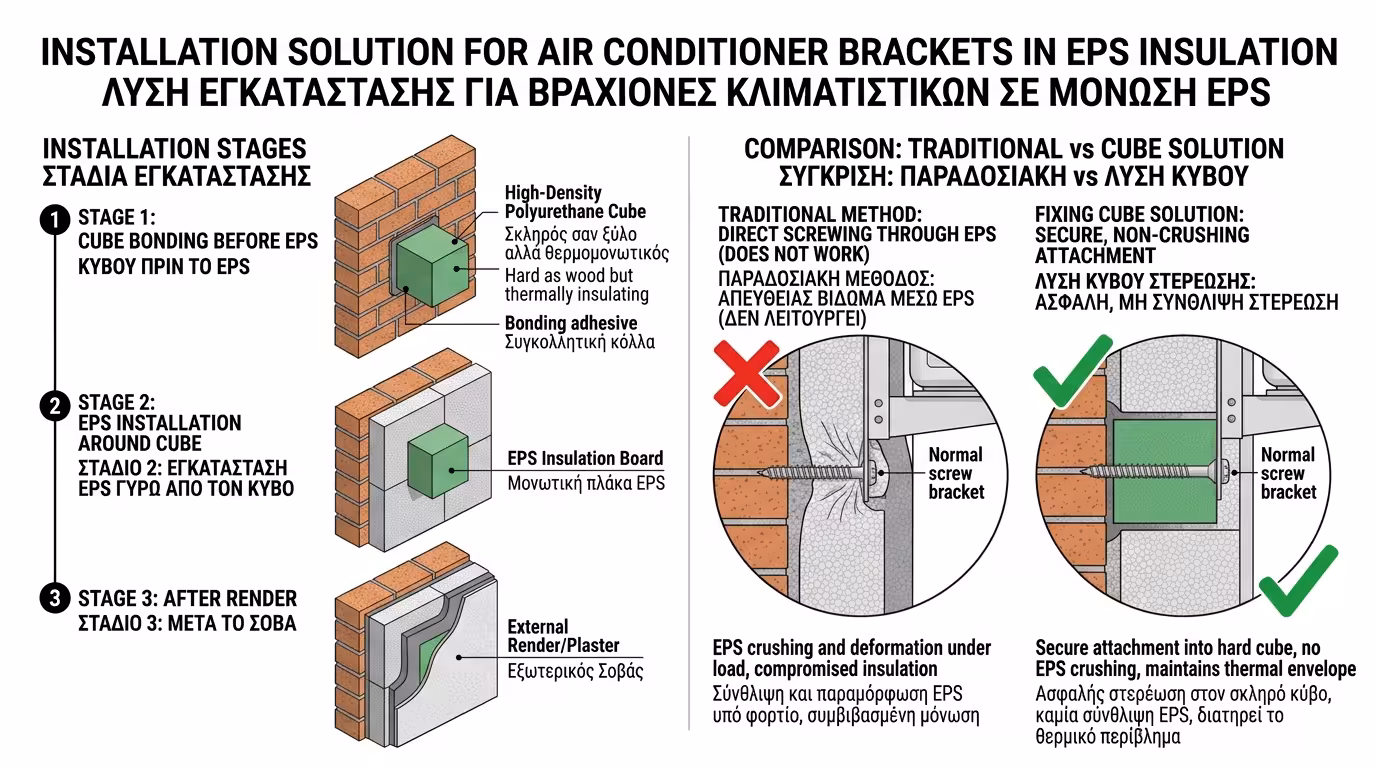
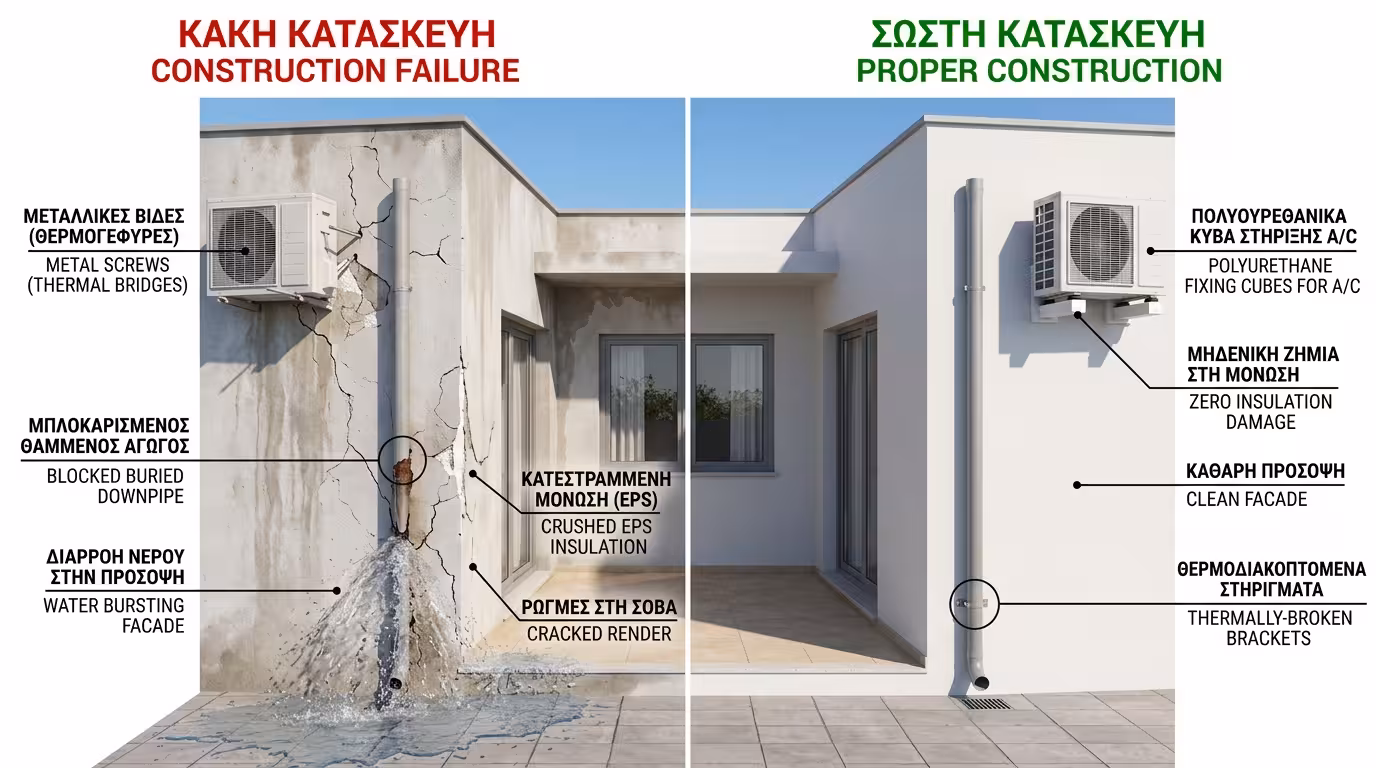
❌ Scenario A (The Slapdash Approach)

The worker buries the downpipe inside the EPS. The following winter leaves accumulate, it blocks, and the water "blows out" the thermal facade. As for the air conditioner, the HVAC technician drives long screws through the polystyrene to find brick. Tightening the screws crushes the EPS, the render cracks, and the metal screws become huge thermal bridges that bring cold into the living room.

✅ Scenario B (Professional Planning)

We planned everything. Polyurethane cubes were installed for the air conditioner. The technician screwed into them safely (zero thermal bridges, zero cracked render). The downpipe was installed externally with special thermally broken brackets. The house is safe, functional and beautiful.

The Final Conclusion: Thermal facade does not forgive "make it up as you go". It requires planning. Before a single drop of adhesive is applied, you must have decided where the lights go, where the power cables run and where the awnings will be mounted. Preparation is everything!

Related Articles

Application & Construction Details: Correct Installation Guide

Return to category.

Go to category

Preview