Polyurethane Liquid Coatings: Seamless Waterproofing Without Joints
Ask any engineer how waterproofing usually fails, and they'll give you
one word: Joints. Water is the most persistent
"invader" in nature. If there's even a one-millimetre hole in the
junction between two materials, it will find it and get through.
Polyurethane liquid membrane systems were created to eliminate joints
entirely. They are thick liquids (like very dense paint) spread on the
roof with a roller, brush or spray. When they contact atmospheric
moisture, a chemical reaction (polymerisation) begins. Within hours the
liquid becomes a unified, hyper-elastic membrane. You're essentially
turning your roof into a "pool" of solid rubber,
without a single seam (Seamless)!
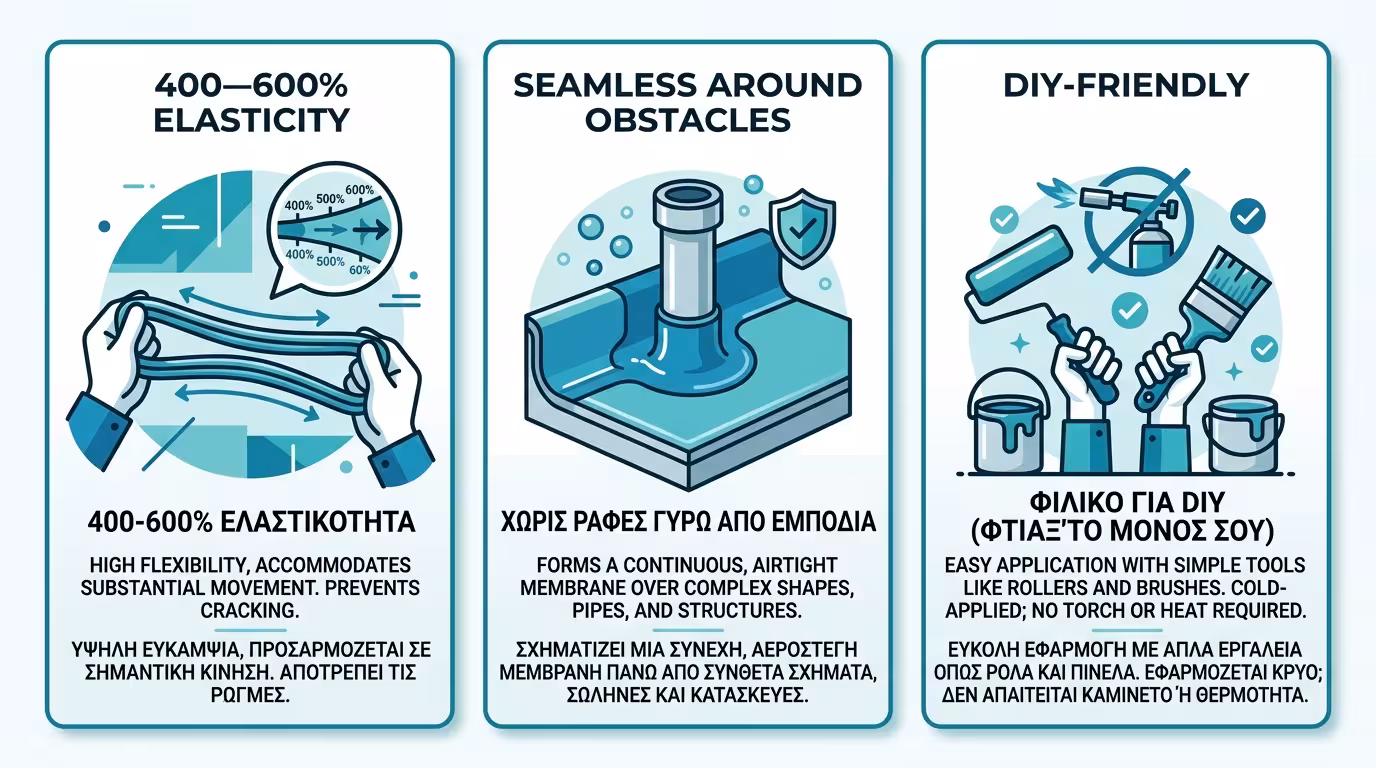
1. The 3 Enormous Advantages of Polyurethane
Why are more and more owners and engineers turning to this solution?
🧪 Extreme Elasticity
Buildings "breathe" and move. In summer they expand, in winter they
contract. A quality polyurethane membrane has an elongation reaching 400% to 600%. You can literally stretch it like an elastic band and it won't
tear. It therefore perfectly bridges the micro-cracks that form in
concrete.
🏗️ Ideal for Roofs with "Obstacles"
If your roof is full of solar-heater bases, aerials, cables and
ventilation pipes, cutting and bonding bitumen membrane around them
is a nightmare. The polyurethane coating is brushed around the pipe
and "hugs" it airtight !
🔧 DIY-Friendly
No fire, blowtorches or heavy machinery needed. With a good roller,
careful cleaning and following the instructions, a homeowner can
waterproof a small roof with professional results.
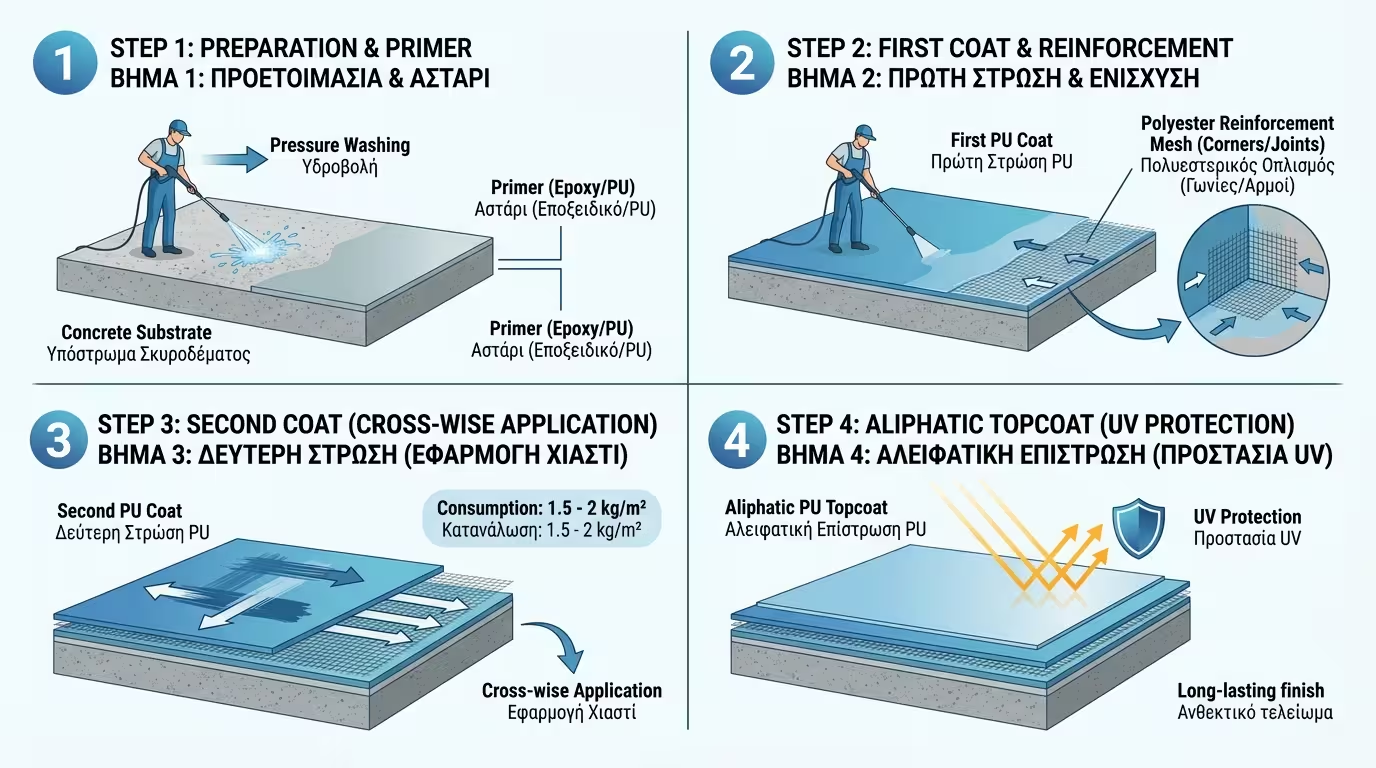
2. How to Apply Correctly (The 3-Coat Rule)
The success of polyurethane depends entirely on preparation. If you
spread it over dust, it will peel off within a year.
1️⃣ Cleaning & Primer
The surface is pressure-washed and must be completely dry.
Then the special polyurethane or epoxy primer is applied. It acts as
"double-sided tape" that bonds to the concrete and waits for the
polyurethane to "hook" onto it.
2️⃣ First Coat & Reinforcing Mesh
We apply the first "coat" of polyurethane.
Important: At cracks, corners and junctions (e.g. where
the wall meets the floor), we embed a strip of polyester fabric (geotextile)
into the wet material. This acts like reinforcement in concrete, giving
enormous mechanical strength to weak points.
3️⃣ Second (and Third) Coat
After the first coat dries (usually 12-24 hours), we apply the
second coat "cross-wise".
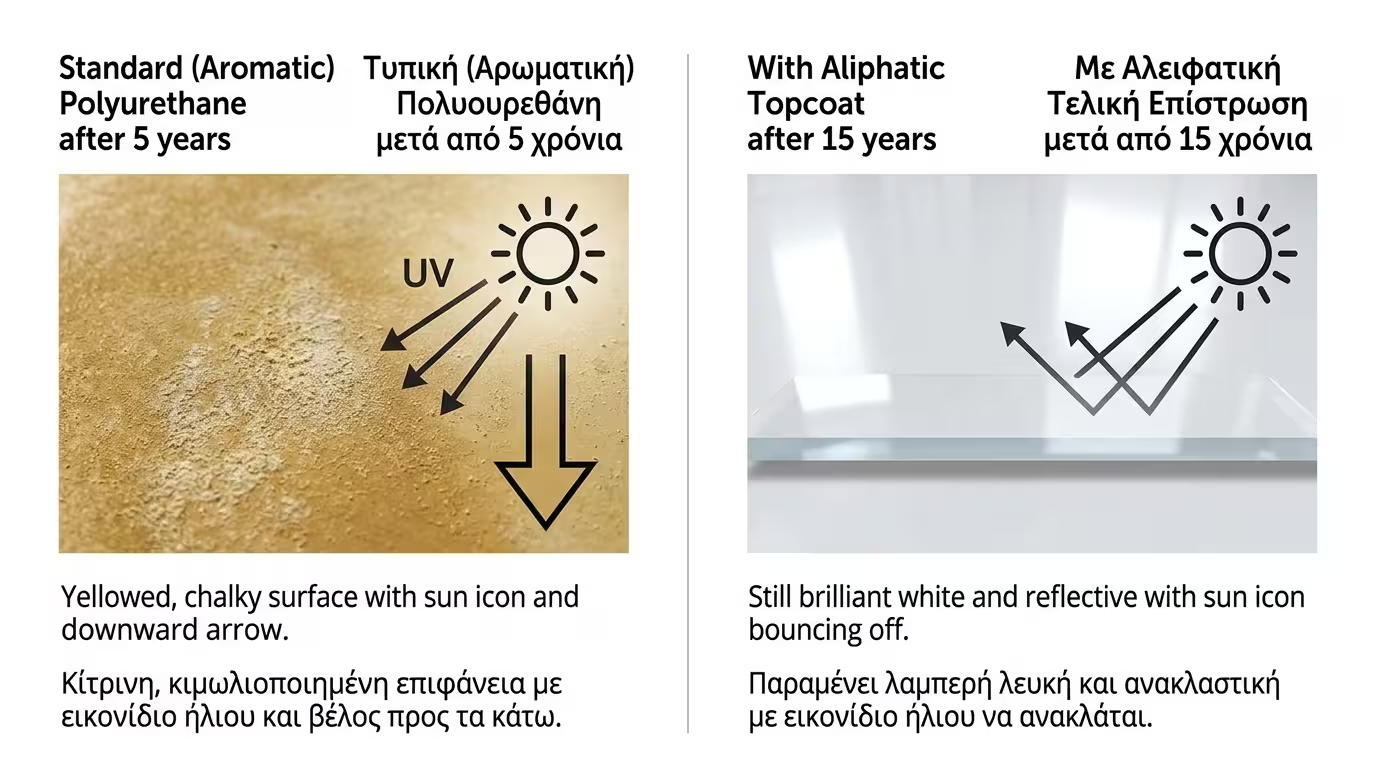
3. UV Protection: Aliphatic Topcoat
Basic (aromatic) polyurethanes yellow and "chalk" after years in the
sun. For 20-year protection, professionals apply a final coat of Aliphatic Polyurethane
. It's a varnish impervious to UV radiation that keeps the
white colour gleaming permanently!
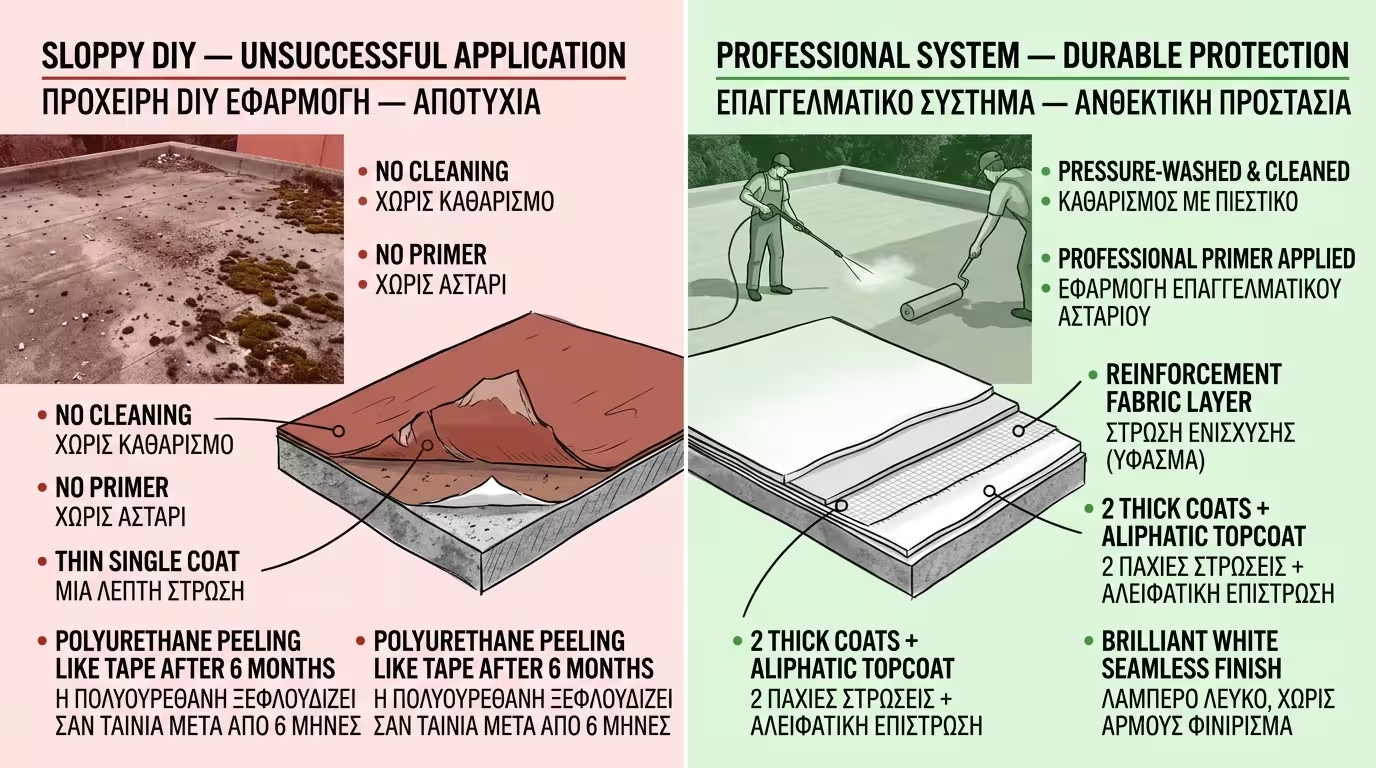
4. The 100 m² Model Experiment
Our roof is full of pipes and solar heaters, so we rule out bitumen
membrane. We buy polyurethane liquid coating.
🔴 Scenario A (The Sloppy DIY Job)
We sweep the roof casually (dirt remains). No primer. We empty the
can and roll it out, trying to save on material. Six months later
the polyurethane peels off the floor like tape, because it bonded to
the dust, not the concrete!
🟢 Scenario B (The Professional System)
We pressure-wash and leave 3 days to dry completely. We apply a
water-based polyurethane primer. We lay polyester reinforcement
fabric at every corner around the parapets. We apply 2 thick coats
of polyurethane (consuming
1.5 to 2 kg per m²). Finally we apply the aliphatic
topcoat. The result? A gleaming, brilliant-white "basin" of rubber,
without a single seam, that also reduces the home's temperature in
summer!
The Final Conclusion: Polyurethane liquid coatings are the
future of easy, fast and seamless waterproofing. Ideal for roofs with obstacles
and accessible to diligent homeowners. However, they demand religious devotion
to surface cleanliness and strict adherence to drying times.