💥 The Power of Water
Hydrostatic pressure (the force of water pushing through the pores) is enormous. It can reach several bars. The elastic paint will swell, form "bellies" full of water and eventually burst, releasing a cascade onto your floor.
In an ideal world, waterproofing is always applied on the external side of the wall (where the water comes from). This is called Positive Pressure, because the water pushes the waterproofing onto the wall, helping it bond even more firmly.
However, when you have a semi-basement, or a house built on a slope, and the soil is in direct contact with your external wall, you often have no access to dig from outside (e.g. because a road passes there, or it is someone else's property). If you try coating a simple waterproofing on the interior wall, the water coming from behind will push it off and blow it like a bursting balloon. This is called Negative Pressure. To withstand it, we need the "heavy artillery" of chemistry.
The biggest mistake homeowners make in these situations is scraping the wall and coating it with "waterproof" paint or liquid rubber.
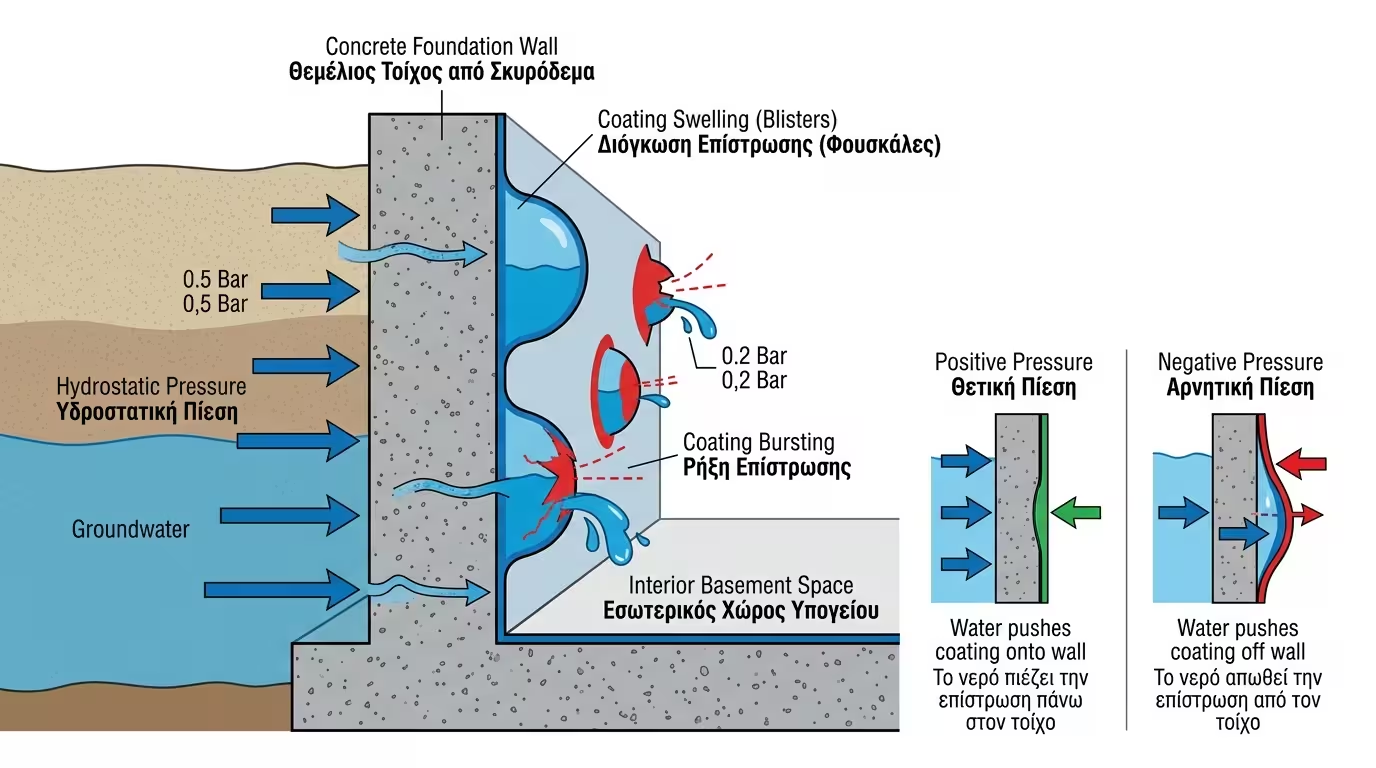
Hydrostatic pressure (the force of water pushing through the pores) is enormous. It can reach several bars. The elastic paint will swell, form "bellies" full of water and eventually burst, releasing a cascade onto your floor.
For negative pressure, we need materials that do not simply sit on the wall but become one body with it.
The only technology that can stop water from the reverse side is Specialised Cementitious Coatings (one- or two-component) certified for negative pressure.
These coatings have enormous adhesion to concrete (they hook into the pores) and are extremely rigid and hard, so they do not yield when water pushes from behind.
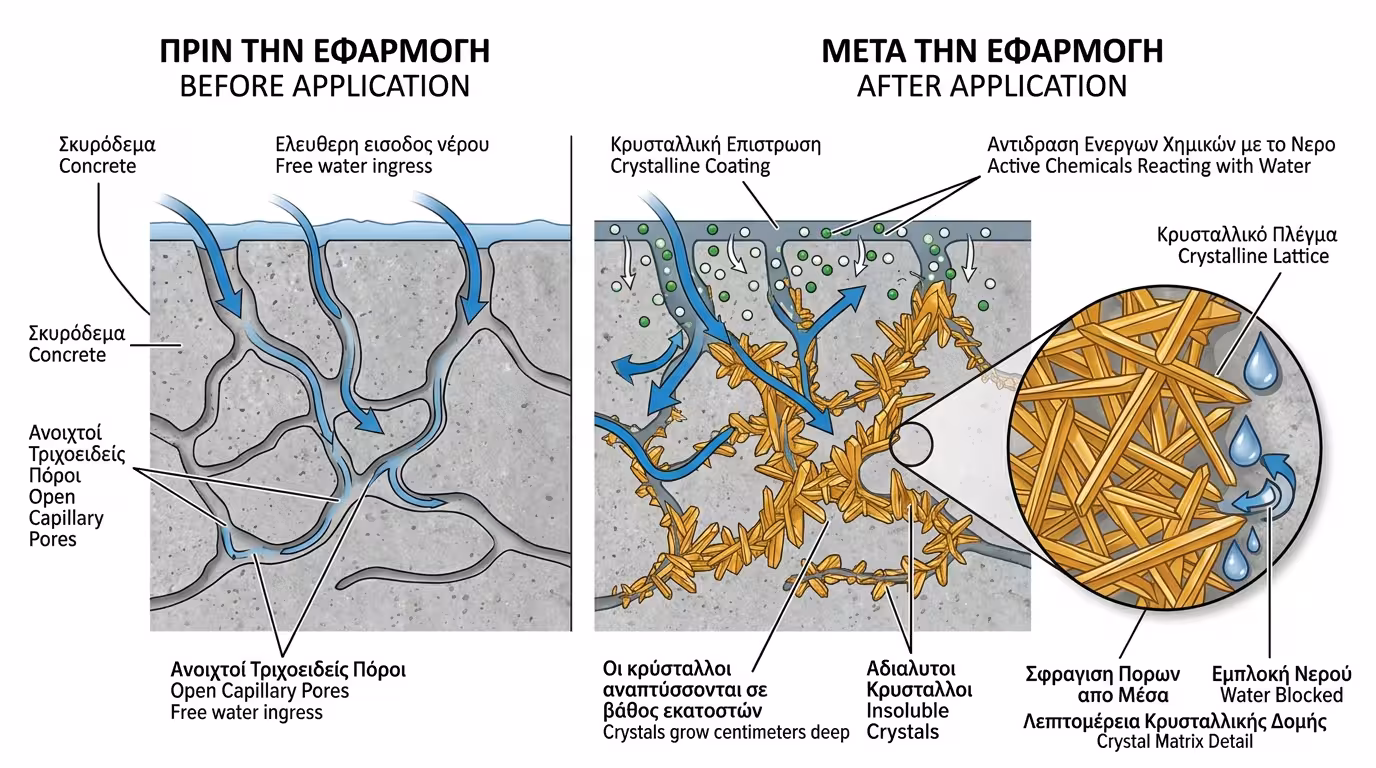
Many of these materials contain active chemicals. When they contact intruding water, they react and create insoluble crystals. These crystals grow and advance into the concrete pores (centimetres deep), sealing the capillaries from the inside out!
This job requires a "bare" wall. Forget half-measures.
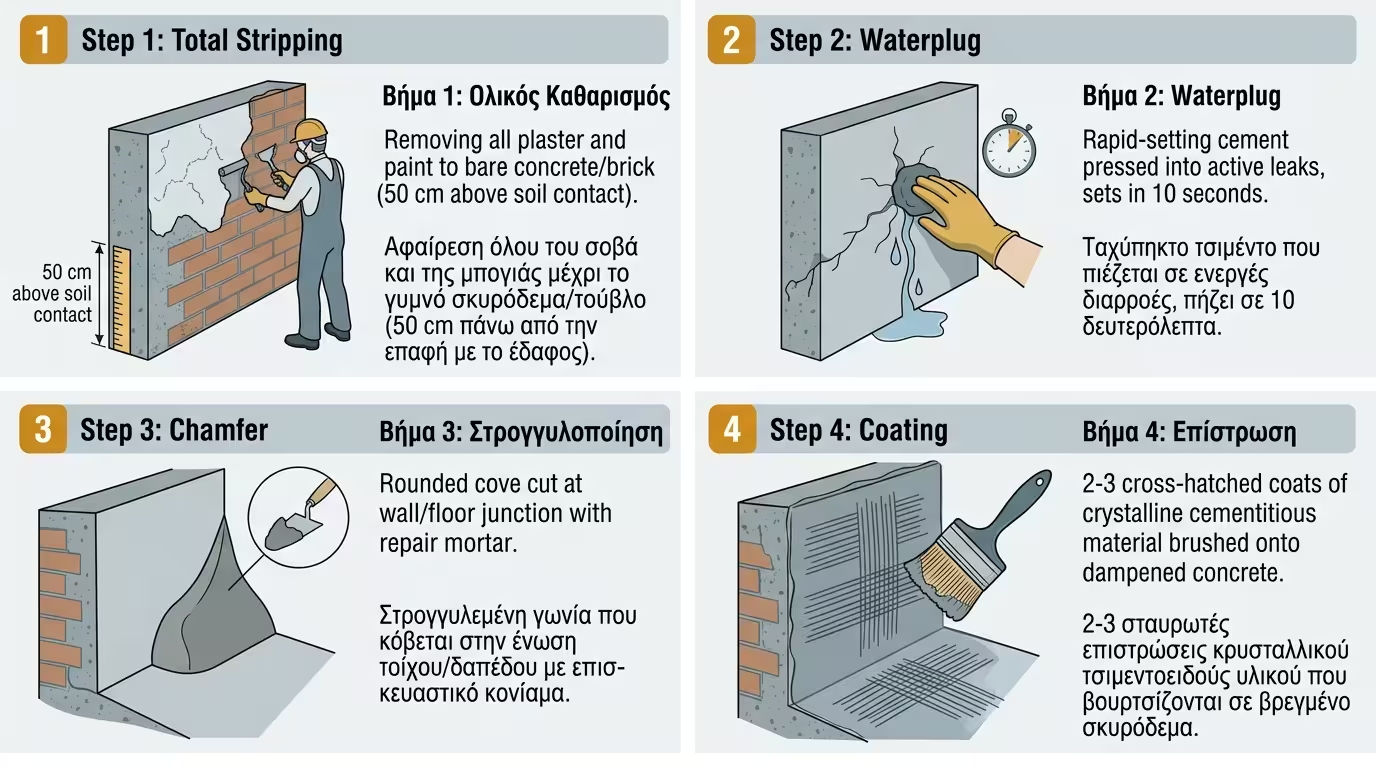
All plaster and paint is removed completely to the full height of the soil contact outside (plus 50 cm above). We must reach bare, solid concrete or brick.
If the wall is actively "running" with water during work, we cannot coat it. We use rapid-setting cement - a powder that, when wetted and pressed into the leak, sets rock-hard in 10 seconds, stopping the water instantly!
At the junction where wall meets floor (a classic crack where water enters), we cut a small channel and form a rounded "cove" with repair mortar.
We thoroughly wet the concrete (so the pores open) and brush on the negative-pressure cementitious coating with a stiff brush, "rubbing" it into the wall. We apply 2 or 3 cross-hatched coats. The wall turns grey, rock-like and absolutely dry. (After a few days, we can plaster over it.)
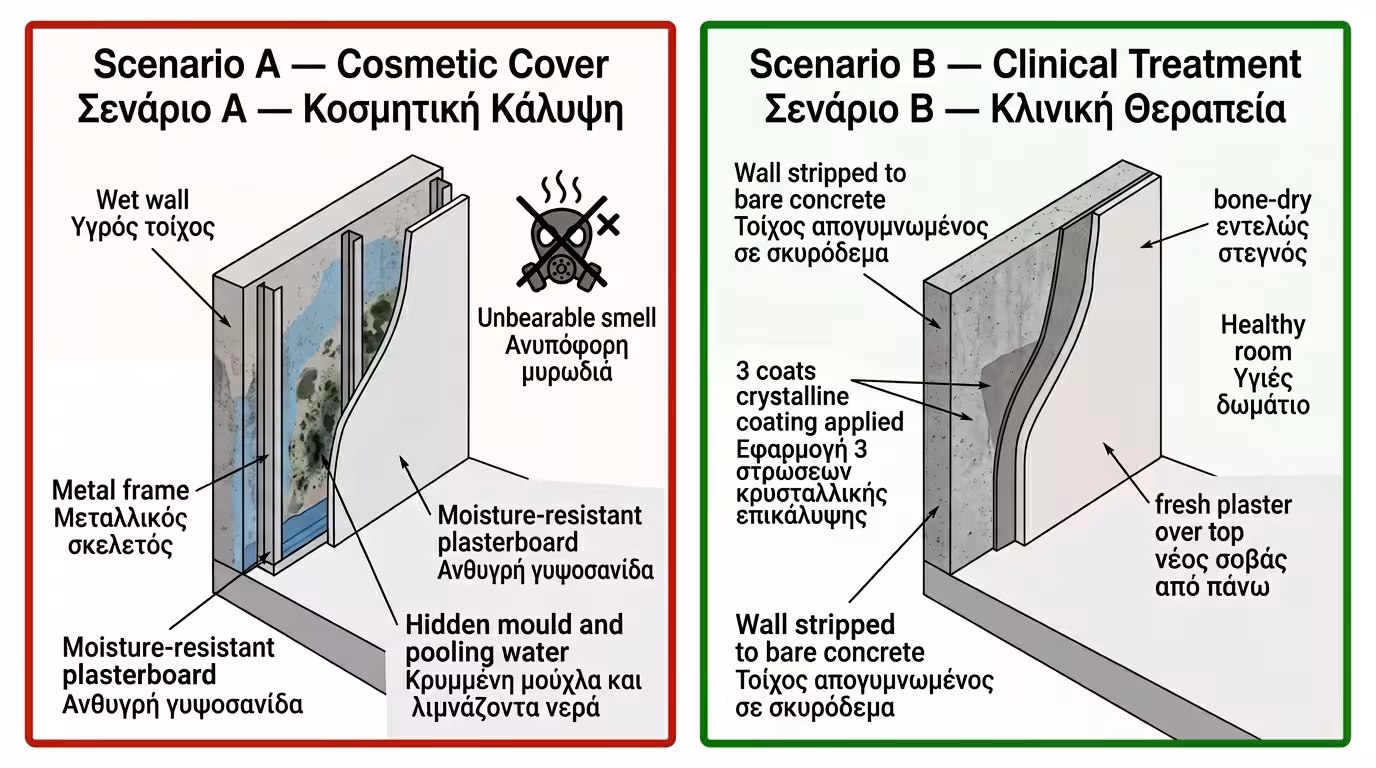
We have a semi-basement room. One side "faces" the pavement (2 m of soil touching our wall). In winter, the wall runs with water.
We don't want hassle. We call a dry-liner. He builds a metal frame, mounts a moisture-resistant (green) plasterboard in front of the wet wall to "hide" it, and paints it. The room looks lovely. But behind the plasterboard, water pools on the floor, the concrete rots, mould throws a party and the smell is unbearable. The wall is being destroyed in secret.
We strip everything down to bare concrete. We scrub with a wire brush. We apply 3 coats of crystalline cementitious coating (negative pressure). The moisture vanishes as if by magic. The wall is now "bone dry" and the crystals have armoured the concrete. We apply fresh plaster and the room becomes perfectly habitable and healthy!
Final Verdict: Negative-side waterproofing is perhaps the most demanding task in waterproofing. It does not forgive slapdash paints or cover-ups with plasterboard. It requires specialised cementitious coatings that become "one" with the structural frame, blocking the cascade from inside.
Return to category.
Go to categoryReturn to the central guide.
Go to guide