Noise from the Ceiling (Airborne): How to Cut Voices from Above with a
Suspended Ceiling
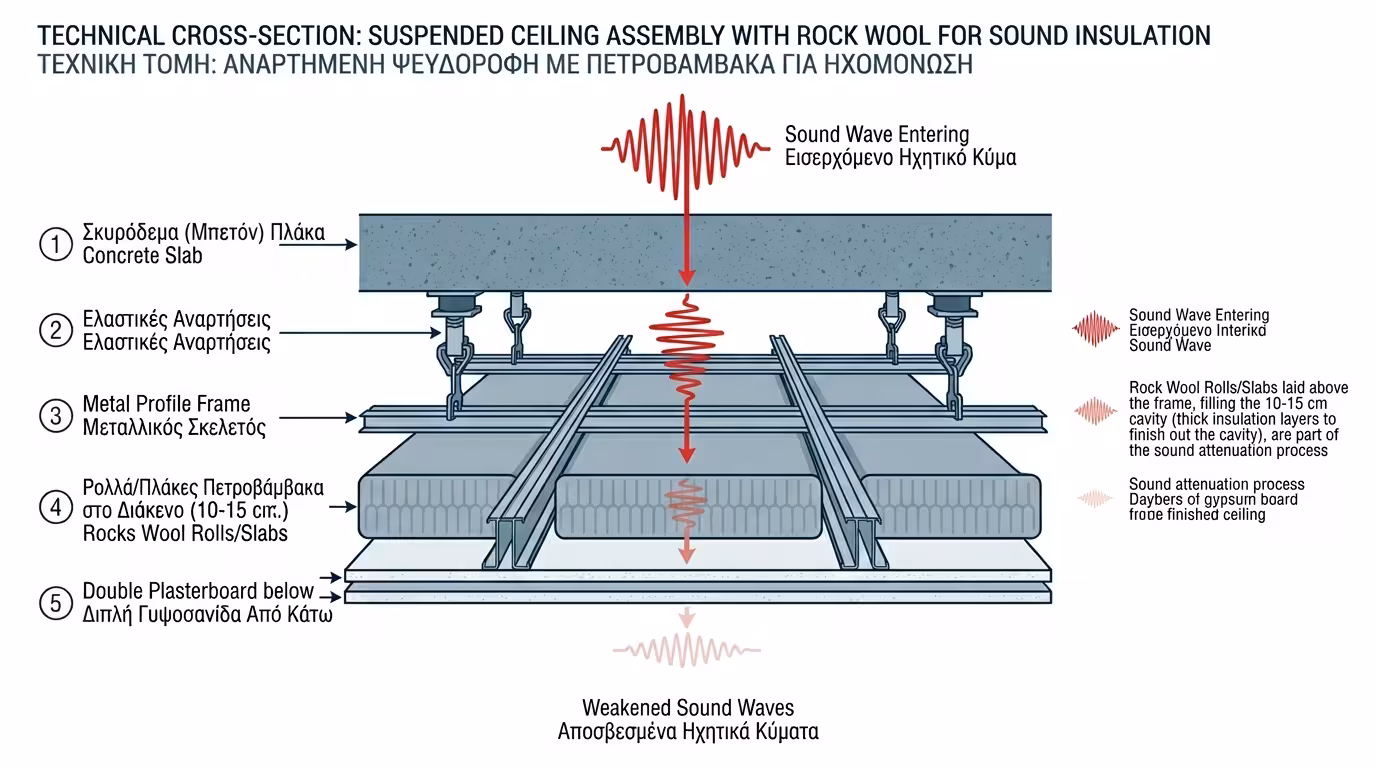
As we learned from the wall, the solution to cutting airborne noise is
the "Mass – Spring – Mass" system. In the case of the ceiling, Mass 1 is
the concrete slab, the Spring is the trapped air with rock wool, and
Mass 2 is our new suspended plasterboard ceiling.
Sounds simple, right? However, because the ceiling… hangs, we are forced
to support it with screws and metalwork on the very same concrete we are
trying to insulate! If we don't pay attention to how this connection is
made, all the noise will travel down through the screws.
The 4 Steps of the Perfect Suspended Ceiling
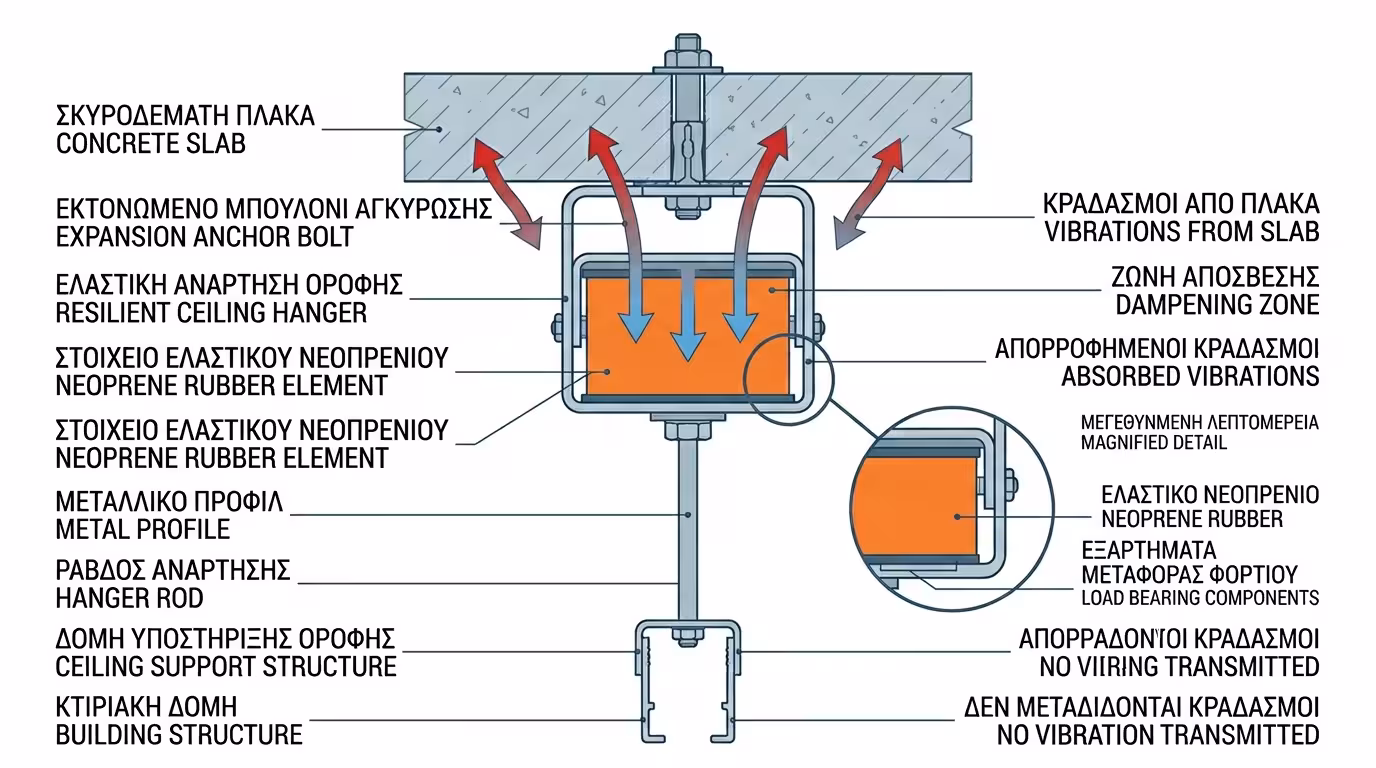
1. Resilient Mounts (The "Holy Grail")
Forget the simple steel brackets used for decorative plasterboard
ceilings. The frame of the new ceiling must be hung from the concrete
using specialist resilient mounts (hangers). These
fittings have an integrated elastic material (neoprene or specialist
rubber). This way, the vibration of the slab "dies" on the rubber and
never reaches the metal frame of our plasterboard.
2. The Sound-Absorbing "Pillow" (The Rock Wool)
Above the metal frame (and before we close with plasterboard), we lay
rolls or slabs of rock wool. As we said, its role is to "drown" the
echo that would otherwise build up inside the air gap, preventing our
ceiling from sounding like a hollow drum.
3. The Heavy Shield (Double Plasterboard)
We screw onto the frame two layers of acoustic (heavy) plasterboard, once again taking care to stagger the joints.
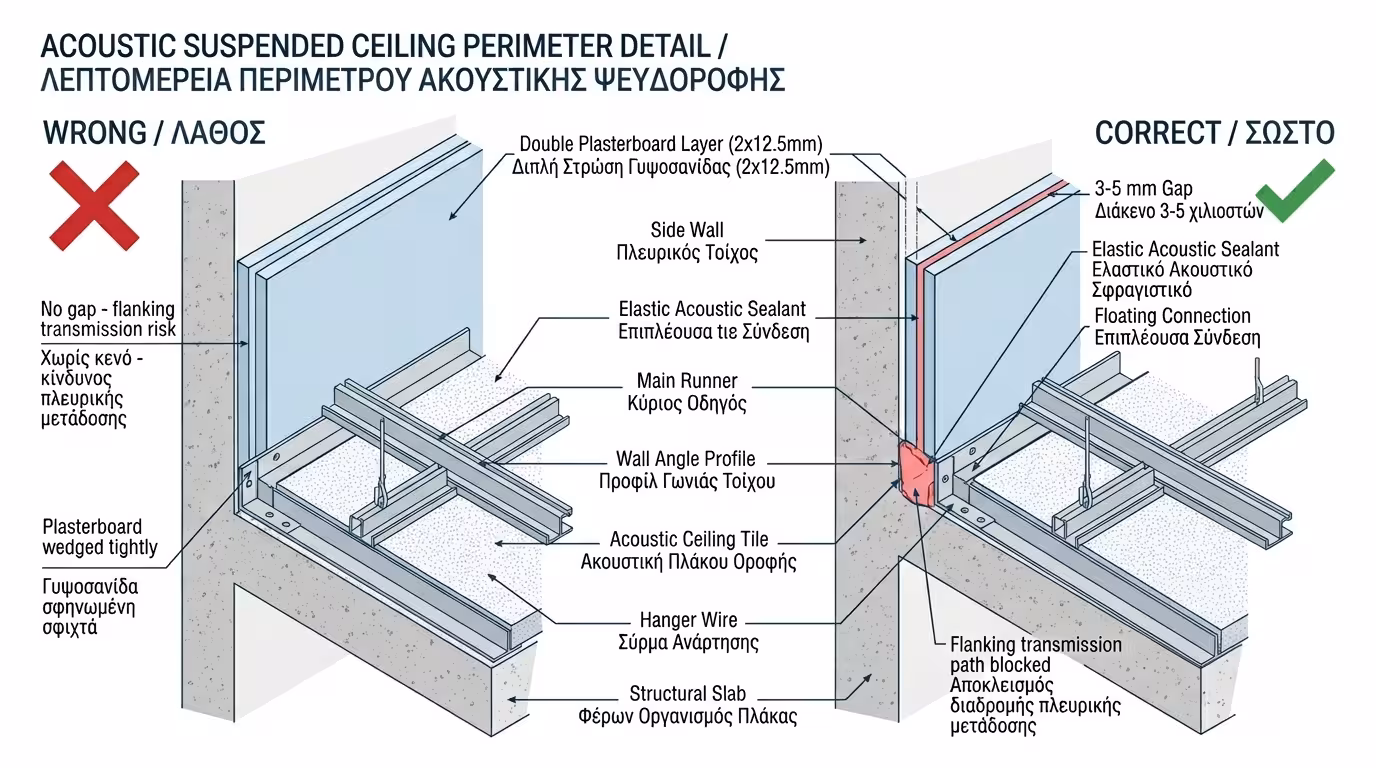
4. Perimeter Decoupling (The Seal)
Our ceiling MUST NOT touch the side walls! We leave a
gap of 3-5 millimetres all the way round and fill it with elastic
acoustic sealant. If the plasterboard is wedged into the walls, the
walls will transfer building vibrations to it (flanking transmission)
and we will lose a large part of our sound insulation.
How Much Ceiling Height Will I Lose?
This is the most common question. For the "spring" (air gap) to work
properly, an acoustic suspended ceiling typically requires 10 to 15 centimetres of your room height. If you have a low-ceiling home (below 2.60 m), you
may feel the space shrinking, but it is the necessary price for silence.
The Experiment in Our Model (The 4×4 Ceiling)
The upstairs neighbour (on the 1st floor) talks loudly and watches TV,
resulting in 35 dB measured at our bed.
❌ Scenario A (The Cheap Ceiling)
The tradesman screws the metal frame directly to the concrete with
plain steel rods ("threaded rods"). He adds a single thin
plasterboard with a little rock wool. The upstairs TV makes the slab
vibrate, the vibration travels down the rods, shakes the lightweight
plasterboard, and we hear the TV almost as loudly as before. We have
thrown away €600.
✅ Scenario B (Full Decoupling)
We buy resilient mounts. We hang the frame, lay 5 cm of rock wool,
and screw on two layers of heavy acoustic plasterboard, leaving a
perimeter gap. We have lost 12 centimetres of height. At night, the
neighbour's voices vanish completely (−15 dB). Our ceiling is a
disconnected, heavy "lid" that does not participate in the
building's vibrations!
The Final Conclusion: The ceiling is essentially a wall turned
horizontal. The only way soundproofing can succeed is to "break" the mechanical
connection with the concrete slab using elastic, resilient mounts. Without
them, you are simply building a beautiful, decorative ceiling.