1️⃣ Wedging (Thermal Insulation)
Wedge rock wool (typically 7-10 cm thick) between the rafters. Leave a 2-3 cm air gap between the insulation and the tiles (or deck) so air can circulate and timber doesn't rot from any external moisture.
If you live in a house with an old, uninsulated tiled roof, you already know: in winter you're literally heating the birds sitting on the tiles, and in summer the house turns into an oven.
If your roof is watertight (no leaks) and the timbers are sound, you don't need to strip it. You can create a perfect thermal shield working exclusively from the room or loft interior, using the space between the wooden rafters.
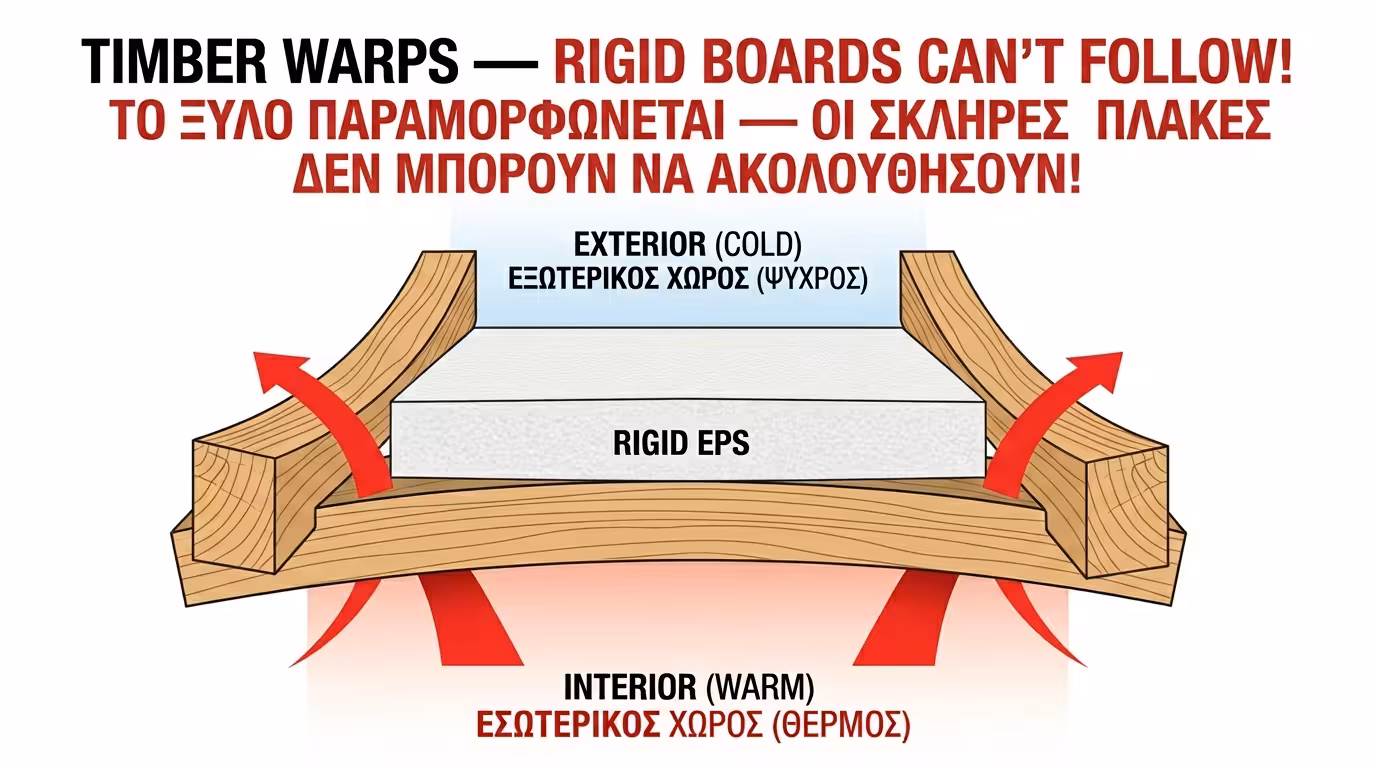
The first mistake many DIY-ers make is buying rigid boards (EPS or XPS) and trying to cut them to fit between the timbers.
Timber is never perfectly straight, and over time it warps. If you push a rigid, inflexible board between two warped rafters, air gaps will remain (gaps). Heat will find its way out through these gaps (thermal bridge).
The ideal material for this job is fibrous insulation - rock wool or glass wool (in rolls or semi-rigid batts). Because they're soft and compressible, the installer cuts them 1-2 cm wider than the gap between rafters. When wedged in, the material "springs" open, hugs the timber perfectly and leaves not a single millimetre of air gap!
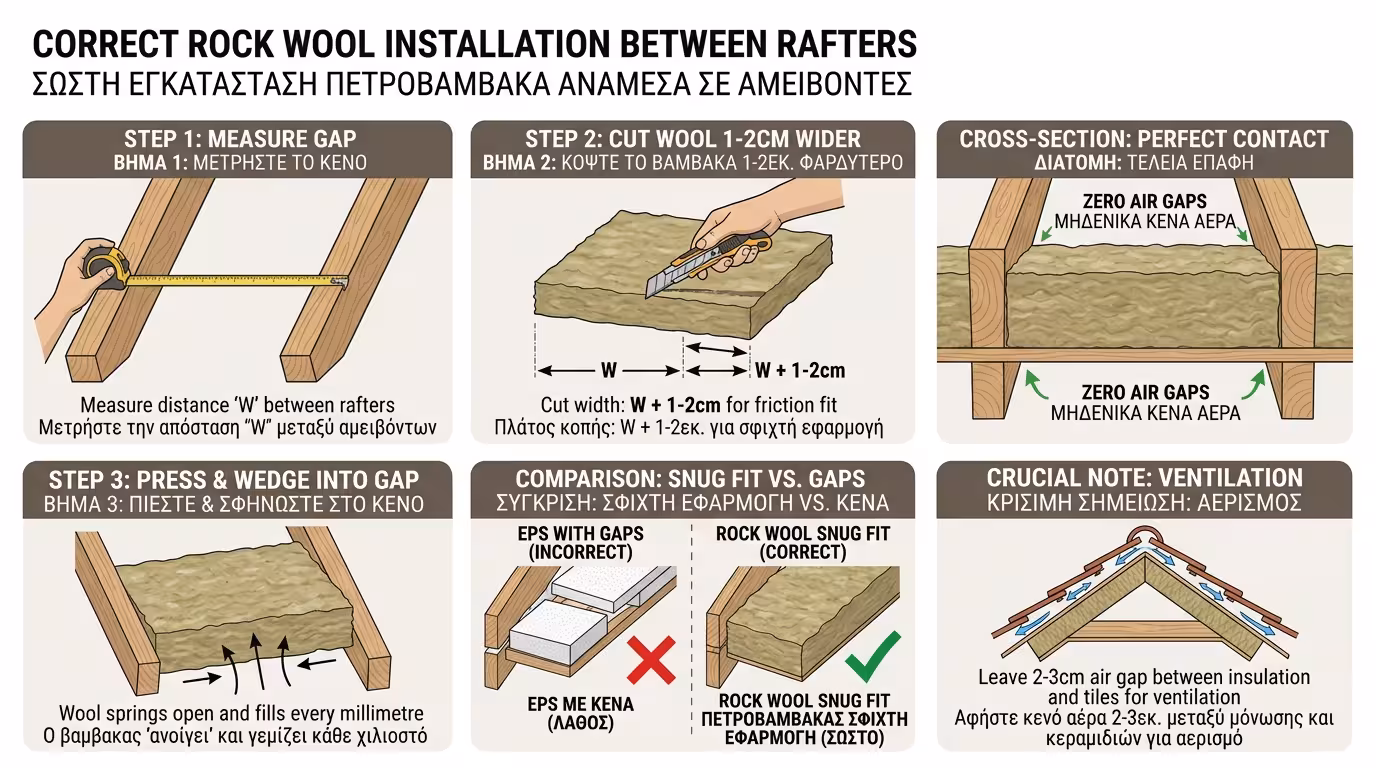
For correct installation, we follow 3 strict steps (from tiles towards the living room):
Wedge rock wool (typically 7-10 cm thick) between the rafters. Leave a 2-3 cm air gap between the insulation and the tiles (or deck) so air can circulate and timber doesn't rot from any external moisture.
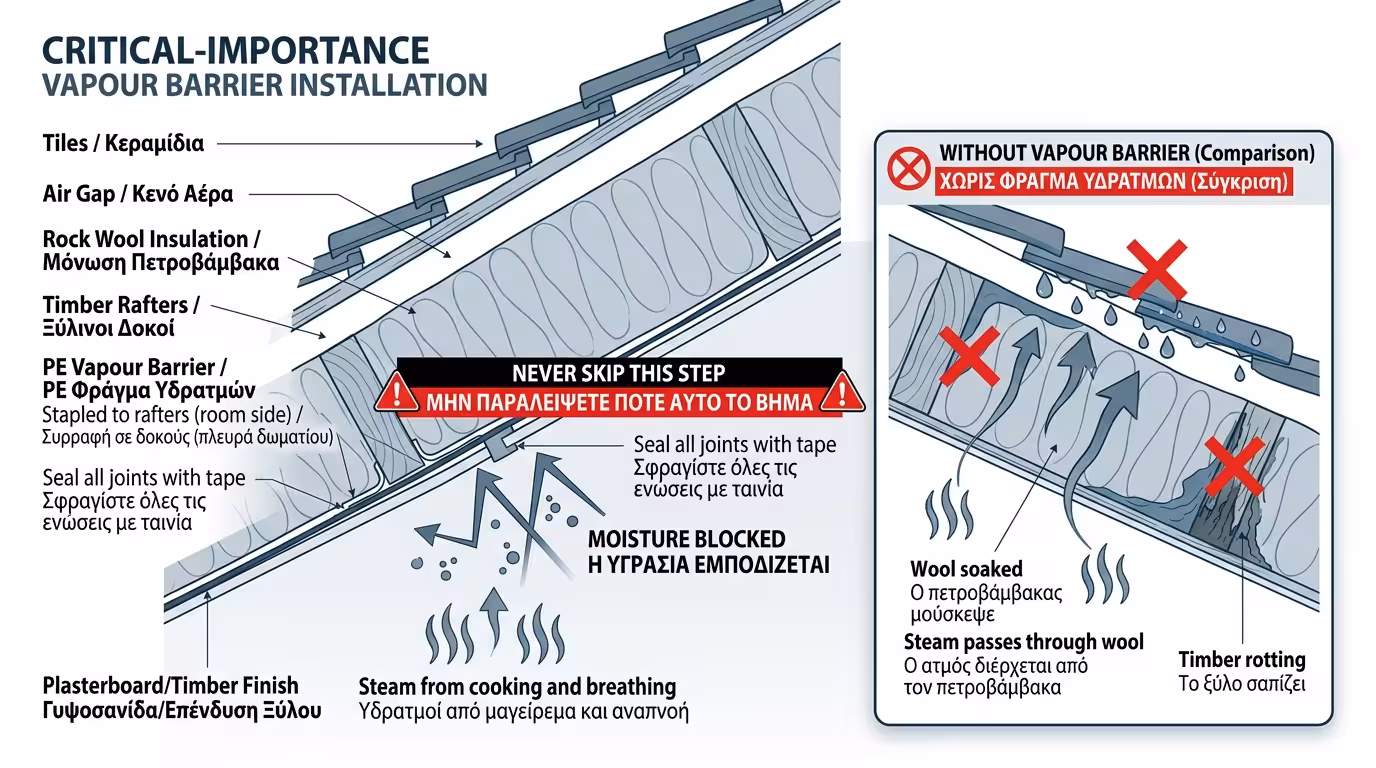
Above the insulation (i.e. on the room side), staple a special plastic sheet (vapour barrier) to the rafters. This step is NEVER skipped. Without it, steam from breathing and cooking passes into the rock wool, condenses on the cold tiles, the rock wool becomes soaked and loses 100% of its insulating ability. The sheet is sealed at all joints with special tape.
Screw plasterboard or tongue-and-groove timber to the rafters. Paint it and your home looks brand new.
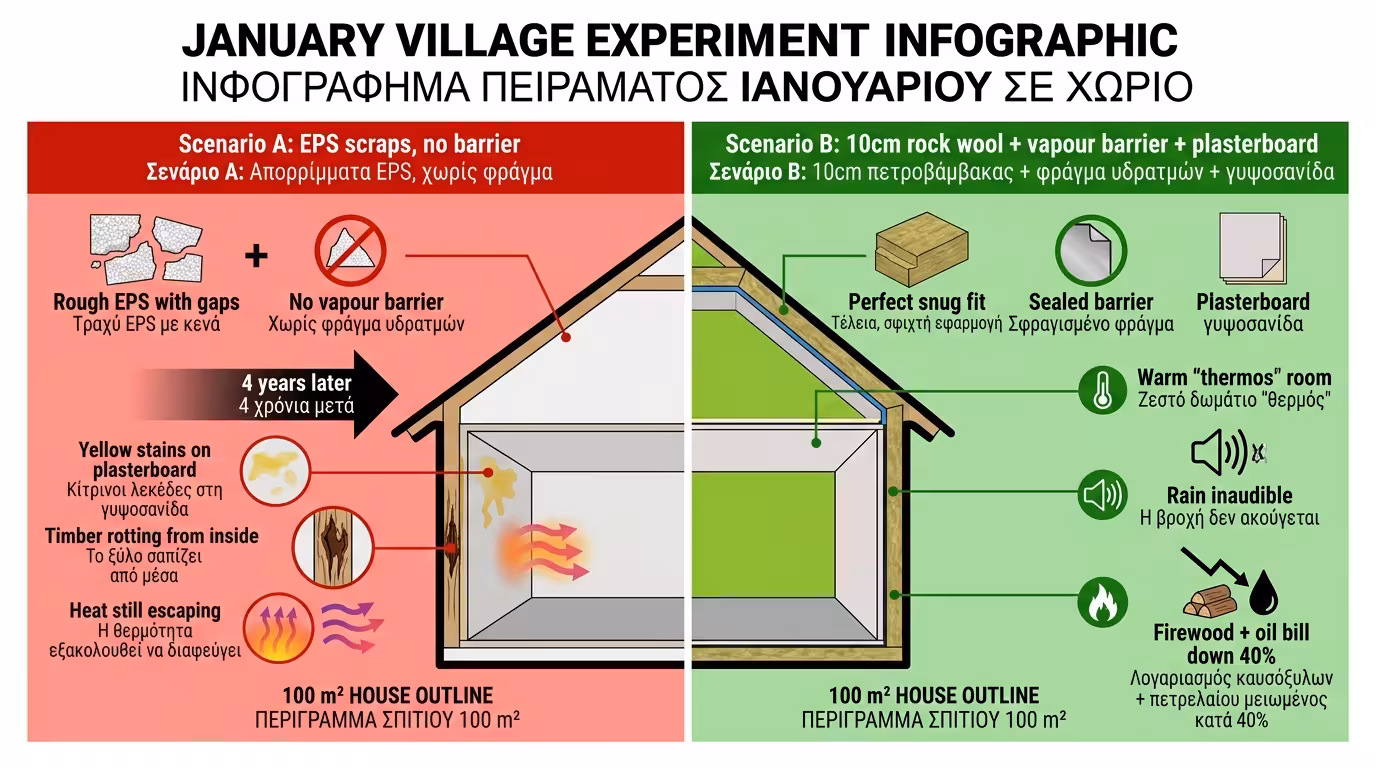
It's January in the village. The roof is uninsulated and we can see the tiles from inside.
We roughly shove some EPS pieces in and close with plasterboard. Air gaps around the EPS let heat escape. Worse? Indoor humidity passes into the roof timbers. In 4 years, the roof starts rotting from within and yellow stains appear on the plasterboard.
We wedge 10cm rock wool between rafters. Seal airtight with a vapour barrier and screw on plasterboard. The room becomes a "thermos". We cut the draughts, cut the heat loss and gain superb sound insulation (we can't even hear heavy rain). The firewood and heating oil bill drops by 40%!
The Final Conclusion: Internal roof insulation between rafters is the most "value for money" renovation you can do in an old house. An experienced DIY homeowner can even do it. All it requires is meticulous attention to the vapour barrier to protect your roof timbers!
Return to category.
Go to categoryReturn to the central guide.
Go to guide