📐 2-3cm XPS or EPS
The worker must line the entire perimeter of the window with XPS or EPS 2cm or 3cm thick. Even these 2 centimetres are more than enough to "cut" the cold's path and prevent condensation.
You have paid a fortune to "dress" your house with 8 centimetres of top-quality thermal facade. You enter on the first winter, turn on the heating and feel wonderful. Two months later, however, you notice something terrifying: right around the window frame (where the aluminium meets the wall), an intense black line of mould has started to form.
What went wrong? How can a fully insulated house grow mould? Most likely your contractor left the "reveals" bare. Let us look at what this construction crime is and how to prevent it.
In construction, "reveal" (or "return") refers to the inner surround of the window. It is that narrow piece of wall (typically 10-15 centimetres) that "turns" inward to meet the window frame.
The most classic defect in Greece is this: the worker installs the 8cm polystyrene on the flat facade. But when he reaches the window, he sees that if he wraps the 8cm board inside the reveal, it will cover the window and the shutter will not open. The easy solution? He leaves the reveal completely uninsulated! He simply renders it with a little plaster to look nice and moves on.
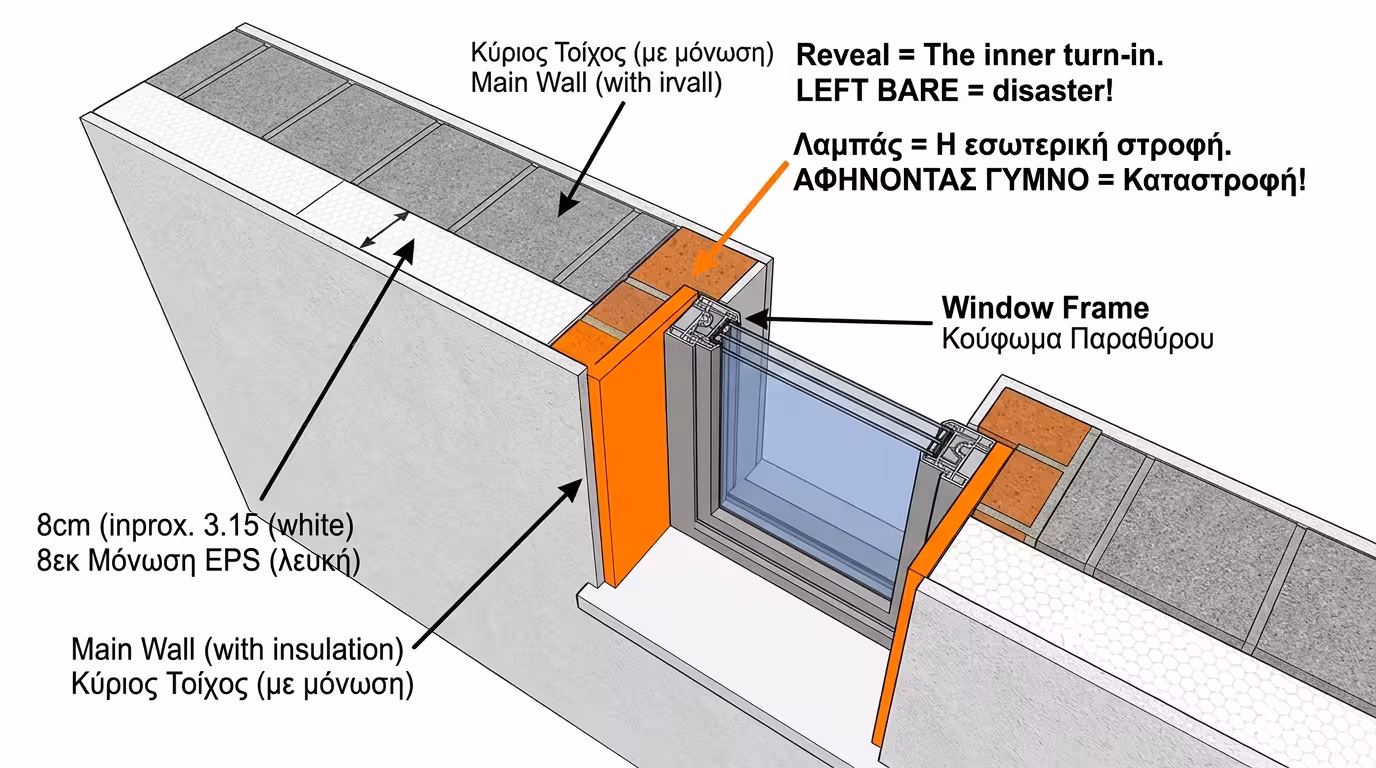
By leaving that narrow piece of wall bare, the worker has just created a colossal thermal bridge. Cold is like water. It will not try to pass through 8 centimetres of insulation. It will bypass the insulation, hit the bare reveal and travel through the brick, arriving directly at the interior corner of your living room (right next to the window).
There, the wall freezes, the warm room air touches it, condensation occurs (Dew Point) and mould throws a party!

The golden rule of ETICS systems is absolute: Insulation is NEVER interrupted.
If the 8cm thickness does not fit inside the reveal, we use special, thinner boards.
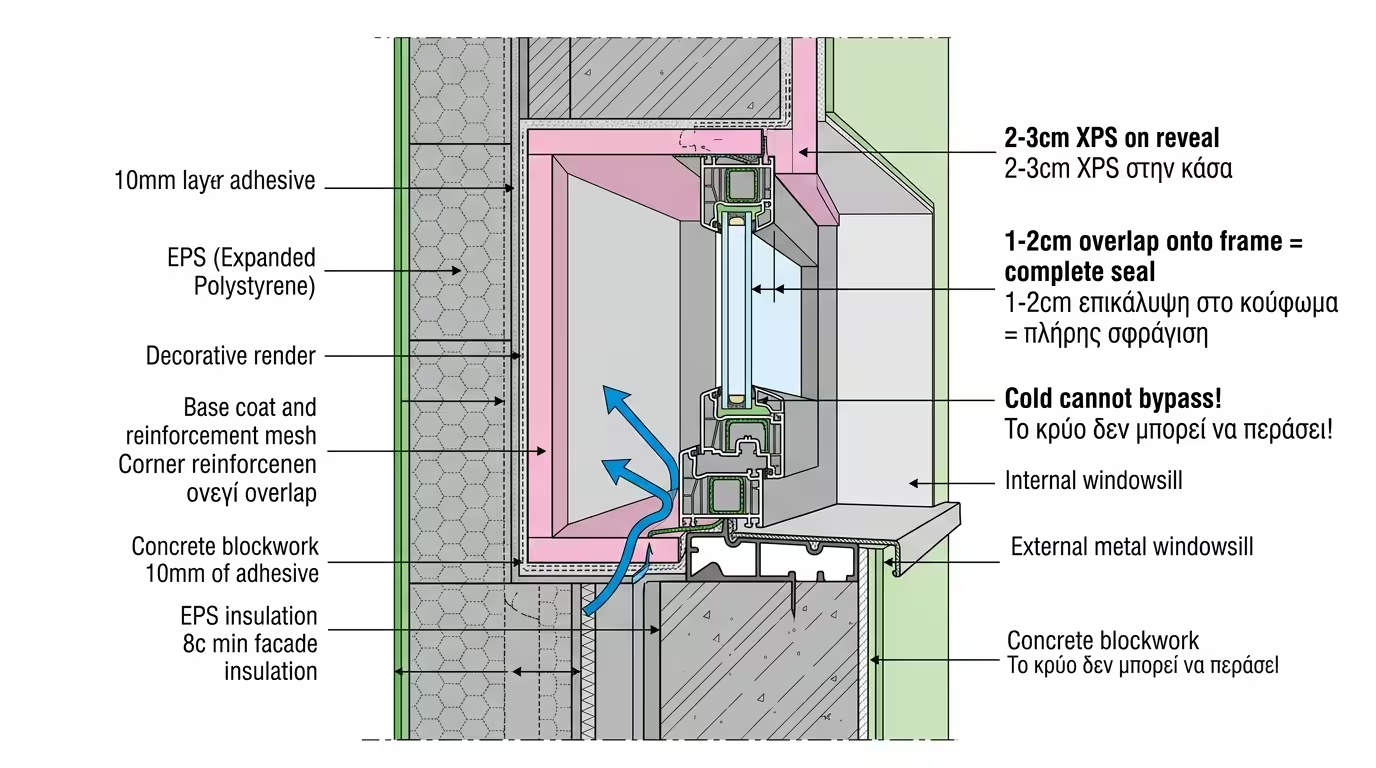
The worker must line the entire perimeter of the window with XPS or EPS 2cm or 3cm thick. Even these 2 centimetres are more than enough to "cut" the cold's path and prevent condensation.
The reveal insulation should ideally come flush and overlap slightly onto the window frame (by 1-2 centimetres), to completely seal the joint. This way, cold cannot pass even through the gap between the aluminium and the wall!
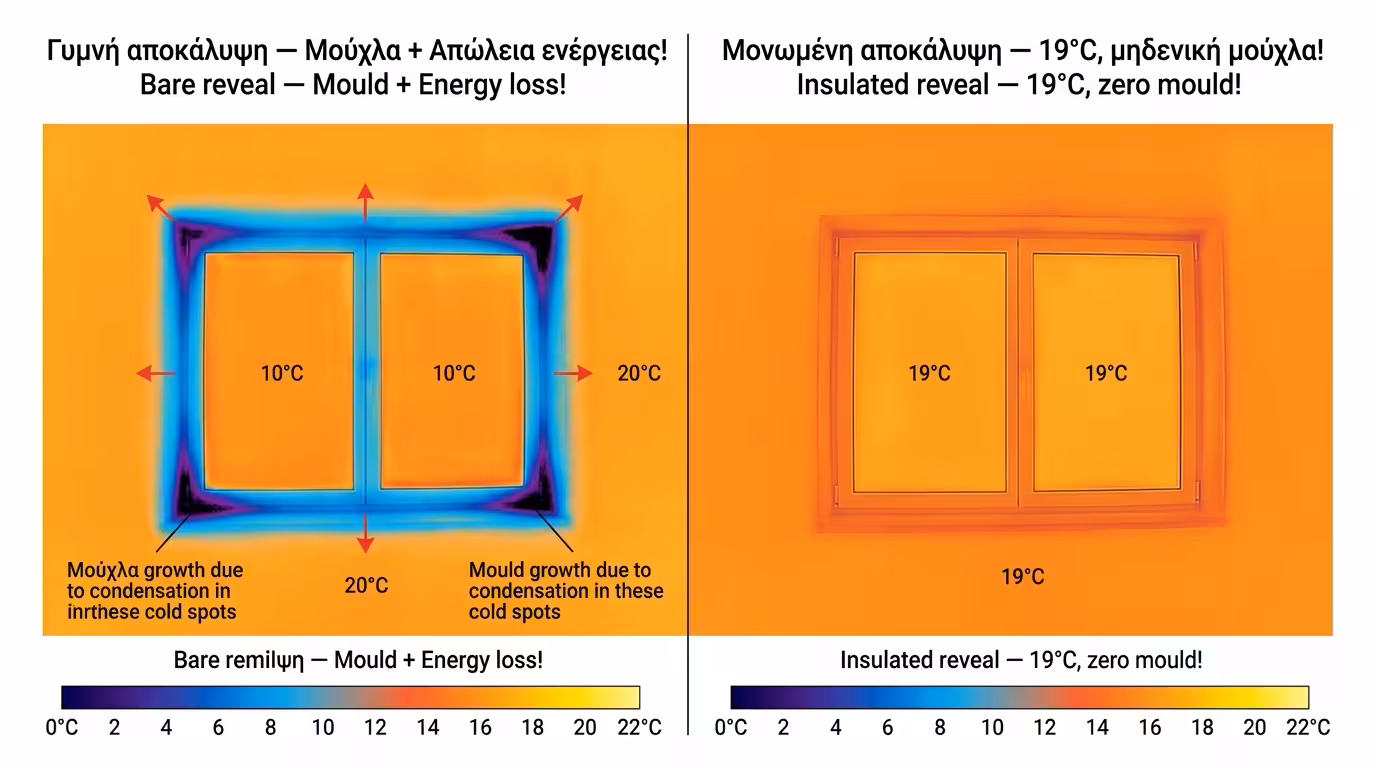
We are in the living room of our virtual house, which has a large 2×2 metre window. Outside it is 2°C. We point the thermal camera inward.
The main wall appears warm (orange). But right around the window, there is a bright, freezing blue "halo". The wall there has dropped to 10°C. The room's water vapour sticks there and turns to liquid. The thermal bridge steals energy and brings mould.
The worker installed thin insulation all around and "hugged" the frame. The thermal camera now shows the entire wall, right up to the edge of the aluminium, uniformly warm. The wall temperature beside the window is 19°C. Zero loss, zero mould!
The Final Conclusion: When talking to a crew, one of your first questions should be: "How will you handle the window reveals?". If they tell you "it doesn't matter, we'll just render them because the material won't fit", thank them and look for another crew. Reveal insulation is not an optional detail - it is the core of a successful thermal facade.
Return to category.
Go to categoryReturn to the central guide.
Go to guide