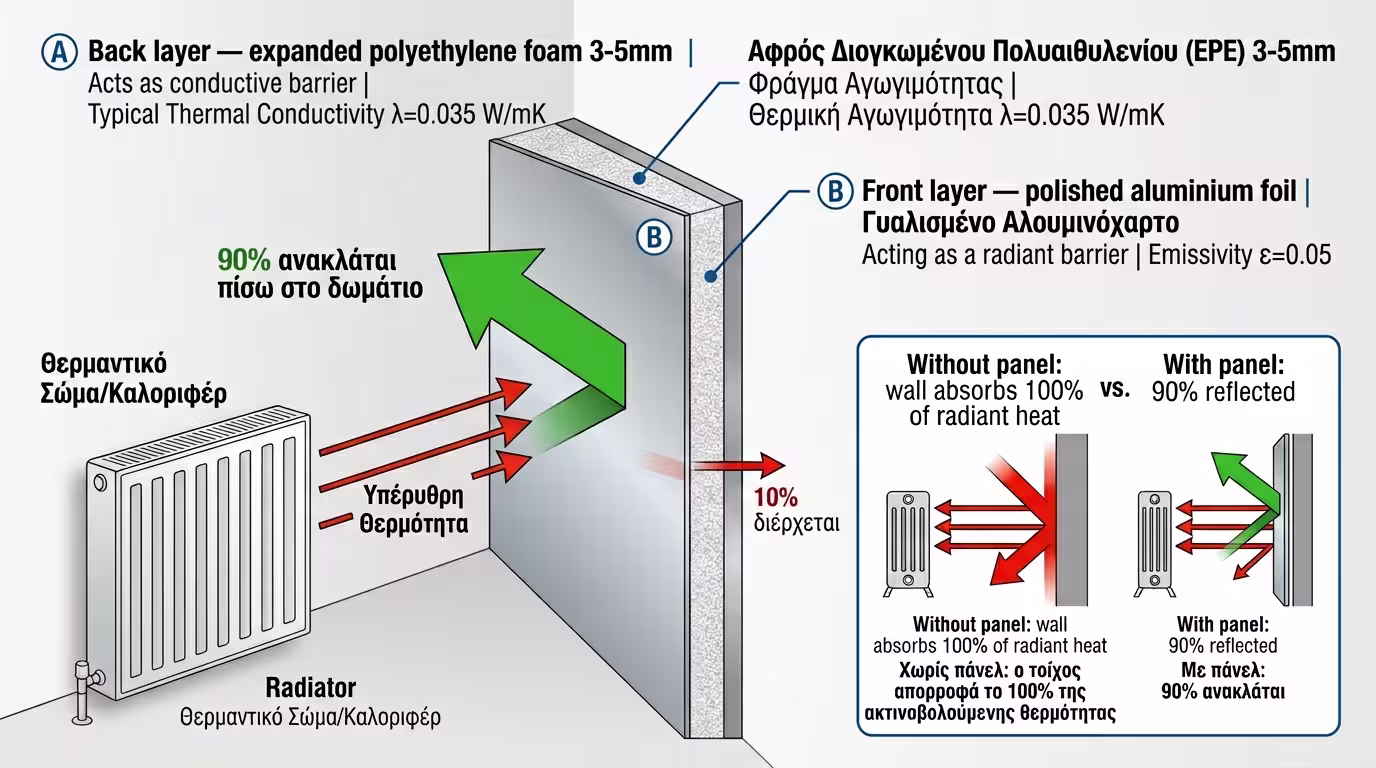
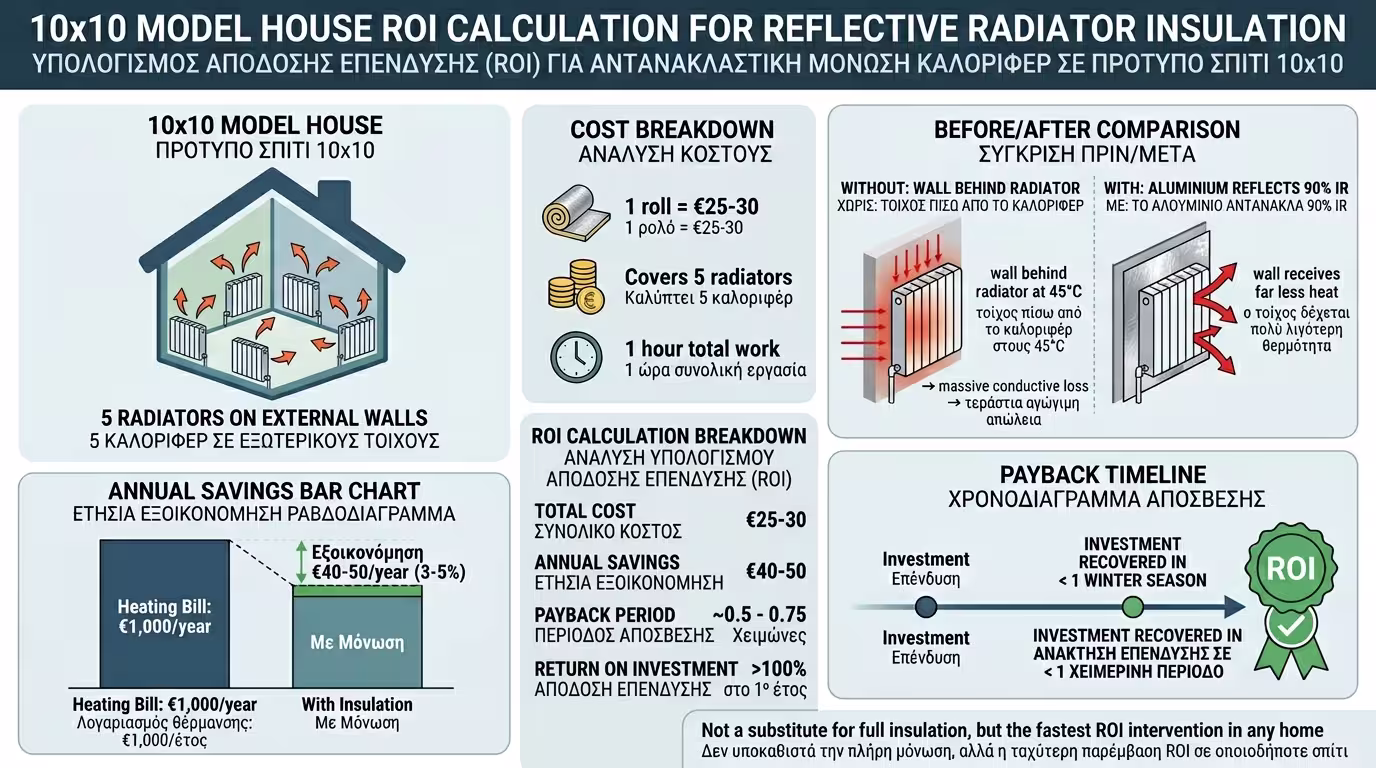
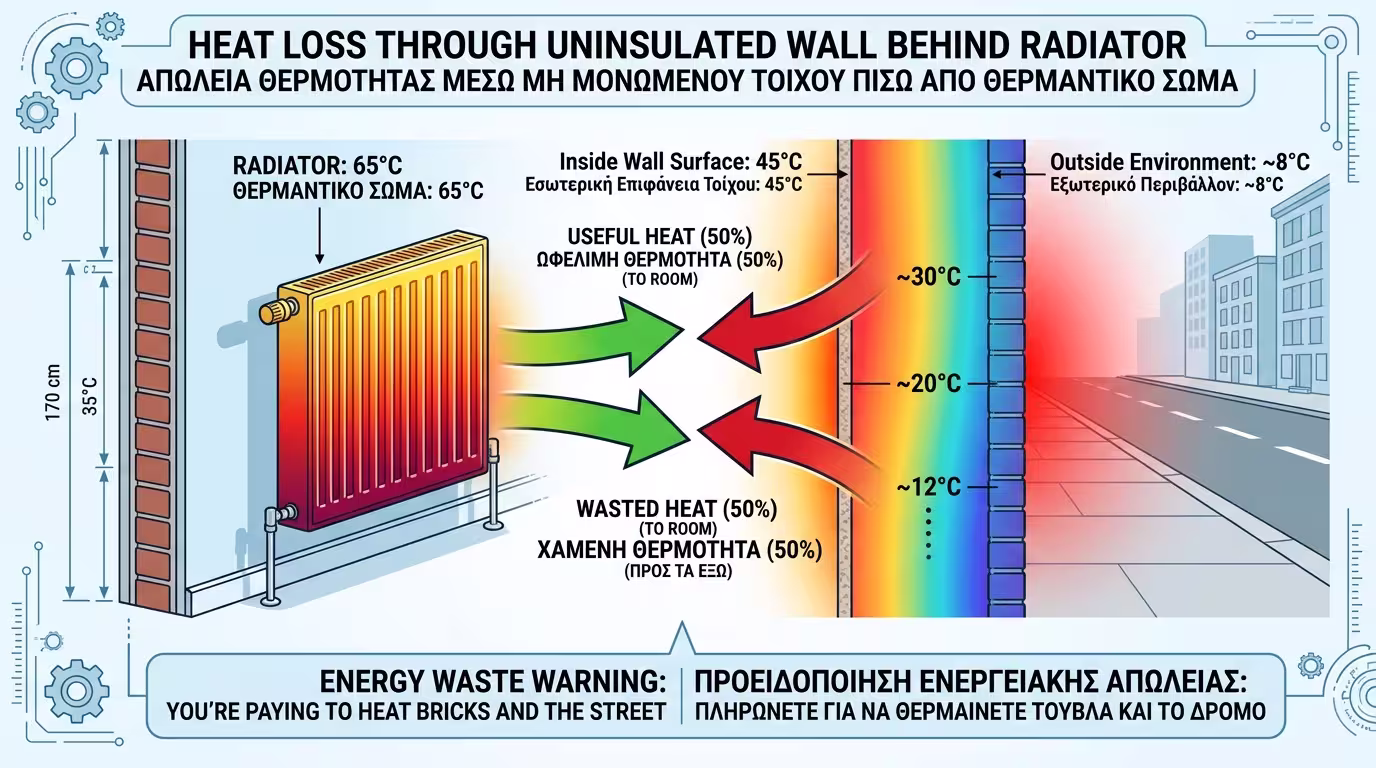
Insulation Behind Radiators (Reflective Membrane): Is It Worth the Effort?

If you don't have the budget or time for full insulation, there's a "small" intervention you can do yourself this weekend, costing less than €10 per room.

We're talking about fitting reflective insulation panels (membranes) directly behind radiators. It's arguably the most well-known DIY energy-saving trick, but the question remains: does it actually work or is it just a "renovation urban myth"? The science of thermodynamics has a clear answer: Yes, it's 100% worth it. Let's see why.

1. The Problem: How Radiators Heat the… Street

In most Greek homes built before 2010, radiators are mounted on external walls (below windows).

Heat losses behind a radiator on an uninsulated wall

🌡️ The Waste

When the radiator burns at 60°C–70°C, it emits heat in all directions. Half the warmth goes towards your living room, but the other half "hits" the wall directly behind it. Because this wall is typically uninsulated and freezing, it greedily absorbs that heat and sends it straight to the outside environment. Effectively, you're paying for oil or gas to heat the bricks and the street.

2. The Solution: Reflective Insulation (Foam + Aluminium)

The special radiator panels are typically thin sheets (3 to 5 millimetres thick) consisting of two layers:

Reflective panel cross-section - foam layer + aluminium foil

🧱 Foam Layer

A thin layer of foam material (e.g. expanded polyethylene or EPS) that acts as insulation, preventing heat from passing through by "conduction" to the wall.

🪞 Aluminium Foil

An aluminium coating (foil) on the front side, which works like a mirror. Aluminium has the property of reflecting up to 90% of infrared thermal radiation. So when the radiator's heat hits the panel, the membrane "returns" (reflects) it back into the room, preventing the wall from absorbing it.

3. Installation Guide (DIY)

The process is extremely simple and does not require removing or disconnecting the radiator:

Steps for fitting reflective membrane behind a radiator

1️⃣ Measure & Cut

Measure the radiator dimensions. Cut the reflective membrane (with simple scissors or a craft knife) slightly smaller than the radiator, so it doesn't show and spoil the room's aesthetics. Make small vertical slits at the points where the radiator brackets are fixed to the wall.

2️⃣ Adhesive

Apply double-sided tape (or use special heat-resistant adhesive/silicone) on the back face (on the foam side).

3️⃣ Placement

Slide the membrane behind the radiator with the aluminium facing the room and press it against the wall so it sticks securely.

4. The 10x10 Model Experiment

We have the uninsulated 100 sq.m Model with 5 radiators mounted on external walls.

ROI of reflective membrane - payback in one winter

🌡️ Before the Membrane

Without membranes, the wall behind each radiator reaches 45°C and loses enormous amounts of energy to the environment.

💰 Cost & Application

We go to the hardware store and buy 1 roll of reflective insulation (cost approximately €25–30). We cut it and fit it behind all 5 radiators (working time: 1 hour).

📊 Result

The wall stays cold. The heat stays in the room, reducing the total annual heating losses of the house by approximately 3–5%. If the heating bill is €1,000 per year, we've saved €40–50.

⏰ Payback Period

Payback (ROI): Less than one winter! The intervention with the fastest payback you can make in your home.

💡 Conclusion: Can a radiator reflector replace proper 8cm insulation on an entire wall? Absolutely not. But for €30 and half an hour's work, it's the intervention with the fastest payback you can make in your home.

Related Articles

Insulation Systems: Complete Solutions for Every Building

Return to category.

Go to category

Preview