Visual Inspection & Water Test: The Traditional (But Foolproof) Method
for Finding Roof Leaks
Before hiring crews with jackhammers to tear up the roof, you need to be
100% certain that water is entering through the roof surface and not
from a side wall, pipe, or parapet. The detection process is purely
investigative work, split into two phases.
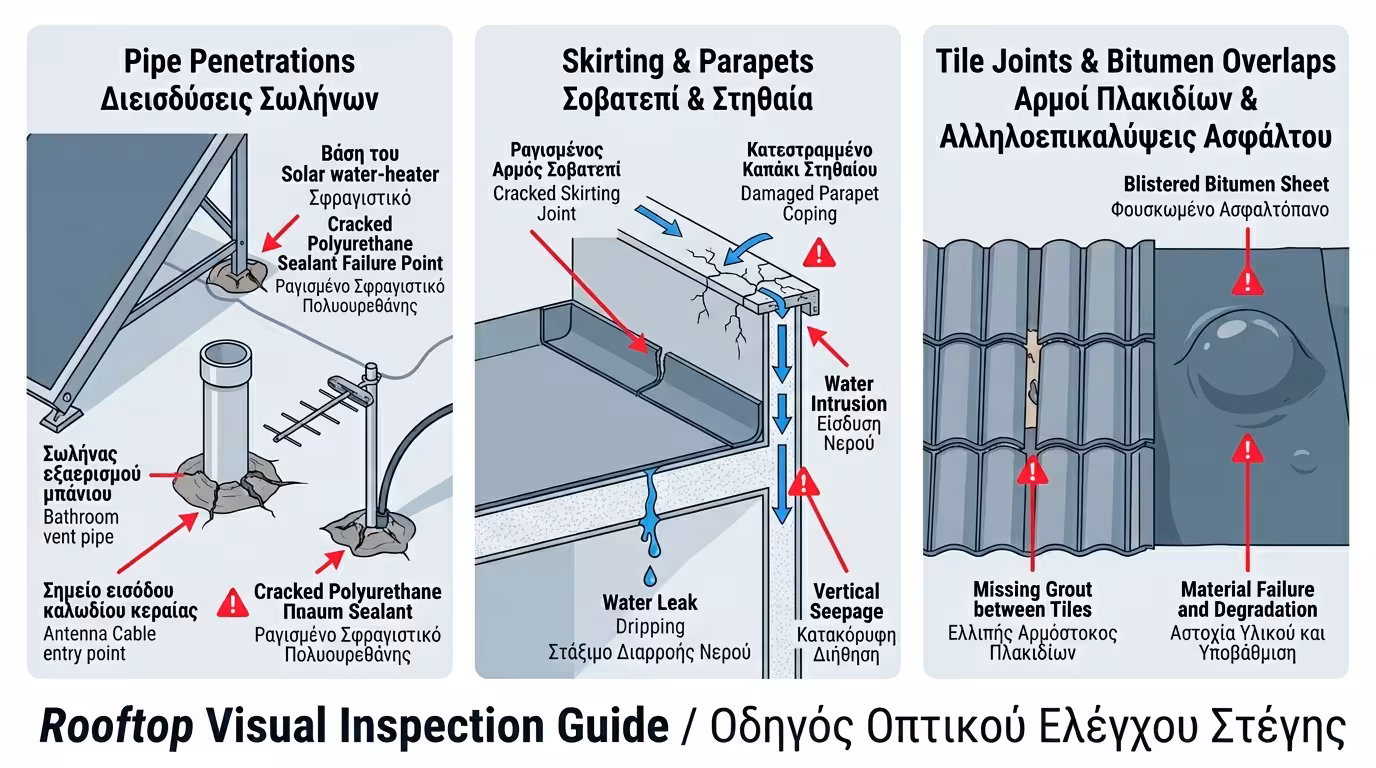
1. Phase 1: The "Surgical" Visual Inspection
Don't look for huge holes. Water needs a crack smaller than a
millimetre to cause damage. Go up on a dry day and check the 3 most
common "victims" in order:
🔧 Penetrations Around Pipes & Obstacles
Check meticulously around the solar water-heater mounts, bathroom
vent pipes, and antenna cables. Where metal or plastic penetrates
the membrane (or tiles), is there polyurethane sealant? Has it dried
out and cracked open?
🧱 Skirting & Parapets
Right-angle junctions are the "Achilles heels." Look for cracks in
the skirting joint. Also inspect the top of the parapet wall
(the coping). If the coping has cracks, water enters the wall, runs vertically
down, and emerges on your ceiling!
🏗️ Tile Joints or Bitumen Sheet Overlaps
Are there blisters in the bitumen sheet? Is grout missing between
tiles?
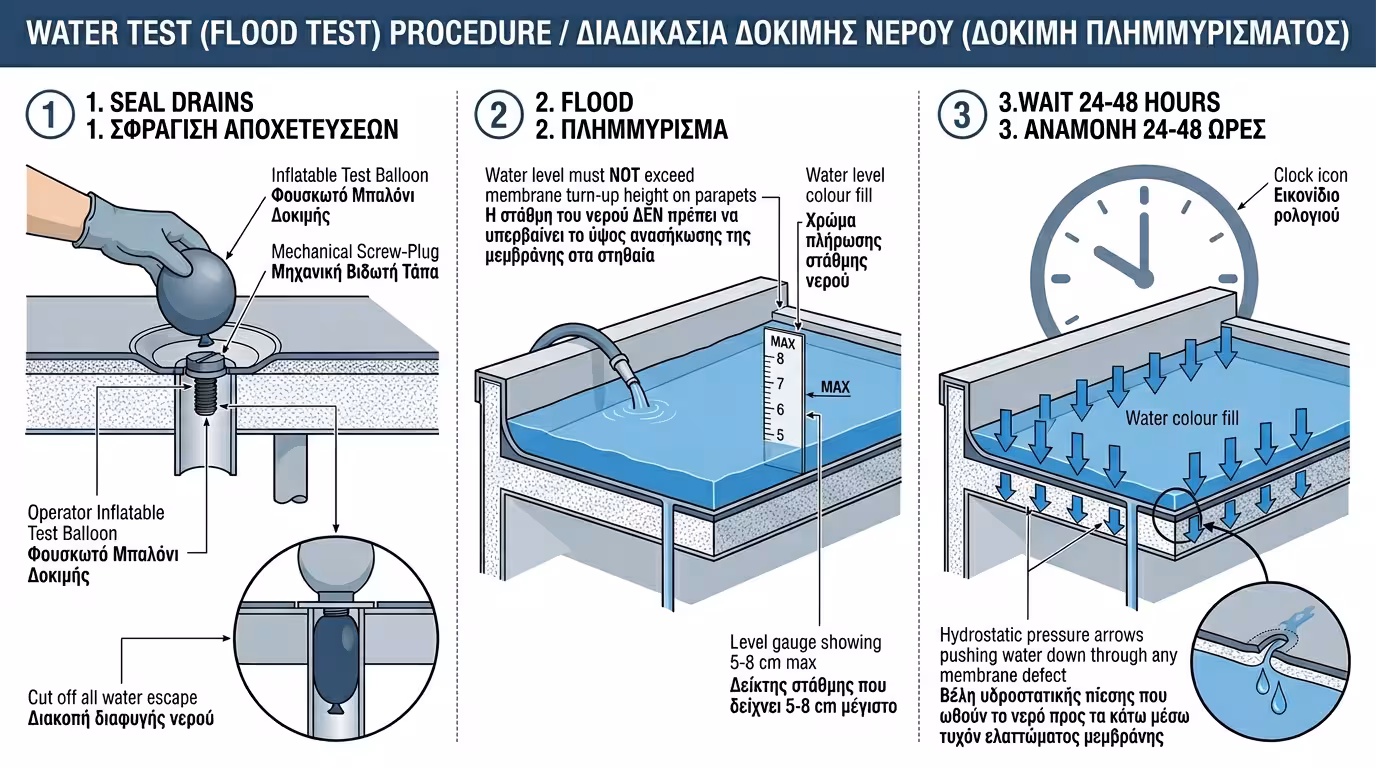
2. Phase 2: The Water Test (Flood Test)
If the visual inspection doesn't reveal anything obvious - or if you
found 5-6 suspicious spots but don't know which one is guilty - it's
time to intentionally "drown" the roof.
🔌 Step 1: Seal the Drains
The technician plugs the drain outlets airtight, usually with
inflatable test balloons or mechanical plugs that tighten with a
screw inside the pipe.
🌊 Step 2: Flood
We open the hose and fill the roof with water, turning it into a
shallow pool. The water level must NOT exceed 5-8 cm and must stay below the height the membrane turns up on the parapets.
⏱️ Step 3: Wait 24-48 Hours
We leave the roof flooded. If there's a hole, the enormous
hydrostatic pressure will force water through every defect in the
membrane.
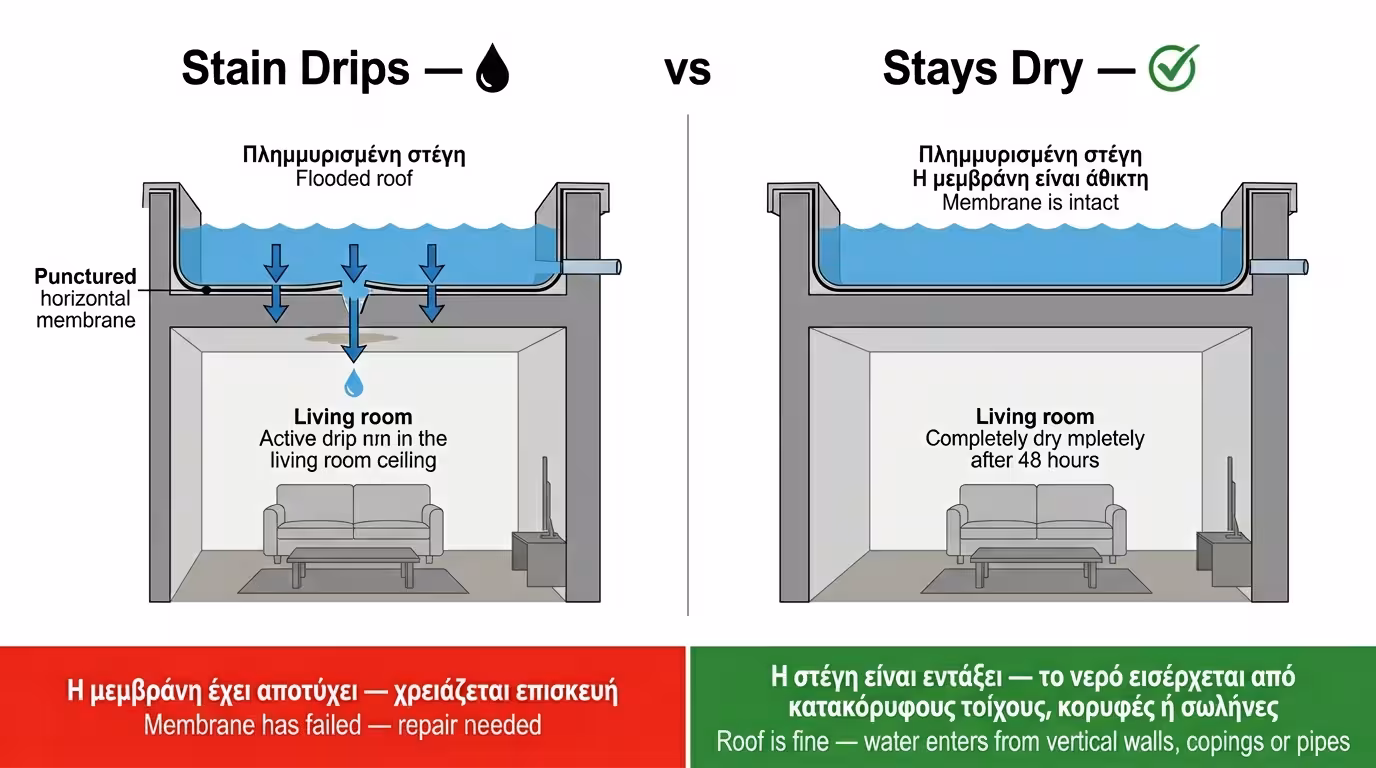
3. The Diagnosis
What does the Water Test tell us?
💧 If the Stain Drips
If the living-room stain starts dripping heavily, then absolutely certainly the problem is in the horizontal roofing membrane. The waterproofing
has been punctured.
✅ If It Stays Dry
If 48 hours pass with a full roof and a dry living room, the roof is
fine. Water is entering from somewhere higher - vertical parapet
walls, cracked copings, or damaged pipework in wind-driven rain.
4. The Experiment: The 100 m² Roof
The living-room stain has driven us crazy. The contractor says: "The bitumen sheets are gone - full tear-off, €3,000."
🔴 Scenario A (The Blind Tear-off)
We listen to the contractor. We strip 100 m² and lay fresh
membranes. Winter comes, a storm hits with strong northerlies, and
the stain reappears! What happened? Water was entering through a
crack in the external, vertical wall - not through the roof at all! €3,000 wasted.
🟢 Scenario B (The Engineer with the Balloon)
We call an engineer. He plugs the drains and fills the roof with 5
cm of water. We wait 2 days. The roof is flooded but the living room
is bone-dry. The engineer drains the roof, then locally hoses the
vertical parapet wall for 30 minutes. Bingo! The room starts
dripping. We've found the real culprit, and with €50 of elastomeric paint we fix the problem.
Bottom Line: Never proceed to expensive repairs or tear-offs
unless you've proven, beyond any doubt, exactly where the water enters. The
Water Test is the cheapest, most reliable and "toughest" test to see whether
your horizontal membrane holds or has failed.