💧 Zero Water Absorption
XPS has a closed-cell structure. Even if you submerge it in a pool for 10 years, it won't absorb a single drop.
The soil surrounding your basement is a living, insidious enemy. In winter it's freezing, after rains it's full of mud and water, and it permanently exerts enormous mechanical pressure (weight) on the walls of your house.
If the basement concrete comes into direct contact with this wet soil, it will act like a sponge. It will absorb water, pass it inside (mould, peeling paint), and simultaneously act as a thermal bridge, sucking your home's warmth into the earth. To break this contact, we must create an impenetrable shield around the foundations.
In this battle, forget rock wool and white EPS. If you bury them in soil, they will absorb water, rot and disintegrate. The only insulation material that resists these extreme conditions is the rigid, coloured Extruded Polystyrene (XPS) boards.
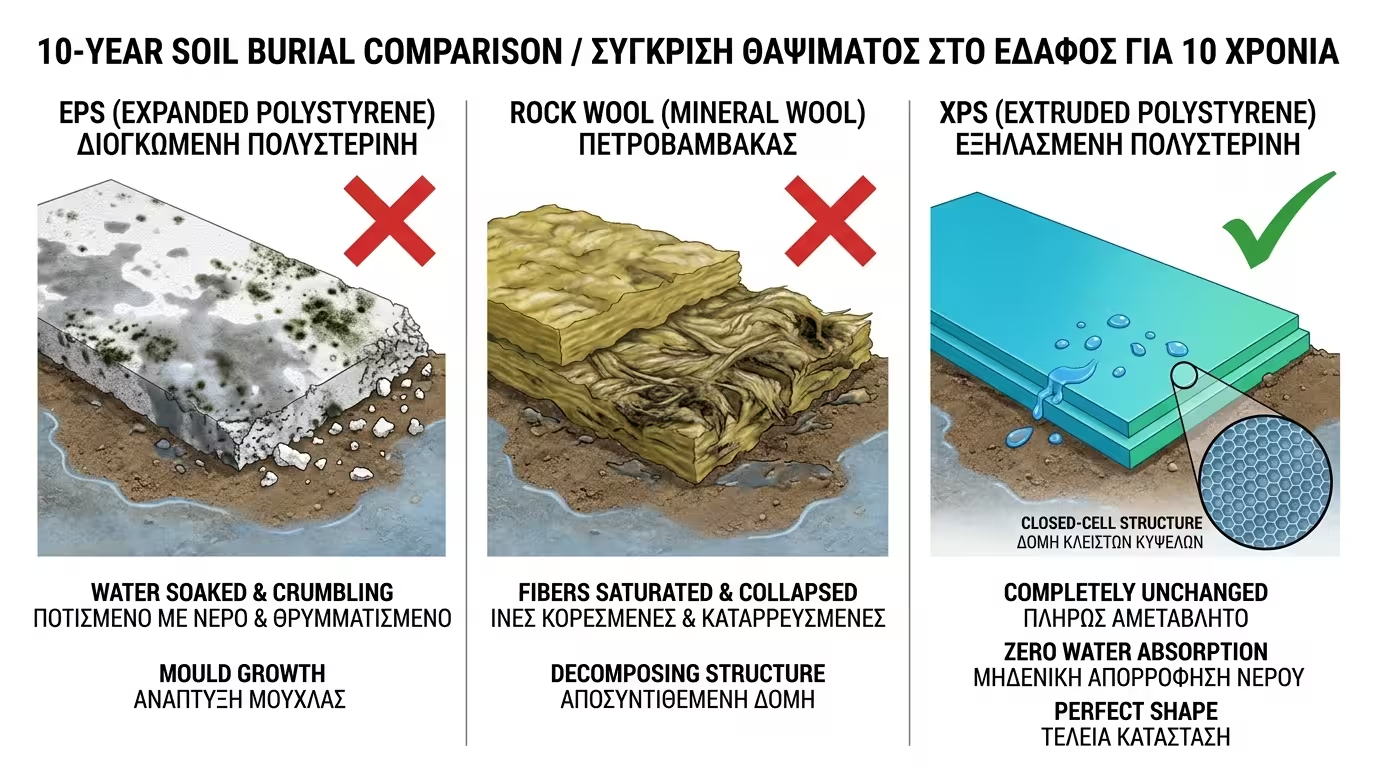
XPS has a closed-cell structure. Even if you submerge it in a pool for 10 years, it won't absorb a single drop.
It's so rigid it withstands the tonnes of soil pressing against it, without deforming a single millimetre.
Installing insulation on foundations requires surgical precision and has a strict sequence (from concrete outward toward soil):
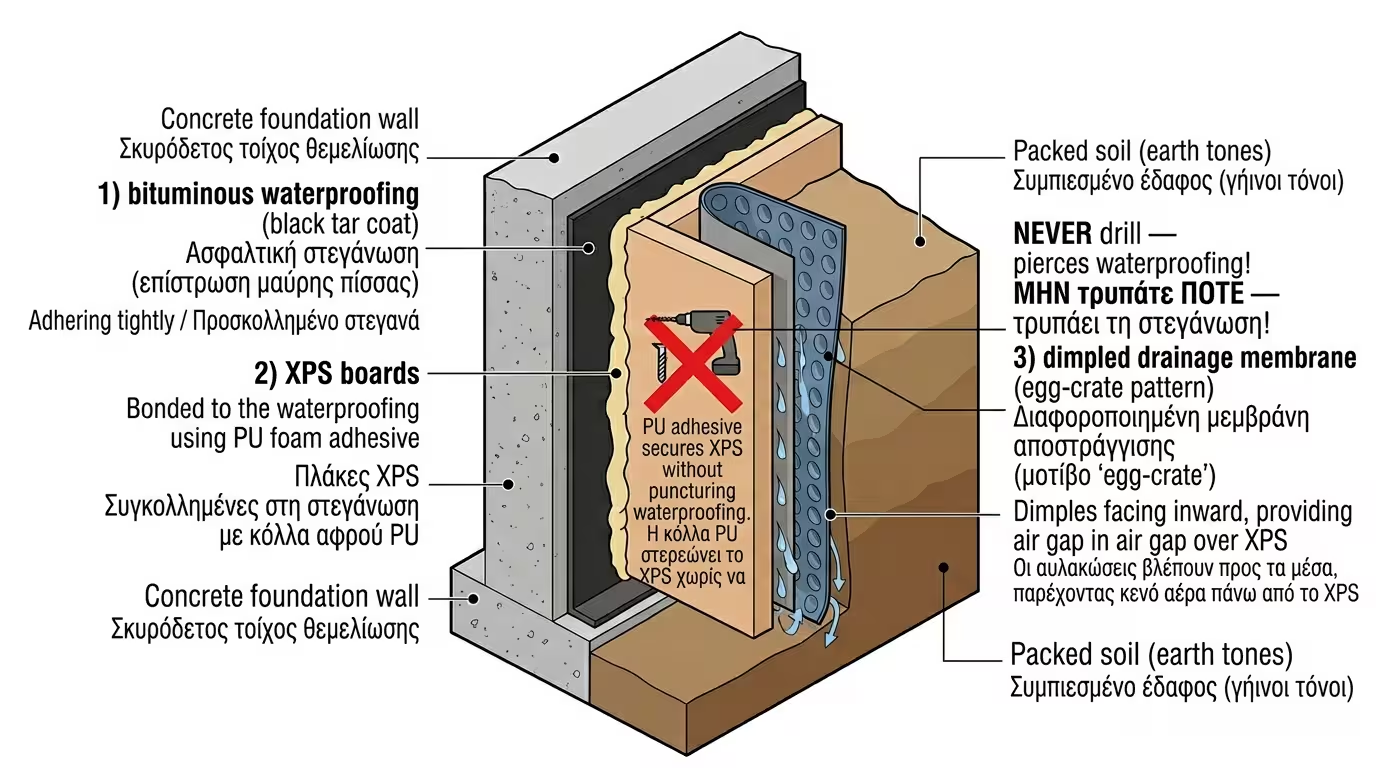
First, the bare concrete is thoroughly coated with bituminous emulsions (tar) or liquid-applied cementitious waterproofing. This is the impenetrable damp-proof layer.
XPS boards are bonded over the waterproofing. WARNING: The Fatal Mistake! The contractor is strictly forbidden from using mechanical anchors (bolts)! If the insulation is drilled, the waterproofing is drilled too. From that hole, water will enter the basement! Boards are fixed only with special adhesive or PU foam.
After XPS is bonded, we don't backfill directly. We roll on a thick plastic dimpled drainage membrane. The "dimples" face the XPS, creating a small air gap so groundwater slides downward, while simultaneously protecting the insulation from impact during backfill.
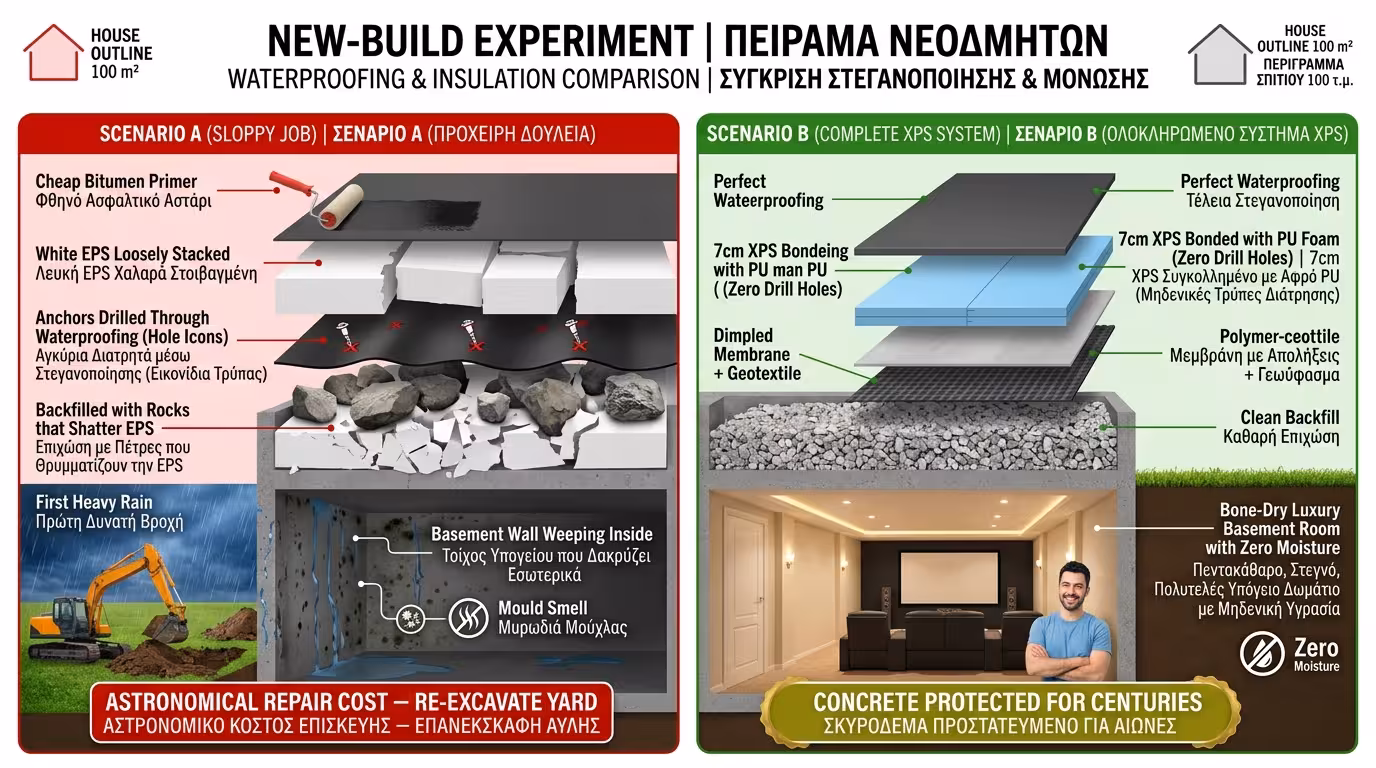
The basement concrete has just been poured. The bulldozer waits to backfill.
The contractor applies a cheap bituminous primer, loosely stacks white EPS, drills it with anchors and backfills with rocks. Rocks shatter the EPS. Anchors have punctured the tar. At the first heavy rain, the basement wall "weeps" inside. The room smells of mould. The cost to fix now? Astronomical (re-excavate the entire yard!).
We apply the waterproofing perfectly. We bond 7cm XPS with special PU foam (not a single drill hole). We wrap with dimpled membrane and geotextile. We backfill with clean soil. Our basement is now a perfectly dry, warm "capsule" that can become a luxury family room with zero trace of moisture, while the concrete will last centuries protected from corrosion.
The Final Conclusion: Foundation perimeter insulation is the ultimate application of the rule "you get what you pay for". Make absolutely no compromises on materials at this stage. XPS and correct waterproofing without drill holes are the best life insurance for your entire building skeleton!
Return to category.
Go to categoryReturn to the central guide.
Go to guide