Flanking Paths: You Soundproofed the Wall Perfectly, but You Can Still
Hear the Neighbour Through the... Socket or the Air Duct!
In acoustics, we love comparing sound to water. If you build a huge,
impenetrable dam but leave a tiny hole at the base, the water will find
its way through and eventually flood you.
Sound does exactly the same thing. When blocked by a heavy, insulated
wall, it doesn't "give up". It searches for the easiest alternative
route to reach your ear. These bypass routes are called Flanking Paths.
Let's look at the 3 most common "traitors" in an apartment.
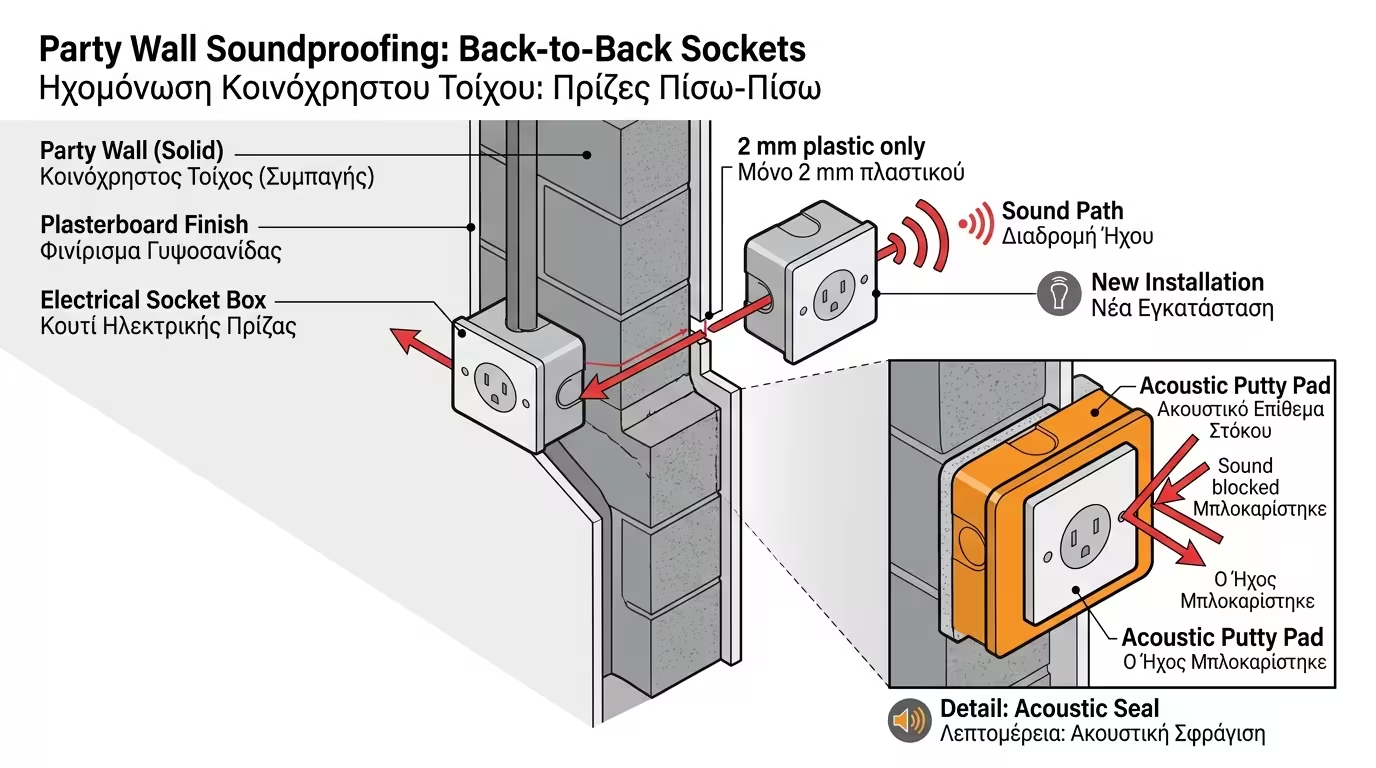
1. The "Phone Booth" of the Electrical Socket
In most apartment buildings, the electrician - to save time and cable
- fits socket boxes "back to back" in the party wall separating two
flats. He chases the brick from both sides, piercing the wall clean
through. Your socket and your neighbour's socket are separated by just
2 millimetres of plastic!
The Problem: Sound enters the neighbour's socket, passes
through the plastic boxes and exits straight into your living room. You
have created a perfect speech conduit.
The Fix: Sockets on party walls must never be fitted
back-to-back. If you are insulating (with plasterboard), the back of the
new socket box must be wrapped in acoustic putty pads that seal the plastic box and stop sound leaking through.
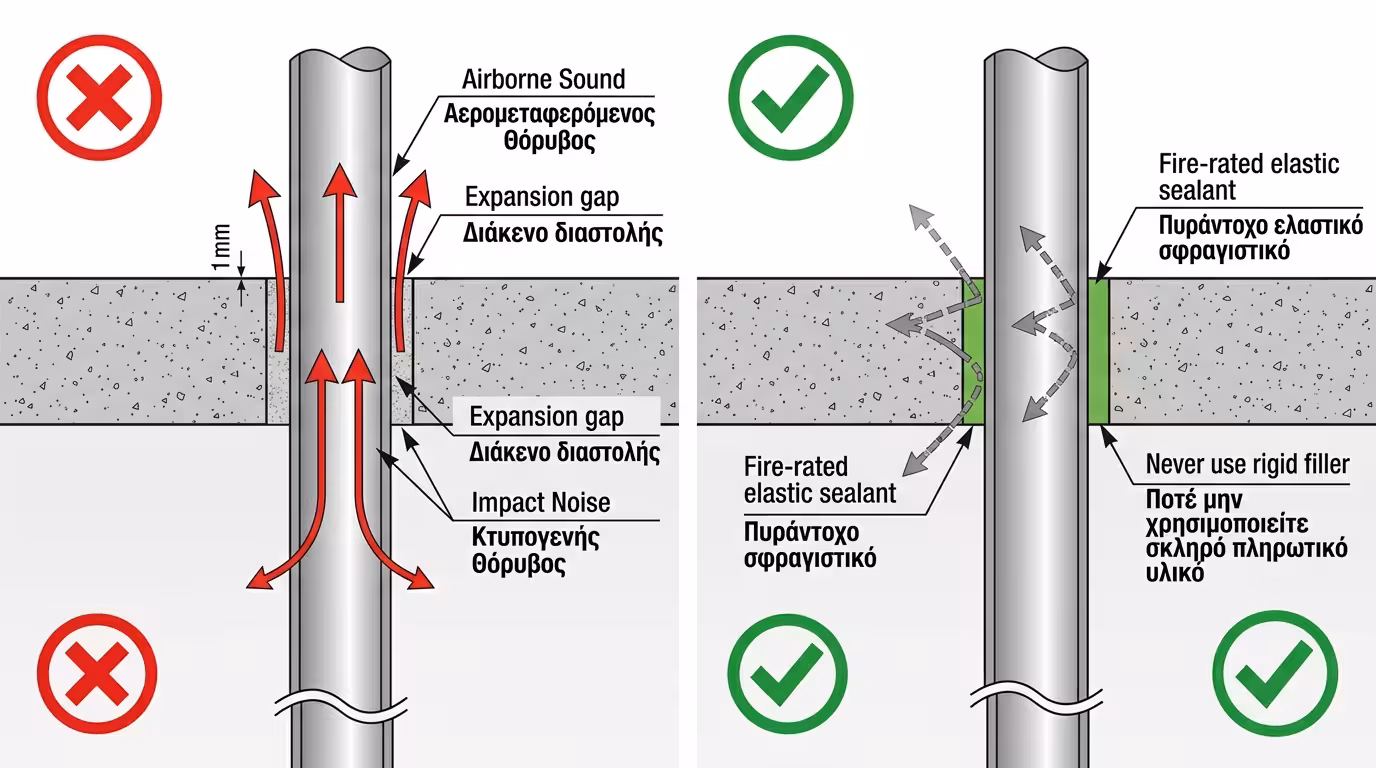
2. Radiator Pipes
Central-heating pipes often penetrate the floor and ceiling slabs to
connect floors.
The Problem: If even a millimetre of gap exists around
the metal pipe where it pierces the concrete, airborne noise (speech)
from the floor below rises through that crack. Additionally, if the neighbour
bangs the pipe, the metal itself carries impact noise.
The Fix: Meticulously seal the gap around the pipe (where
it enters the floor/ceiling) with fire-rated elastic sealant. Never with ordinary filler - the filler will crack as the hot
pipe expands and contracts!
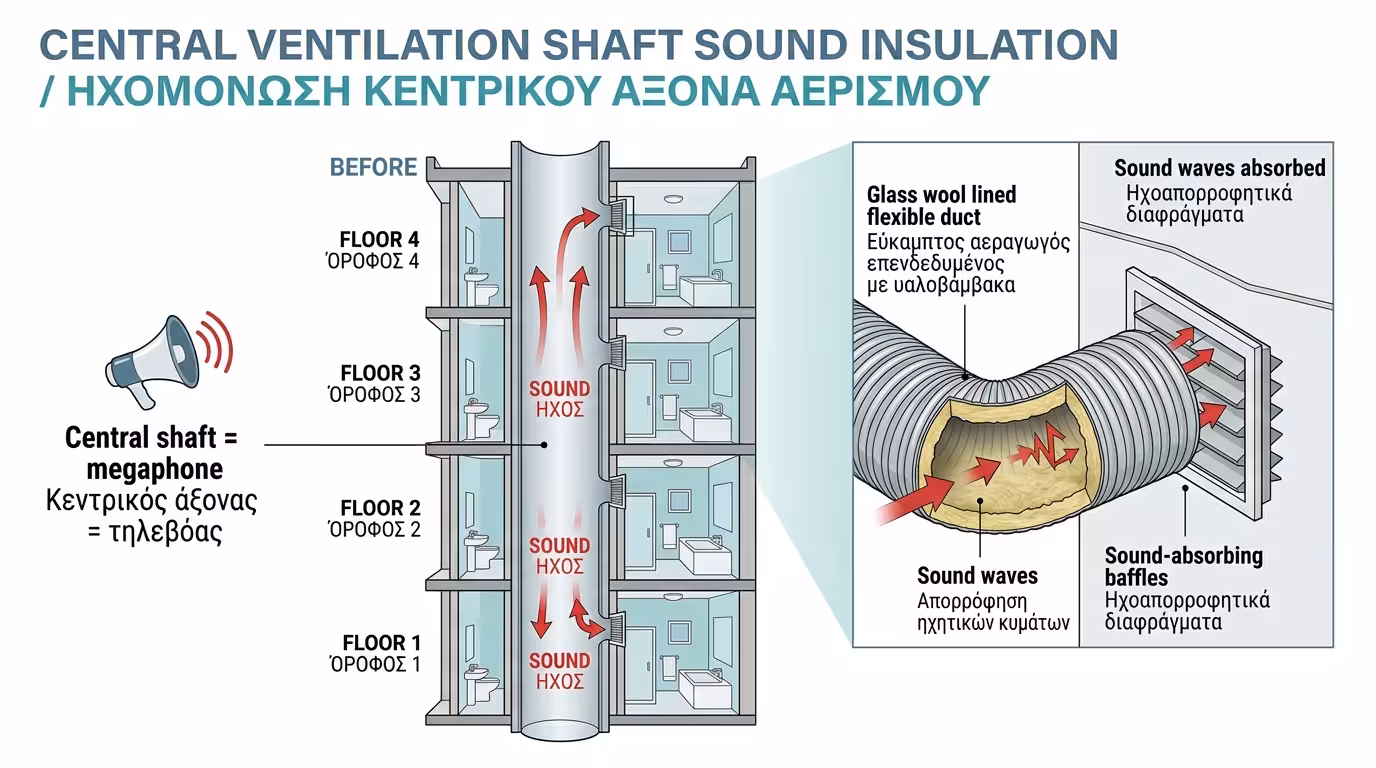
3. Shared Ventilation Ducts (Bathroom Extractors)
This is the classic bathroom problem (light wells). A central
ventilation shaft connects all bathrooms vertically throughout the
building.
The Problem: The duct literally functions as a megaphone.
Sound travels freely through the smooth pipe with no obstacle whatsoever.
The Fix: This is the most difficult Flanking Path to
cut retrospectively. It requires replacing the ventilation grilles with
special sound-absorbing baffles or installing a flexible,
insulated duct (lined with glass wool) on your section, so that sound
is "drowned" before it enters your room.
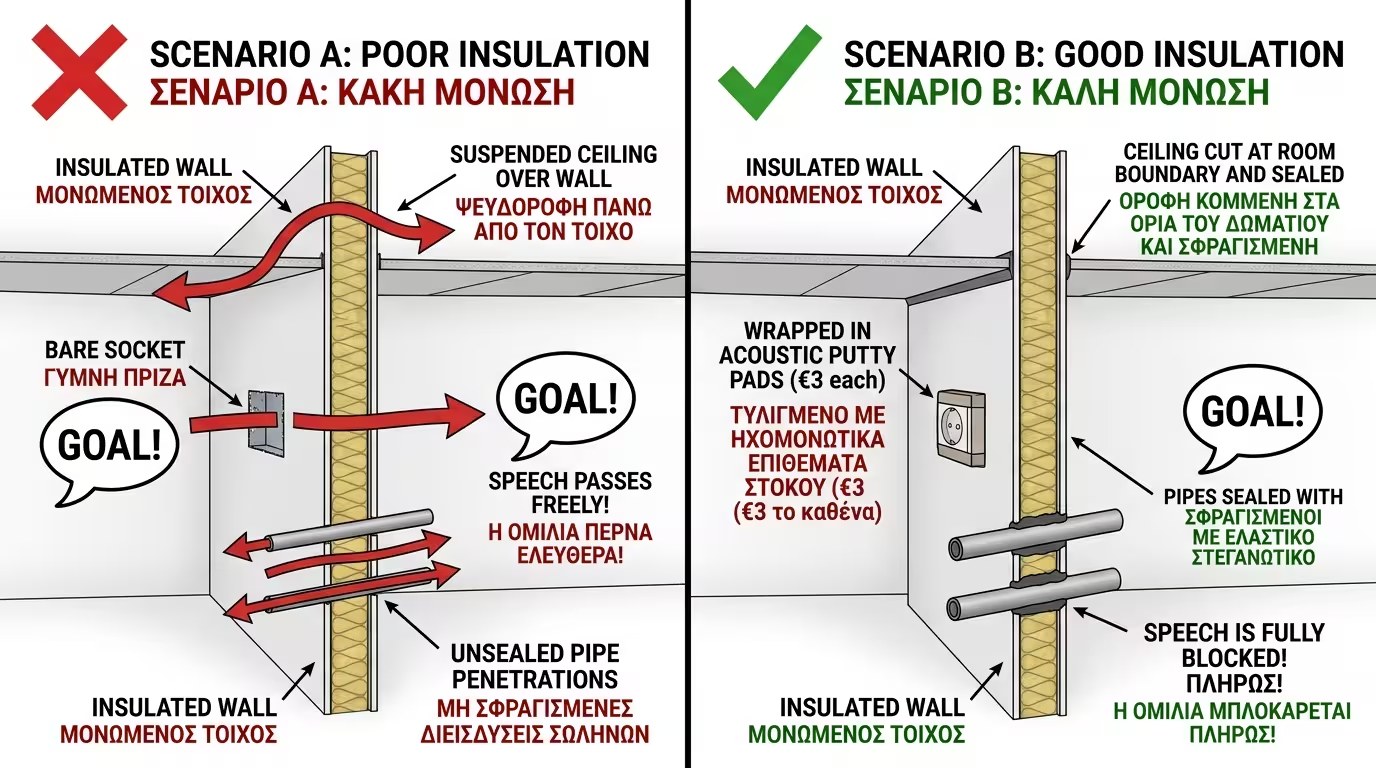
4. The Experiment in Our Model: The Details in the 4×4
We have built the perfect soundproof wall facing our neighbour. We're
watching a football match together, but he celebrates more loudly.
❌ Scenario A (The Betrayal of the Socket)
The plasterer cut a hole in the acoustic plasterboard, fitted our
socket and left it "bare" at the back. Our ceiling is shared with
the neighbour's and our suspended ceiling connects with his. The
neighbour shouts "GOAL!". Our wall blocks the sound, but his voice
sneaks through the sockets and passes... over our suspended ceiling.
We hear him as if he were in our room.
✅ Scenario B (The Total Seal)
The technician wrapped the back of every socket with Acoustic Putty
Pads (cost: €3/socket). He cut the suspended ceiling precisely at
the room boundary and sealed the joint. He applied sealant around
the radiator pipes. The neighbour screams "GOAL!". Our wall holds.
The room is sealed. Not a whisper gets through!
The Bottom Line: Soundproofing isn't just about heavy materials.
It's the obsessive, meticulous sealing of every possible hole, crack and passage.
Before you blame your wall for "not working", check your sockets, radiators,
windows and doors!