🎯 Maximum Performance, Minimum Thickness
A polyurethane board just 5cm thick insulates as well as (or better than) an 8cm white EPS board! It is the perfect solution when you don't have much headroom on your roof.
In construction, every material has its speciality. Some keep heat in perfectly but absorb water. Others don't let a drop through but freeze in winter. What happens when we take the ultimate insulation champion and "marry" it with the ultimate waterproofing champion?
We create a flat roof that doesn't notice the weather at all. Let's meet the two protagonists.
Forget standard white EPS for a moment. PIR polyurethane boards are the most efficient thermal insulation material on the market.
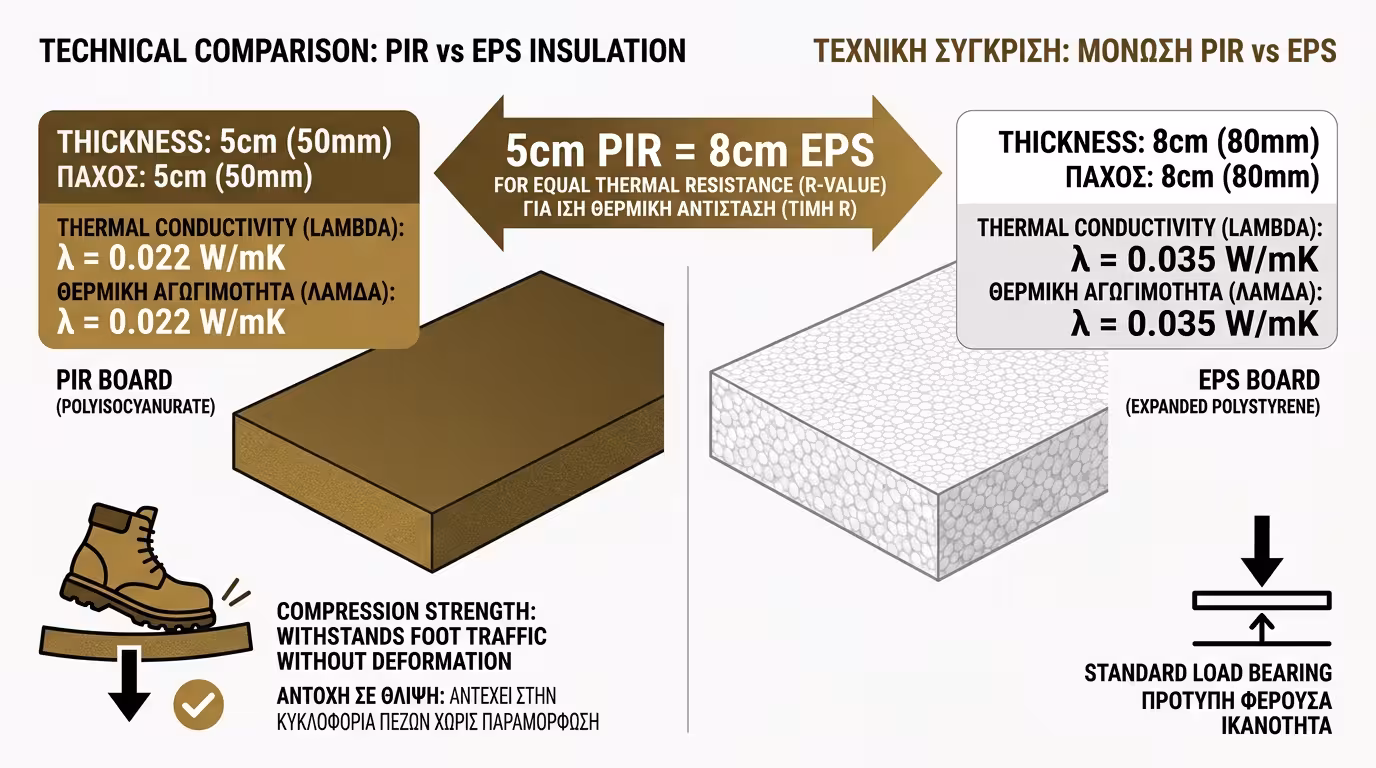
A polyurethane board just 5cm thick insulates as well as (or better than) an 8cm white EPS board! It is the perfect solution when you don't have much headroom on your roof.
It is an extremely hard material, meaning your roof won't "sink" when you walk on it.
We all know bitumen membrane. Those heavy rolls of modified bitumen that are laid on the roof and "burned" with a torch to bond one layer to the next.
When applied correctly, it creates a continuous, unbreakable "pool" (but upside down), that won't let a single drop of water through to the concrete.
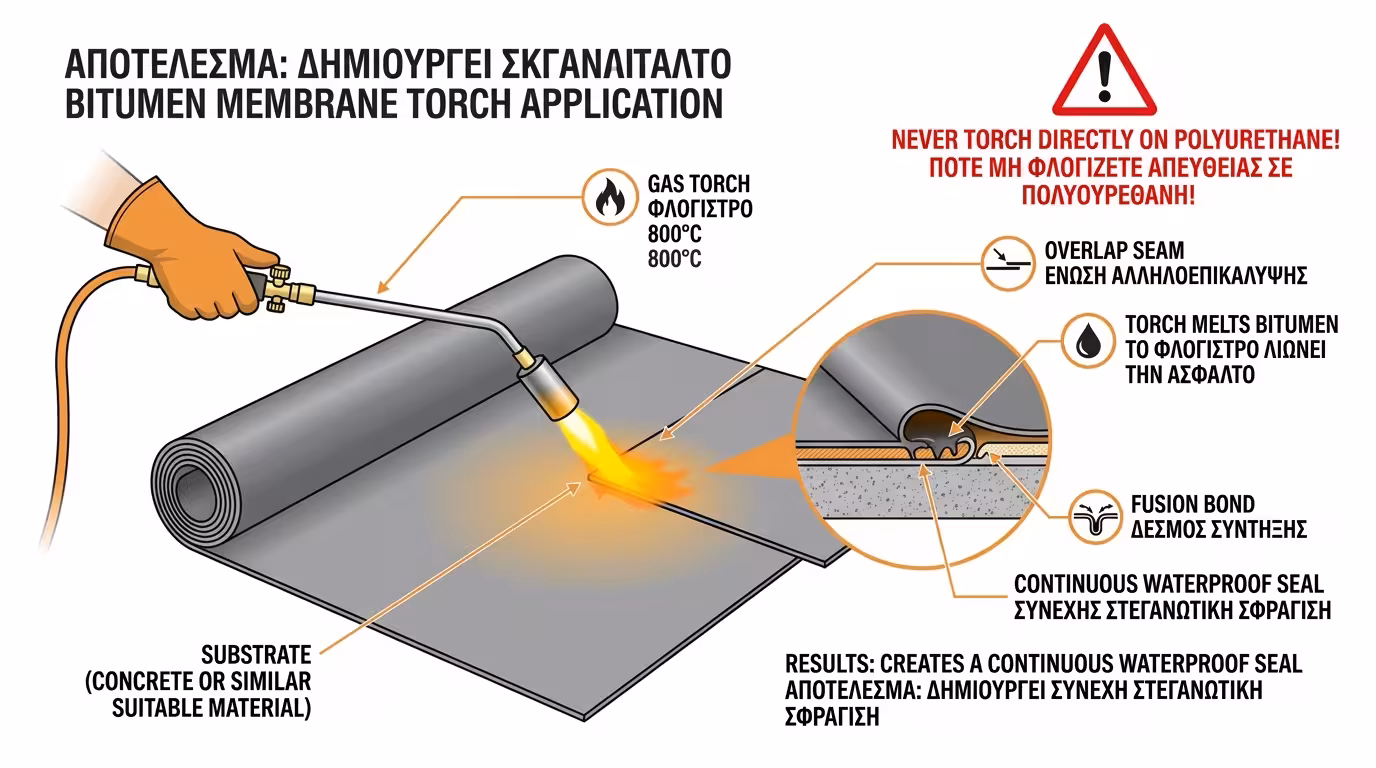
Here lies the huge secret (and amateurs' most common mistake). Bitumen membrane needs a torch (800°C flames) to melt and bond. If the worker places PIR boards underneath and starts torching above, the polyurethane will melt, release toxic fumes or catch fire!
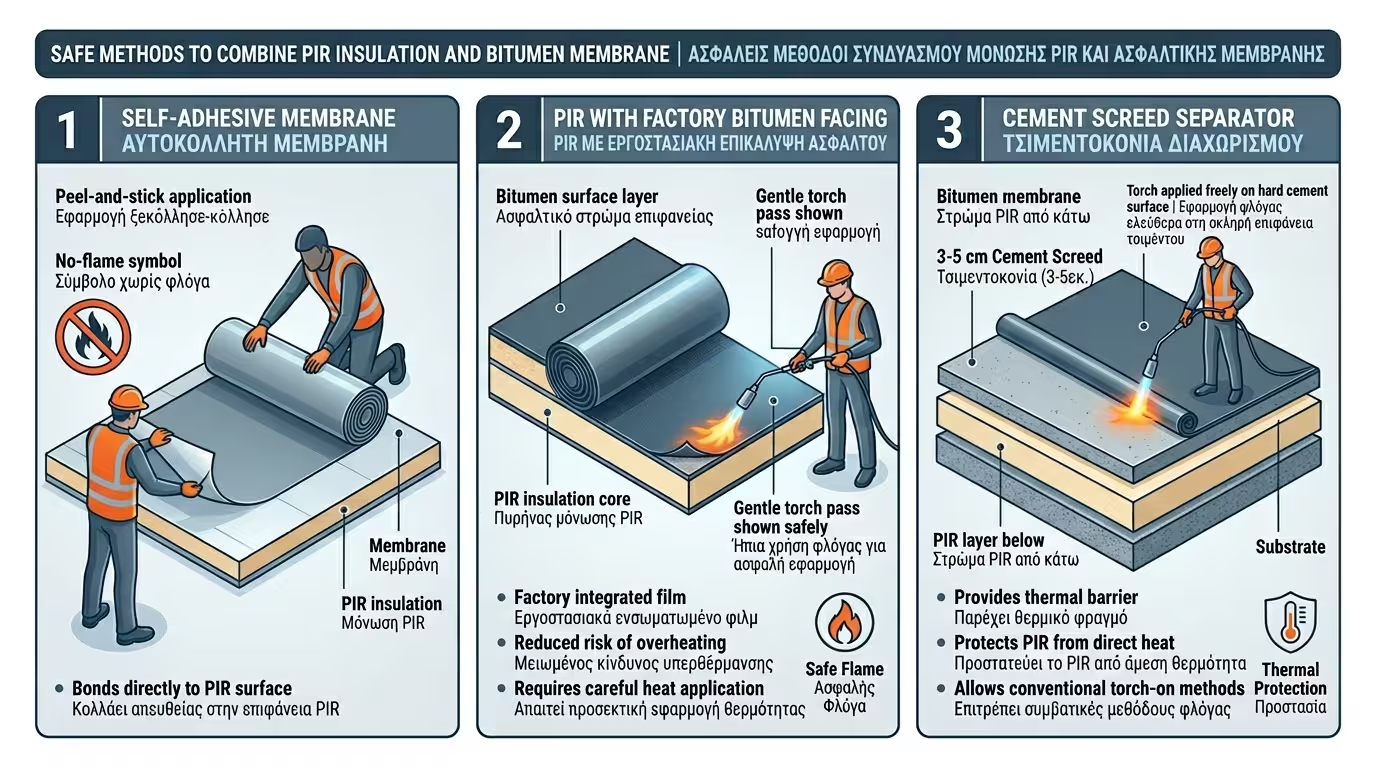
Special bitumen membranes with ultra-strong adhesive that require no torch at all. They bond perfectly and safely on top of polyurethane.
Special factory-made PIR boards with a thin bitumen film built into their top face. This film acts as a shield, allowing the worker to pass the torch lightly without destroying the insulation.
Lay the polyurethane, pour a thin layer of cement screed (about 3-5cm) on top, then freely torch the bitumen membrane onto the hard, non-combustible cement.
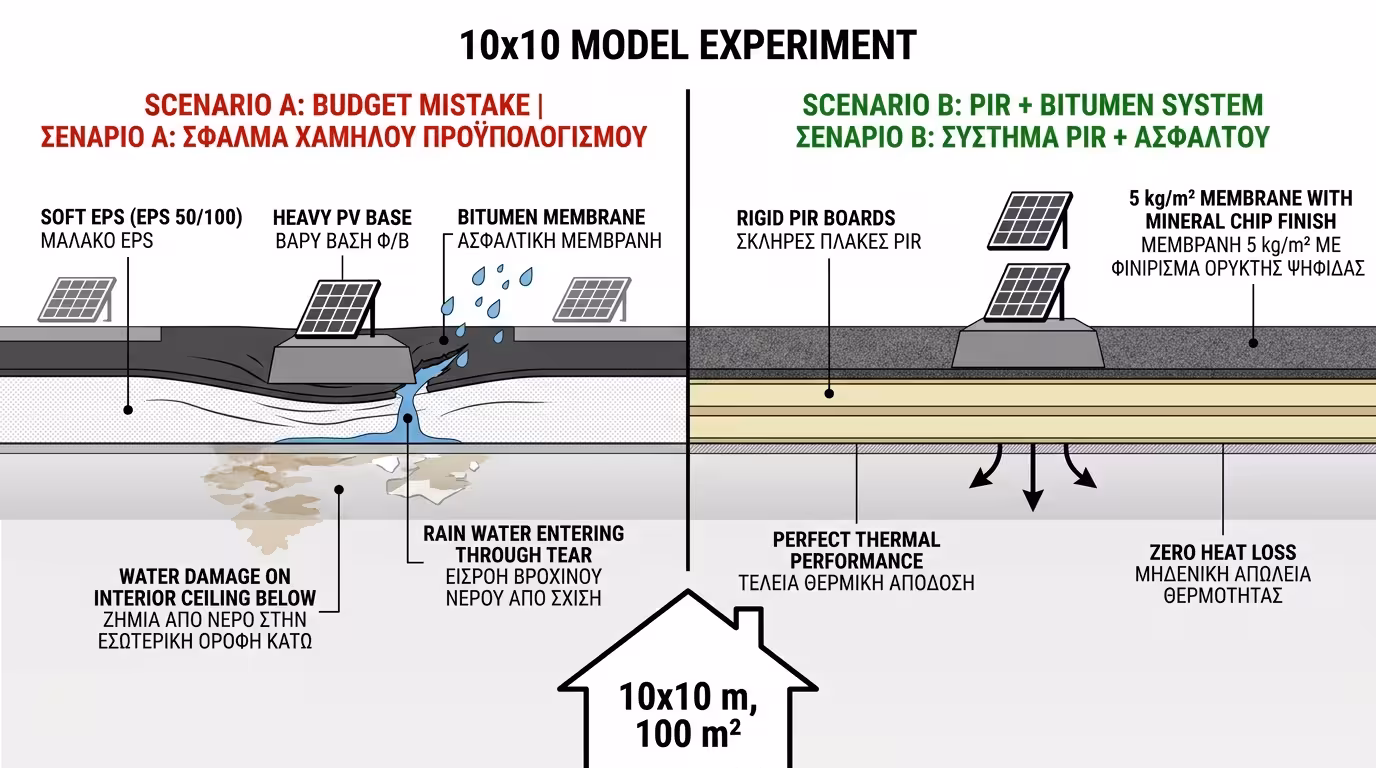
We want to make our flat roof an "impregnable fortress" and install photovoltaics on top (so we need exceptional strength and top-tier insulation).
The worker lays soft, basic EPS, applies a thin screed and torches a cheap membrane. When we mount the heavy photovoltaic bases, the EPS underneath gives way (sinks). The membrane stretches, tears, and in the first rain water enters the living room. The insulation is ruined.
The contractor lays hard PIR boards with special bitumen facing. On top, he perfectly bonds a heavy, quality membrane (5kg/m²) with mineral chip finish. The roof is now rock-hard. We walk, install bases, the sun beats down, torrential rain falls. The system feels absolutely nothing and the house below has zero heat loss.
The Final Conclusion: The polyurethane and bitumen combination is not the cheapest solution, but it is by far the most reliable (it is widely used in industrial and demanding buildings). If you want to insulate your flat roof once and forget about it for the next 25-30 years, this is the direction to look!
Return to category.
Go to categoryReturn to the central guide.
Go to guide