❌ The Result
The mesh is stuck at the back, resting on the EPS, and in front of it there is a thick, completely "bare" and unreinforced layer of adhesive.
The thermal facade endures enormous daily stresses from sudden temperature changes (expansion and contraction). The material responsible for holding the render together and preventing "cracking" is the fibreglass mesh (the special glass-fibre net).
This mesh sits inside the adhesive (the so-called base coat), directly below the final coloured render. It works exactly like steel rebar inside concrete: it provides elasticity and tensile strength. But if placed incorrectly, your wall will crack - guaranteed.
The most common mistake of rushed (or unskilled) crews is called "Dry Meshing".
How does the defect happen? The worker, to finish quickly, nails the dry mesh directly onto the bare polystyrene (with a few fixings or staples) to hold it in place. Then he takes his trowel and "smears" the adhesive over the top.
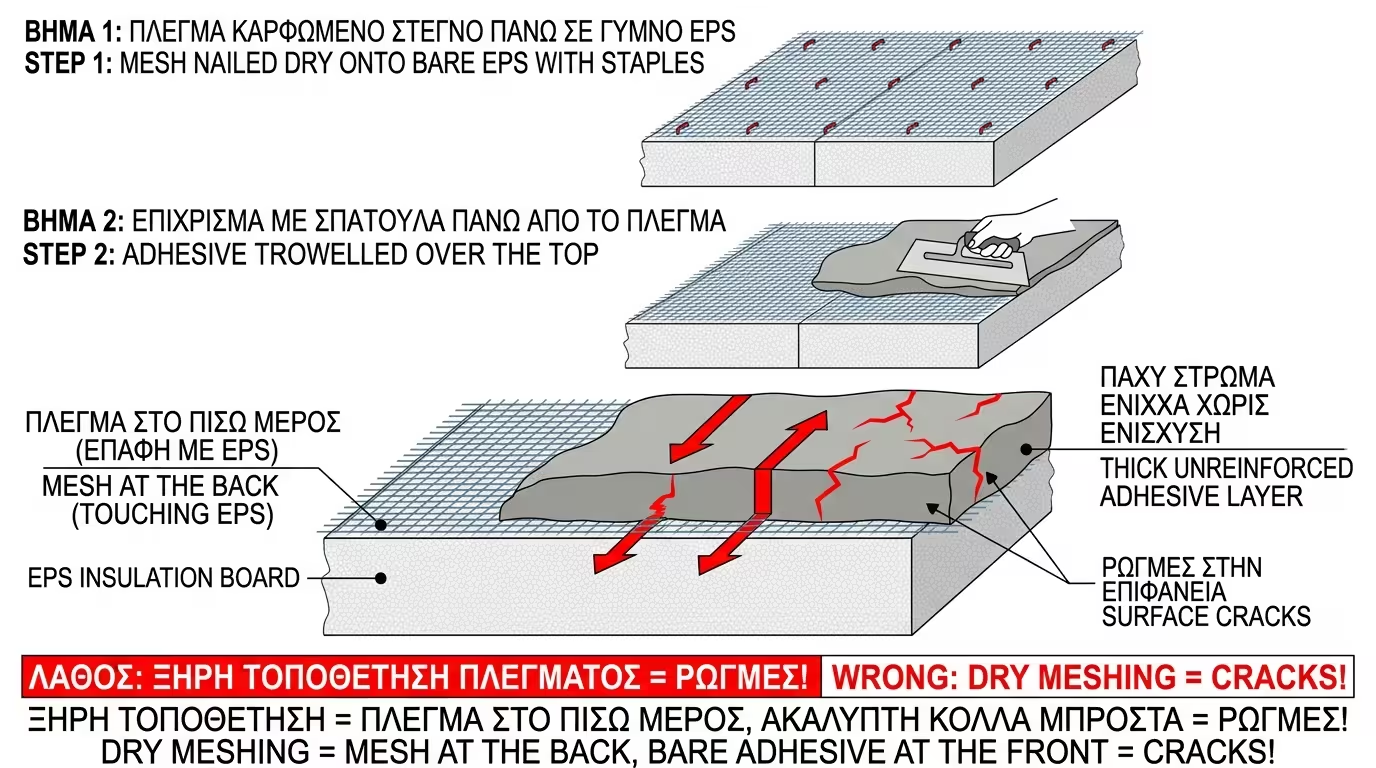
The mesh is stuck at the back, resting on the EPS, and in front of it there is a thick, completely "bare" and unreinforced layer of adhesive.
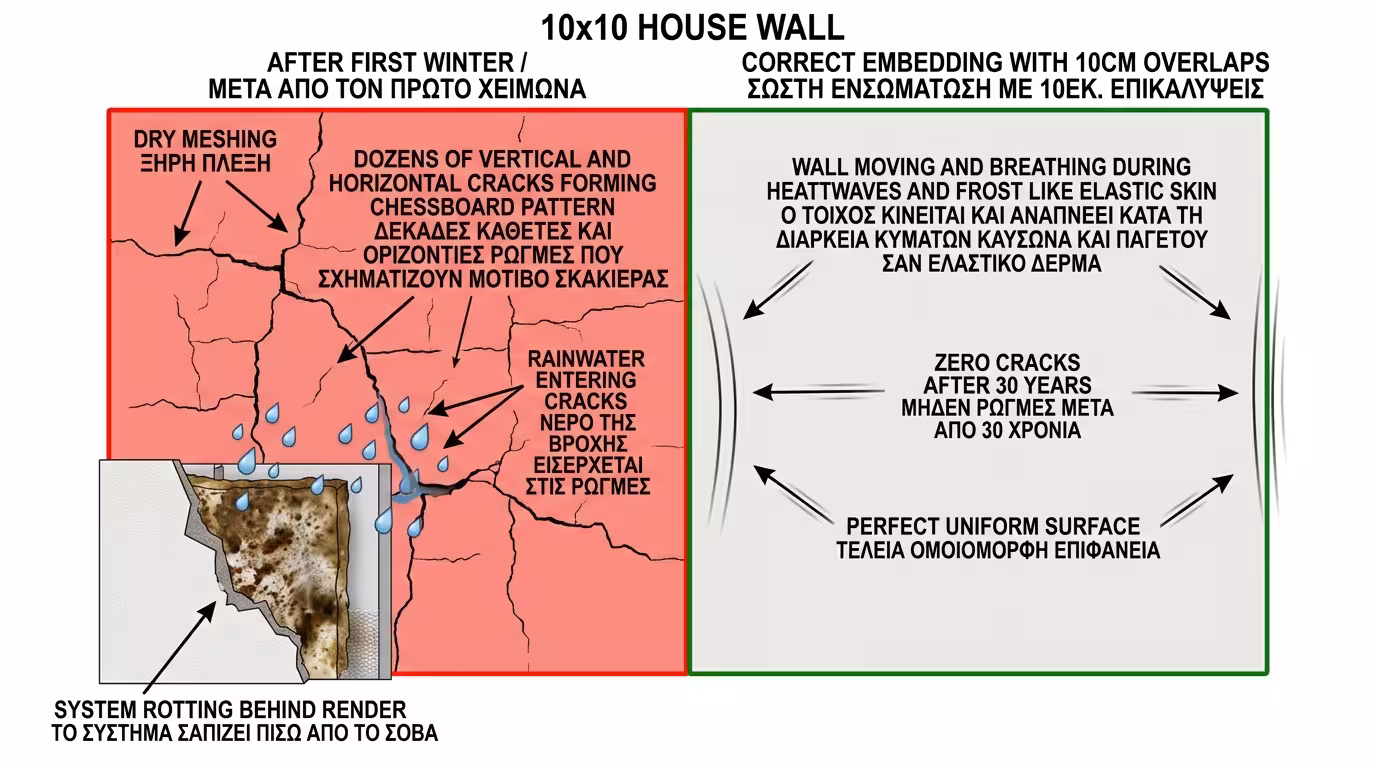
When the first cold snap or heatwave arrives, this bare adhesive will expand. Because the mesh is buried behind it and cannot restrain it, the surface cracks. The cracks follow the board joints (polystyrene) underneath, creating a chilling pattern that looks like a chessboard on your wall! Rainwater will enter through these cracks and the system will rot.
The key word here is embedding. The mesh must not touch the polystyrene; it should "float" inside the adhesive mass, ideally in the outer 1/3 of the thickness!
How professionals do it (wet-on-wet method):

The worker first spreads a generous layer of adhesive onto the bare polystyrene using the notched side of his trowel (for uniform thickness throughout).
He takes the mesh and presses it gently onto the wet adhesive. The mesh begins to sink in.
With the flat side of the trowel, he smooths the surface. The mesh has now been "swallowed" by the adhesive, yet remains close to the surface.
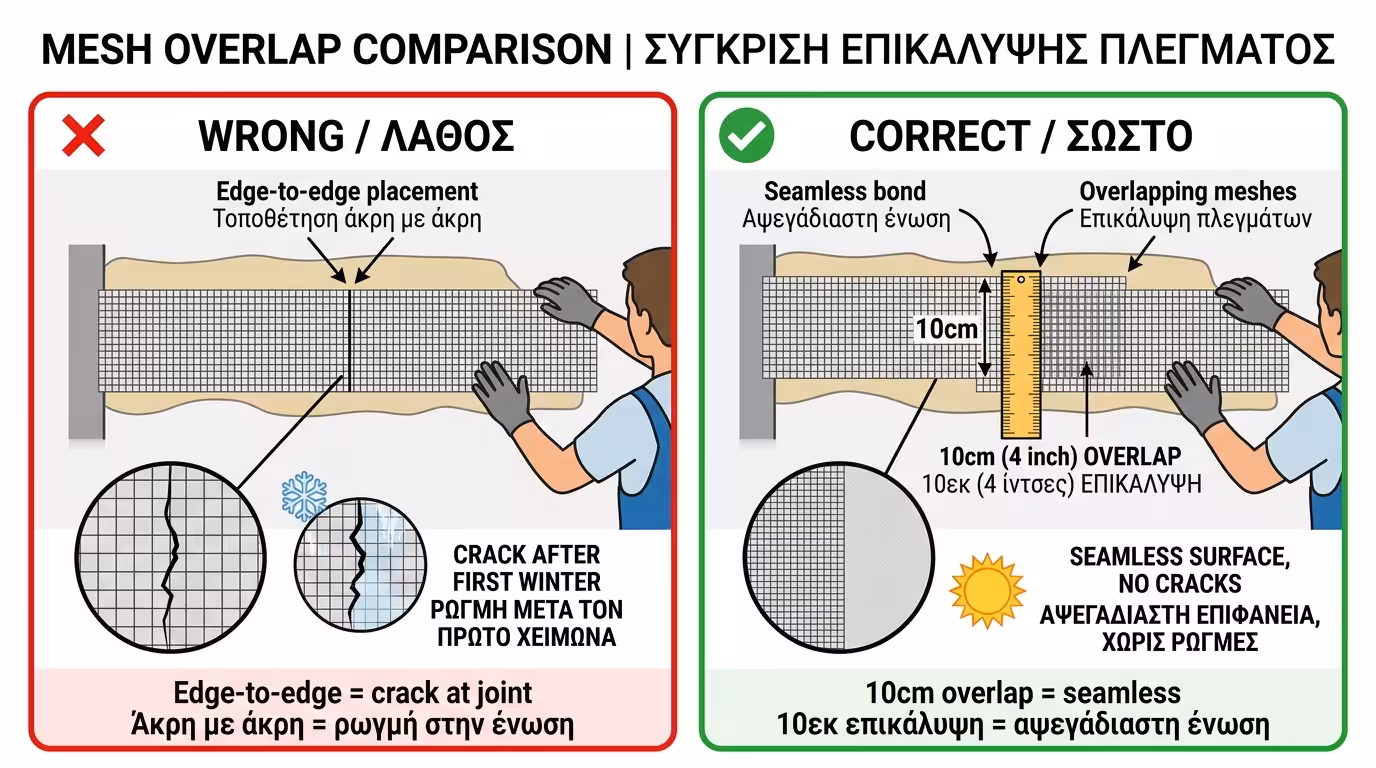
Furthermore, each mesh strip must overlap the next by at least 10 centimetres. If the mesh strips merely sit side by side, the wall will tear exactly at the joint!
How much does technique matter?
The contractor nails the mesh to the polystyrene and throws adhesive over it. He finishes early. The first winter, the temperature drops suddenly. The outer surface of the adhesive contracts, but the mesh cannot hold it (it is buried deeper). The wall "blows" and dozens of vertical and horizontal cracks appear. Rainwater enters inside.
The worker first spreads the adhesive, sinks the mesh, overlaps the joints by 10cm and smooths. The mesh now holds the entire adhesive mass together. Heatwaves and frosts come and go. The wall moves and breathes like one seamless, elastic skin, without a single crack forming for the next 30 years.
The Final Conclusion: When the crew starts the mesh phase, sit and watch them for 10 minutes. If you see them nailing the mesh "dry" onto the polystyrene, stop the work immediately. Correct embedding takes double the time, but it is the ultimate secret to a thermal facade that will never need patching.
Return to category.
Go to categoryReturn to the central guide.
Go to guide