ETICS Base Waterproofing: Protection from Rising Damp

When it rains, water does not only fall vertically onto the wall. It hits the ground and "splashes" upward. In winter, snow accumulates at the wall base and melts slowly. And of course, there is the notorious rising damp (capillary rise): the soil is wet and the wall sucks water upward like a sponge.

If you extend the standard thermal facade with white EPS all the way down to touch the soil or the paving, your system already has an expiry date. The water will destroy the render and the moisture will rot the wall.

1. The Problem: White EPS "Drinks" Water

Standard white expanded polystyrene (EPS) is excellent for 95% of your wall. But it is not 100% waterproof if permanently submerged in water or buried in damp soil. If installed at the building base, over the years it will absorb moisture. Its U-Value will be destroyed (wet insulation does not insulate) and the render will start blistering, efflorescence will appear, and it will peel off.

Furthermore, the building base (knee height) receives the most mechanical abuse: footballs, bicycles, brooms, garden tools. Soft EPS cannot take the punishment!

White EPS absorbing moisture at building base

2. The Solution: The Thermal Facade's "Wellington Boots"

International standards require the creation of a High Waterproofing Zone (or Plinth Zone) for the first 30 to 50 centimetres above ground level. How is this zone built?

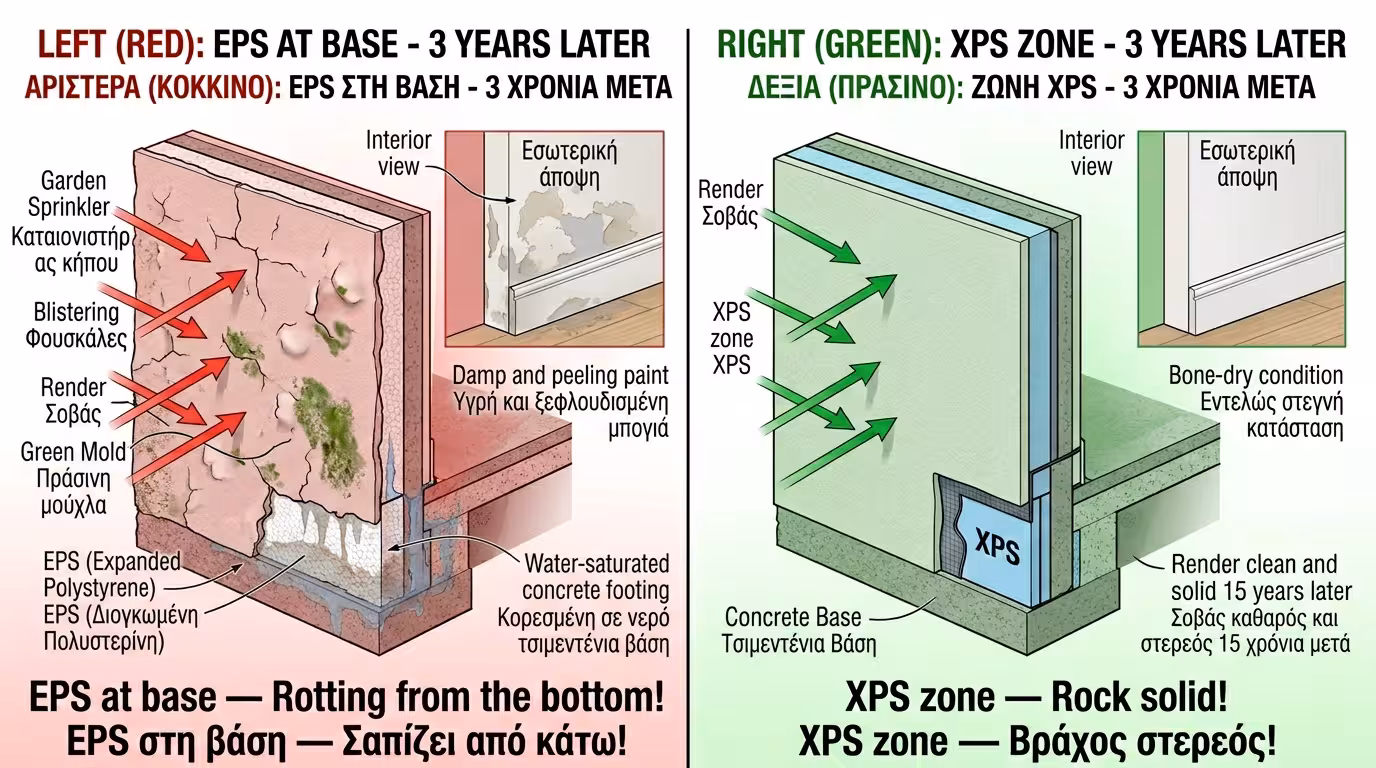
1️⃣ Material Change (EPS to XPS)

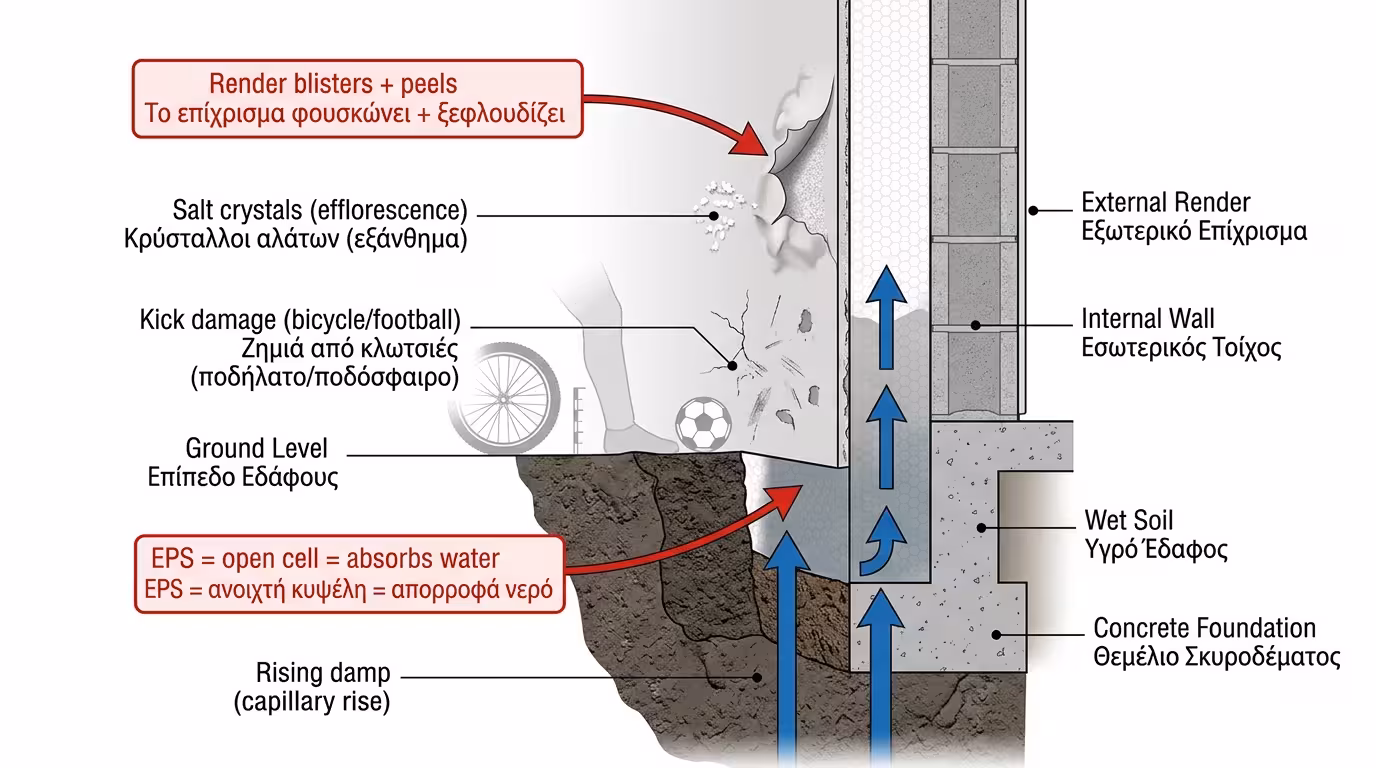
For the first 50 centimetres, we do not use white EPS. We use Extruded Polystyrene (XPS) (the well-known hard, coloured material). XPS has a "closed cell" structure. It is completely waterproof and simultaneously very hard. It withstands kicks and absorbs not a single drop, even buried in soil.

2️⃣ Brush-Applied Waterproofing on the Wall

Before even bonding the XPS, the bare wall at the base is coated with a special cementitious waterproofing (a "black" or "grey" waterproof emulsion). This way, if the soil is wet, the water cannot rise through the bricks and concrete of the house.

3️⃣ The Starter Profile with Drip Edge

If the thermal facade does not start from the ground but "hangs" slightly higher (e.g. above a basement), we use a metal or plastic starter profile (rail). This profile has a small "tooth" at the bottom (the drip edge). When rainwater runs down the wall, it reaches the tooth and drops to the ground - it does not turn inward to soak the base.

3. The 10x10 Model Experiment

10x10 experiment - EPS vs XPS at building base

Our virtual house is surrounded by a lawn garden. The sprinklers run every day and splash the building base.

❌ Scenario A (Wrong & Cheap Solution)

The worker extends the white EPS down to the soil. After three years, the lawn and constant moisture have done their damage. The render at the base is covered in green mould, has blistered and is falling off in chunks. The interior living room wall shows damp patches just above the skirting board.

✅ Scenario B (High Waterproofing Zone)

The worker applies brush-on waterproofing on the first 40 centimetres. He bonds hard XPS there and continues with EPS above. He installs reinforced mesh and waterproof render. The sprinklers hit the wall every day. Fifteen years pass and the house base is rock-solid, with not a single hairline crack or damp spot, while the interior remains bone-dry.

The Final Conclusion: The first half-metre of your house takes the harshest attack from nature. XPS and waterproofing materials in this zone are not "luxury" or "overkill" by the engineer. They are the absolute prerequisite to prevent your thermal facade from rotting from the foundations up!

Related Articles

Application & Construction Details: Correct Installation Guide

Return to category.

Go to category

Preview