✅ Near-Zero Space Loss
At just 1–2cm thick, you'll barely notice the room shrank. Ideal for narrow corridors or small bedrooms.
In previous articles we showed how metal-frame plasterboard is the most complete internal insulation method. But what if the room is already very small and you can't afford to lose 6–7cm of space? Or the budget is tight and you want to do the work yourself (DIY) in a single weekend, without dealing with screws, frames and tradespeople?
The answer lies in direct-bond insulation tiles (or wallpapers). An extremely "smart" and fast solution to warm up a freezing north-facing wall.
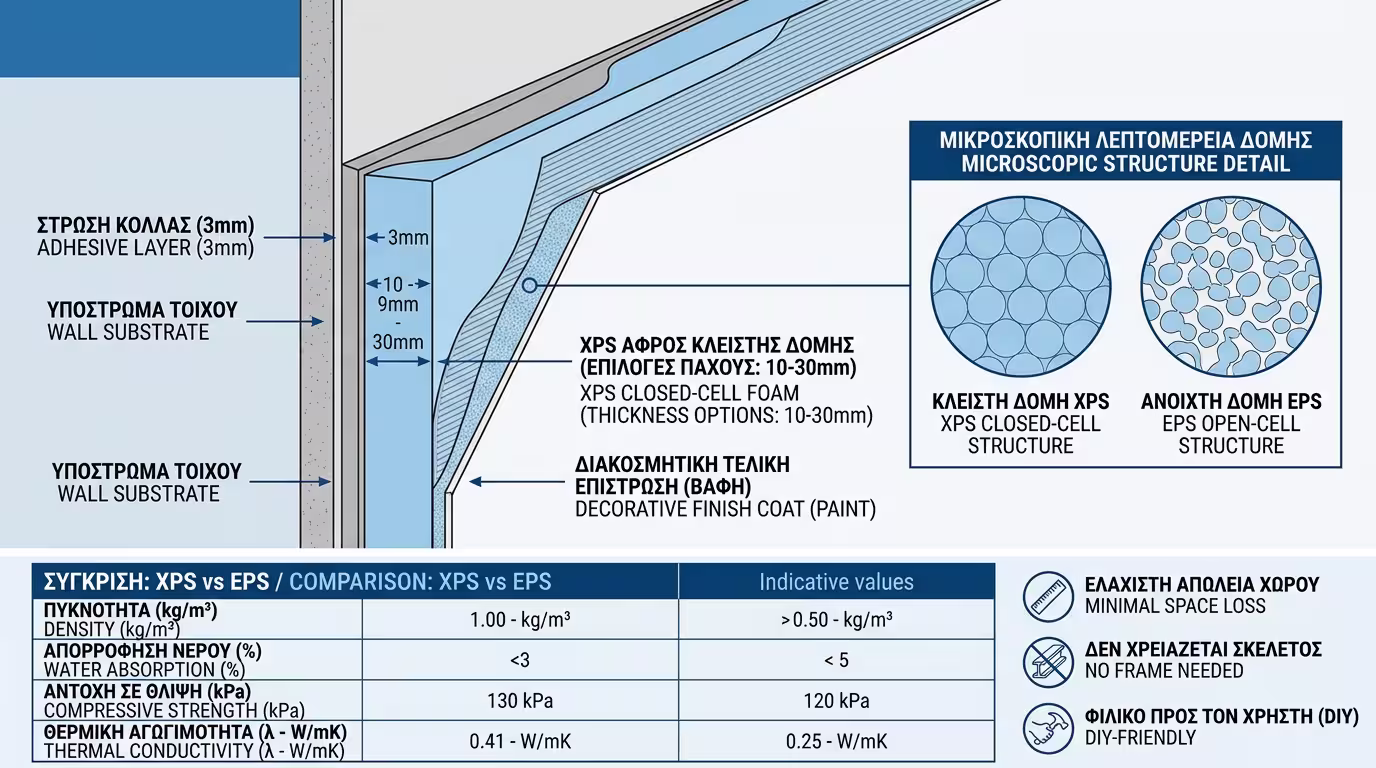
These are thin sheets, typically 5mm to 3cm thick, made mainly from Extruded Polystyrene (XPS) - known for its high density - or from specially processed Expanded Polystyrene (EPS).
Their great advantage is the surface finish: many panels come factory-coated with either special paper or a thin cement crust (reinforced with fibreglass mesh). This means once you bond them to the wall, you can paint directly, skim-coat them, or wallpaper over the top - no plasterboard required!
At just 1–2cm thick, you'll barely notice the room shrank. Ideal for narrow corridors or small bedrooms.
Installation requires nothing more than a notched trowel and special adhesive. No drills needed, no metal-cutting dust-the entire job is done in just a few hours.
They cut "cold radiation" dead. The wall stops feeling freezing, the room heats much faster.
You save on metal profiles, screws, plasterboard sheets and (if you're handy) tradesperson labour.
Of course, the convenience comes with trade-offs you need to know about. Because they are thin (e.g. 1cm), they cannot deliver the same energy savings as a 5–10cm mineral wool system. They also require a flat and sound wall - if it has bumps, peeling paint or mould, it must first be scraped, cleaned and primed perfectly. They don't forgive wall "irregularities" the way a plasterboard frame does. Finally, unlike plasterboard which leaves a 5cm gap behind for pipes and new wiring, these tiles bond "face-on" to the wall and cannot conceal cables.
If you read our previous article on the Dew Point, it's perfectly logical to wonder: "Since I'm insulating internally, won't the wall behind the tiles grow mould?" The answer lies in the nature of the material and the installation method.
Unlike rock wool, which "breathes" and allows air through, Extruded Polystyrene (XPS) has a closed-cell structure. It effectively acts as its own "vapour barrier" (with very high resistance to vapour diffusion). This prevents room moisture from passing through its mass and reaching the frozen wall behind.
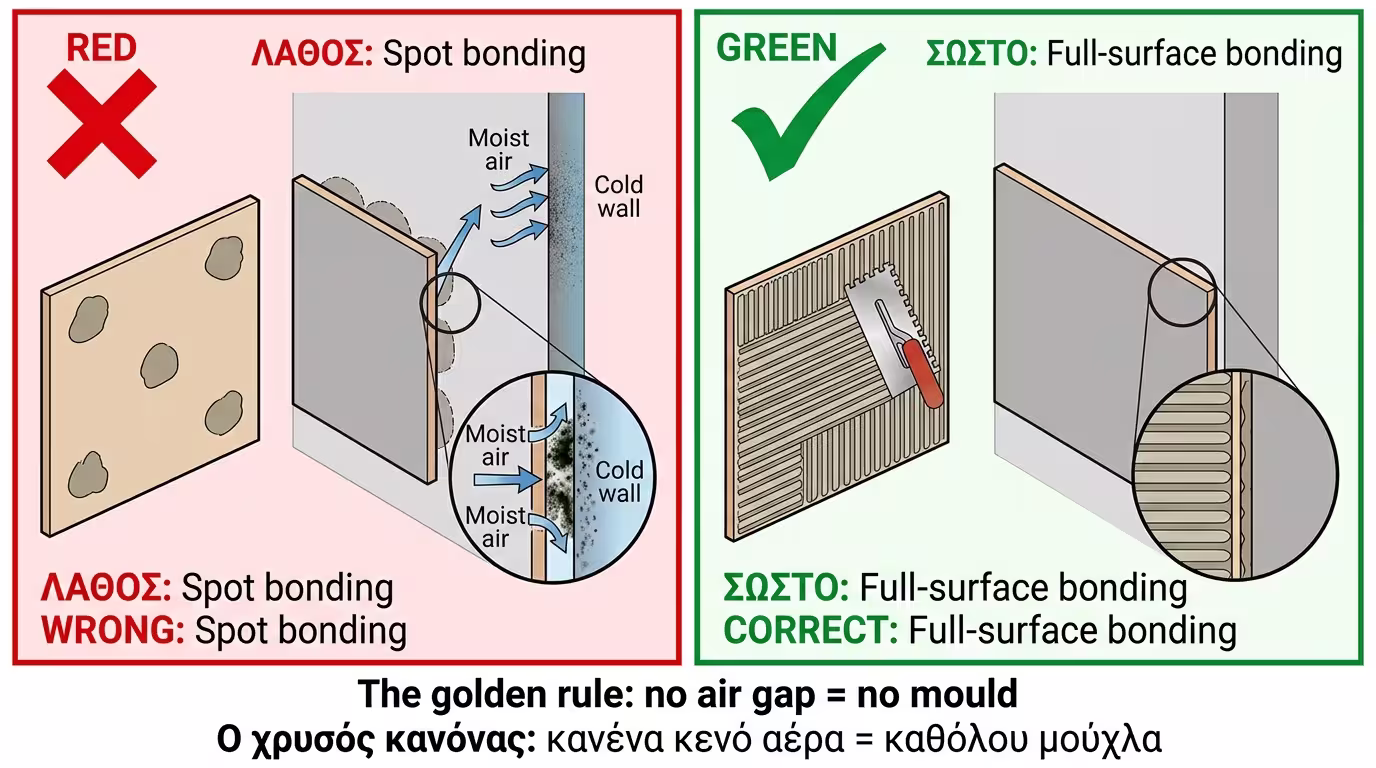
The only way mould can develop is if you apply the adhesive in "spots" (a little at the corners and centre). This leaves a layer of trapped air between the tile and the wall. If moist room air sneaks into this void (e.g. through a poorly sealed joint, the skirting board or a socket), it will hit the cold wall, condense, and the back of your construction will fill with black mould.
Full-surface bonding is mandatory. The adhesive must be "combed" across the entire surface of the wall or tile with a notched trowel. This way the insulation "suctions" perfectly to the wall, leaving no air gap behind, and tile joints are sealed hermetically with filler and joint tape.
If you decide to do it yourself, follow these key steps:
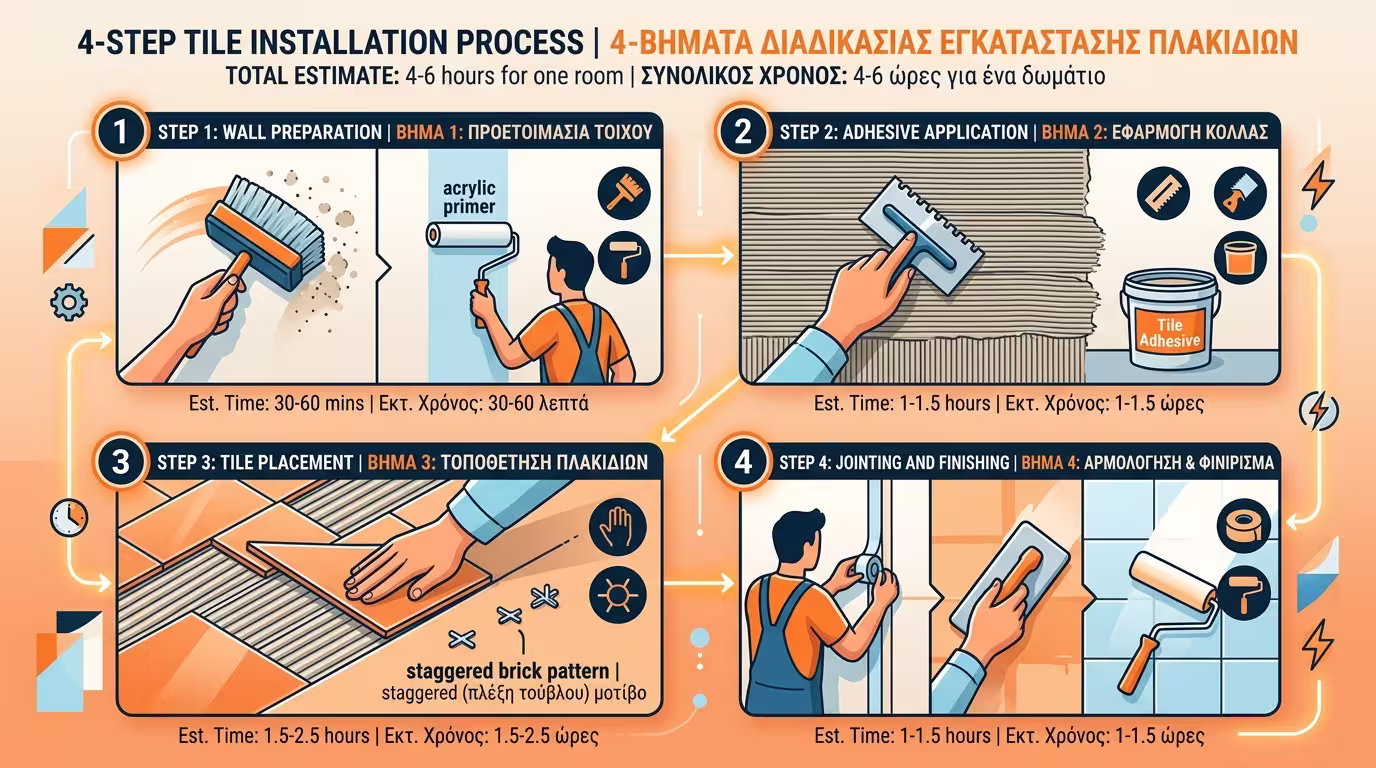
Clean the wall of dust and loose material. Apply an acrylic primer to stabilise the surface.
Use exclusively the adhesive recommended by the manufacturer (usually a special acrylic paste or cementitious adhesive). Spread it on the wall with a notched trowel.
Press the tile firmly (but carefully to avoid cracking it) onto the adhesive. Ensure tiles are laid "staggered" (like bricks) and are butted perfectly against each other.
Apply self-adhesive joint tape (mesh) over the tile joints and smooth a little filler over them so the "seams" disappear.
Once everything is dry, prime the entire surface and paint with emulsion!
Let's take the north-facing wall of our digital house (U-Value: 2.50 W/m²K). Because the room is narrow, we decide to fit an XPS insulation tile just 2cm thick with direct bonding.
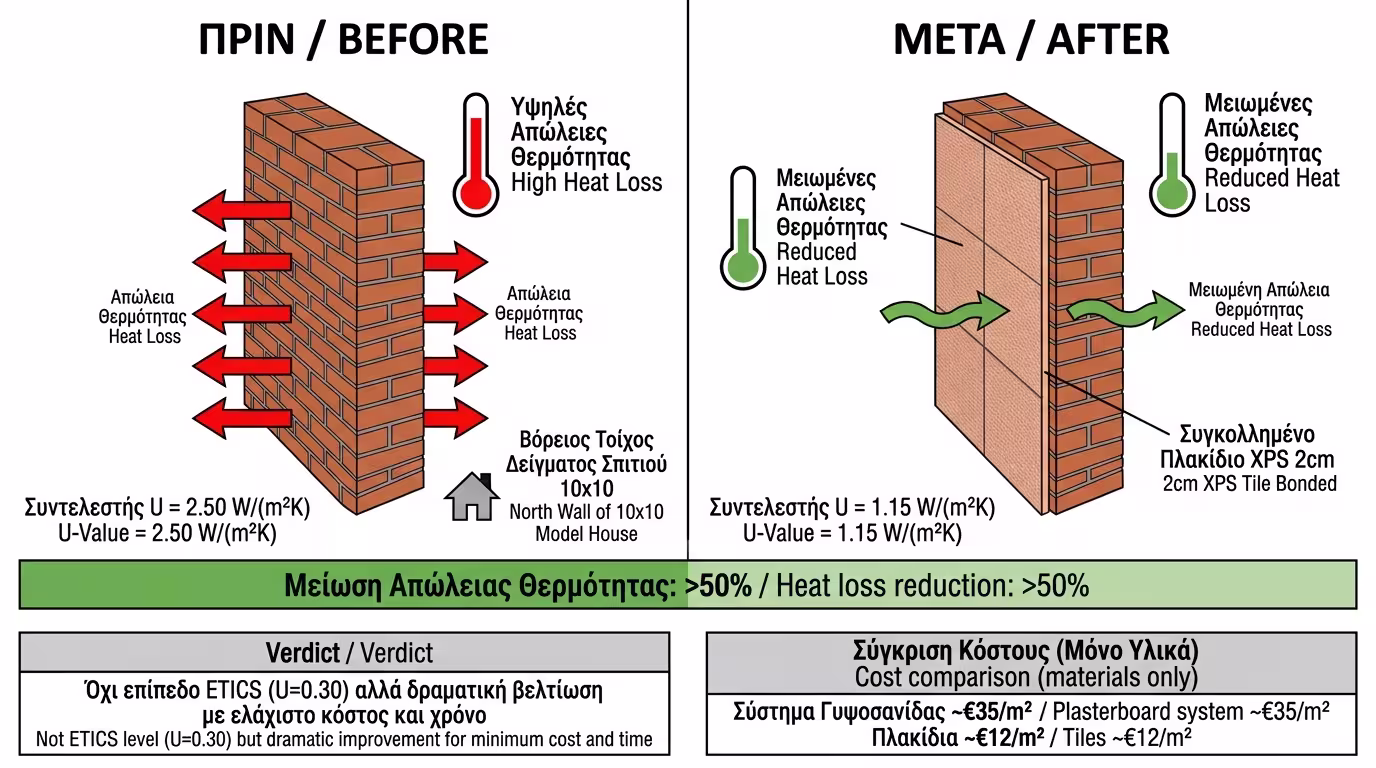
The wall's U-Value drops to approximately ~1.15 W/m²K. We don't reach the impressive figures of external ETICS (where we got down to 0.30), but with a single move that took half a day and minimal cost, we've cut thermal losses on that specific wall by over 50%! The room is no longer a "freezer".
💡 Conclusion: Insulation tiles are the ultimate "smart bomb" against localised cold. They won't give you an A+ Energy Certificate, but they will dramatically improve the quality of life in your room for the lowest possible cost.
Return to category.
Go to categoryReturn to the central guide.
Go to guide