1️⃣ Bonding
The worker bonds insulation boards to the pilotis ceiling.
The pilotis (open ground-floor car park) is an ingenious architectural invention for parking. In energy terms, however, it is a "nightmare" for whoever lives directly above.
The reason is simple: The 1st floor's floor slab is bare concrete exposed 24/7 to freezing air and moisture. Because concrete is a perfect heat conductor (it absorbs the cold), all the warmth your radiators produce travels downward, passes through the slab and is lost into the car park air. If you don't insulate this slab, you're effectively trying to heat the… street!
The most effective, fast and painless solution (since you don't need to rip up the tiles inside your home) is to insulate the slab from below - that is, insulate the pilotis ceiling.
The process is identical to External Thermal Insulation (ETICS) used on walls, just applied horizontally:
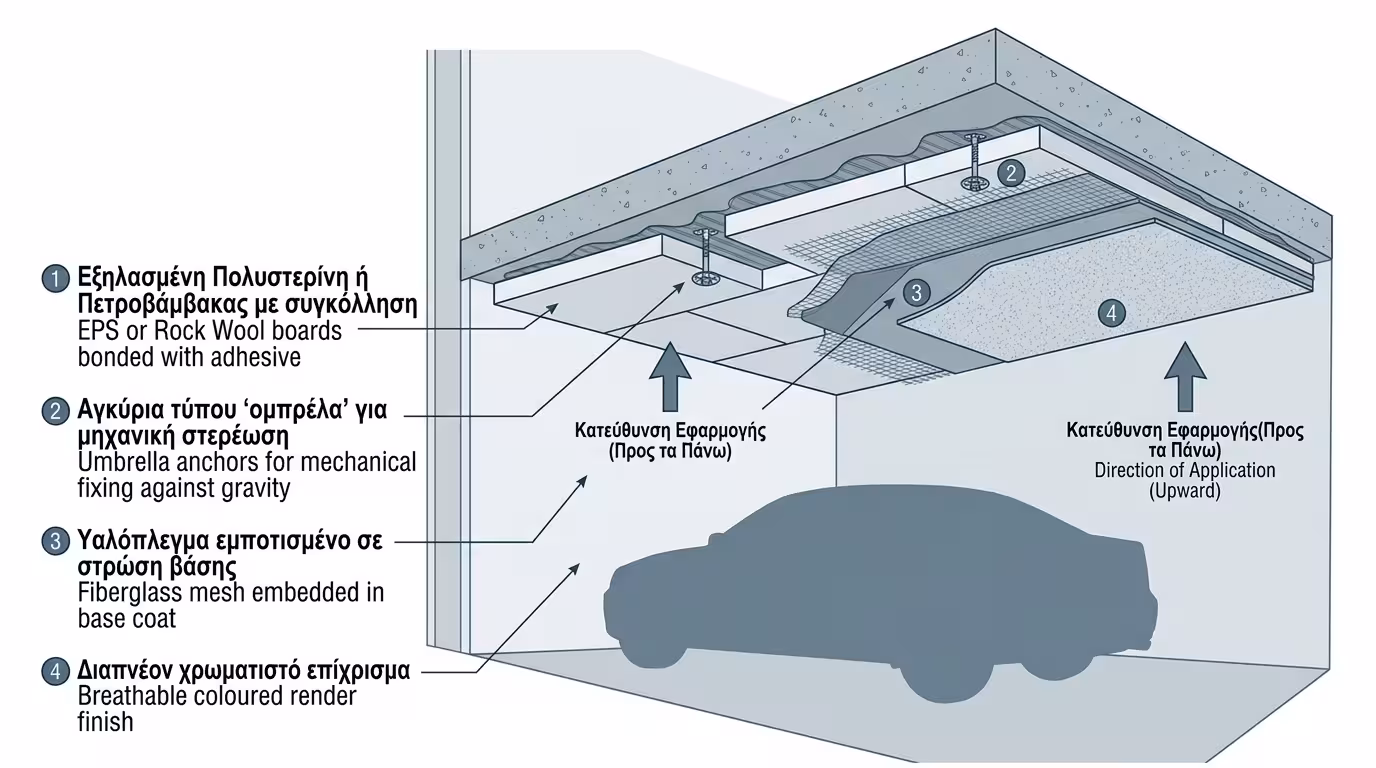
The worker bonds insulation boards to the pilotis ceiling.
Anchors (umbrella dowels) are essential, as gravity pulls materials downward.
Fibreglass mesh with adhesive mortar (base coat), then a breathable, coloured render for a perfect finish.
There is a classic mistake crews make on pilotis ceilings. The car park ceiling is never perfectly flat; it has "beams" (the thick concrete members that protrude downward and support the building).
Often, to save money or finish quickly, contractors insulate only the flat sections and leave the beams bare. This is a fatal mistake. The cold will find the bare beam, travel through the concrete and reach your floor (thermal bridge).
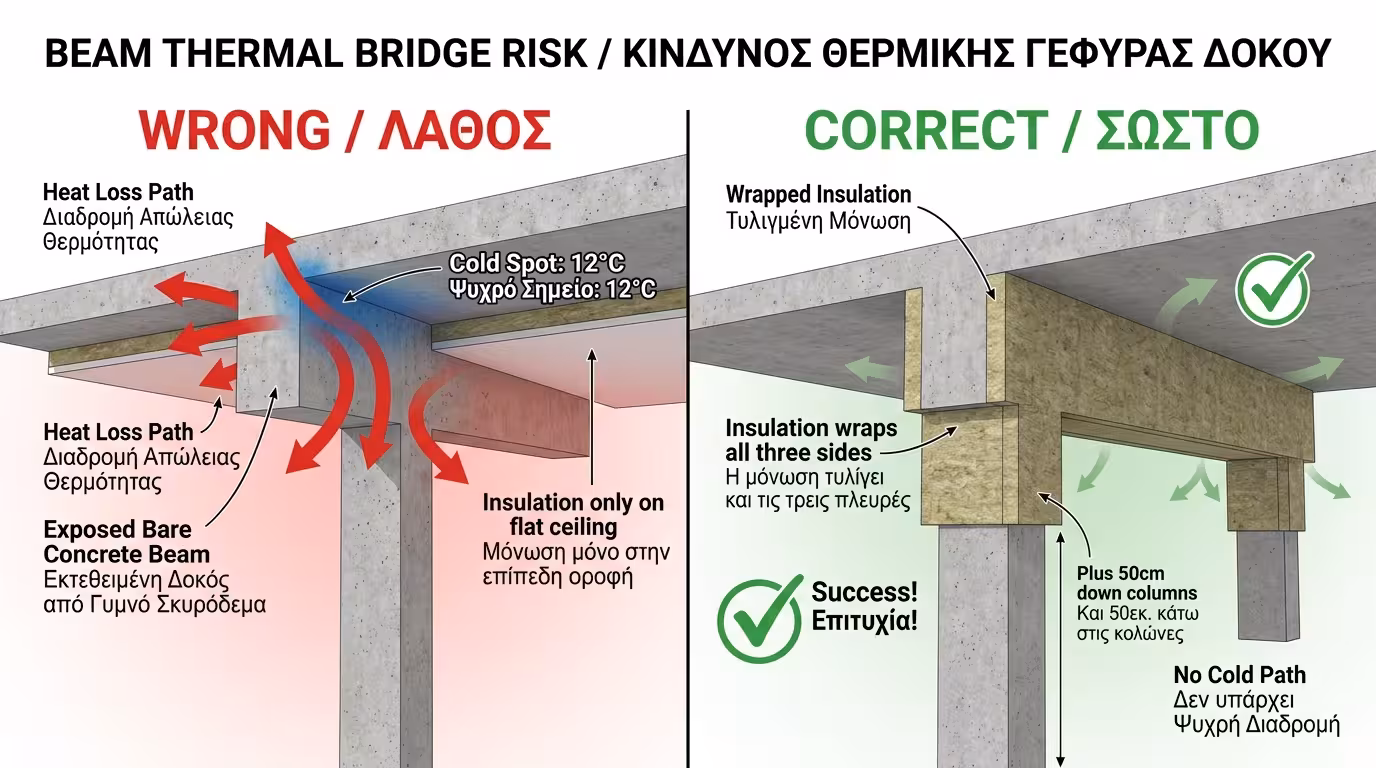
Insulation must "embrace" and wrap all beams and columns (at least half a metre downward).
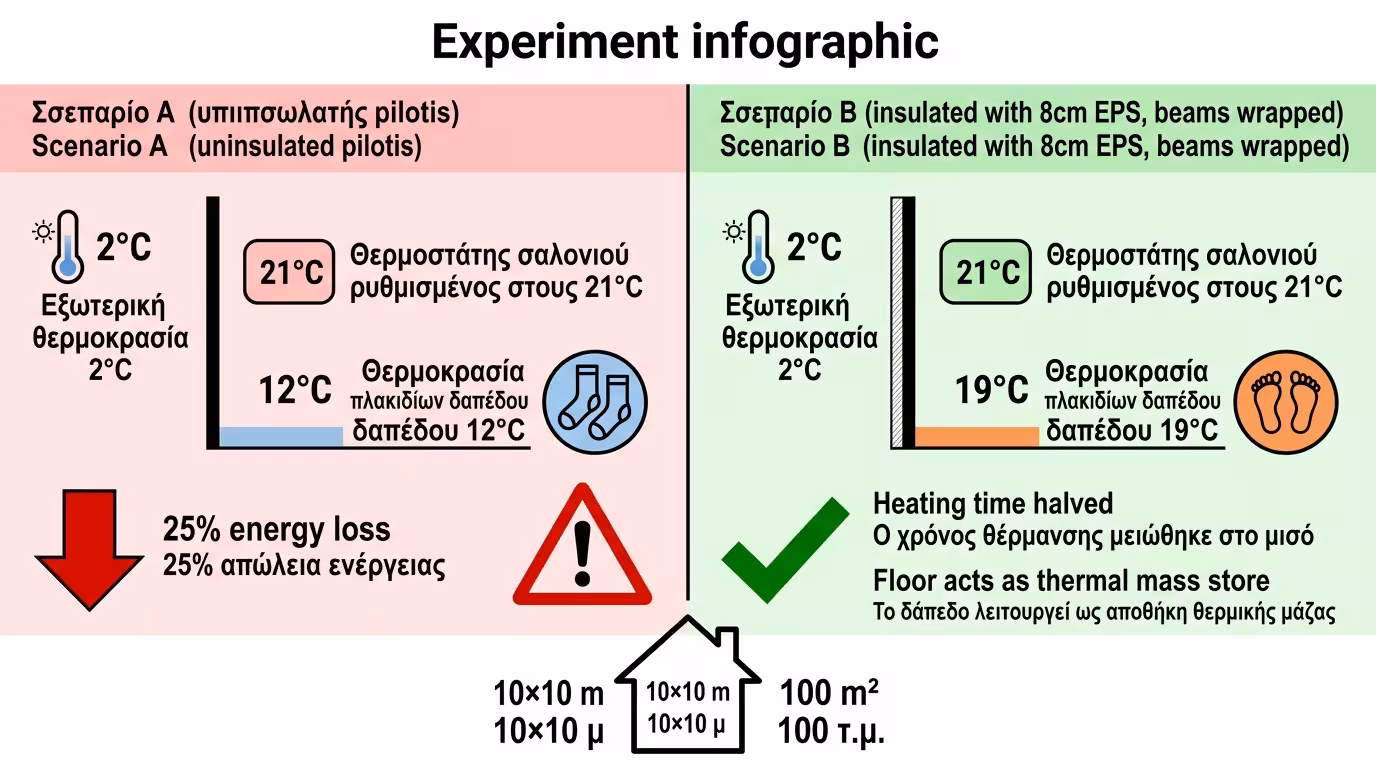
It's winter with 2°C outside. The thermostat in the living room is set to 21°C.
The wind blowing under the house freezes the slab. If we measure the living room floor (tiles) with an infrared thermometer, it reads just 12°C. No matter how hard the radiator burns, our feet are cold and we're forced to wear double socks. The energy loss is enormous (up to 25% of total heating escapes through the floor).
We insulated the pilotis ceiling and "wrapped" the beams. The floor slab is now protected, "inside" the thermal envelope. The tile temperature in the living room rises to 19°C. We walk in socks comfortably. The house heats up in half the time and the floor acts as a massive heat store!
The Final Conclusion: If you live above a pilotis, insulating it is perhaps the most cost-effective investment you can make (often paying back faster than wall insulation). You save money immediately, banish moisture from the skirting boards and dramatically upgrade your home's quality of life.
Return to category.
Go to categoryReturn to the central guide.
Go to guide