✅ The Pros
Your roof becomes virtually indestructible. You can barbecue, drag heavy furniture and hose it down like any balcony.
In the world of insulation, flat roofs fall into two categories: Non-walkable (you go up once a year to clean the solar heater) and Walkable (you use them as a regular balcony or yard).
The problem with waterproofing materials (such as liquid-applied polyurethane or simple bitumen membrane) is that they are relatively soft. If a woman walks in heels or someone sits on a chair with thin metal legs, the weight concentrates at a tiny point (point load). The result? The material punctures, the insulation is wounded and water finds its way to your living room.
To make your roof "walkable", you must add a hard protective shield over the insulation. Here are the two best ways to achieve it:
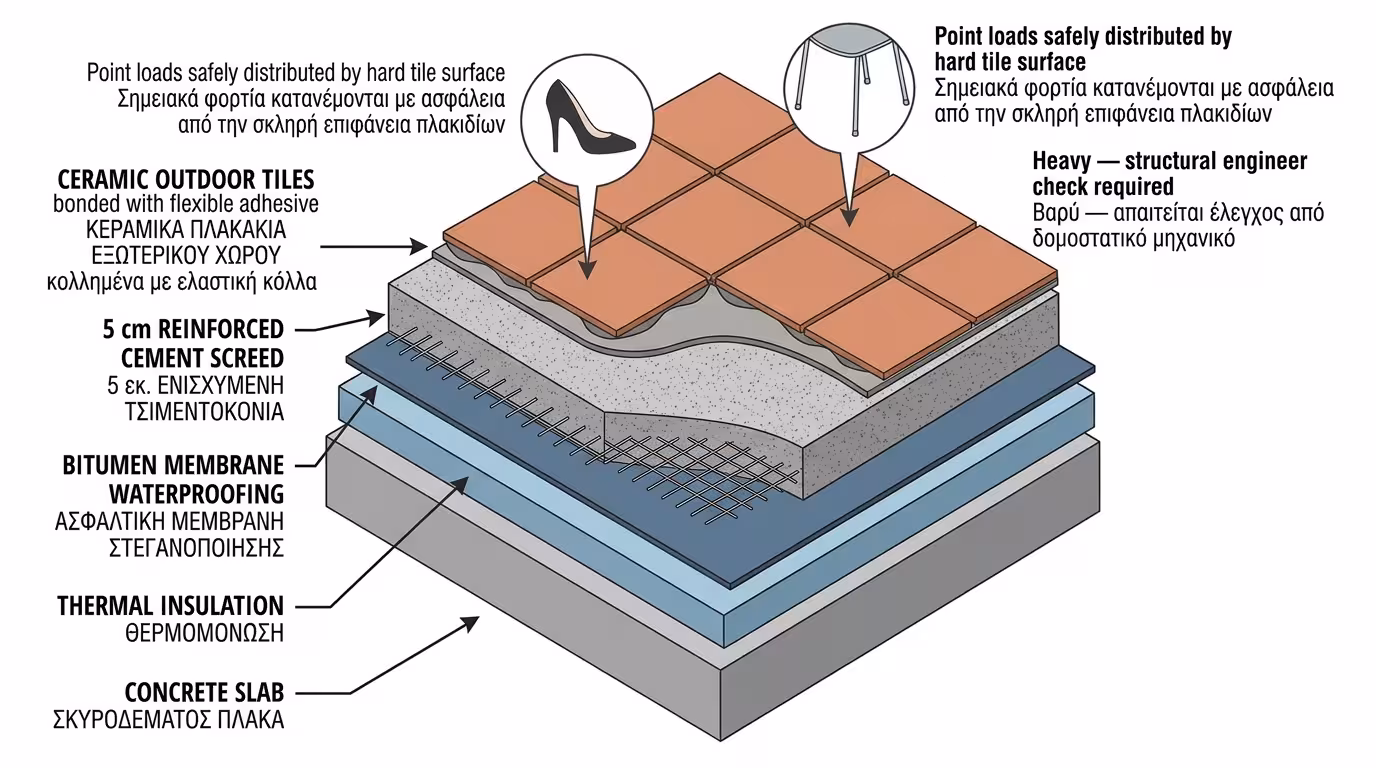
This is the traditional way to convert your roof into a beautiful, regular balcony. The logic is simple: We build a conventional insulation (insulation below, waterproofing on top) and "bury" it under tiles.
How it's built: Above the waterproofing (e.g. the bitumen membrane), the worker pours a thin layer of reinforced cement screed (about 5cm). On top of this screed, he bonds ceramic tiles using flexible adhesive and flexible grout.
Your roof becomes virtually indestructible. You can barbecue, drag heavy furniture and hose it down like any balcony.
This is an extremely heavy construction. Before choosing it, a structural engineer must verify the old slab can bear the extra tonnes (especially in pre-1980 buildings). Also, if the insulation fails, finding the leak means breaking the tiles.
If your house cannot bear the weight of screed and tiles, or if you want a more modern and "warm" aesthetic, the floating floor solution is the only way.
Here we use the inverted insulation logic (from Article 1): the bitumen goes below, and hard XPS boards sit on top.
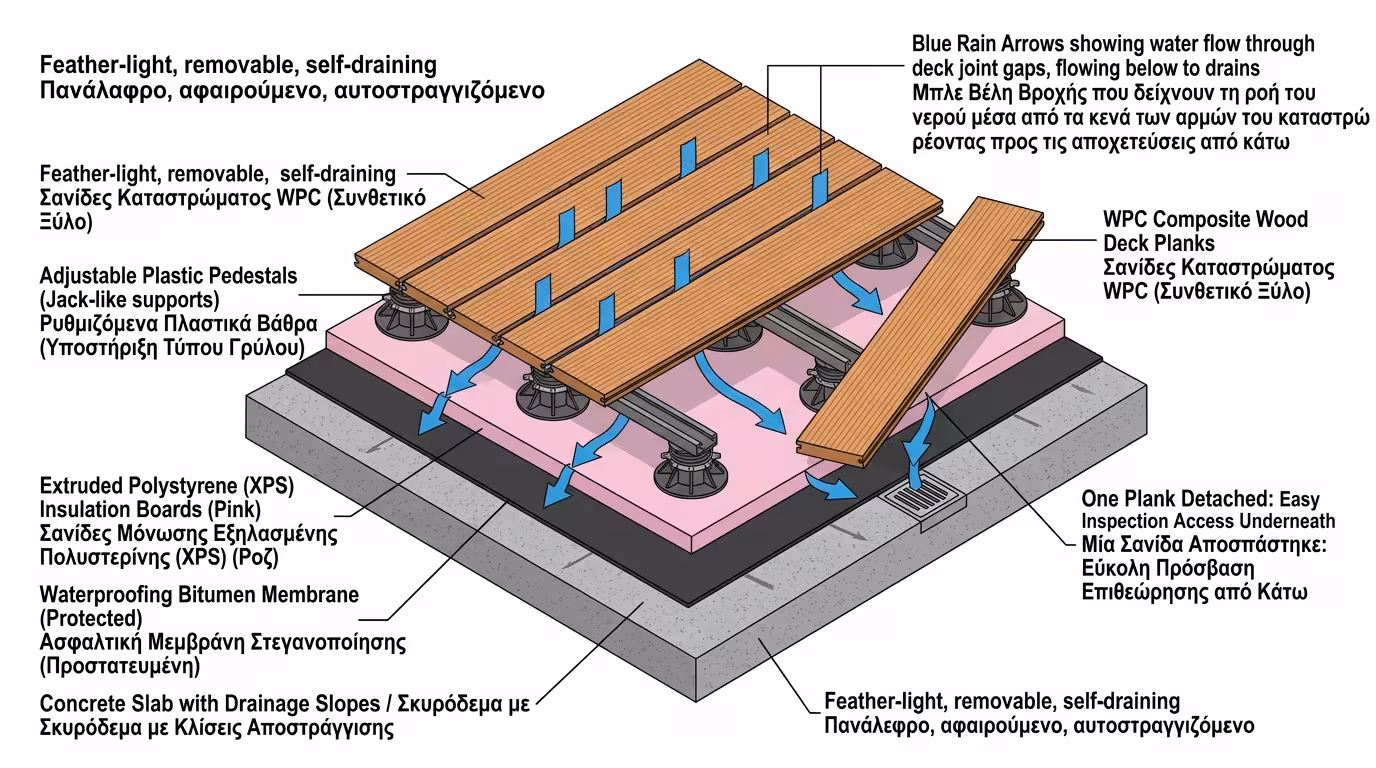
On top of the XPS we don't pour cement. We place special plastic "pedestals" (adjustable supports that look like mini jacks). On these supports, we click in either thick paving slabs (no mortar!), wooden planks, or the famous WPC Deck (synthetic wood that doesn't rot).
The system is feather-light. Rainwater passes through the deck joints, runs below the floor and drains away, keeping the surface you walk on always dry! Furthermore, if you need to check the insulation, simply unclip a plank, look underneath and put it back.
High-quality WPC may be slightly more expensive than a basic tile, although you save the cement screed cost.
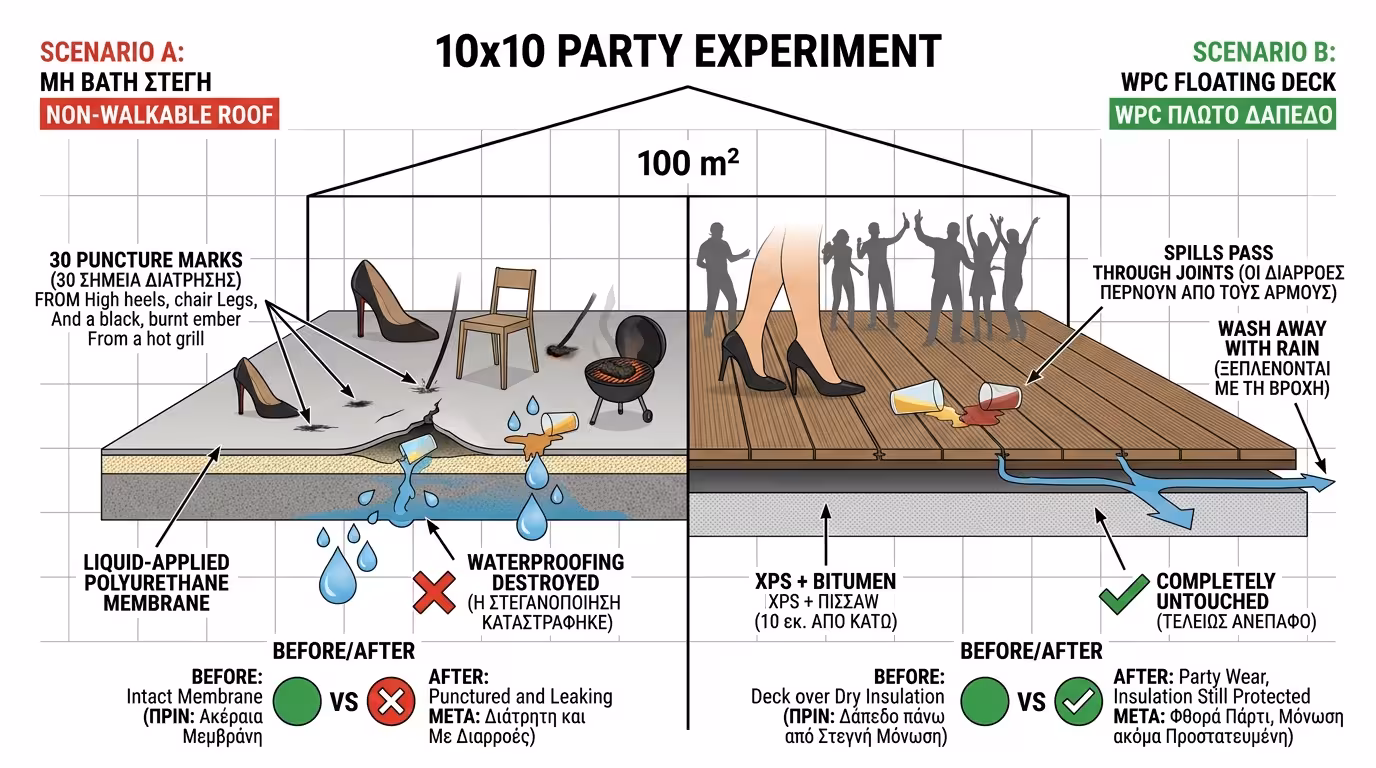
We want to throw a big summer party on our 100m² flat roof.
We've coated the roof only with a nice, white liquid-applied polyurethane. The guests go up. Chairs are dragged, heels stamp hard, someone drops a lit ember from the grill. The next day, the white membrane has 30 tiny "holes" and tears. The waterproofing is destroyed.
We ensured pedestals and a beautiful synthetic deck were installed over the insulation. The party goes ahead normally. Heels hit the "wood", spilled drinks pass through the joints and wash away with the next rain. The insulation (XPS and bitumen) 10cm below, protected, feels absolutely nothing.
The Final Conclusion: Making your flat roof walkable is not a luxury; it is the only way to reclaim the lost square metres of your home! Whether you choose the sturdiness of tiles or the elegance of floating deck, the key is to "hide" the sensitive insulation materials away from your feet.
Return to category.
Go to categoryReturn to the central guide.
Go to guide