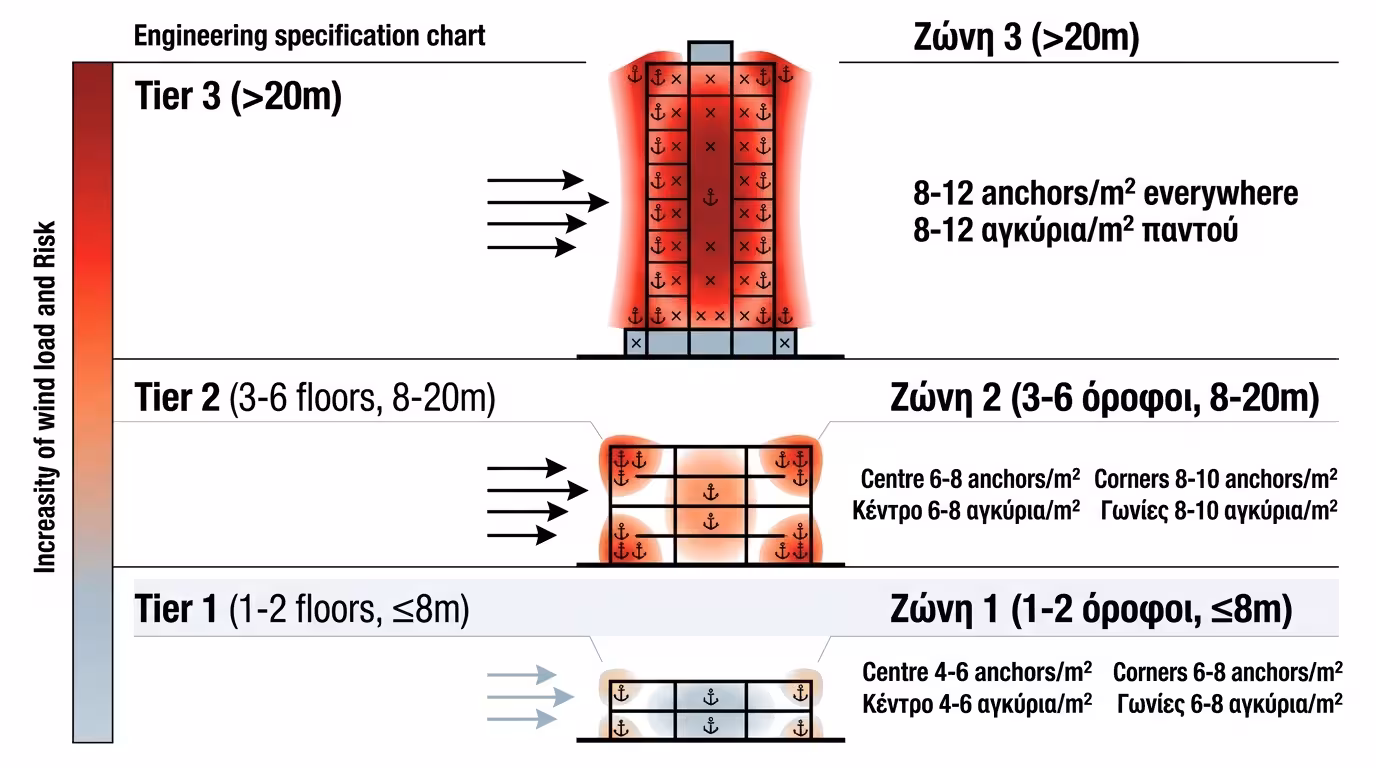
🏠 Low Buildings (up to 8m / 1st-2nd Floor)
In the wall centre: 4 to 6 anchors per m². In the edge zones (building corners), where wind force doubles: 6 to 8 anchors per m².
The adhesive we applied in the previous stage is extremely strong at holding the weight of the boards (vertical force). But what about the wind?
When wind hits a building, it does not simply "push" it. At the corners and leeward sides, enormous suction is created (the uplift phenomenon), which acts like a giant vacuum cleaner trying to suck the insulation outwards! To avoid waking up one morning to find your thermal facade on the pavement, mechanical fixing with plastic anchors (umbrellas) is absolutely mandatory.
The number of anchors is not random, nor does it depend on the worker's mood. It is strictly determined by the system manufacturer (ETICS), based on two factors: the building's height and the area (how windy it is).
In the wall centre: 4 to 6 anchors per m². In the edge zones (building corners), where wind force doubles: 6 to 8 anchors per m².
In the centre: 6 to 8 anchors per m². In edge zones (corners): 8 to 10 anchors per m².
Here the wind is merciless. At least 8 to 12 anchors per m² are required everywhere, combined with specially reinforced anchors with a metal nail.
Anchors are not placed randomly. They must "catch" both the centre of the board and its joints with the neighbours.
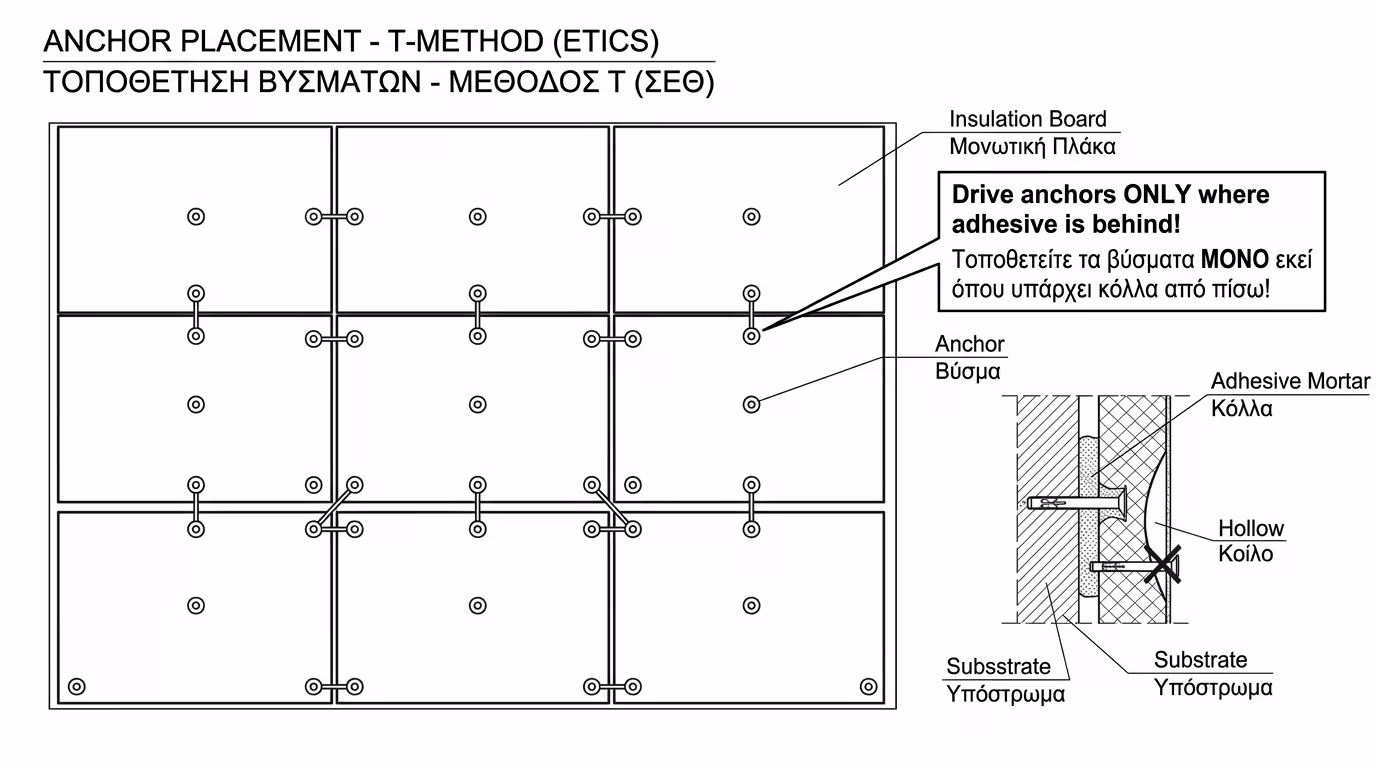
Anchors are placed exactly where boards meet (catching two or three boards simultaneously) and one or two go in the centre of each board.
Important! The anchor must be driven only where adhesive is behind it. If you drive it into a void (remember the "blobs"?), the anchor will bend the board inward, creating an ugly hollow on your wall.
There is a common mistake crews make with anchors. If they use cheap anchors with a metal nail (or if they do not recess them properly into the insulation), the anchor nail acts as a tiny thermal bridge.
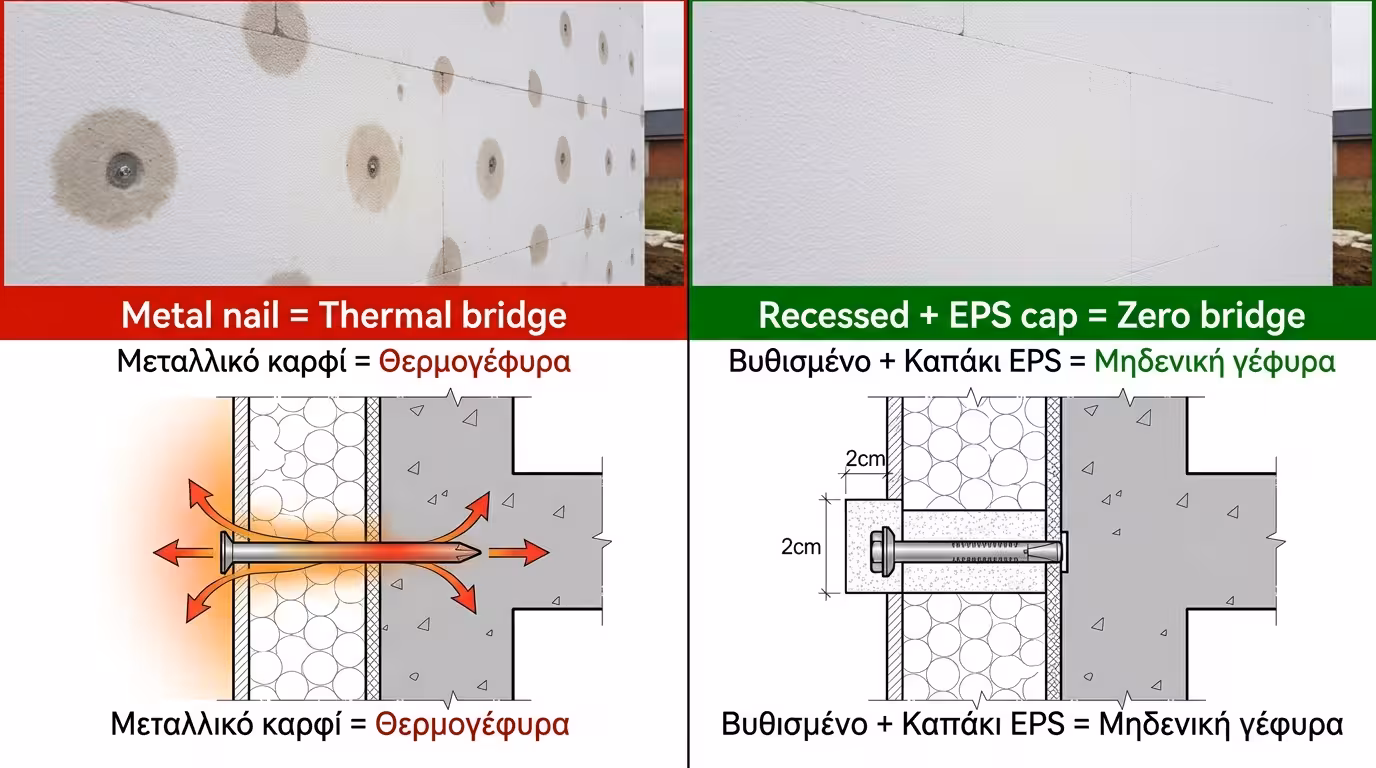
In winter, heat "escapes" through the nail. The result? On a cold, damp morning you will see hundreds of small round marks (like ladybird spots) exactly where the anchors are, because moisture dries differently there!
Demand that the contractor uses anchors with a plastic nail (for thin profiles) or, even better, uses counter-sinking: recessing the anchor 2 cm into the polystyrene and sealing it with a small, ready-made EPS cap. This way the thermal bridge is eliminated!
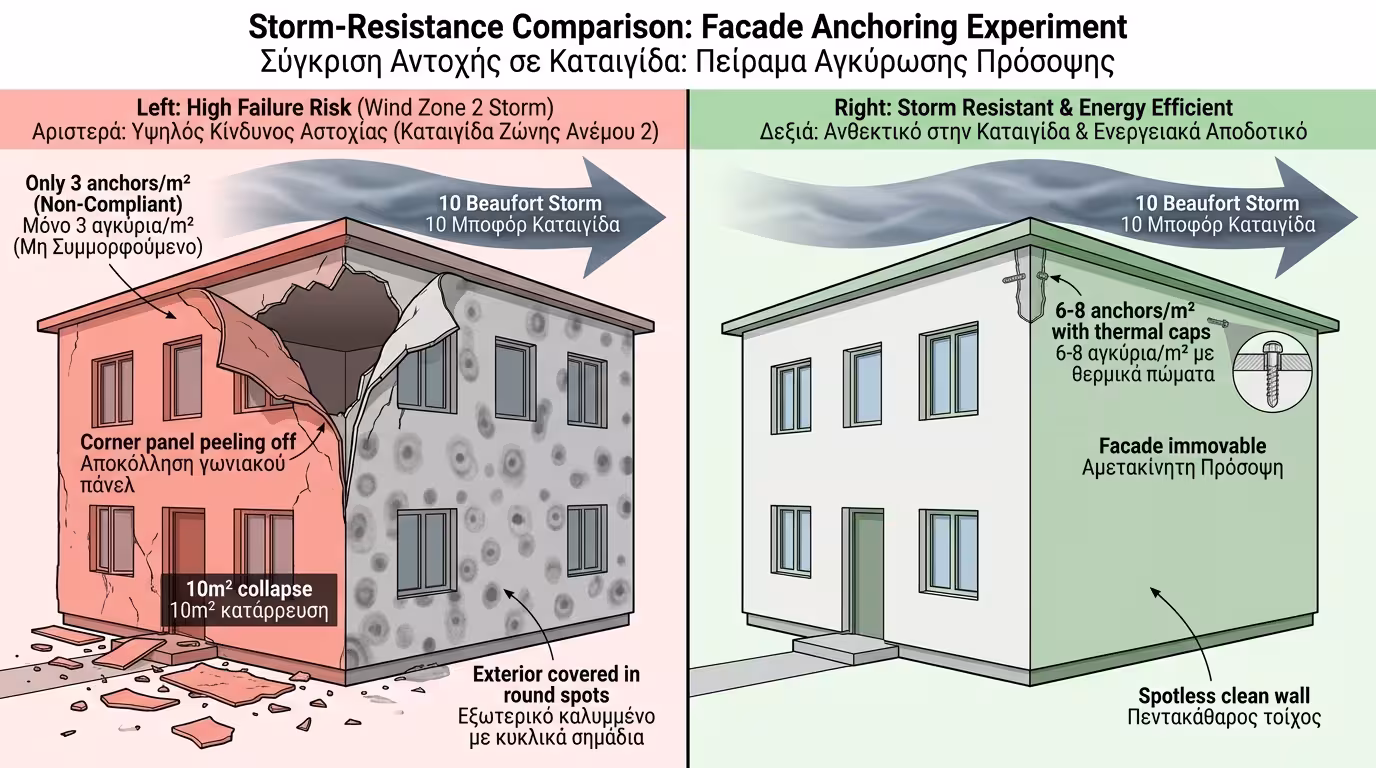
Our virtual house is located in an area with strong winds (Wind Zone 2).
The worker installs only 2 anchors per board (roughly 3 per m²) to save money, and uses cheap plastic nails without EPS caps. In a strong winter Northerly, the wind creates enormous suction at the house's corners. The 3 anchors cannot withstand the tension, they snap, and 10 m² of insulation collapses. Furthermore, in winter the house is covered in round "spots" externally.
We install 6 anchors in the wall centre and 8 per m² at the corners. All anchors are counter-sunk and sealed with thermal caps. A storm with 10 Beaufort arrives. The system does not budge a millimetre. In the morning, the wall is spotless, without a single damp mark.
The Final Conclusion: Anchors cost mere cents each. For a contractor to try to save €50 on anchors in a €6,000 renovation is criminal. Demand the correct number per square metre and the use of thermal caps, so you can sleep soundly on windy nights!
Return to category.
Go to categoryReturn to the central guide.
Go to guide