Use of Acrylic Fillers & Sealants: The Ideal Materials for Elastic Repairs

You have the perfect spatula, opened the crack properly, cleaned the dust, and are ready to fill the gap. You stand in front of the paint store shelf and look at dozens of boxes, tubes, and bags of powders. Which is the right material?

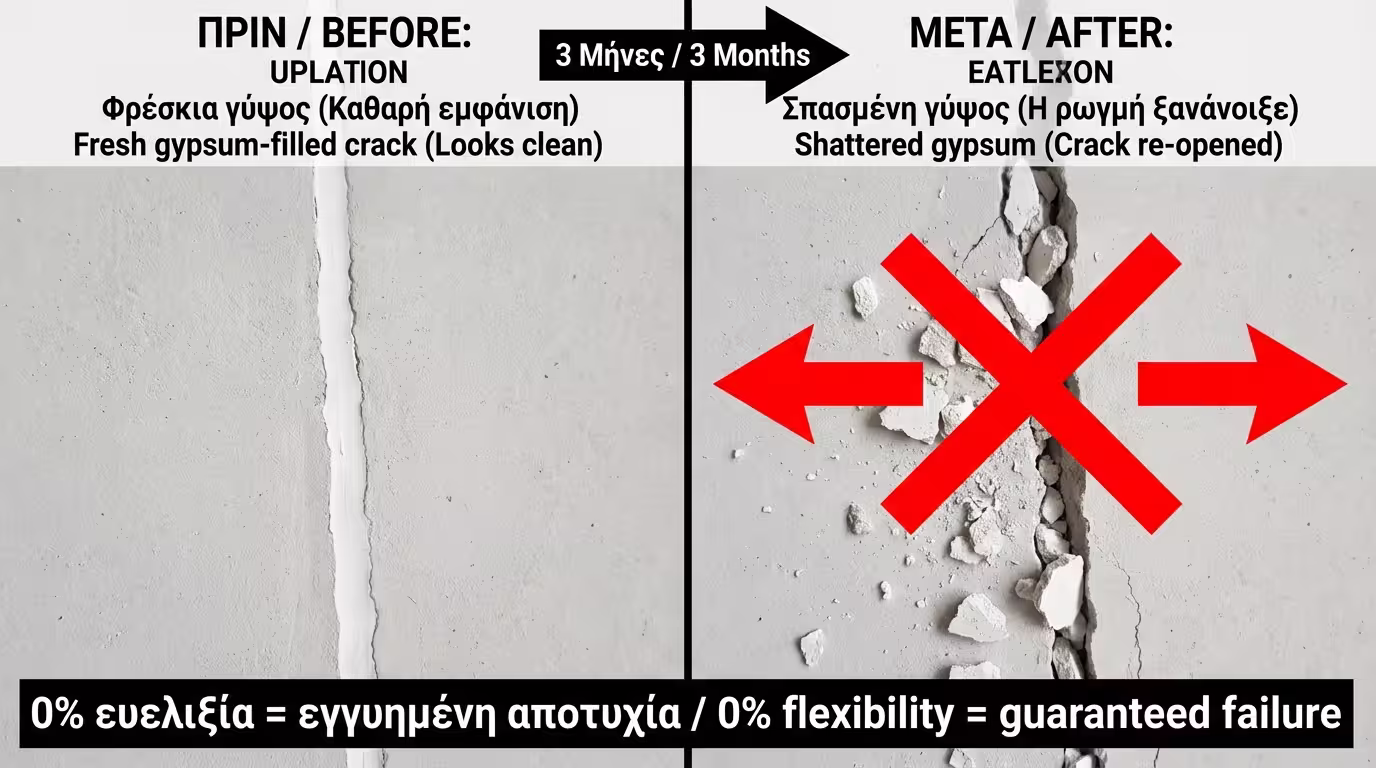
The instinctive move for most is to buy some quick-setting plaster or a simple spackling filler. This is the biggest mistake in crack repairs. Let's see why traditional materials fail and why the future (and your peace of mind) is hidden in acrylic fillers and elastomeric sealants.

1. The Problem with Plaster & Plain Filler

To understand why plaster fails in cracks, you have to think about how it behaves when it dries. Plaster and cementitious fillers become "rock". They have absolutely zero elasticity.

  • Where they are useful: They are excellent for closing a static hole from a nail or a wall plug.
  • Why they are destroyed in cracks: Cracks, as we saw, are created because the building contracts and expands (moves). If you put a completely rigid material (plaster) inside a crack that "opens and closes" even by fractions of a millimetre, the wall's force will shatter the plaster immediately. The crack will reappear.
Before/after: gypsum-filled crack shatters 3 months later - 0% flexibility

2. The Interior Solution: Ready-Mixed Acrylic Filler

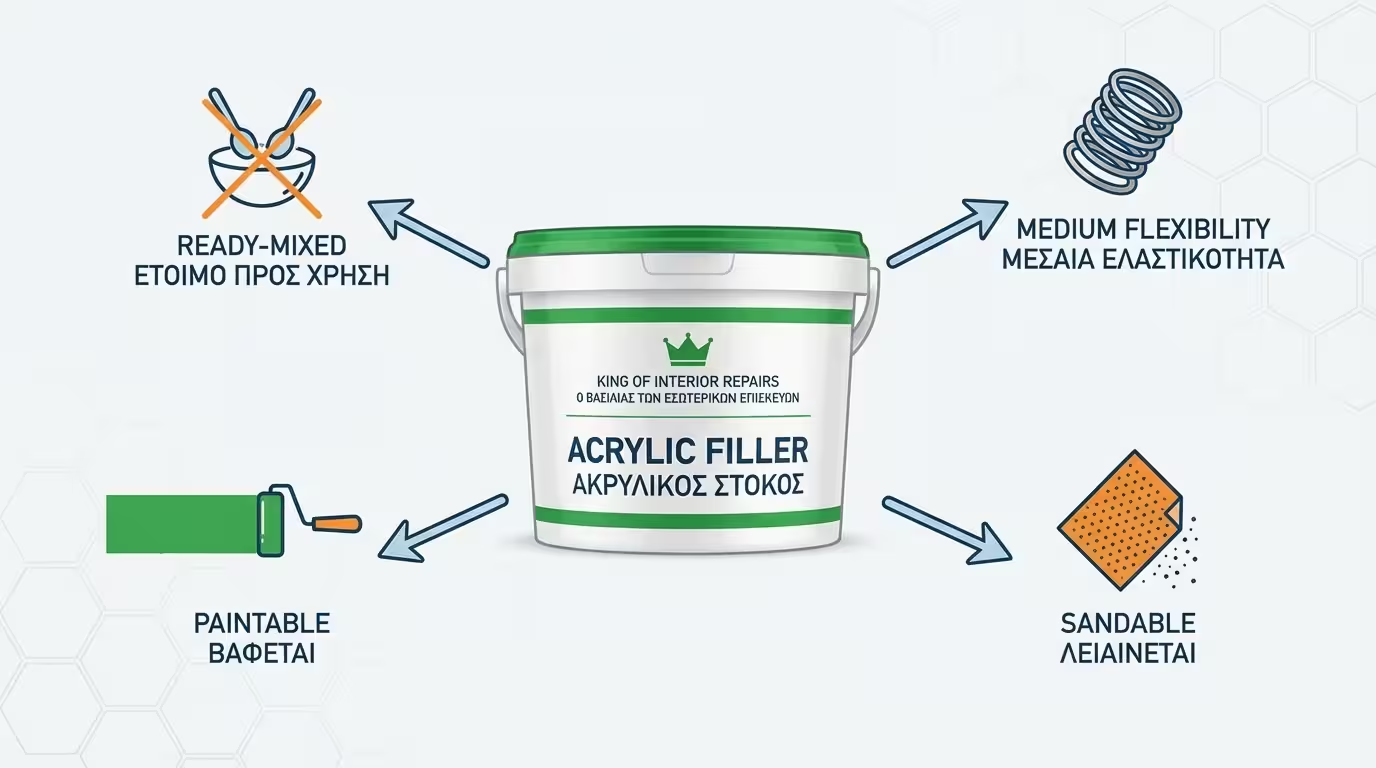
For most interior repairs, acrylic filler (usually sold ready-mixed in plastic tubs) is the "king".

  • What it is: It is a mixture of inert materials with acrylic resins.
  • The Advantages: Unlike powder, acrylic filler retains a small, but lifesaving elasticity even when fully dry. If the wall moves slightly, the filler will "stretch" with it instead of breaking. Moreover, it is very easy to work with a spatula, does not shrink much and (most importantly) is extremely easy to sand with sandpaper to become one with the wall.
Acrylic filler properties: medium flexibility, sandable, paintable, ready-mixed

3. The Exterior & Joint Solution: Elastomeric Sealants

When we go outside the house, temperature differences are huge and material movements are violent. Here, not even acrylic filler can hold up. We need materials that behave like "rubber". Here is where sealants take over (in the form of a "sausage" or cartridge that goes into a silicone gun).

  1. Acrylic Sealant: Ideal for exterior cracks in render. It is very elastic, bridges gaps perfectly and is easy to paint with plastic or acrylic paints.
  2. Polyurethane Sealant: The "heavy artillery". It is incredibly strong, has huge elasticity and does not tear at all. It is the ultimate material to seal the junctions between different materials (e.g. where the external render meets the aluminium of the window or the wooden pergola). It can also be painted, but is a bit harder to work with than acrylic.
Caulking gun: acrylic sealant in render crack, PU sealant at render-to-aluminium joint
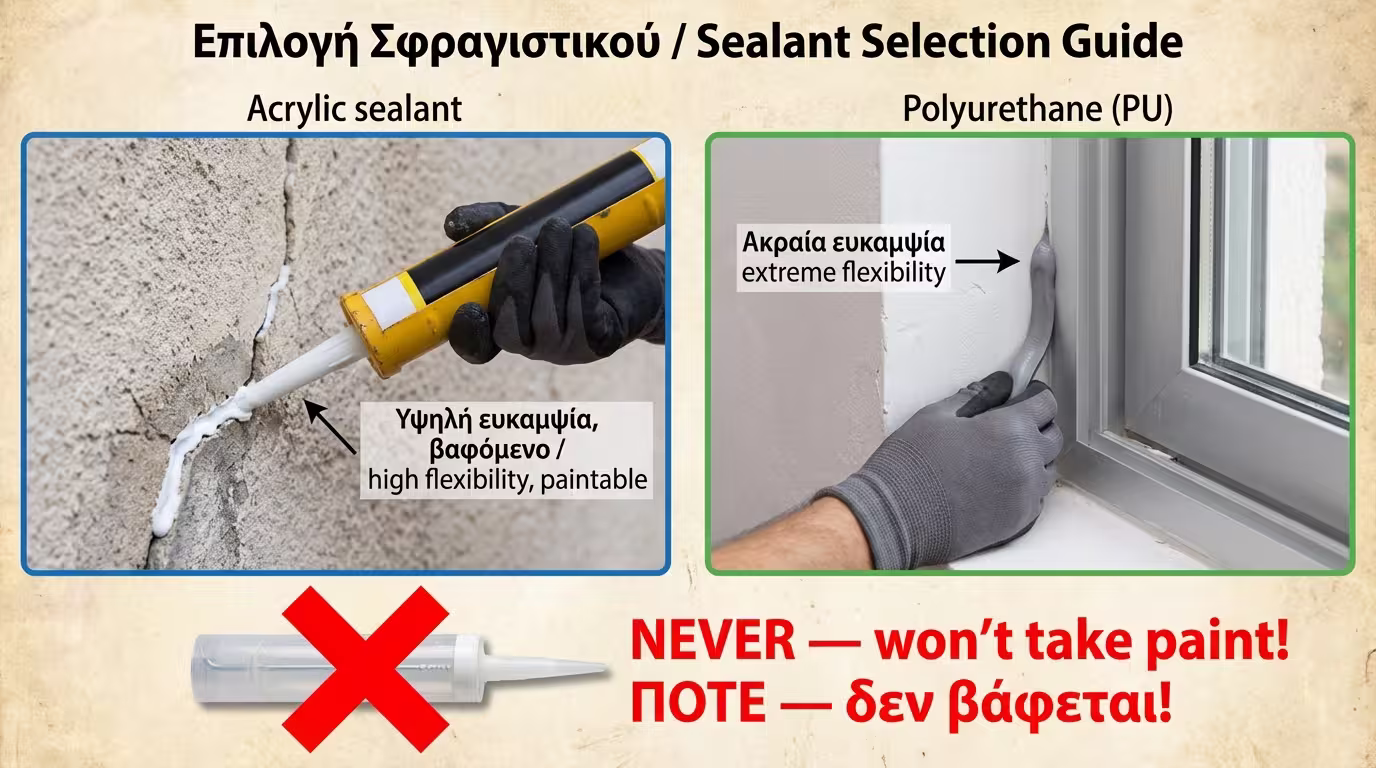
Beware of Silicone: NEVER fill wall cracks with ordinary (clear or white) plumber's silicone. Silicone cannot be painted! The paint will slide off it like water and will leave you with a permanent, ugly line on the wall.

4. Repair Material Comparison at a Glance

The four main repair materials differ radically in flexibility and use. The table below compares them at a glance.
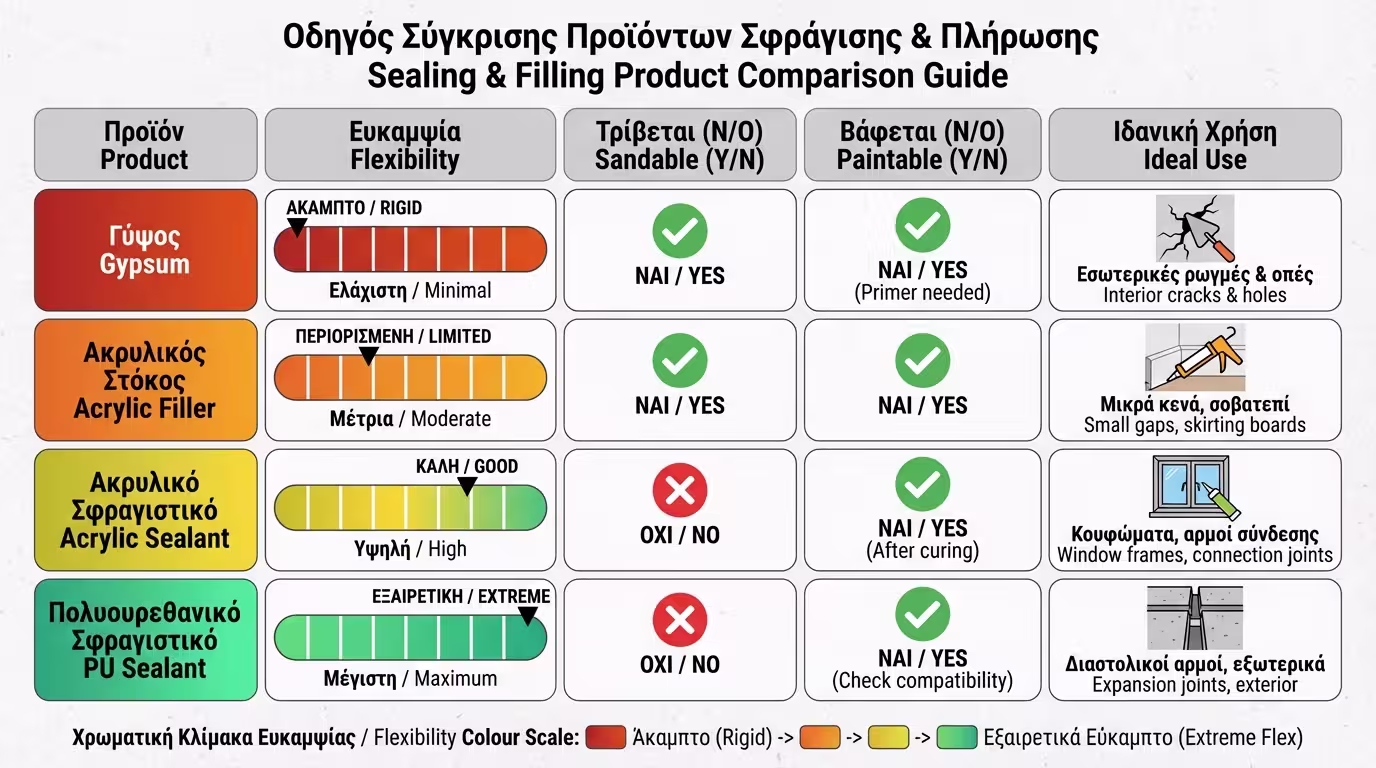
Comparison table of 4 repair materials: gypsum, acrylic filler, acrylic sealant, PU - colour-coded by flexibility
Material Elasticity Sandable? Paintable? Ideal Use
Plaster / Powder Filler Zero Yes (very easily) Yes Small static holes (nails) indoors.
Acrylic Filler (Ready-Mixed) Medium Yes Yes Interior cracks, skim coating.
Acrylic Sealant High No Yes Exterior cracks, expansion joints.
Polyurethane Sealant Extreme No Yes Demanding exterior junctions (render to metal/wood).

5. The Professional's Trick for Sealants

Because sealants are rubbery, they cannot be sanded with sandpaper when they dry. If you leave bumps, they will be visible forever.

  • The technique: Fill the crack with the gun. Then, dip your finger (or a special elastic spatula) into a small cup of soapy water (water with a little dish soap). Run your finger gently over the sealant to smooth it. The soap does not allow the sealant to stick to your hand and creates a perfectly smooth finish that is flush with the wall!
Soapy-water technique: finger smooths sealant for a perfect finish

Related Articles

Preview