🪨 Sand (The Body)
It forms the skeleton of the plaster. It provides the volume and the strength.
Ask 10 plasterers how they mix - you'll get 10 answers. Here are the correct ratios, with numbers, not guesswork.
Before looking at ratios, you need to understand what each ingredient does inside the bucket:
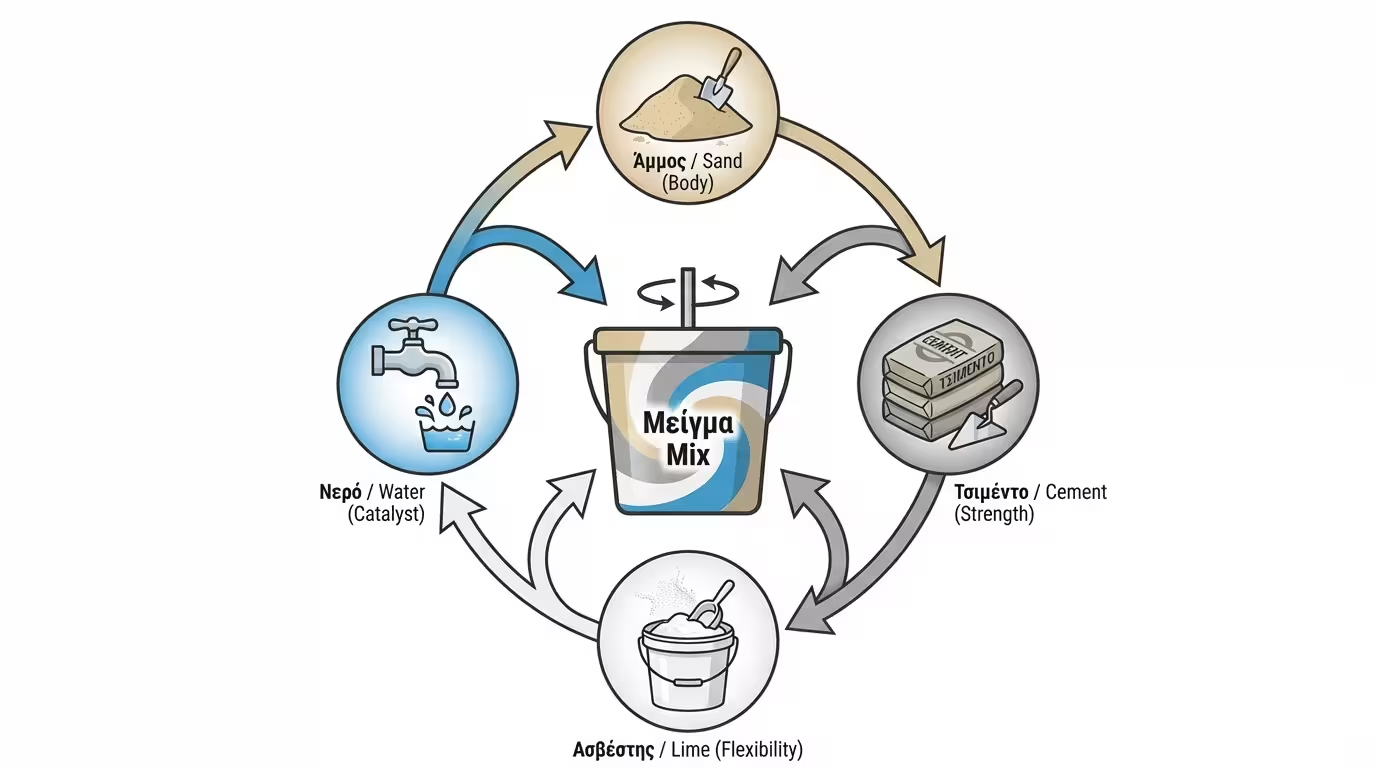
It forms the skeleton of the plaster. It provides the volume and the strength.
It is the "glue" that binds the sand together and provides the hardness.
It makes the mix velvety (workable), allows it to spread easily with the trowel, and prevents cracks by adding elasticity and breathability.
It activates the cement and the lime. Too much water "drowns" the mix and cuts its strength.
In construction we measure by volume. A "measure" can be a shovelful, a tin or a small bucket - as long as you use the same vessel for every ingredient.
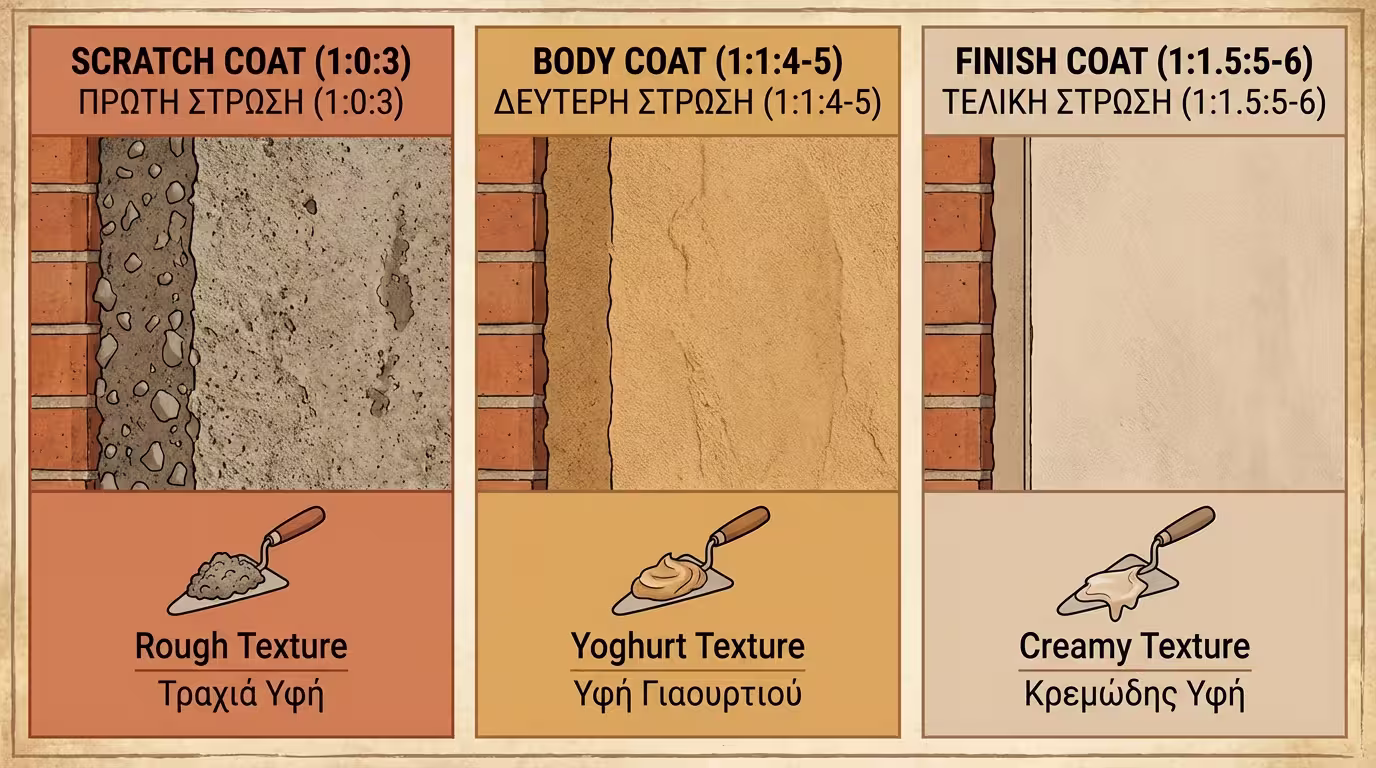
The scratch coat must be hard, rough, and act like an anchor. NEVER add lime to the scratch coat.
Cement: 1 part. Sand (Coarse / Concrete): 2.5 to 3 parts. Add water as needed until the mix becomes thick like a slurry (not watery,
but not stiff either).
This is the main volume of the plaster. Here we need elasticity so
the thick layer doesn't crack, which is why lime is the protagonist.
Cement: 1 part. Lime (Putty): 1 part. Sand (Medium / River): 4 to
5 parts. Add water gradually until the mix stands on the trowel without spilling
(like thick yoghurt).
This is the thin, white skin of the wall.
White Cement: 1 part. Lime (Putty): 1.5 to 2 parts (you
need enough so it smooths easily). Marble dust (very fine sand): 5 to 6 parts. Add water as needed for a smooth and creamy mix.
| Coat | Cement | Lime | Sand | Ideal Texture |
|---|---|---|---|---|
| Scratch | 1 | 0 | 3 (coarse) | Runny slurry |
| Body | 1 | 1 | 4-5 (medium) | Thick yoghurt |
| Finish | 1 (white) | 1.5-2 | 5-6 (marble dust) | Creamy paste |
The order in which ingredients go in matters enormously - whether you're using a concrete mixer or a bucket with a drill paddle.
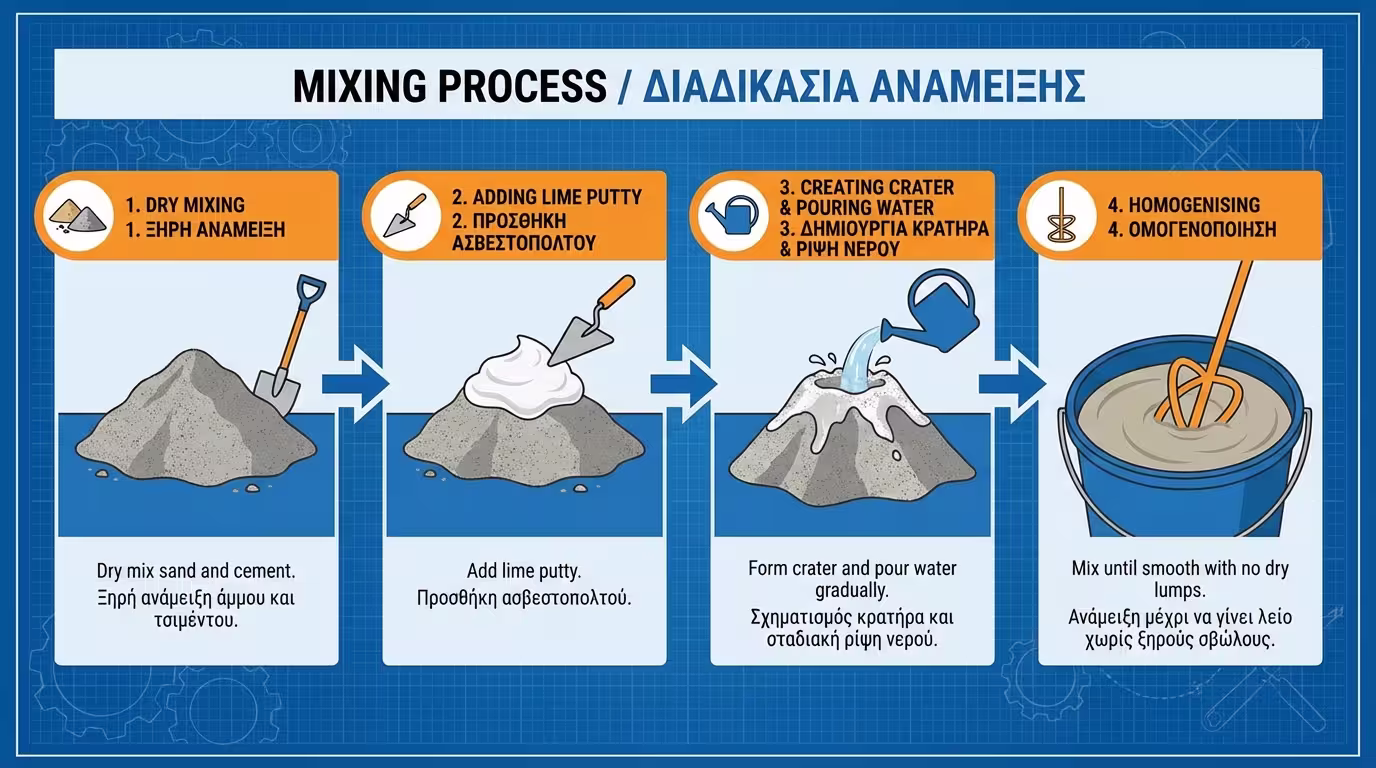
Put the sand and the cement in first (dry). Mix them very well until the color becomes a uniform grey.
Add the lime putty (if you are making body or finish coat) and mix again.
If you are working on the ground or in a tub, open a hole in the middle of the mix (like a volcano crater). Start pouring the water gradually into the center, bringing the dry material from the sides to the inside.
Mix well from the bottom. There should be no lumps of dry sand in your mix.
⚠️ The "Live" Lime Rule: The building lime (putty) must be well-slaked (left to "sit" for weeks). If you use fresh, unslaked material (that is boiling), it will pop small "blisters" (pimples) on your wall months later, destroying the paint job.
It is much easier to add a little water to a stiff mix than trying to "stiffen" a watery mix by adding extra sand and cement (which will completely ruin the ratios). Always add water little by little.
Cement and especially lime cause severe chemical burns to the skin and eyes. Never mix with bare hands. Always wear thick rubber gloves, safety glasses for splashes, and long sleeves.
A ready mix must be worked within 1-2 hours (depending on the heat). If it starts to set in the bucket, DO NOT add water to "revive" it. The chemical reaction of the cement has already started, and by adding water you will "cut" it (it will lose its strength). Throw it away and make a new one.
The right ratio is the foundation of every render. Follow the "recipe", respect the lime and always measure with the same vessel.
Return to category.
Go to categoryReturn to the central guide.
Go to guide