❌ Absence of Fixings
The most frequent (economical) mistake. Some completely omit them at low heights.
A strong gust of wind in winter, a loud bang, and suddenly... a large section of your external thermal insulation (ETICS) is on the pavement. The wall is left bare, revealing the old brick underneath, while you wonder how such an expensive installation can collapse like a theatre set.
The detachment of entire boards of thermal insulation material (EPS, XPS, or stone wool) is not an accident. It is the direct result of criminal omissions during installation. ETICS systems are designed to withstand hurricanes, provided they are applied according to the rules. Let's look at the 3 fatal mistakes that lead to total destruction.
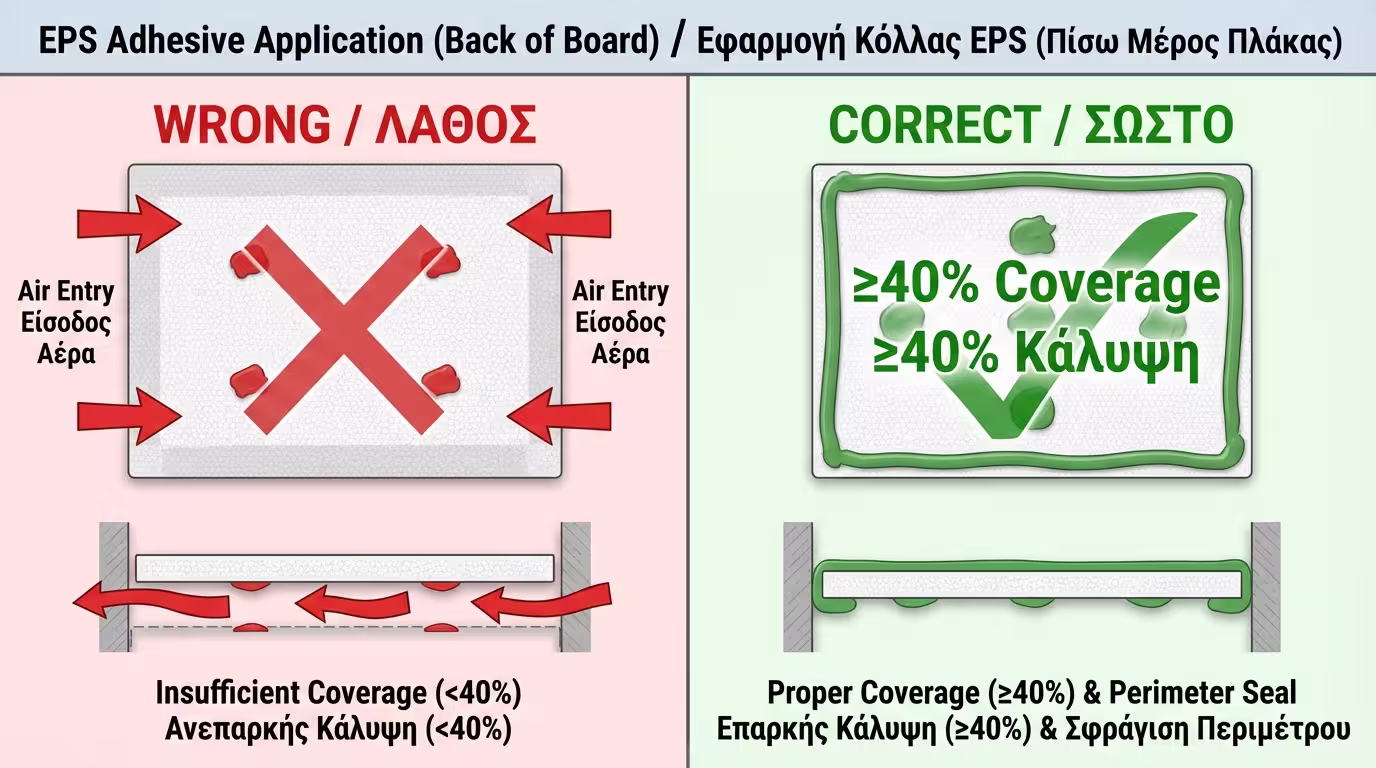
How the cementitious adhesive is spread on the back of the insulation board determines 90% of the system's strength. Unfortunately, to save time and material, many crews apply the forbidden "dot" method.
✅ The Correct Way ("Bead-and-Dot" Method): The adhesive must obligatorily be spread perimeter-wise (like a continuous bead all around the edges of the board) and 2-3 "dabs" placed in the centre. Thus, when the board is pressed against the wall, it seals airtight and the adhesive covers at least 40%-50% of the surface. Alternatively, on flat walls, the adhesive is "combed" over the entire surface with a notched trowel.
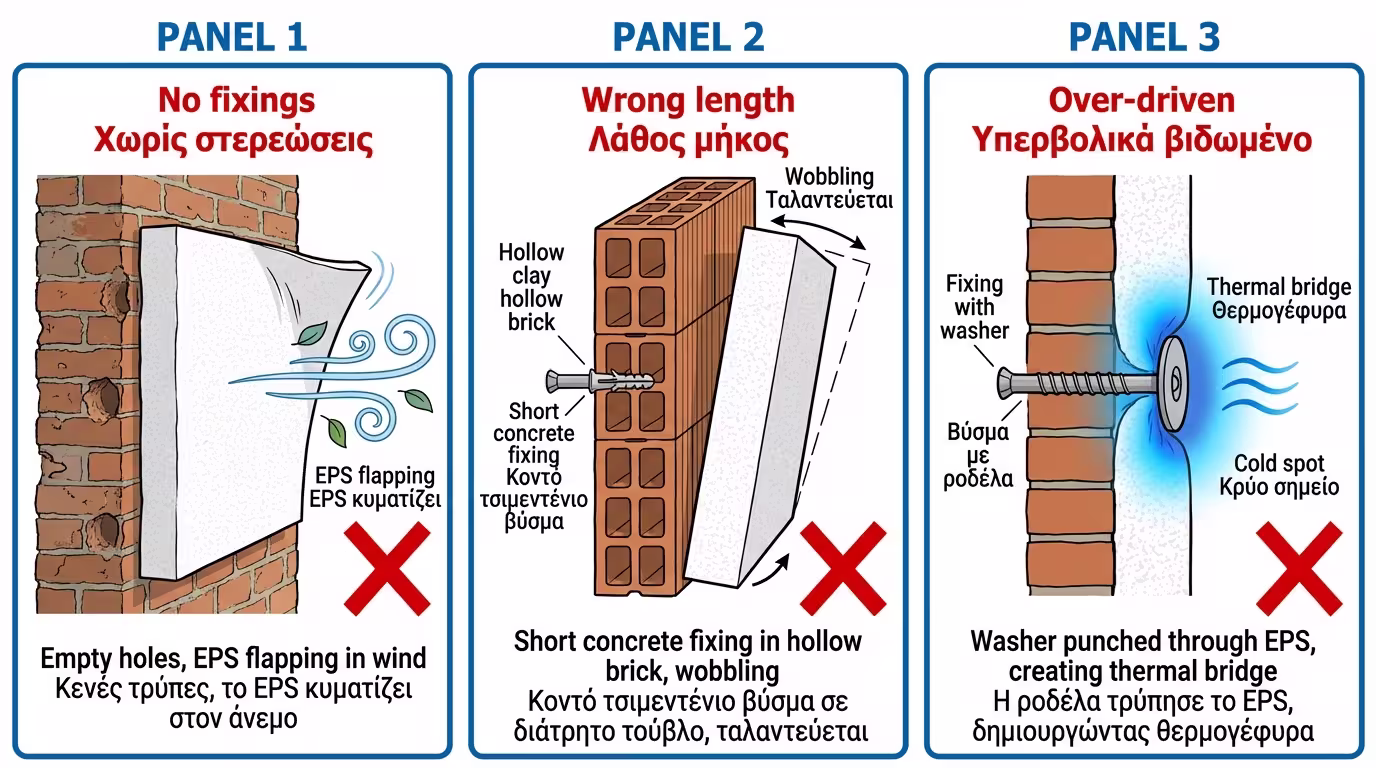
Adhesive alone is not enough. The system is mechanically supported on the wall with special plastic fixings (anchors/dowels) that have a large "washer" (head).
The most frequent (economical) mistake. Some completely omit them at low heights.
If the wall is made of perforated (hollow) brick and the crew uses short fixings intended for solid concrete, the fixing won't "catch" anywhere. It will merely be decorative.
If the worker hits the fixing vigorously, the washer will break the EPS and sink into it. The board is no longer held by the fixing, while a massive thermal bridge is also created (which will later appear as a circular mark on the facade).
The best adhesive in the world is useless if you stick it onto dust. Many renovations are done over old, peeling plastic paints or crumbly renders.
If the crew does not perform an adhesion test (pull-off test), does not pressure-wash the wall, and does not apply the appropriate deep-penetrating primer, the ETICS adhesive will grab onto the old paint. When the system becomes heavy, it will pull the old paint and collapse with it.

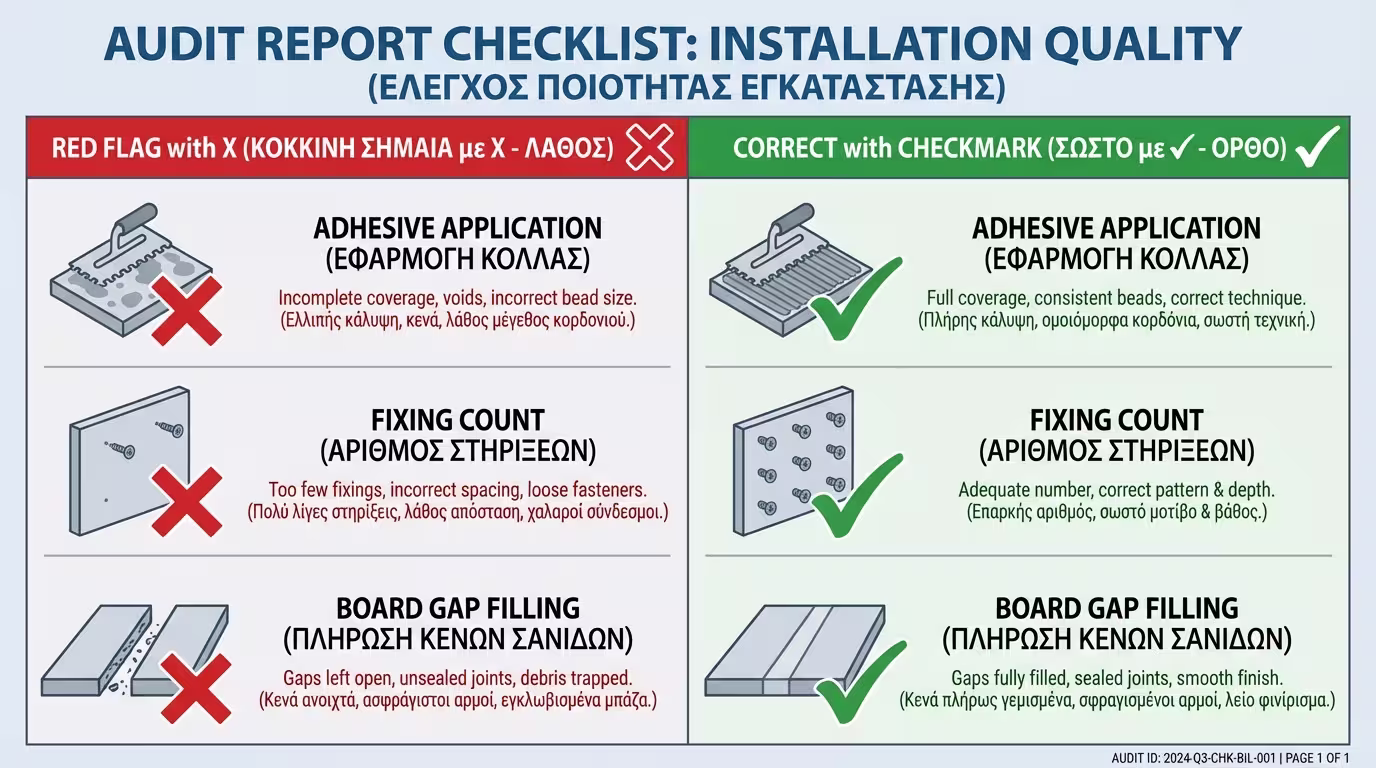
If you see the installation happening in front of you, check these 3 points:
| Control Point | The "Dangerous" Mistake (Red Flag) | The Correct Way (Based on Certification) |
|---|---|---|
| Adhesive Application | Only 4 "dabs" in the centre, gap at the edges | Perimeter bead + centre (Sealing) |
| Number of Fixings | Fewer than 4 per square metre | Usually 6-8 fixings/m² (depending on height and winds) |
| Gaps between boards | Filling gaps/joints with adhesive | Gaps are filled exclusively with polyurethane (PU) foam |
If you see the external insulation wall making a large "belly" outwards or large horizontal and vertical cracks have opened up demarcating the boards underneath, delamination has already started internally.
Return to category.
Go to categoryReturn to the central guide.
Go to guide