Safe Plaster Demolition Process: Tools, Technique & Substrate Preparation

The decision has been made: the old, failing render must come off. The demolition phase (commonly known as stripping) is by far the noisiest, dirtiest and most physically exhausting stage of any renovation. At the same time, however, it demands absolute concentration.

Hidden behind the render are the "veins" of your home: live electrical cables, water pipes and drains. The old bricks are often fragile too. If you attack the wall with blind fury, the cost of collateral damage will exceed the cost of the new render. Let's look at how professionals carry out a controlled and safe demolition.

1. Preparation: Safety & Wall Scanning

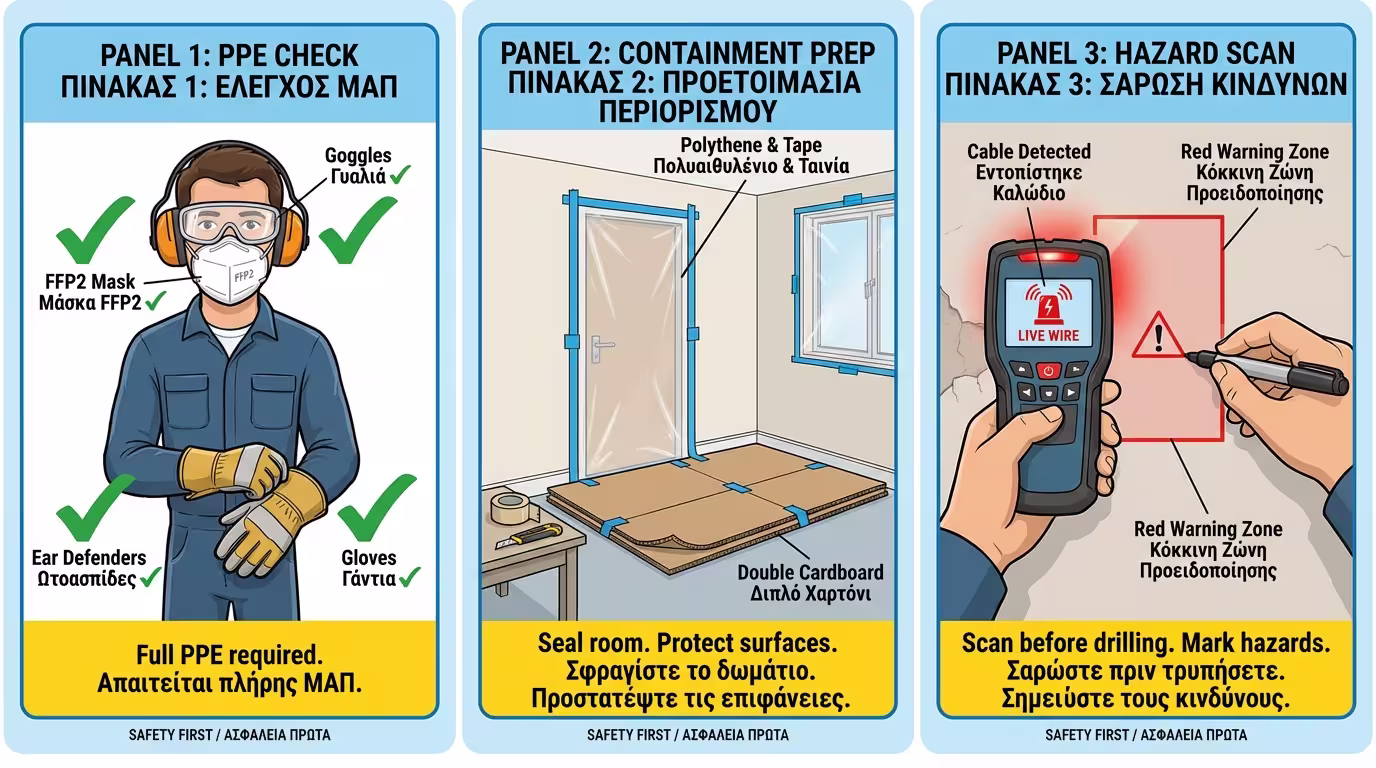
Before you even pick up the first tool, you must secure yourself and the space:

  • Personal Protection (Non-Negotiable): Old render dust contains sand, cement, fungi (mould) and sometimes hazardous substances. You must wear an FFP2/FFP3 dust mask, sealed safety goggles, heavy-duty work gloves and ear defenders.
  • Room Sealing: Seal the doors of adjacent rooms airtight with heavy polythene sheet and masking tape. Protect floors with double corrugated cardboard (falling render chunks act like meteorites and destroy tiles and timber).
  • Wall Scanning (The Critical Step): The most crucial step. Run the wall with a digital wall scanner to locate where live electrical cables and metal or plastic water pipes run. Mark their routes with a felt-tip pen. At these points, power tools are forbidden.
Room sealed with polythene, wall scanner marking cable routes

2. Choosing Tools: Hand vs Power

  • Hand Tools (Lump Hammer & Cold Chisel): Used for small patches or when approaching sensitive points (e.g. near consumer units or window/door frames).
  • Power Tools (SDS Rotary Hammer): The primary tool. A medium-weight SDS-Plus (or SDS-Max for large areas) rotary hammer is ideal.
  • The right attachment: Do NOT use a pointed chisel - it will punch through the brick. Use a wide spade chisel (4–8 cm).
SDS-Plus rotary hammer with 4-8cm wide spade chisel

3. The Demolition Technique (Step by Step)

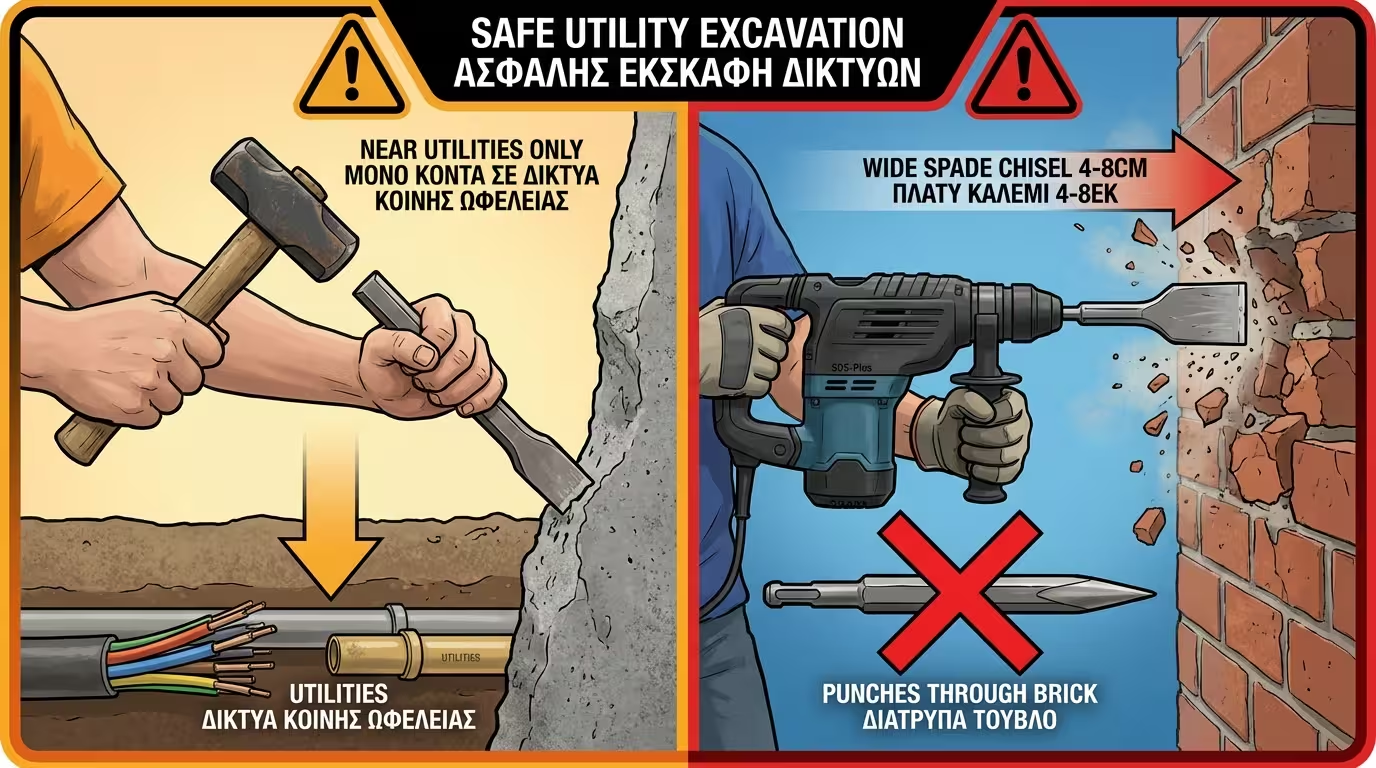
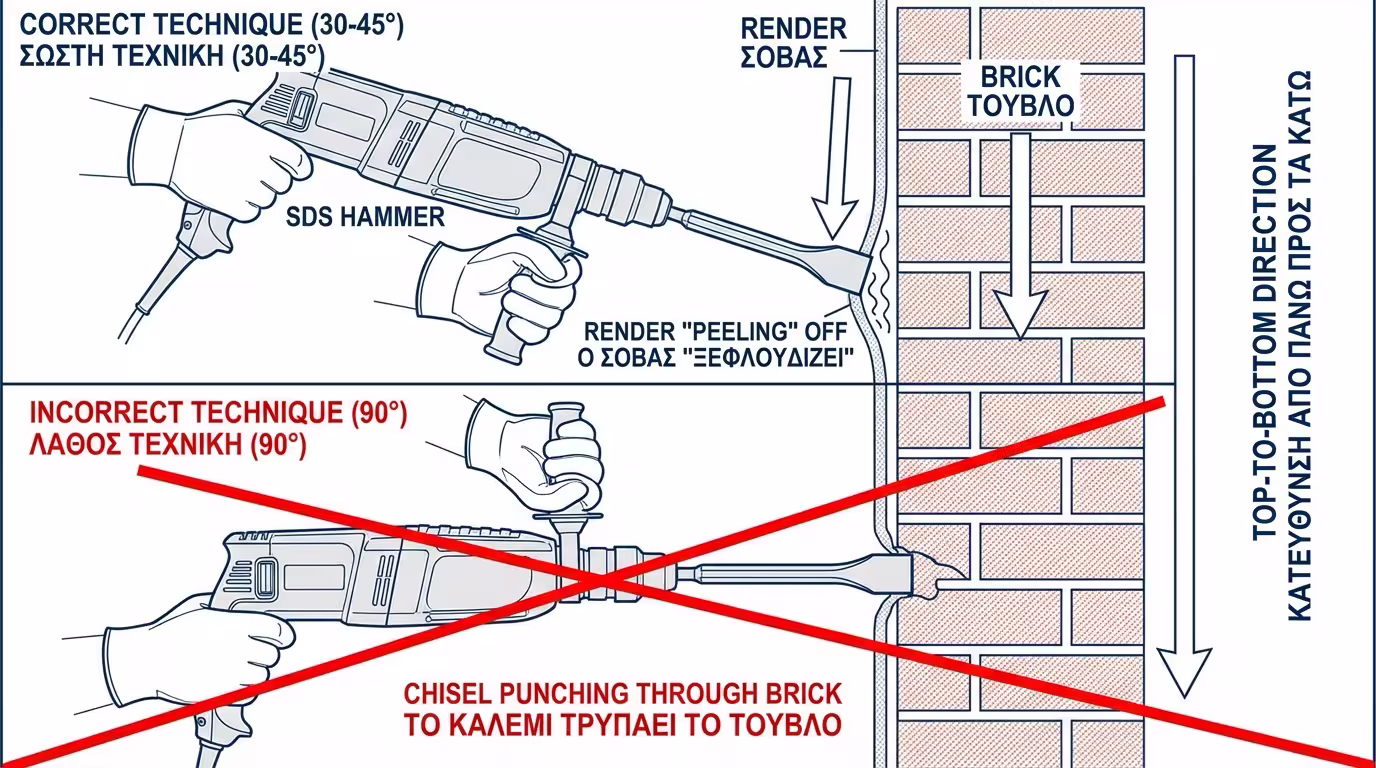
Demolition is NOT done by hitting the wall head-on. The goal is to "peel" the render:

  1. Top Down: Always start from the ceiling (or the highest point of the wall) and work downwards. This prevents upper chunks from falling on your head while you're working lower down.
  2. The Correct Angle (The Secret): Hold the rotary hammer at 30 to 45 degrees to the wall. Place the spade chisel tip between the render and the brick and let the percussive action "push" the render outward. If you hold the tool perpendicular (90°), you will punch through the brick.
  3. Caution Zones: When you approach the cable/pipe routes you marked, put down the rotary hammer and continue with a light hammer and hand chisel, tapping extremely carefully.
Hammer held at 30-45° - spade chisel peels render off between brick

4. Substrate Preparation (After Stripping)

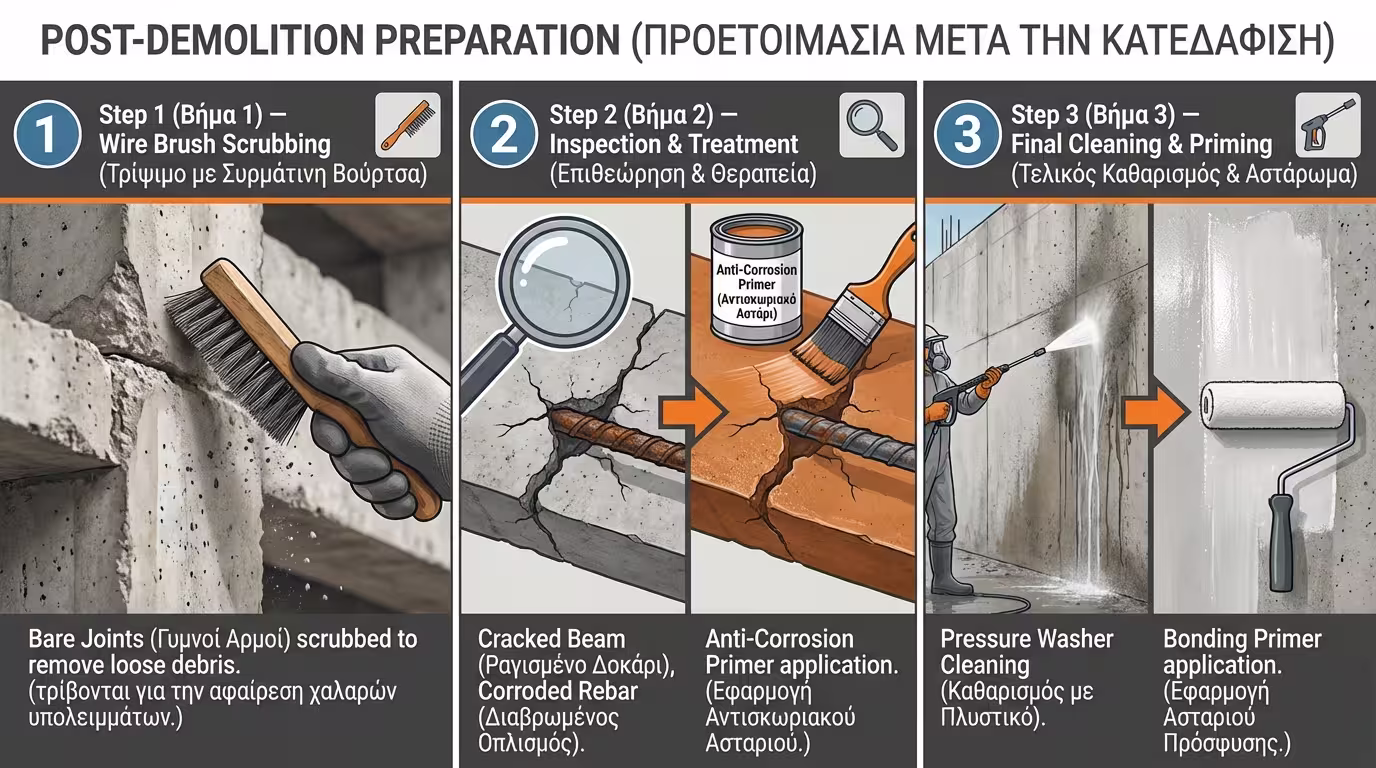
When the render is off, the exposed wall is in poor condition. For it to accept new render, it must be prepared rigorously:

  • Removing Loose Joints: Take a stiff wire brush (or a brush attachment on an angle grinder) and scrub the bare bricks. Remove dust and pieces of old bedding mortar that protrude or crumble from the joints.
  • Structural Inspection: Now that the wall is bare, check for cracks in beams and columns (the concrete structure). If rebar shows signs of corrosion (carbonation), it must be wire-brushed clean, coated with an anti-corrosion primer (red oxide or corrosion inhibitor), and covered with a resin-modified repair mortar.
  • Washing & Priming: Wash the wall with plenty of water (with a hose or pressure sprayer) to remove fine dust. Before applying the new "scratch coat" (the first coat of new render), ensure the wall is damp (not soaking) or apply an acrylic bonding primer.
Bare masonry after demolition: wire brushing joints, pressure washing, priming

Related Articles

Preview