Repainting Rendered Facades: How to Renew ETICS Safely

External Thermal Insulation (ETICS) is an excellent system, but its external pasty render does not stay new forever. After 10-15 years of exposure to the sun, rain and exhaust fumes, the surface loses its gloss, fades and may show small hairline cracks or mould stains.

The building is asking for a renewal. The trap, however, lies in the fact that an external insulation system is not painted like a conventional concrete wall. If you use the wrong paint, you can literally destroy the entire insulation. Let's see how you can refresh your home while protecting your investment.

1. The Great Danger: Trapping Moisture

As we have analysed in previous articles, the success of a facade lies in the word breathability. The wall must act like the GORE-TEX membrane in sportswear: keeping rainwater out, but allowing the home's water vapour to escape.

Consequences of wrong paint: Moisture entrapment and blistering

❌ The Wrong Material

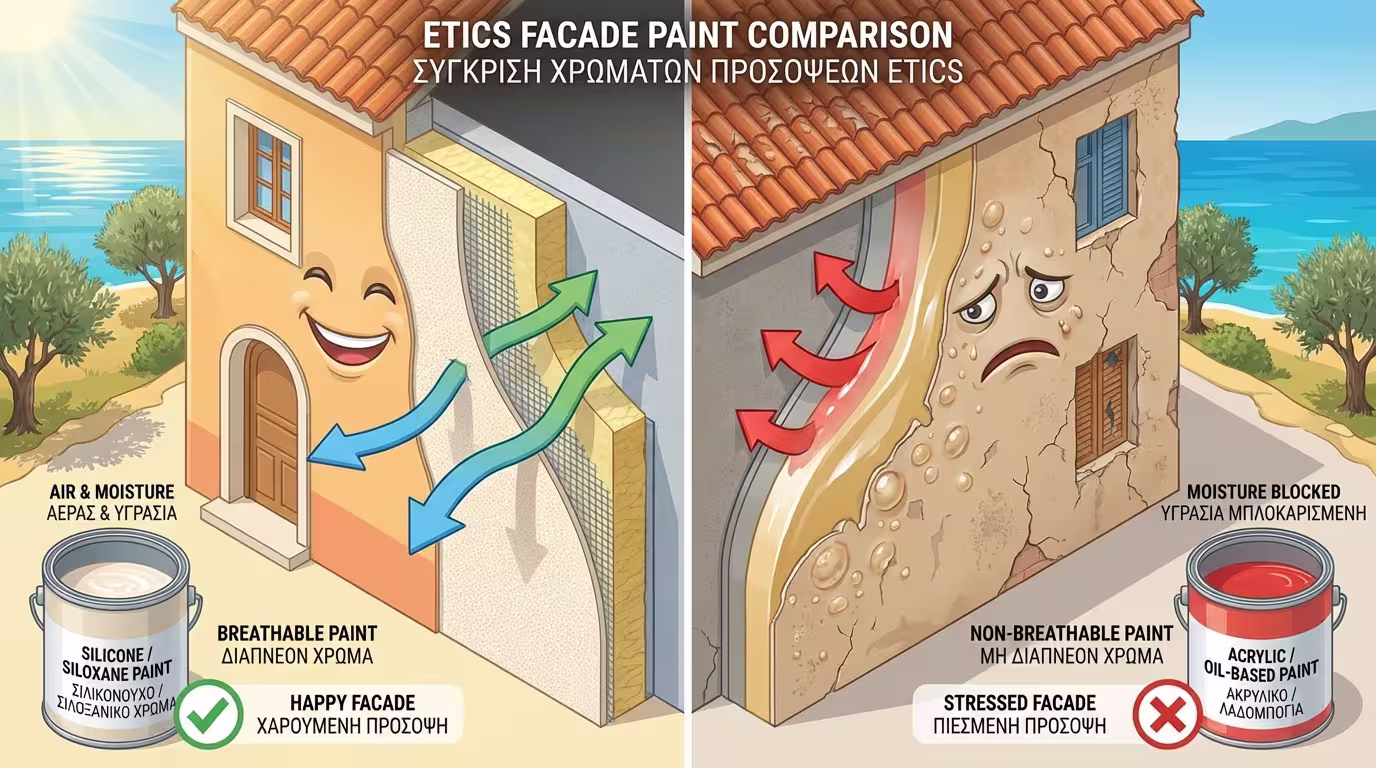
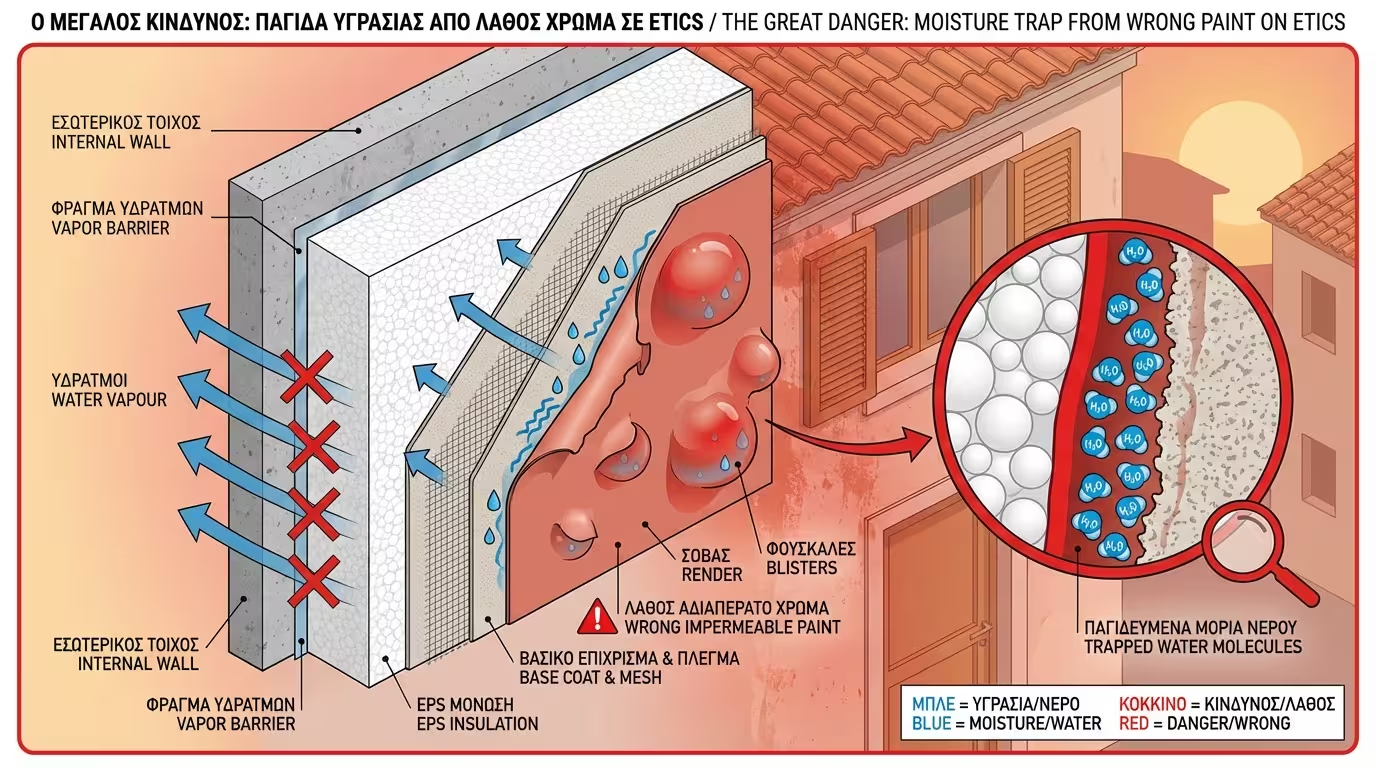
Many owners, in their attempt to "seal" the cracks, ask for their ETICS to be painted with heavy, 100% elastomeric insulating paints (the ones that turn into rubber) or with very cheap, thick acrylics. These paints have a very high Water Vapour Diffusion Resistance index (Sd).

⚠️ The Result (Blistering)

They create an impermeable membrane (like a plastic bag) over the render. When the moisture from the house tries to get out (or when the wall is heated by the sun), the vapour will be trapped behind the paint. The result? Nightmarish blisters (blistering) and complete peeling of the new paint in less than a year.

2. Which Paints Are Allowed for ETICS?

For repainting external insulation, the material must be certified for use over ETICS systems. The options are specific:

Allowed paints: Silicone and high-quality acrylics

🏆 1. Silicone Paints (The Ideal Choice)

They are the "king" of repainting. They offer unbeatable breathability, while simultaneously being extremely water-repellent (rainwater forms "beads" and rolls off, washing the wall - the so-called "Lotus effect").

🛡️ 2. 100% Acrylic Paints (High Quality)

A more economical, but reliable solution. They offer great elasticity and sun resistance, but lag slightly in breathability compared to silicone paints.

3. The Golden Rule of Colours (LRV)

If your old ETICS was light-coloured (e.g., beige), it is forbidden to repaint it in a very dark colour (e.g., anthracite or black)! Dark colours absorb huge amounts of solar radiation. The facade temperature will skyrocket to 75°C-80°C, melting the polystyrene insulation boards internally and breaking the render.

Light Reflectance Value (LRV): light colours safe, dark colours dangerous
📐 Rule: The paint must have a Light Reflectance Value (LRV) greater than 25%, unless you use specialised "Cool Colors" technology paints.

4. The Repainting Process (Step-by-Step)

4-step process: Cleaning, Crack repair, Priming, Painting

It's not enough to just open the tin of paint. The substrate needs preparation:

1️⃣ Step 1: Gentle Cleaning and Disinfection

The system has gathered dust and maybe fungi (green algae). Wash the surface with water under low pressure (do not use a strong pressure washer because you will cut the old render). If there are fungi, spray a special biocide / fungicidal liquid, let it act and rinse. Let the wall dry completely.

2️⃣ Step 2: Micro-Crack Repair

Inspect thoroughly for cracks. Do not use standard filler! Hairline cracks in ETICS must be filled with exterior elastomeric polyurethane or acrylic mastic.

3️⃣ Step 3: Proper Priming (The Paint's "Glue")

The old, weathered render has become porous (friable). It needs to "bind" again before accepting the new paint. Use a micromolecular acrylic or silicone primer (water or solvent based, depending on the condition). The primer will penetrate deeply, stabilise the chalking (the dust) and create the perfect bonding base.

4️⃣ Step 4: Painting

Apply the certified silicone or acrylic paint in two coats, strictly observing the drying times specified by the manufacturer between coats. Using a roller with the correct pile length (so the paint gets into the "rough" texture of the render) is essential.

Related Articles

Preview