
1️⃣ Expose and Clean
With a chisel, dig the concrete around the corroded rebar. You must expose the steel fully, creating a void behind it too, so the new material can wrap around it circumferentially.
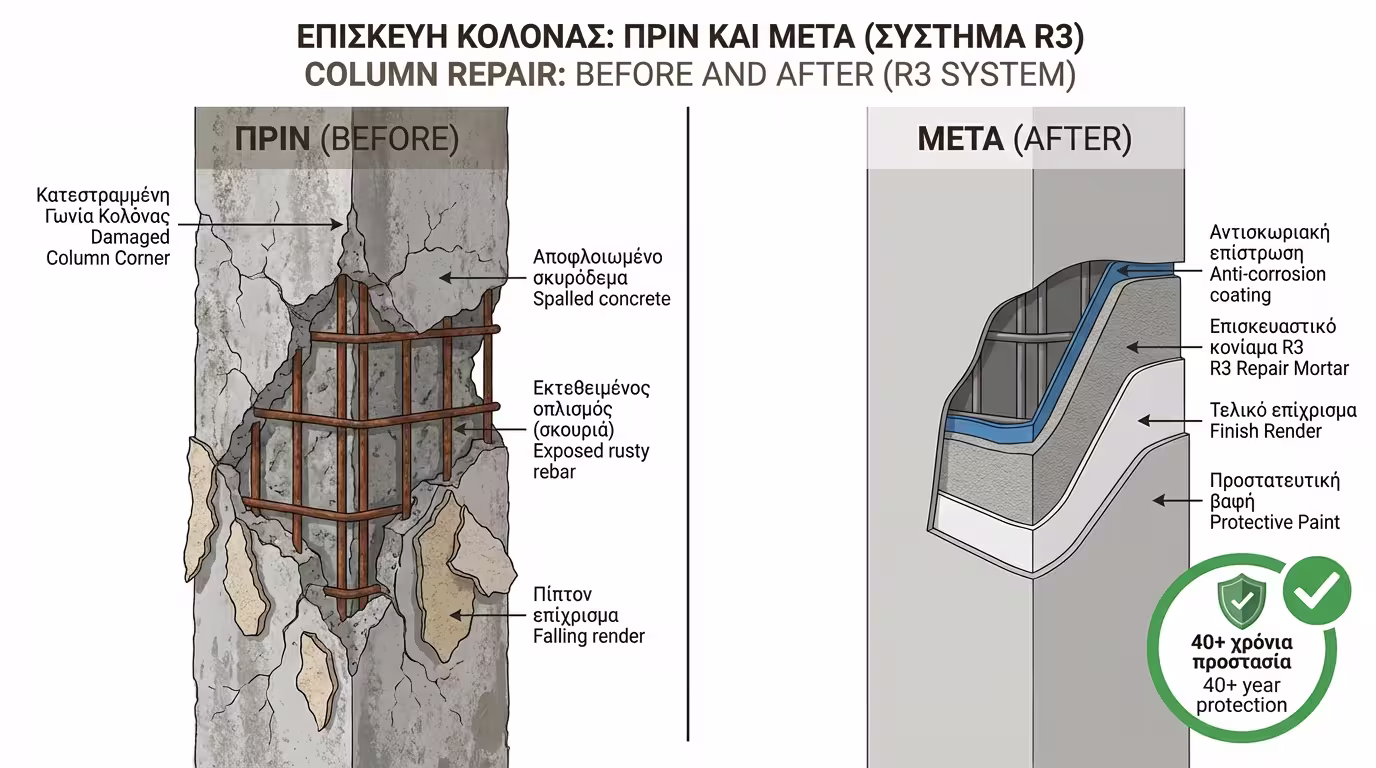
It is perhaps the most frightening sight during any renovation: you're stripping old, blistered render from a corner of the house and, along with it, a large chunk of concrete breaks away. Deep in the cavity, the column's reinforcing bars are revealed, coated in a thick layer of brown rust.
At this point, you have crossed the line of cosmetic repair and entered the realm of structural restoration. Filling this hole with ordinary cement render, plaster or acrylic filler is simply criminal. Load-bearing elements (columns, beams, slabs) carry the weight of the building and require materials with immense mechanical strength. Let's see how to properly address this damage using certified repair mortars.
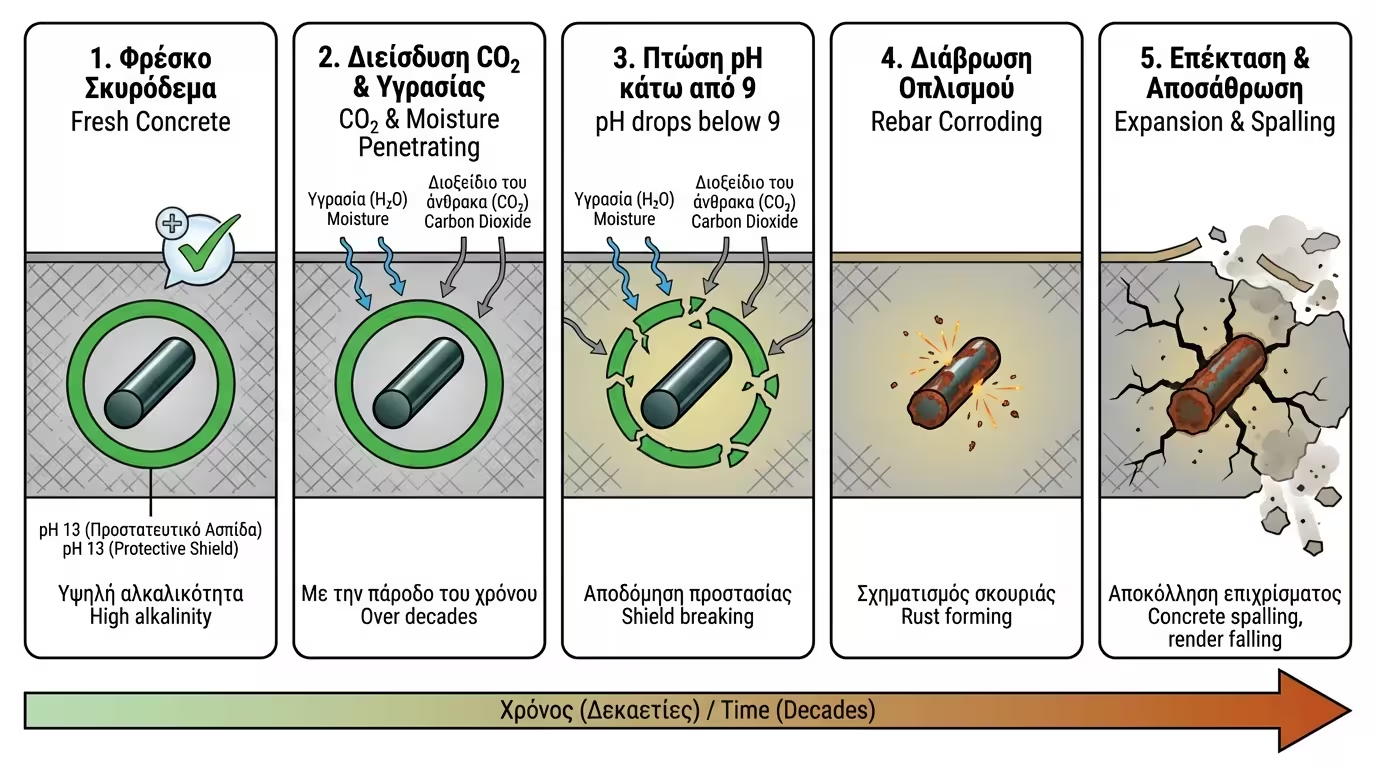
Concrete is inherently highly alkaline (pH around 13). This alkalinity acts as a shield that protects the steel reinforcement (rebar) from rust.
Over the decades, atmospheric carbon dioxide (CO2) and moisture penetrate the concrete's pores, gradually lowering its pH. This is called carbonation. When the pH drops below 9, the shield breaks. The steel comes into contact with oxygen and water, and begins to corrode (oxidise).
Rust occupies a much greater volume than clean steel. It expands with tremendous force, shatters the concrete cover above it, and "blasts" the render off.
To repair this damage, you must use materials certified to the European standard EN 1504-3. These materials are reinforced with resins, special admixtures and often fibres (fibre-reinforced), so they don't shrink and offer strengths equal to or greater than the concrete itself.
They are divided into 4 categories (R-Classes), depending on their mechanical strength:
| Class (Category) | Repair Type | Compressive Strength | Where Used |
|---|---|---|---|
| R1 | Non-Structural (Cosmetic) | ≥ 10 MPa | Surface fills, pores, minor blemishes with no exposed rebar. |
| R2 | Non-Structural | ≥ 15 MPa | Local patches on non-load-bearing elements, wall skimming. |
| R3 | Structural (Load-Bearing Elements) | ≥ 25 MPa | The ideal choice for homes. Repairing columns, beams, balconies. |
| R4 | High-Performance Structural | ≥ 45 MPa | Bridges, industrial floors, harbours, heavy-duty infrastructure. |
💡 The Selection Rule: If you can see exposed rebar, R1 and R2 are banned. You must use material of category R3 or R4.
The process does not tolerate shortcuts. If you simply trowel mortar over the rust, it will fall off again within a year.
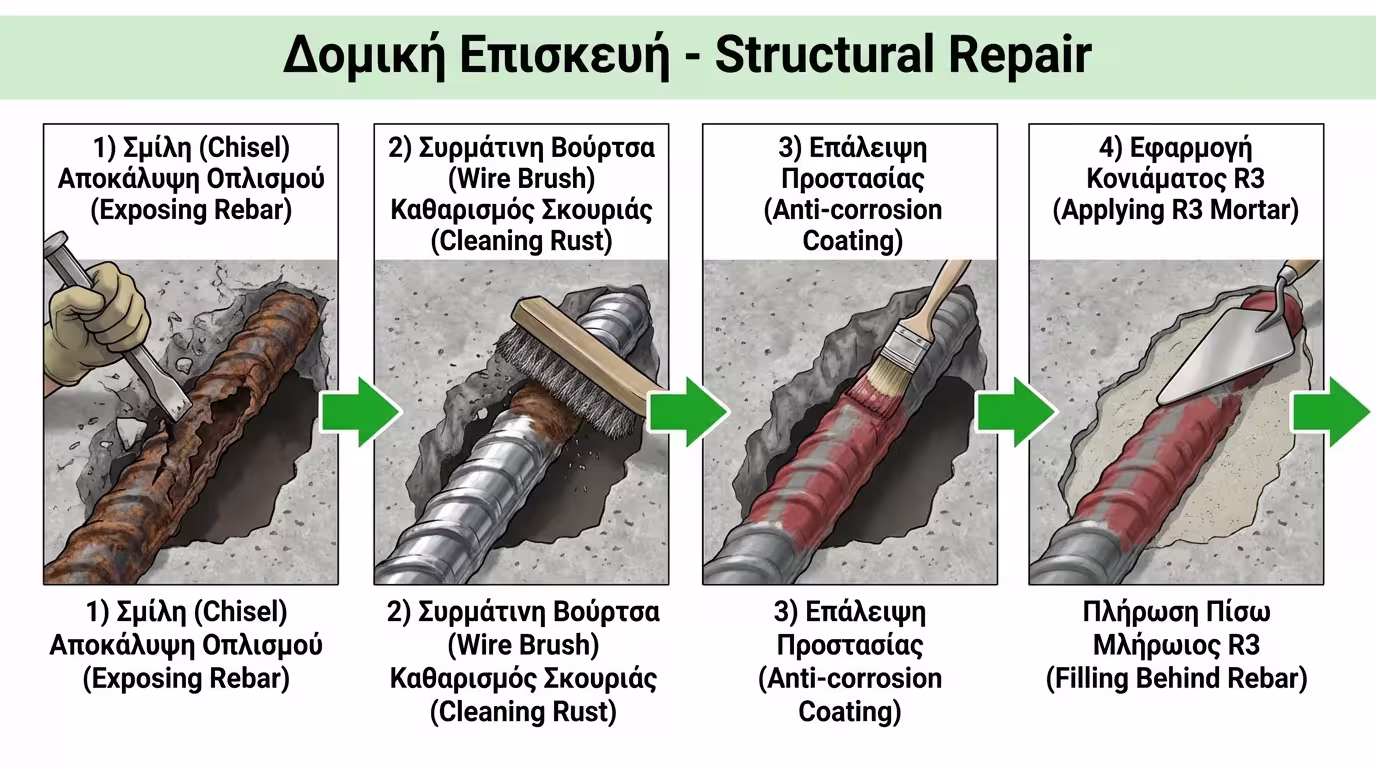
With a chisel, dig the concrete around the corroded rebar. You must expose the steel fully, creating a void behind it too, so the new material can wrap around it circumferentially.
Take a wire brush (hand or angle-grinder attachment) and scrub the steel until every trace of the brown crust is gone and the metal shines. Dust off thoroughly.
Apply a specialist cementitious corrosion inhibitor (anti-corrosion coating) onto the clean steel. This material (which usually resembles thick red or grey paint) will act as a new chemical shield, halting future oxidation. Allow it to dry.
Lightly wet the old concrete. Mix the R3 or R4 repair mortar with water (exactly as stated on the packaging) and press it firmly into the cavity with a trowel. Make sure to fill the void behind the rebar.
Once cured, you can lightly smooth it with a damp sponge. On top of this robust repair, you can now safely apply your final render and paint.
Return to category.
Go to categoryReturn to the central guide.
Go to guide