💧 Moisture & Salts (The No.1 Enemy)
As we saw in a previous chapter, if water gets behind the render (from a leak or rising damp), the crystallising salts expand and "push" the render outwards with immense force, destroying the bond.
One of the most dangerous situations in construction is when a structural element "looks" solid, but in reality, it isn't. A freshly painted, smooth wall without any visible cracks can hide a bomb behind it... ready to fall on your head.
This is the phenomenon of "hollow" render. It means that the render has completely detached from the substrate (the brick or concrete) but remains in place, held only by its edges, its internal mesh, or... by a miracle. Let's see how you can detect it before it collapses.
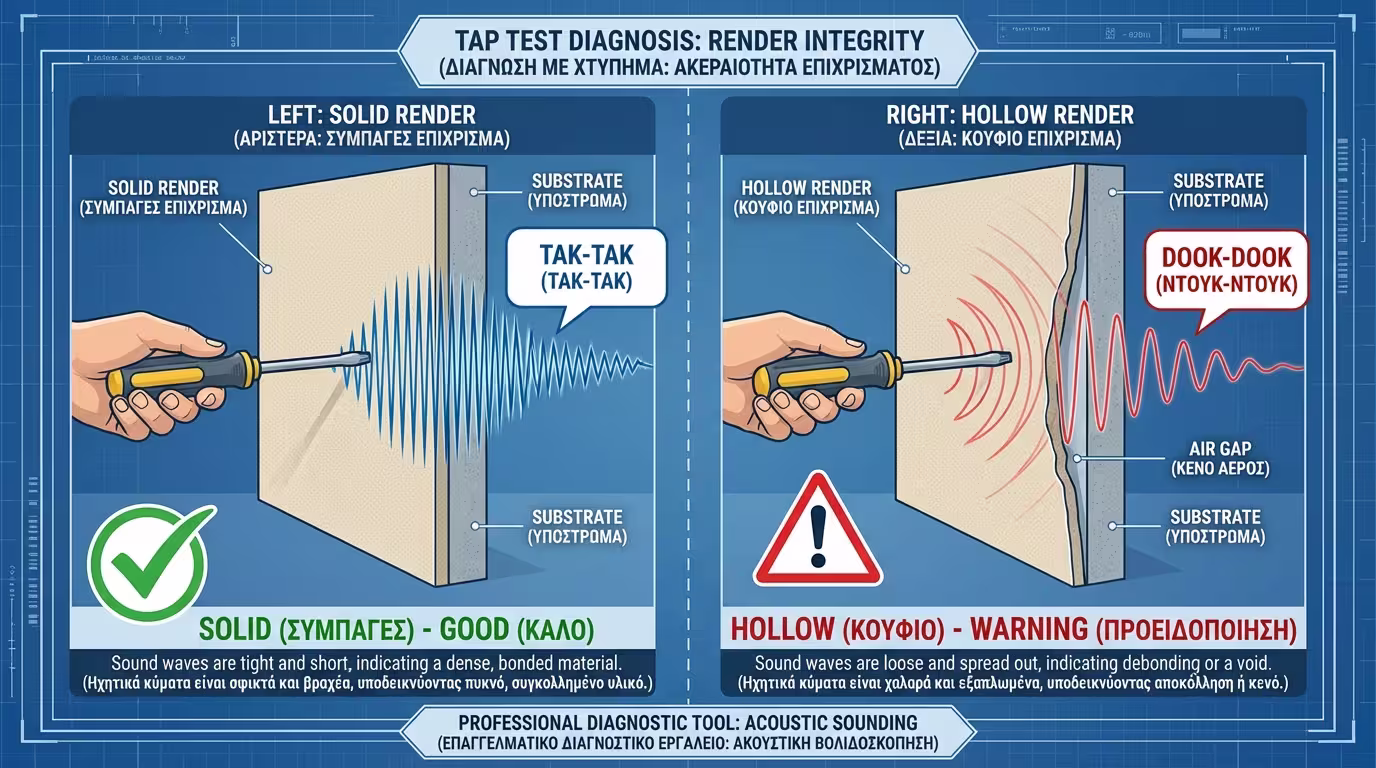
Professional engineers and experienced contractors never rely solely on their eyes to judge the condition of a wall. They rely on their hearing.
The hollow sound test (sounding) is the most reliable (and free) diagnostic method:
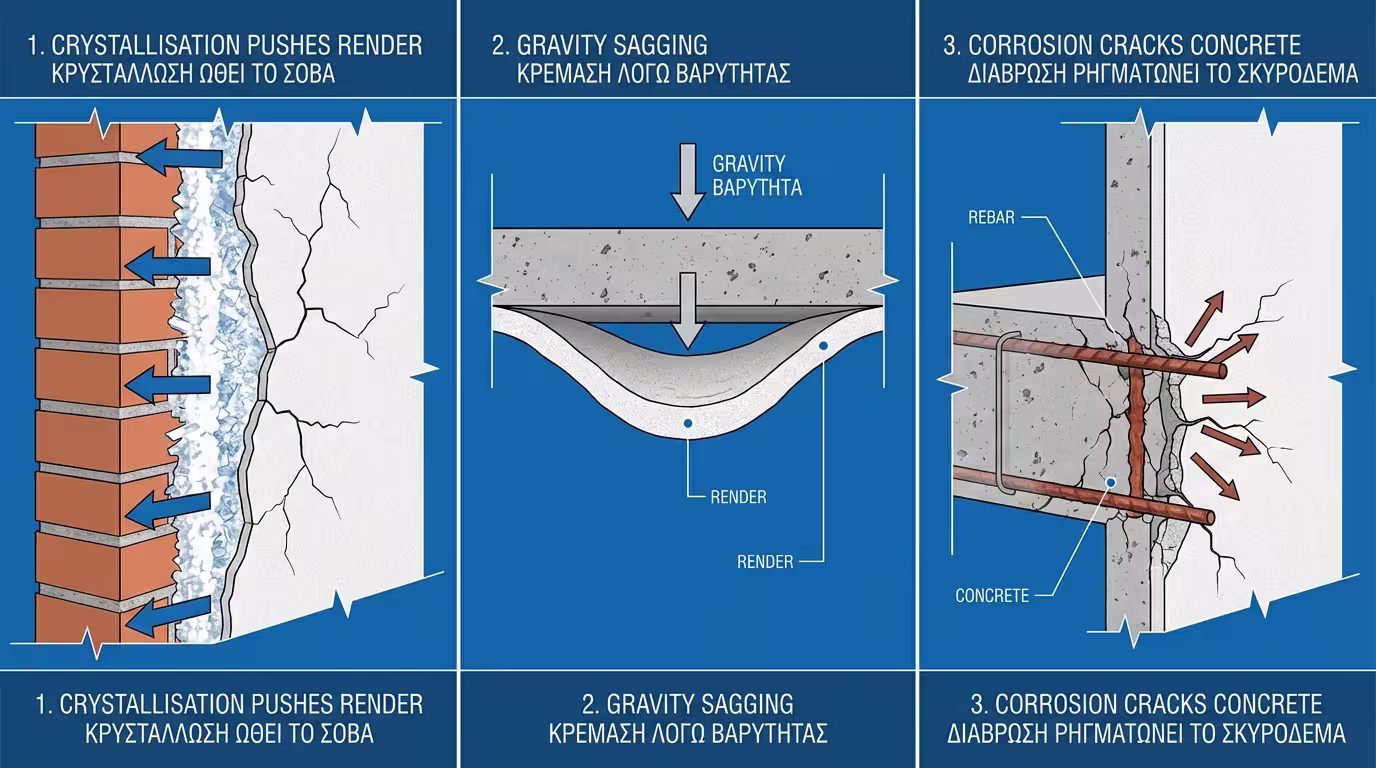
Delamination doesn't happen without a reason. Most of the time, it's due to failures that occurred years ago, during construction:
As we saw in a previous chapter, if water gets behind the render (from a leak or rising damp), the crystallising salts expand and "push" the render outwards with immense force, destroying the bond.
If the plasterer didn't apply a quartz primer (Betokontakt) to the smooth concrete of the ceiling before applying the mix, gravity will gradually overcome the chemical adhesion. The render will "belly out" and go hollow.
If moisture reaches the reinforcing steel of the column, it rusts. Rust has a larger volume than steel, so it "expands" and throws off the render (and the concrete cover) above it. If you hear a hollow sound on a column or beam, the problem is serious.
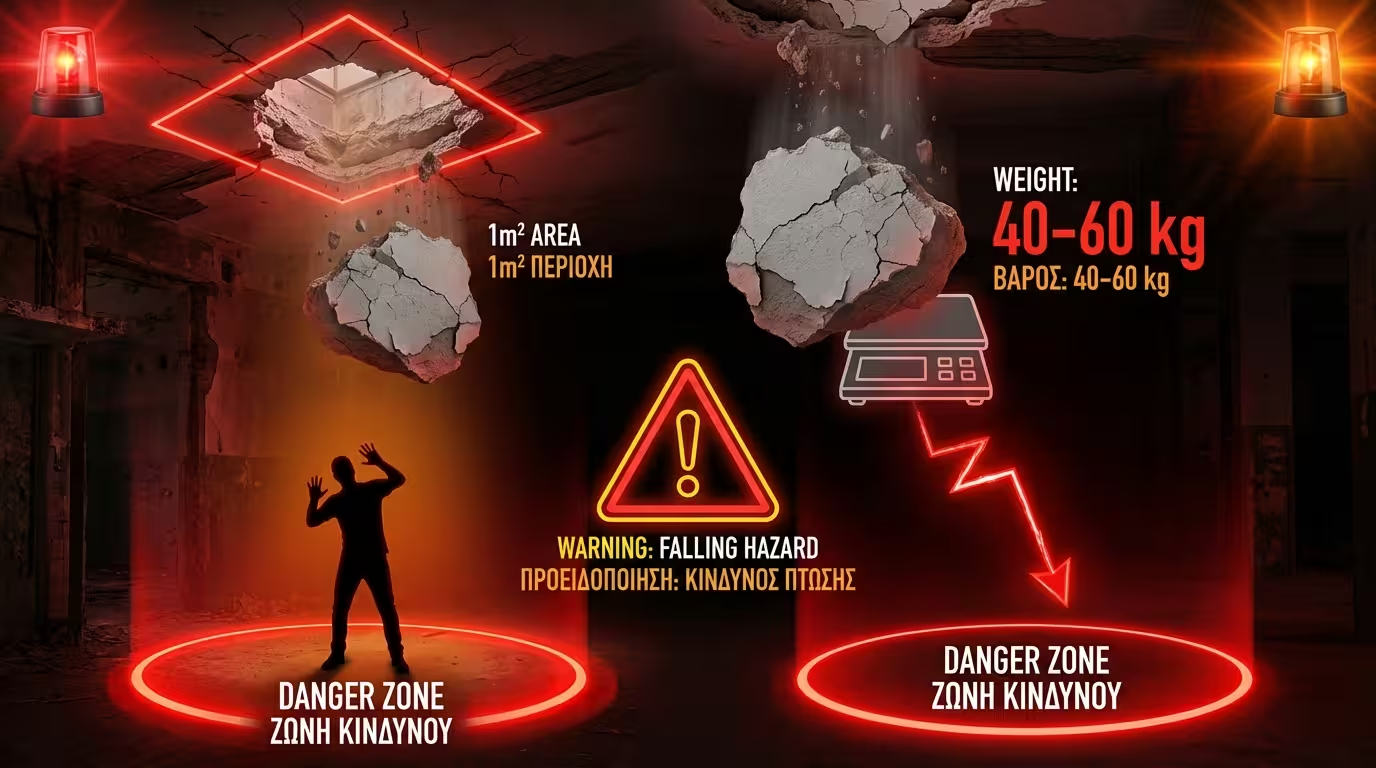
🚨 The Golden Rule of Safety: DO NOT ignore hollow render on the ceiling!
One square metre of traditional render 2-3 centimetres thick weighs about 40 to 60 kg. If this weight detaches and falls, it can cause a fatal accident.
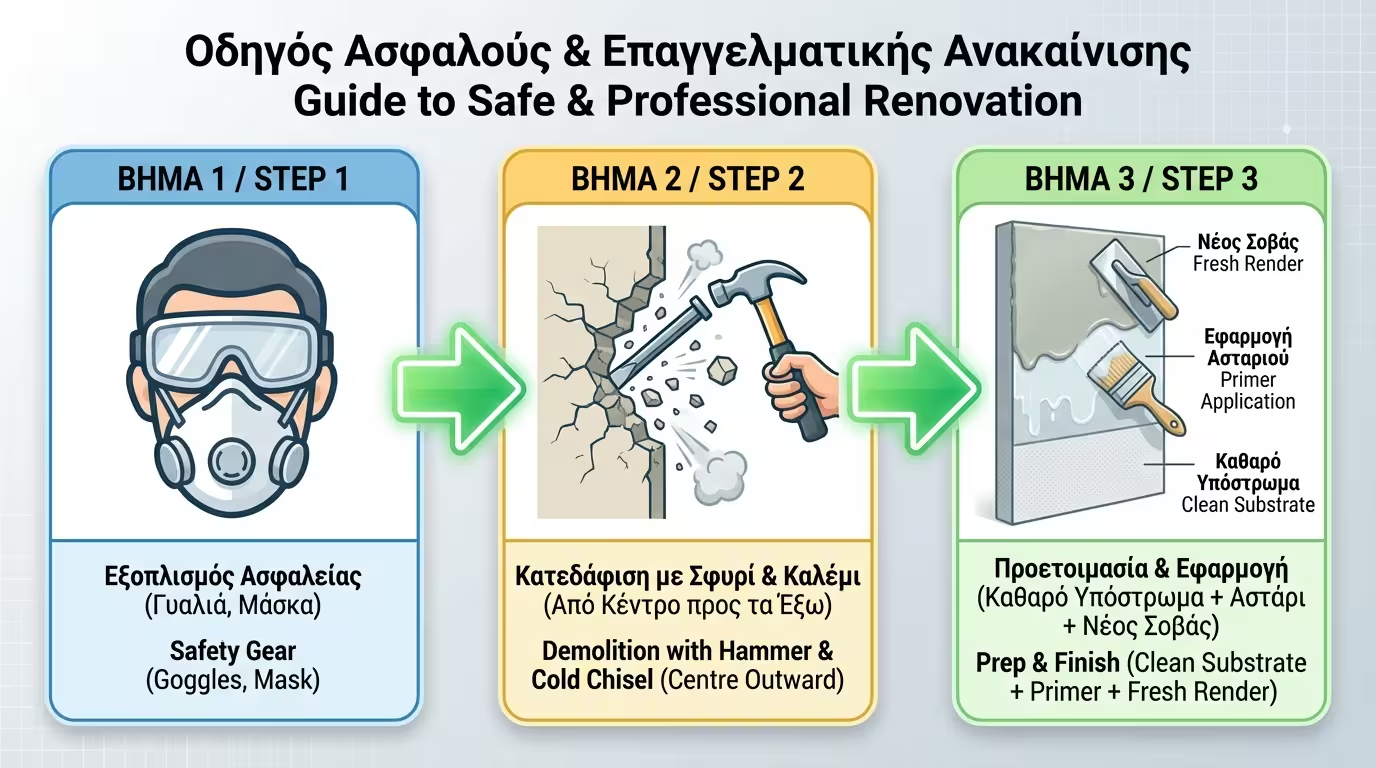
The only safe and permanent solution is radical (surgical) removal.
Wear safety goggles and a dust mask.
Take a hammer and a cold chisel (or a bricklayer's hammer) and start breaking the hollow render from its centre outwards.
Continue demolishing until you reach the points where the render is "petrified" onto the wall (doesn't come off with blows and sounds solid).
Thoroughly clean the dust from the bare brick or concrete, apply ample primer, and apply a fresh mix, following the steps of the DIY repair we analysed in a previous guide.
Return to category.
Go to categoryReturn to the central guide.
Go to guide