Reinforcement Mesh in Repairing: The Definitive Cure for Cracks that "Persist"

Is there anything worse than spotting a crack in your living room? Yes - watching the exact same crack reopen just months after you paid to have it repaired and repainted.

When a crack persistently reappears in the exact same spot, it is sending us a clear message: the crack is active. The building at that point "moves" slightly (due to contractions-expansions or junctions of different materials) and the forces that develop are greater than the strength of simple filler. The solution is not to apply more filler, but to "arm" your repair using reinforcement mesh (fibreglass mesh).

What Is Fibreglass Mesh and How Does It Work?

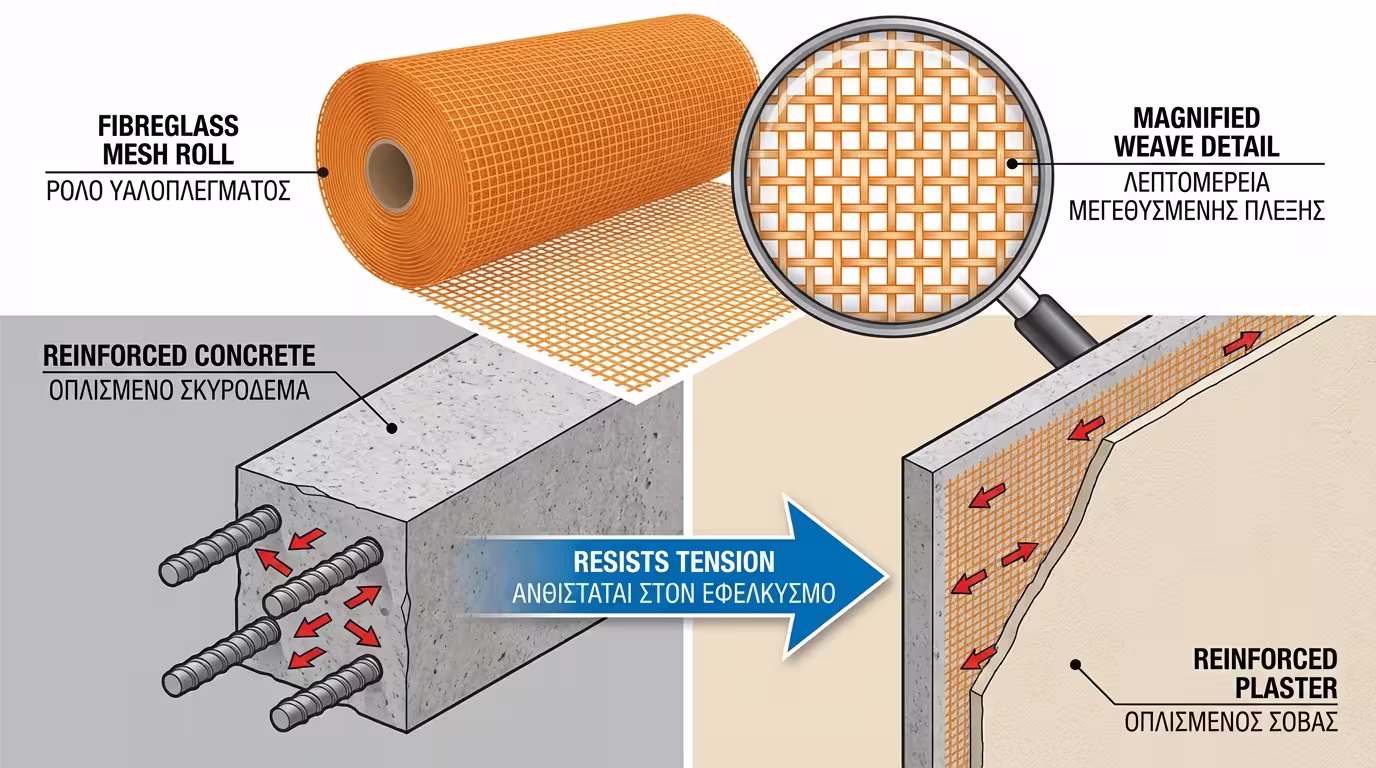
The reinforcement mesh (known on construction sites as "the net") is a woven grid of glass fibres, usually coated with special resins to resist the alkalis of cement.

Its function is supremely simple yet lifesaving: it does for the render exactly what iron does for concrete (reinforced concrete). On its own, the render or filler has enormous resistance to compression, but zero resistance to "tension" (pulling). When the wall is pulled, the filler tears. Fibreglass mesh, being extremely resistant to pulling, absorbs these tensions and keeps the repair united, preventing the creation of a new crack.

Fibreglass mesh roll with magnified weave, analogy: rebar in concrete = mesh in render

When Is Mesh Absolutely Essential?

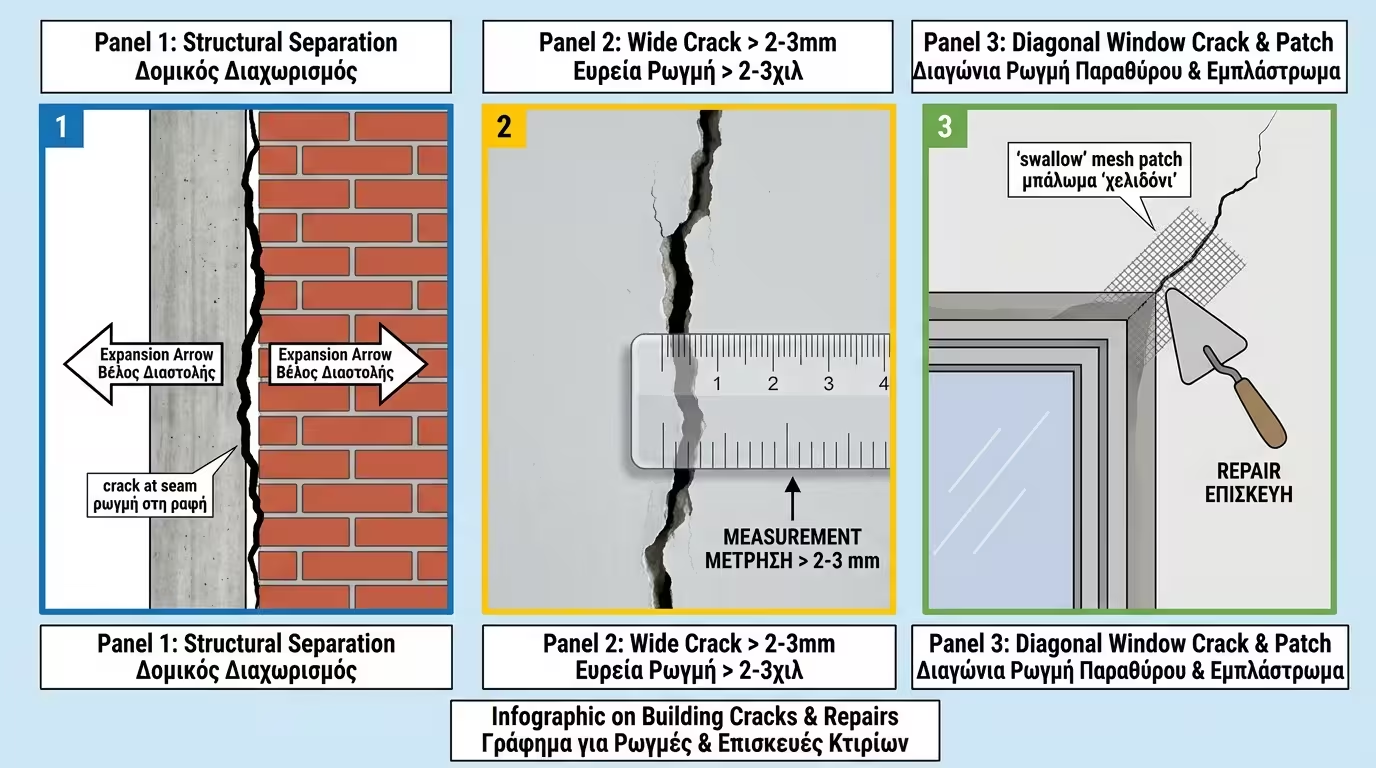
Not all cracks need net. However, in the following 3 cases, its use is a one-way street:

  1. At Junctions of Different Materials: If the crack is located exactly at the point where the column (concrete) meets the wall (brick) or where the wall meets the plasterboard. The different materials contract and expand at a different rate, always tearing the render at that seam.
  2. On Broad (Structural) Cracks: If the crack is thicker than 2-3 mm and is quite deep.
  3. Around Frames and Windows: The diagonal cracks starting from the corners of aluminium frames (due to the vibrations from opening and closing) only stop definitively by placing mesh (the so called "swallows").
3 scenarios: concrete-brick junction, wide crack >2-3mm, diagonal crack from window corner

The Biggest Mistake: The "Sandwich" Application

Buying a fibreglass mesh tape is not enough. The secret to success (and the point where many amateurs make a mistake) is the way the net will be trapped inside the material.

WRONG technique: self-adhesive mesh on dry dusty wall, filler on top only, air gap behind
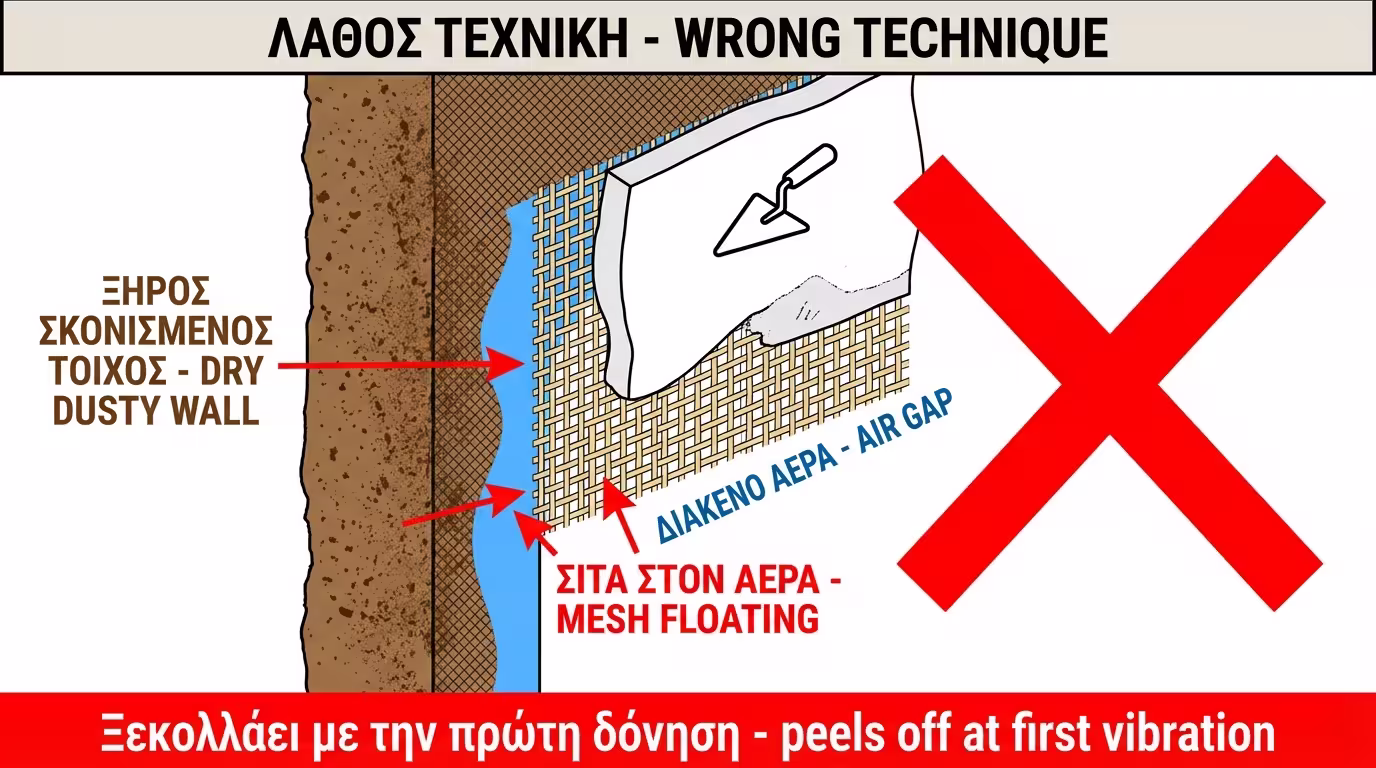
The Classic Mistake: Many take the self-adhesive net tape, stick it directly onto the dry, dusty wall (over the crack) and then pass the filler over it. This is wrong! The net remains in the air (on its back side) and the filler simply covers it superficially. With the first vibration, the whole "patch" will peel off like a sticker.

The Correct Installation Procedure (Step-by-Step)

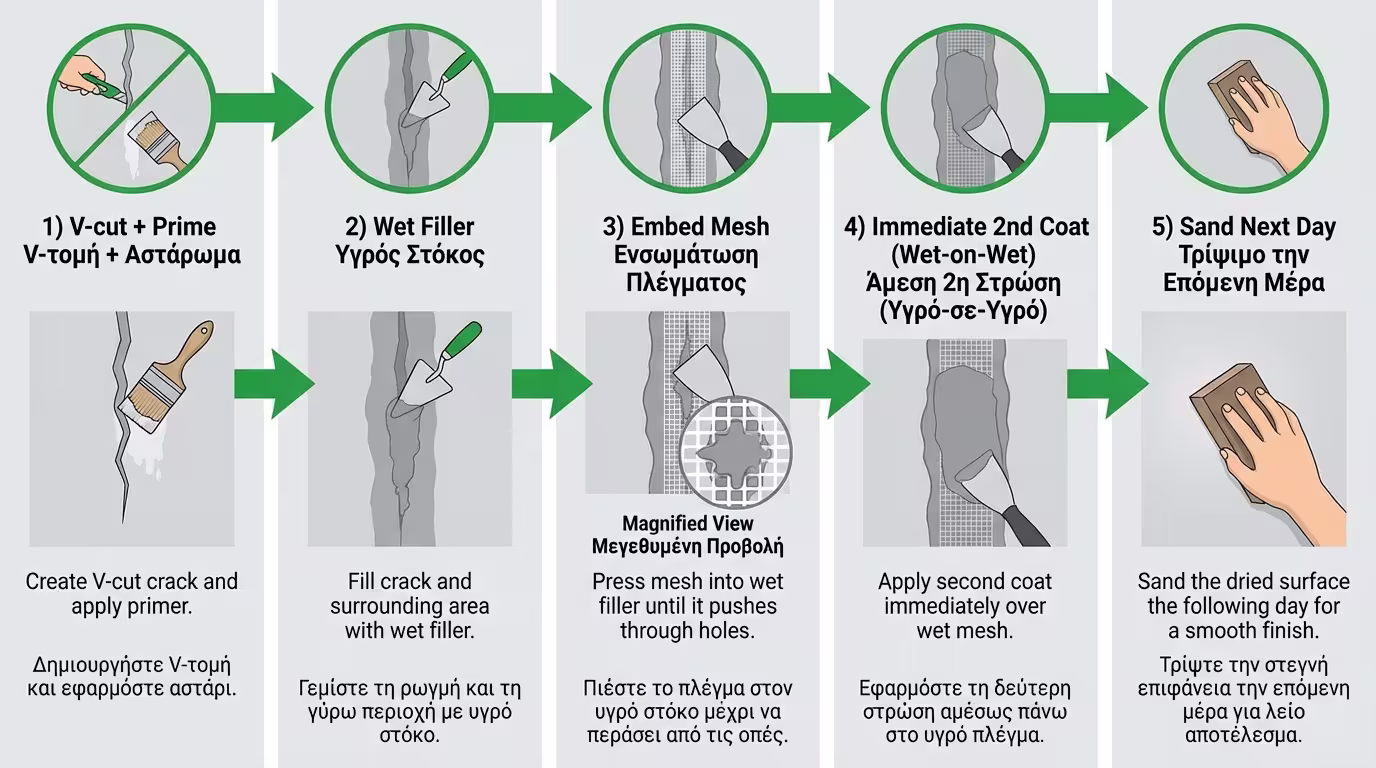
For the mesh to work, it must "swim" inside the repair material (usually in the outer 1/3 of its thickness).

  1. Preparation: Open the crack in a "V" shape, clean it well from the dust and prime it, as we described in the previous article. Cut your net into strips that cover the crack and protrude at least 5 centimetres to the right and left of it.
  2. The First Coat (The Base): Apply the repair material (acrylic filler or repair mortar) inside the crack and in a strip around it. Do not let it dry.
  3. The Trapping (The "Sinking"): Take the cut strip of fibreglass mesh and rest it on the fresh filler. With your spatula, press the net so that it sinks into the fresh material. The material must pass through the holes of the mesh. The net is now "trapped".
  4. The Second Coat (The Coating): Immediately (while the materials are still wet - "wet on wet" technique), pass a second, thin layer of filler over the net to cover it completely. "Pull" well with the spatula to make the surface smooth.
  5. Sanding & Erasing: When completely dry (the next day), sand the edges with fine sandpaper so that there is no visible bump on the wall, prime and paint.
5-step correct embedding: V-cut, wet filler, mesh pressed in, 2nd coat wet-on-wet, sand

Related Articles

Preview