1. Dusting
Take a dry, stiff brush (or a small broom) and vigorously clean the inside of the "V". You can also use your vacuum cleaner to suck up the stubborn dust.
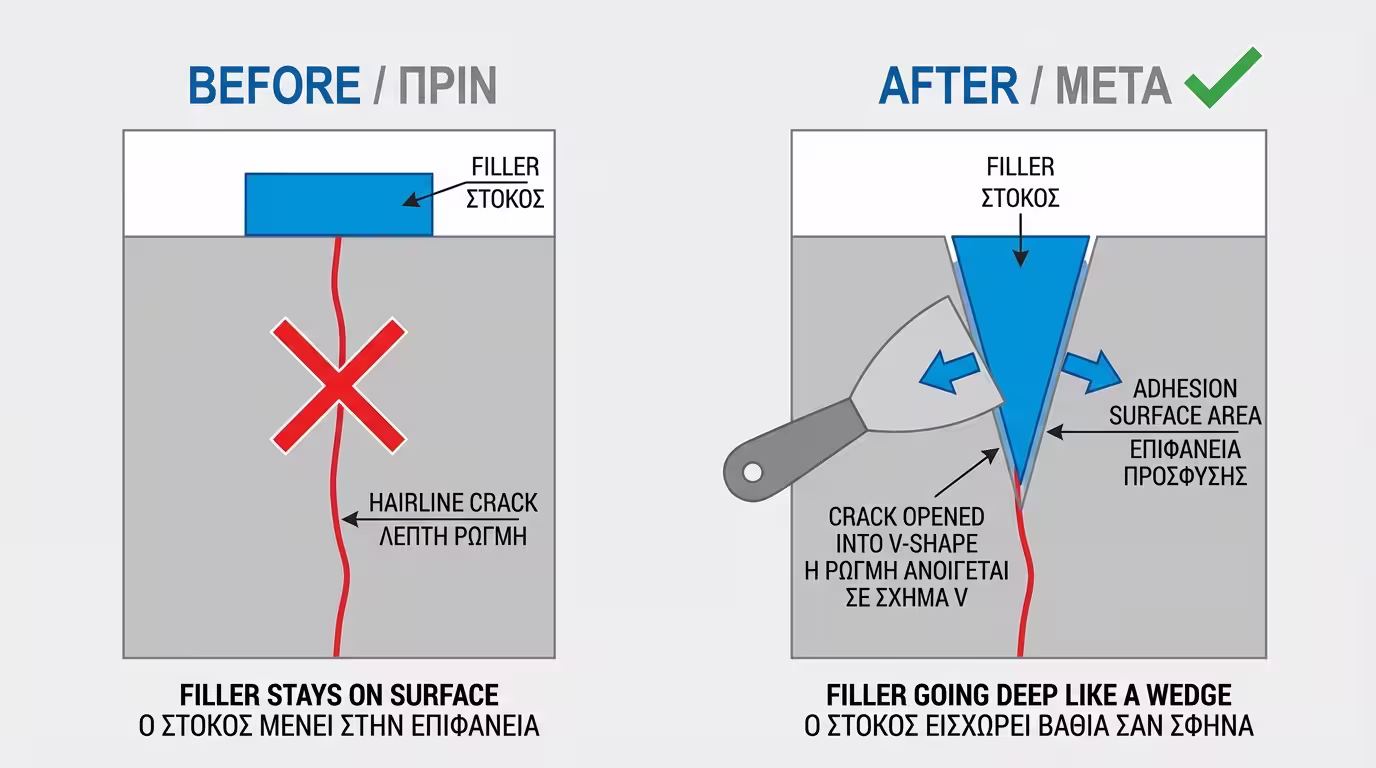
We have all done it: we see a crack in the wall, we take some ready-made filler, we cover it superficially, we apply a coat of paint and we think we are done. A few months later (or with the first change of weather), the crack returns exactly to the same spot, "mocking" our effort.
The truth is raw, but it must be told: you cannot repair a crack if you don't enlarge it first. Surface skim-coating offers no mechanical strength. For the wall to "bind" and the crack not to reopen, you must follow the strict procedure of professionals. Let's look at the 3 basic steps.
It sounds paradoxical to have to damage your wall in order to fix it, but it is the most critical step. Cracks are usually very narrow at the surface. If you try to put material inside a hairline crack, the filler will only stay on the outside.
This "V" shape creates a huge bonding surface (a larger "belly") so that the repair material can enter deep inside, act like a wedge and hook firmly on the left and right.
After you open the crack, its interior will be full of render debris and fine dust. As we have said, dust is the biggest enemy of adhesion.
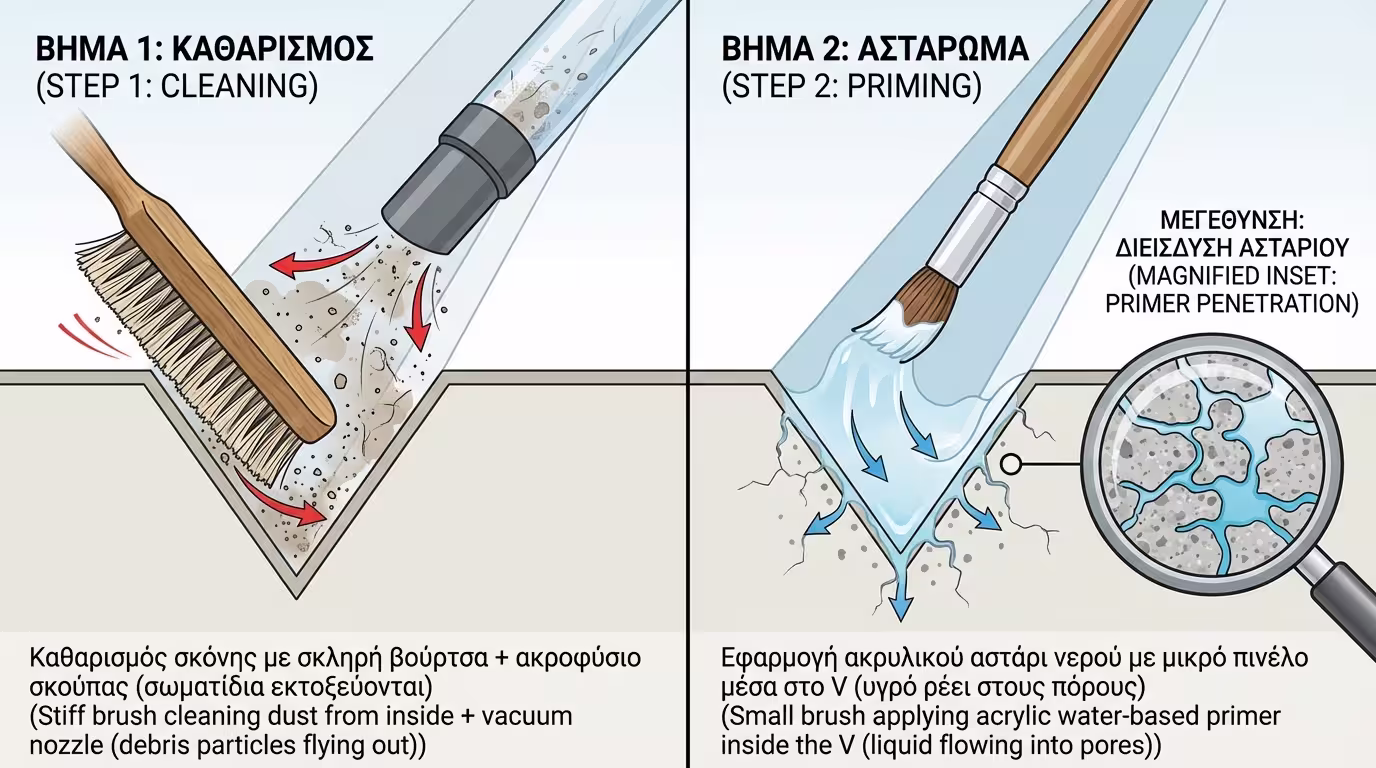
Take a dry, stiff brush (or a small broom) and vigorously clean the inside of the "V". You can also use your vacuum cleaner to suck up the stubborn dust.
Do not put the filler directly onto the dry, bare render. The old render will immediately absorb the filler's moisture, drying it out before it has time to stick. With a small brush, coat the inside of the crack with an acrylic water-based primer (or at least wet it lightly with a damp sponge). Let it dry according to the manufacturer's instructions.
The material you choose makes all the difference. Do not use simple skim-coat filler (putty) or plaster for moving (active) cracks, because they dry, become like "stone" and break.
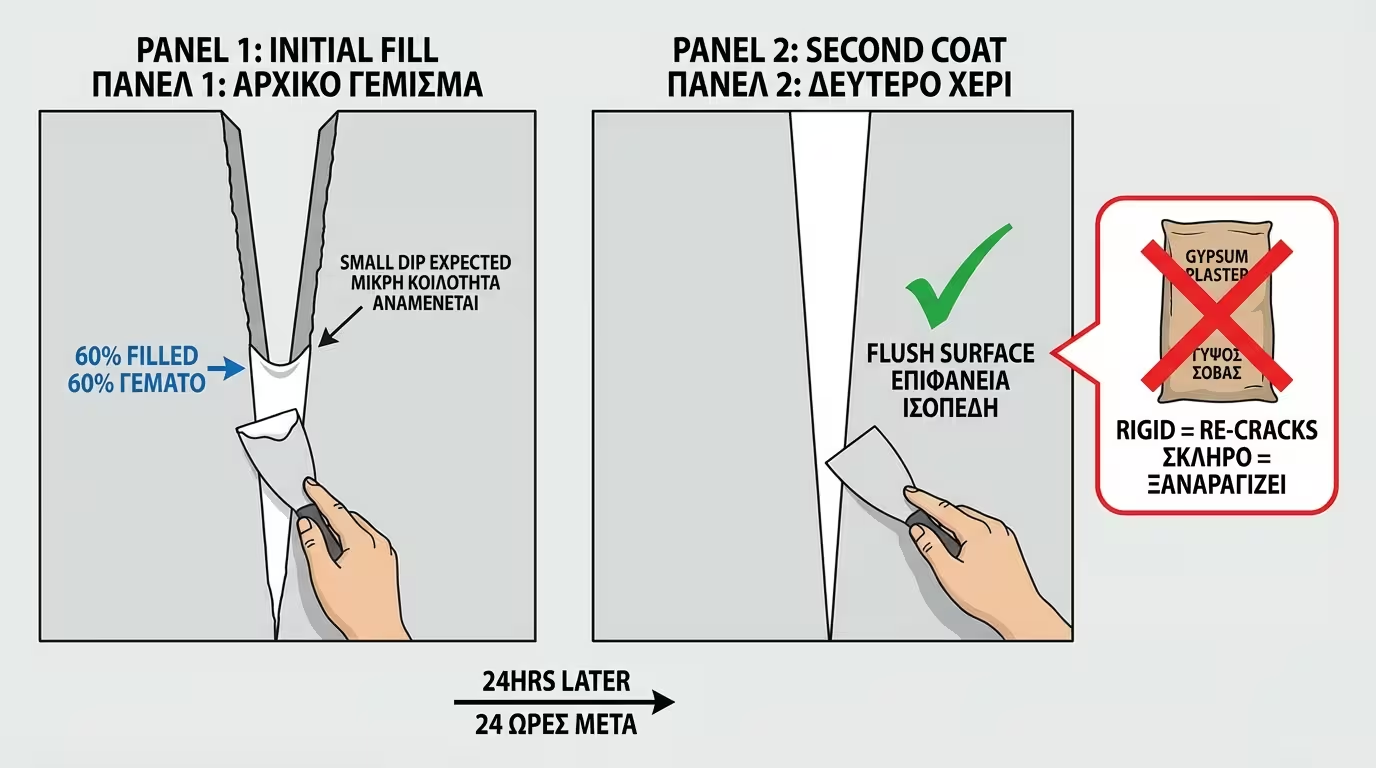
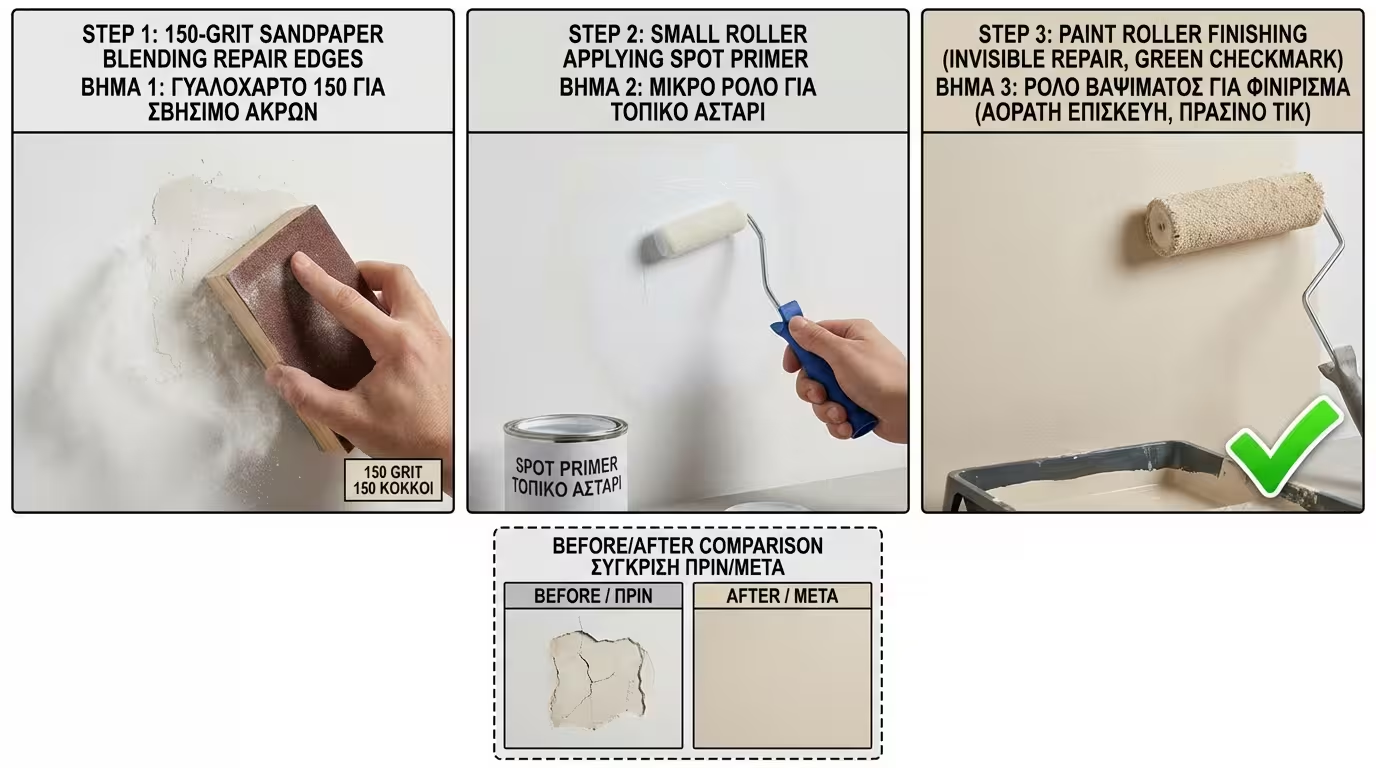
After the repair material has fully dried, you will notice that its surface is slightly rough or protrudes slightly.
Return to category.
Go to categoryReturn to the central guide.
Go to guide