🔧 Trowel
The classic triangular tool for scooping and throwing mortar.
Had a plumbing leak, ran new cables, or simply had a chunk of old render come away? Calling a professional for a half-square-metre patch often costs disproportionately more than it should, and the wait can take weeks. The good news? With the right tools, a bag of ready-mix render and a bit of patience, you can close the hole and restore the wall to its original state entirely on your own. Follow this practical step-by-step DIY guide and save both time and money.
Before you get your hands dirty, make sure you have the basic equipment nearby. You don't need expensive tools - just these:
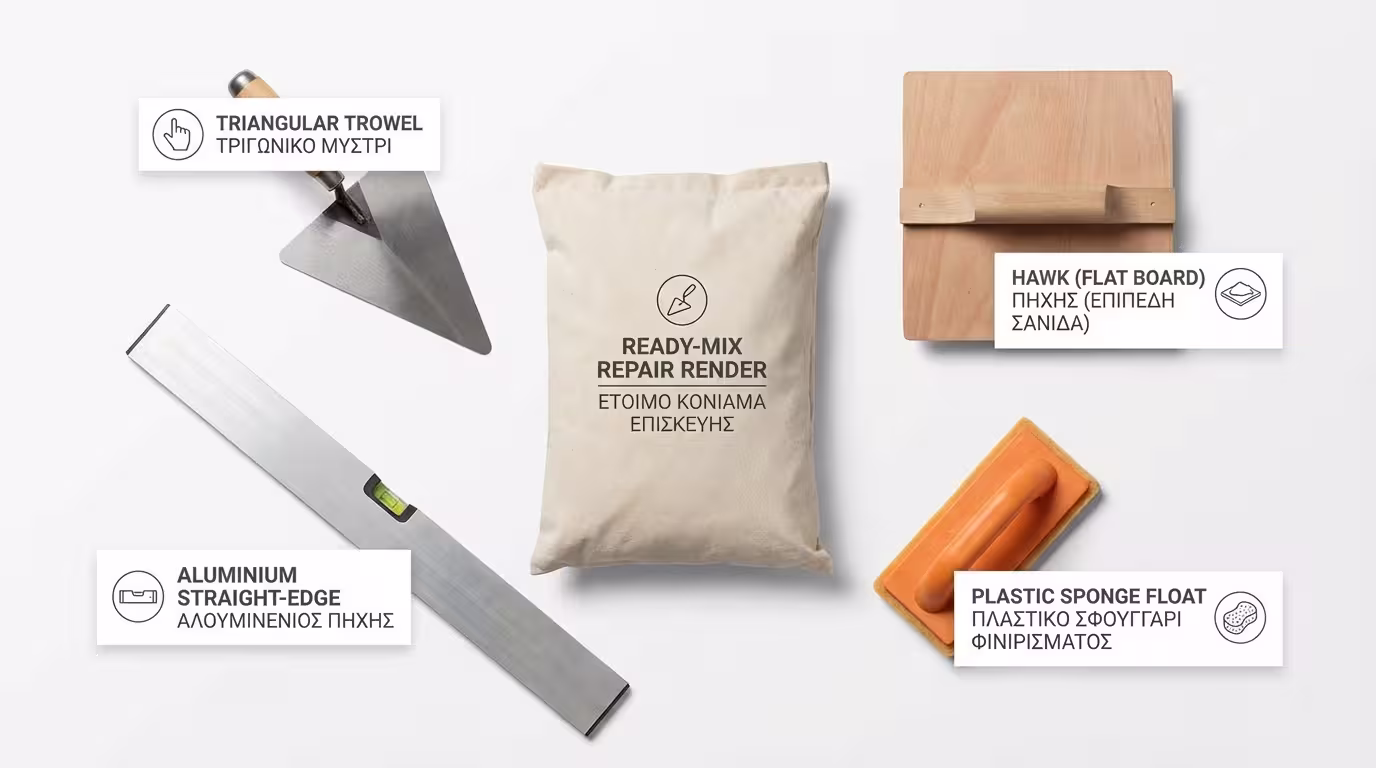
The classic triangular tool for scooping and throwing mortar.
Like a painter's palette - hold the material in one hand, scoop with the trowel.
For "cutting" excess material and levelling the wall flat.
Gives the final smooth finish with circular motions.
For patches, skip mixing from scratch. A bag (just add water) is perfect.
80% of success is decided before you even open the bag:
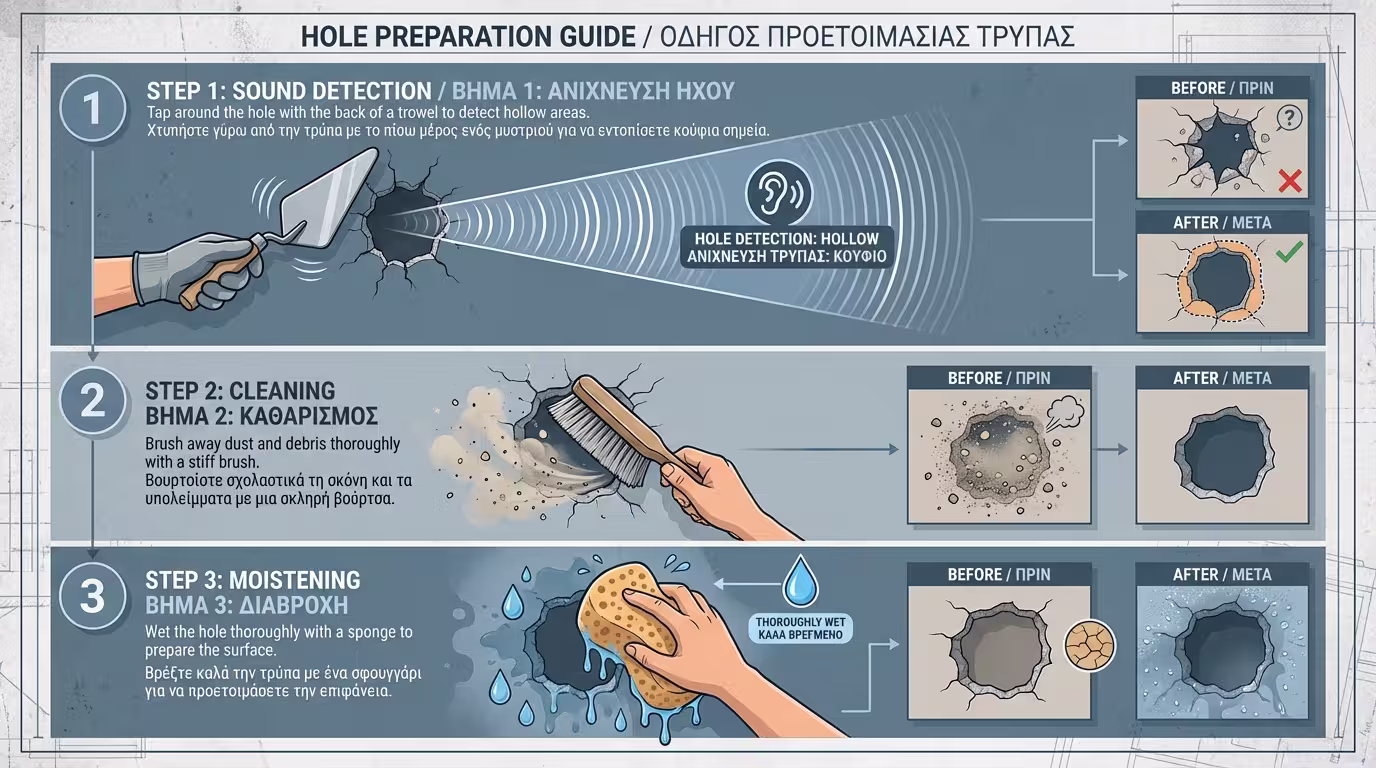
Tap lightly with the back of the trowel around the hole. If it sounds “hollow”, knock that piece off too. You must reach solid, stable substrate.
With a stiff brush, remove every trace of dust and sand from the brick. Dust prevents adhesion.
Wet the hole and the brick thoroughly with a sponge (or spray with water). If the wall is dry, it will suck the water out of the fresh render instantly and the mortar will come unstuck. Alternatively, apply an acrylic primer.
Once your mix is ready (it should sit on the trowel without dripping), load a good amount of mortar onto the hawk or spatula.
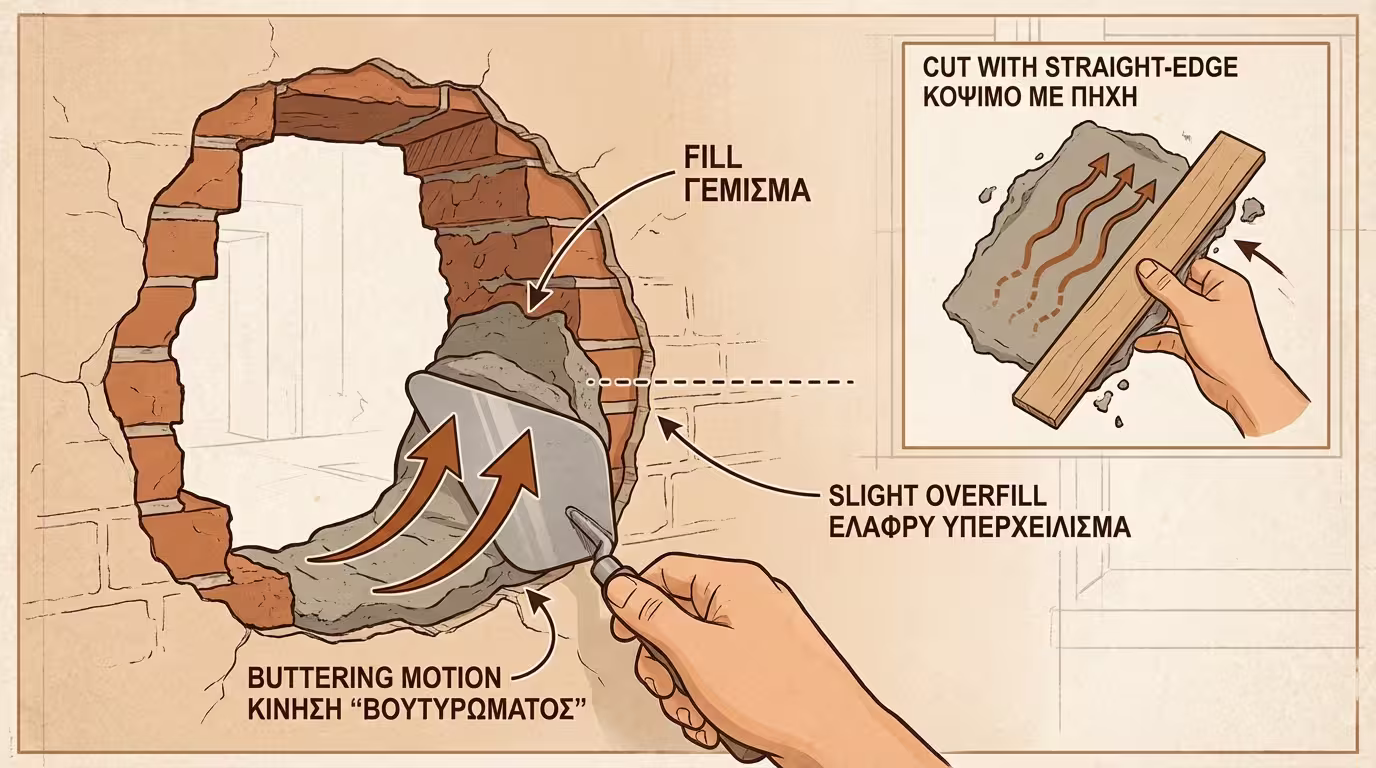
Take some material with the trowel and press it firmly into the hole. The motion should be from bottom to top (like buttering bread). Fill until the mortar is slightly proud of the surrounding wall.
If the hole is very deep (e.g. more than 3-4 cm), don’t try to fill it in one go, because the material will sag under its own weight. Half-fill it, let it dry for 1-2 hours, and then apply the second coat.
Rest the aluminium straight-edge vertically on the wall so that it sits on the old, solid render (which acts as a guide). Slide the rule upward in a zig-zag motion (like a saw). The rule will scrape off all excess material, leaving the surface perfectly flat.
Once you’ve “cut” the render with the straight-edge, the surface will be level but rough. Follow the correct finishing sequence:
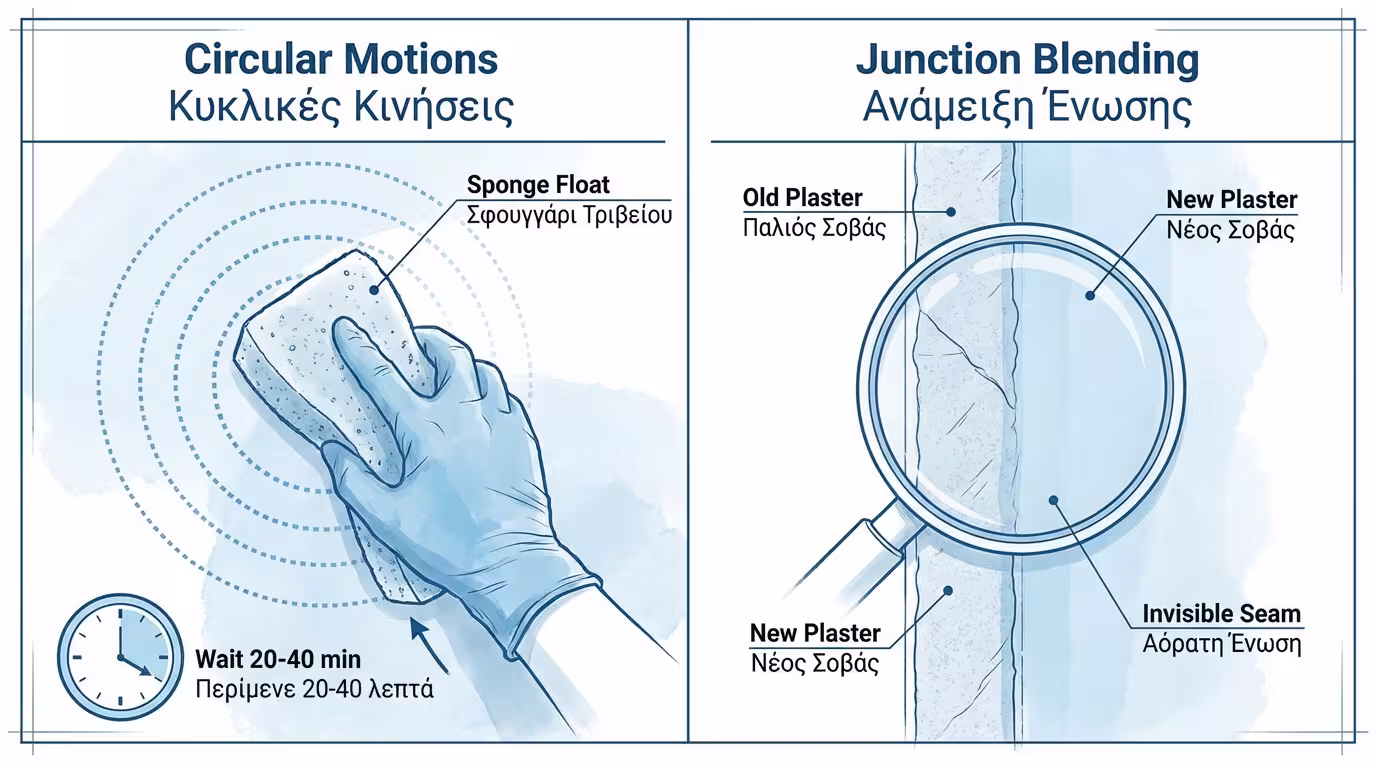
Don’t float immediately! Let the material “firm up” (lose excess water) for roughly 20-40 minutes. You should be able to touch it with your finger without it sinking easily.
Dampen the sponge float slightly. With gentle, circular motions, start rubbing the surface.
Pay enormous attention to the joints (where new render meets old). Rub the joints in circles until they “disappear” completely and you can no longer tell where the old ends and the new begins.
⚠️ Summer Curing: If the patch is on an external wall in the middle of summer, the sun is your worst enemy. Once you finish floating, lightly mist the fresh render with a little water 1-2 times during the day. This “curing” prevents the cracks that form when cement dries too quickly.
Damp, not dripping! Too much water washes cement off the surface - the render will crumble like sand when dry.
Closing an electrical chase? Embed fibreglass mesh in the first coat - otherwise a crack will appear right above the conduit, guaranteed.
Don't paint the next day. The render looks dry but holds internal moisture. Wait 7-15 days before filling and painting.
A small patch is the perfect first project for any DIYer. Prepare properly, wet the wall, fill gradually and allow drying time.
Return to category.
Go to categoryReturn to the central guide.
Go to guide