🧹 Always Clean First
If you suspect the concrete has formwork release oils (which it almost always does on new builds), wash the entire surface with a pressure washer and industrial degreaser. Allow to dry completely - do not rush this step.
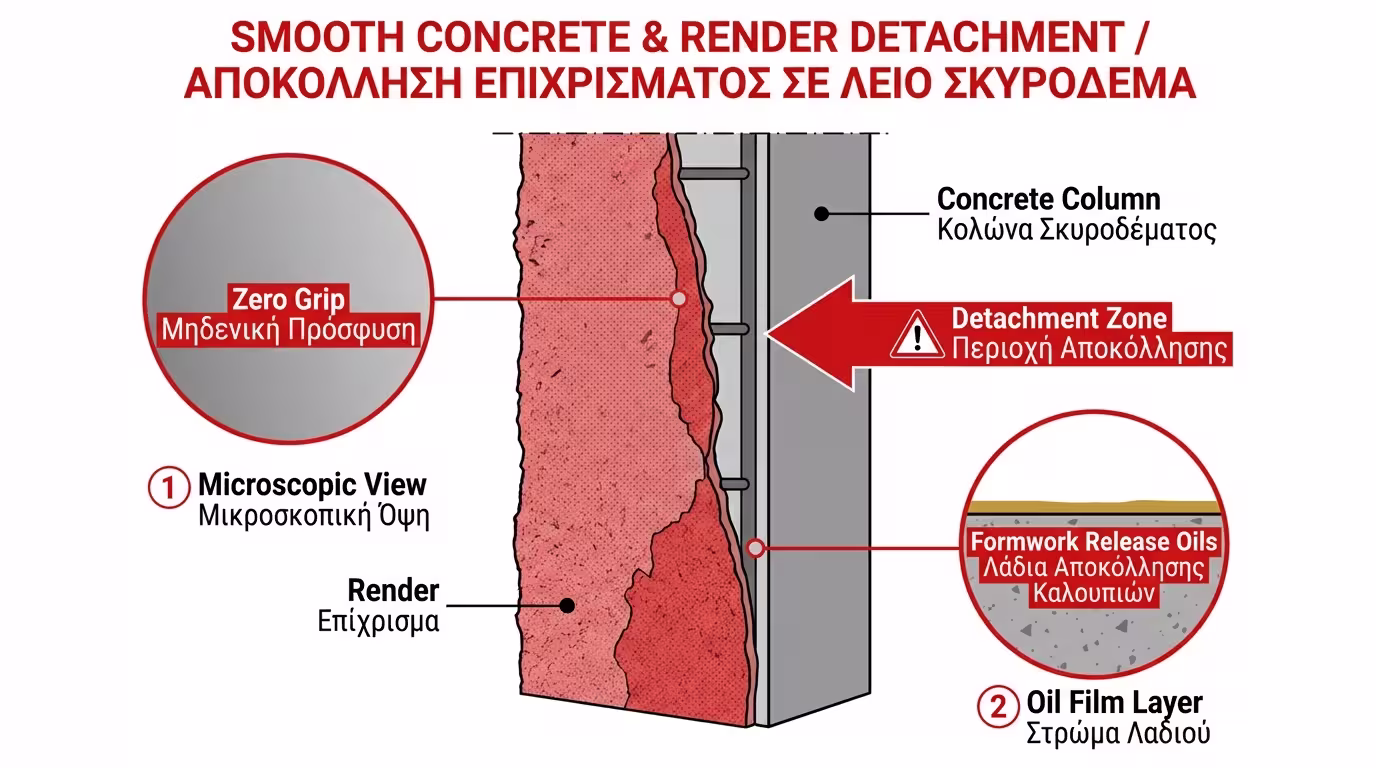
Fair-faced concrete - the kind you see on cast columns, beams and ceilings - is as smooth as marble. And that marble-smooth finish, while beautiful structurally, is a plasterer's worst nightmare. A smooth column is the number one cause of "hollow" render that sounds like a drum when you tap it and eventually falls off the wall in sheets.
Two factors combine to create this problem. First, the surface has zero mechanical grip: unlike brick or aerated concrete, cast concrete has no pores, no roughness, no "teeth" for the mortar to cling to. The plaster sits on the surface like water on glass and simply slides off under its own weight. Second, formwork release oils (the chemicals sprayed inside the mould before pouring concrete) remain on the surface. These silicone- or mineral-based oils form an invisible, water-repellent film. Even if you manage to press the render against an oily surface, the bond will fail within days. Plastering directly over oil = guaranteed failure.
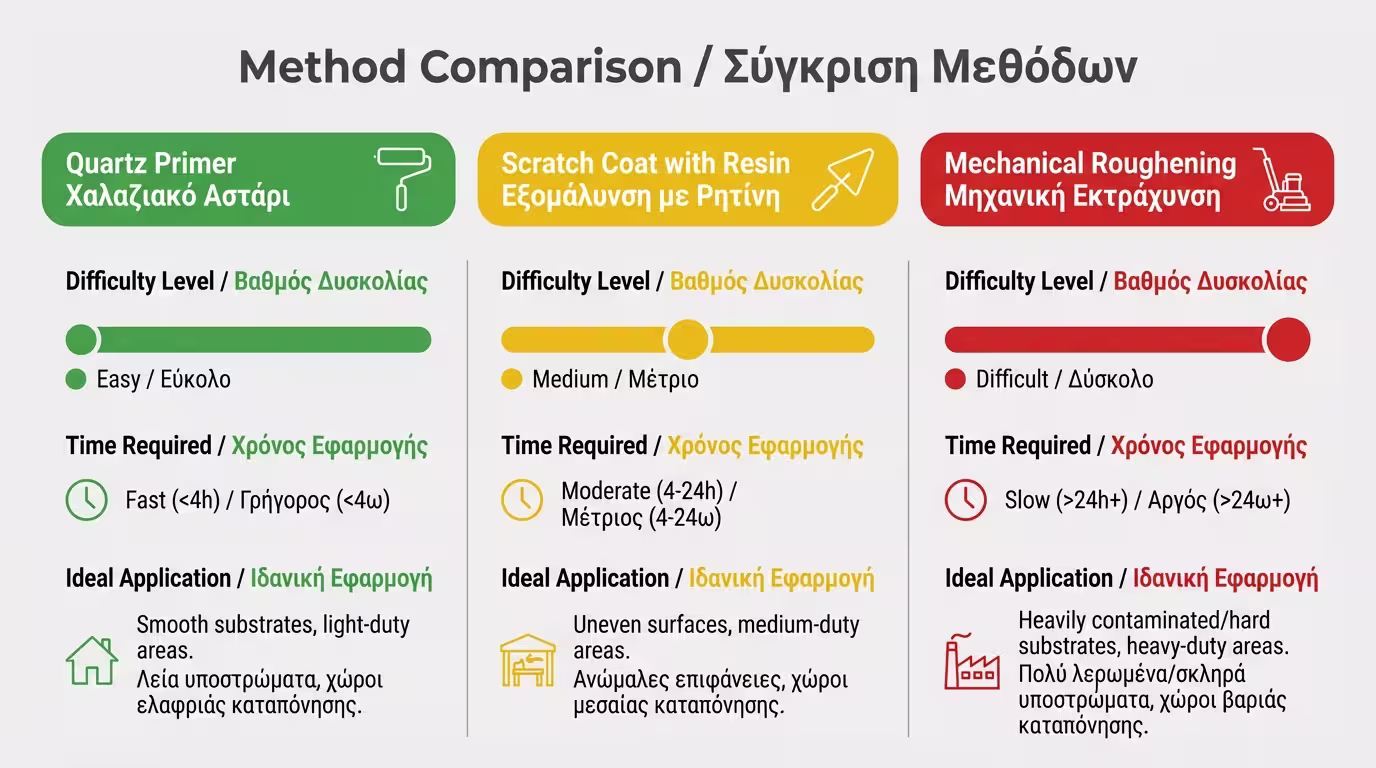
This is the easiest and most reliable modern technique. It uses a thick primer packed with hard quartz sand grains (trade name: Betokontakt). Process: Clean the column surface, apply the primer with a paint roller or stiff masonry brush. After 12-24 hours drying time, the quartz grains bond permanently to the concrete, transforming the surface from marble-smooth to rough like coarse sandpaper. The render can then grip onto the textured surface. Result: Full mechanical adhesion. Ideal for: Interior renovations, gypsum renders, small areas.
This is the tried-and-tested method favoured by experienced plasterers for exterior columns. A strong mix of cement + coarse sand is prepared, but instead of water, construction resin (SBR latex) is used as the mixing liquid. The SBR resin significantly enhances adhesion and flexibility. The tradesperson flings the wet mix forcefully at the concrete ("scratch coat" / "spatterdash") using a trowel or tile adhesive gun. Process: Dampen the column, fling the resin-enriched mix in a rough layer, allow to cure 24 hours. Result: A rough, permanent key for the main render coat. Ideal for: Exterior columns, cement-based renders, large construction sites.

Use this table to select the most appropriate technique for your specific situation:
| Method | DIY Difficulty | Time Required | Best For |
|---|---|---|---|
| Quartz Bonding Primer | Very easy (roller application) | Fast (12-24h drying) | Interior renovations, gypsum render |
| Scratch Coat with SBR Resin | Moderate (trowel/gun) | Fast application, 24h cure | Exterior columns, cement render |
| Mechanical Roughening | Difficult (specialist equipment) | Slow, dusty and noisy | Contaminated or degraded surfaces |
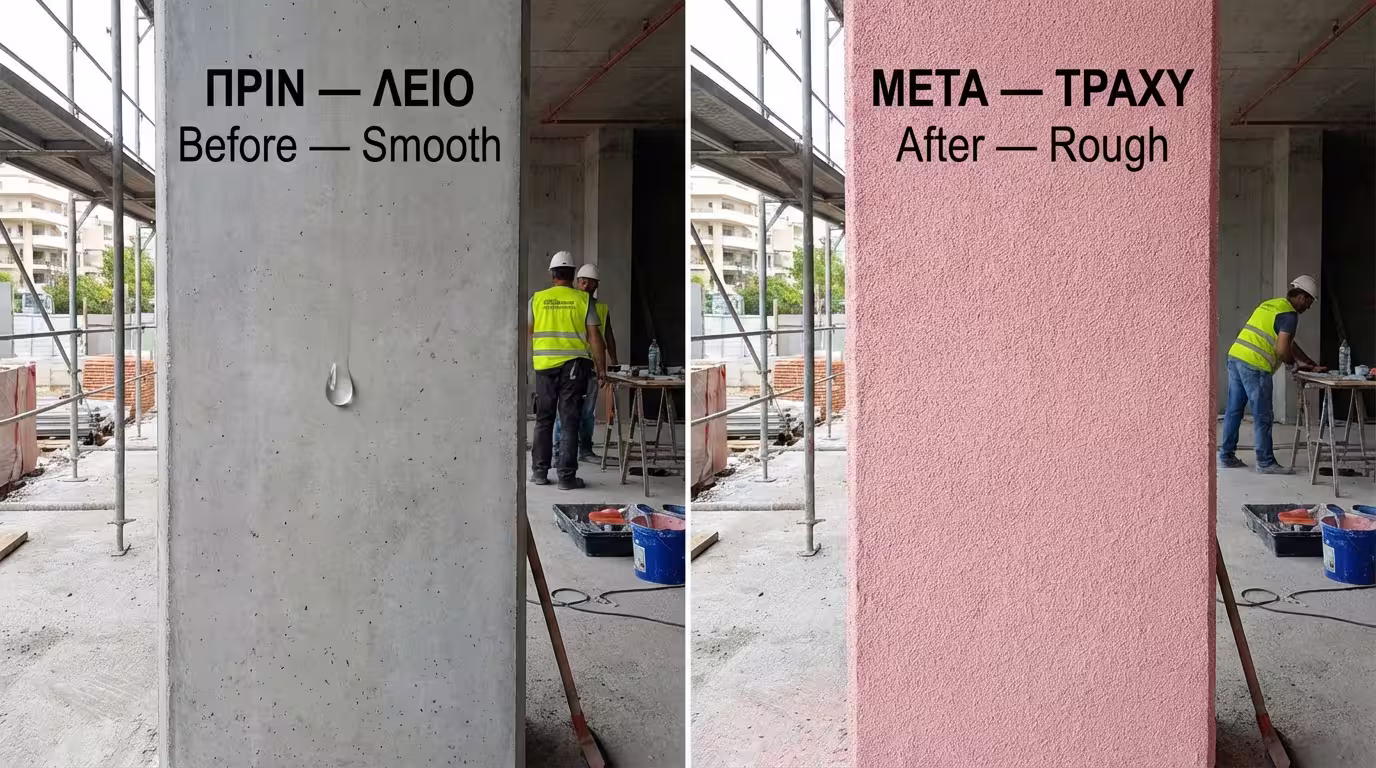
💧 The Water Drop Test: Before choosing your method, splash some water on the concrete column. If the water absorbs (the surface darkens) - that's a good sign, and any method will work. If the water beads up and rolls off like it would on plastic - there are formwork oils present. You must wash the entire column with a pressure washer and industrial degreaser first, then let it dry completely before applying any primer or scratch coat.
If you suspect the concrete has formwork release oils (which it almost always does on new builds), wash the entire surface with a pressure washer and industrial degreaser. Allow to dry completely - do not rush this step.
Quartz primer must dry until the grains don't come off when rubbed. Plastering over wet or insufficiently cured primer causes total adhesion failure. Touch-test the surface before proceeding.
If you're applying a resin-enriched scratch coat during summer heat (above 30°C), lightly dampen the concrete surface just before flinging the mix, so the material doesn't "burn" from excessively rapid drying.
Proper smooth concrete preparation transforms a plasterer's worst nightmare into a rock-solid base. Choose the right method for your surface condition, apply it correctly, respect the curing time, and the render will never "hollow out".
Return to category.
Go to categoryReturn to the central guide.
Go to guide