Direction
They have no specific direction (not just vertical or horizontal).
You've just paid for a freshly rendered wall that looks perfect, yet within days (or even hours) you notice a web of fine, hairline cracks spreading across it like a spider's web. Your first reaction is panic and the thought that the building has a structural problem.
Fortunately, in most cases this is the most common (yet infuriating) phenomenon in construction: shrinkage cracks. Let's look at why this phenomenon happens, how you can recognize it and, most importantly, how it is prevented.
To understand why render cracks, we need to understand the physics of the material. When we mix cement, sand and water, we create a wet paste. As the water begins to evaporate (and the cement reacts chemically), the total volume of the render decreases (shrinks).
If this reduction happens too quickly, or the render lacks the elasticity to withstand the "pull," its surface literally tears.
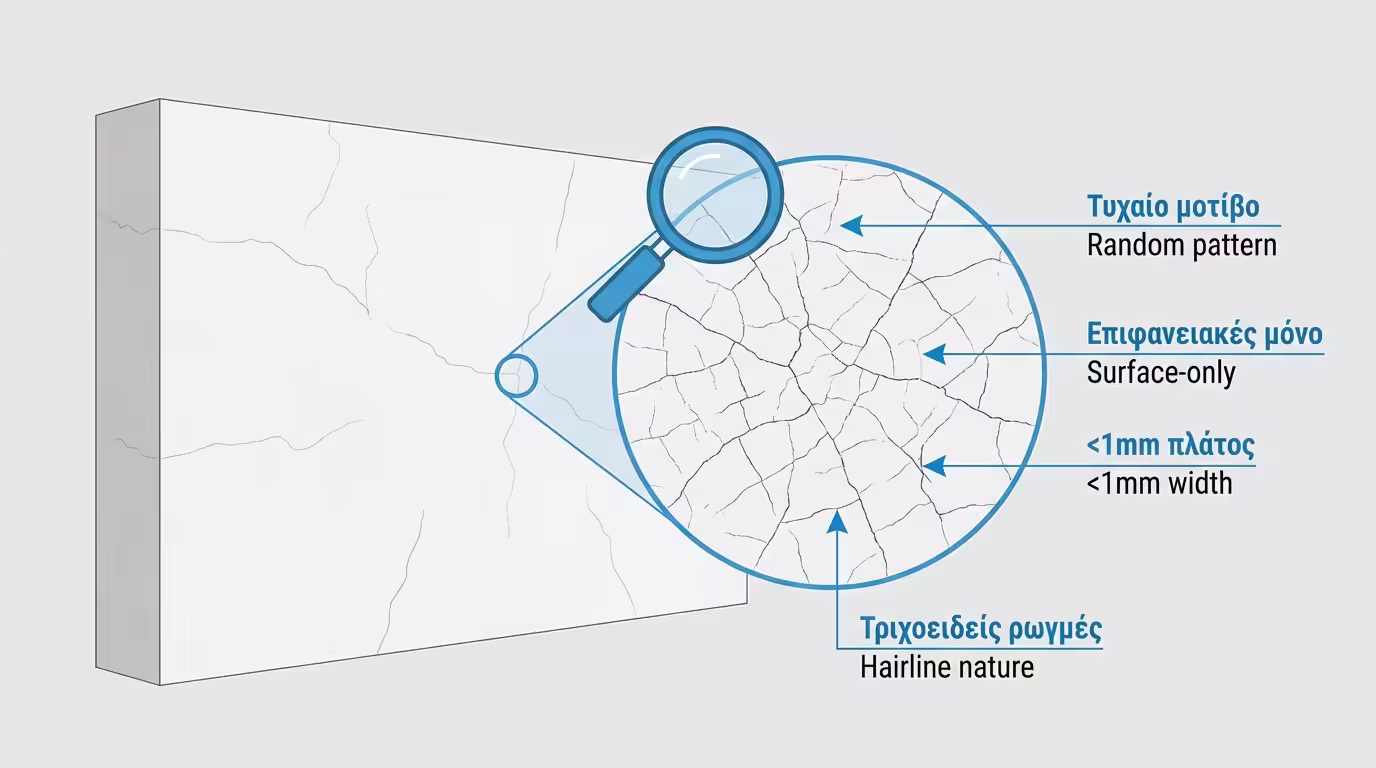
They have no specific direction (not just vertical or horizontal).
They form a random pattern resembling broken glass, a map or a spider's web (map cracking).
They are usually shallow (surface-level) and extremely fine, like a hair (hairline).
Shrinkage cracks aren't caused by earthquakes or subsidence - they are purely the result of construction error or poor application conditions.
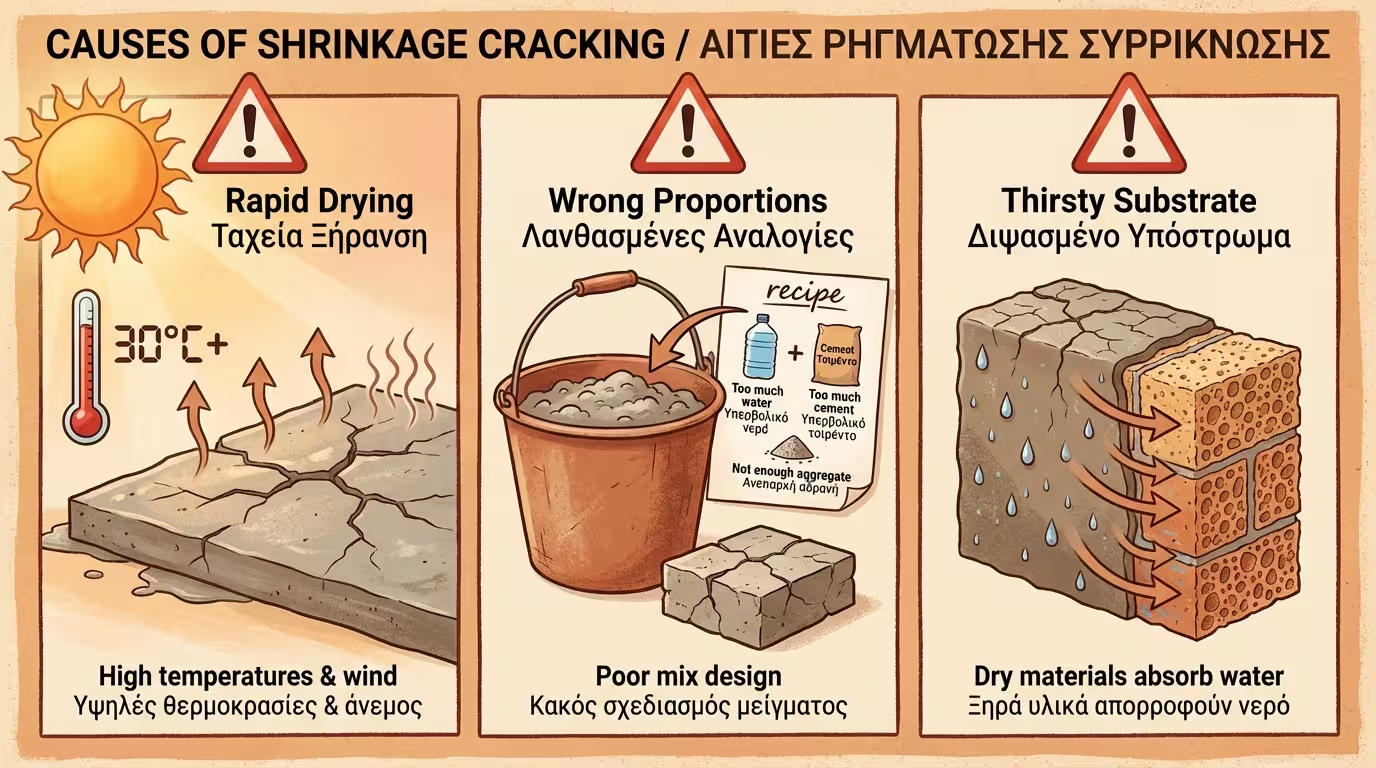
The number-one culprit. As we also analyzed in the weather conditions article, if rendering is done in temperatures above 30°C, with the blazing sun hitting the wall directly, or with strong, dry wind, the water evaporates instantly. The render's "skin" dries and shrinks violently while its interior is still wet, causing immediate cracking.
The render recipe forgives few mistakes. Cracks appear when the mix: Has too much water: The more water put into the mix, the greater the shrinkage (loss of volume) will be when that water evaporates. The paste must not be "soup." Is too "strong" (rich in cement): Cement offers strength, but it is the component that shrinks. The absence of lime (which gives elasticity) or the use of excessive cement makes the render "rigid," with the result that it cracks easily. Has the wrong sand: If only very fine sand (powder) is used, the "skeleton" of coarse aggregates that holds the material in place is missing.
If render is applied on dry, absorbent bricks or aerated concrete (Ytong) without proper priming or wetting beforehand, the substrate sucks the water from the mortar like a sponge. The result is the instant drying of the render from the inside out.
To avoid worrying unnecessarily about the structural integrity of your house, see the differences:
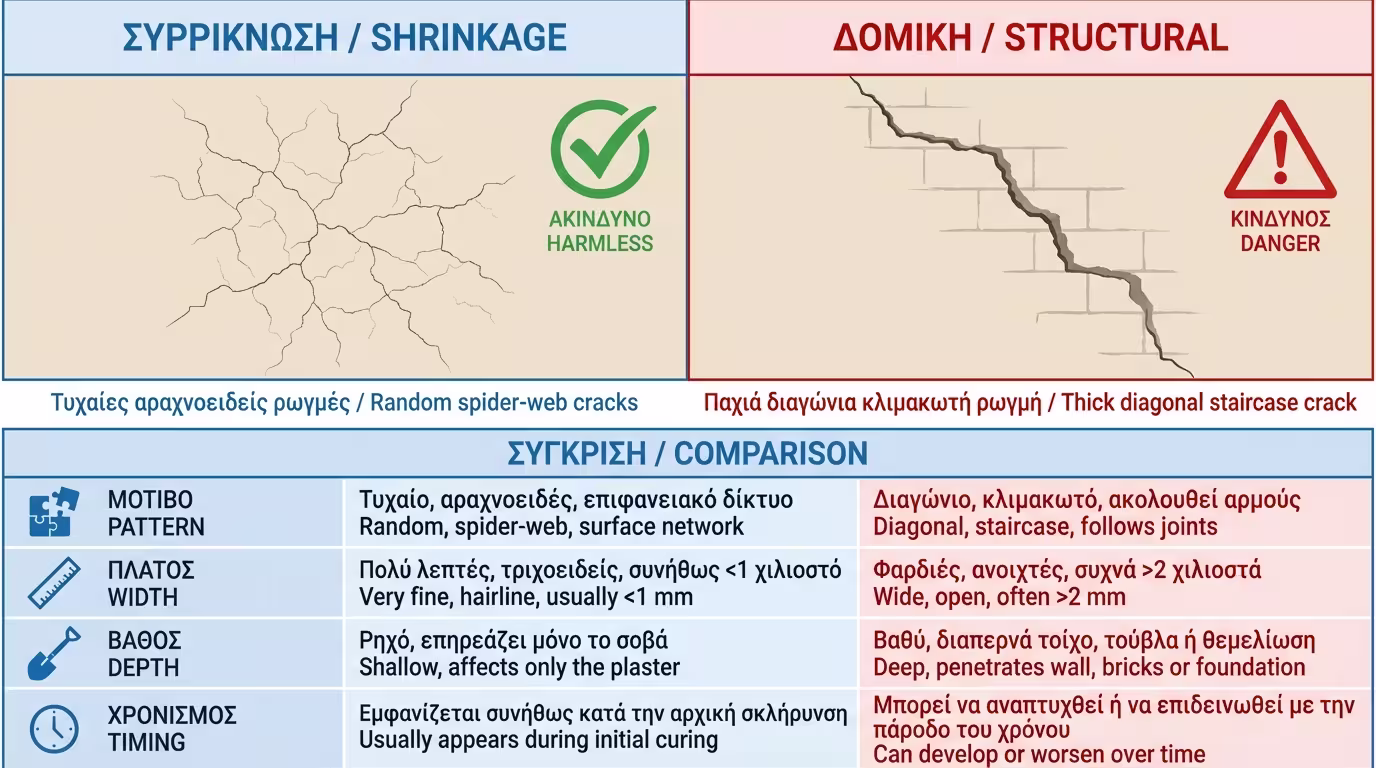
| Feature | Shrinkage Cracks (Render) | Structural Cracks (Masonry/Concrete) |
|---|---|---|
| Shape / Pattern | Irregular (like a spider web) | Usually straight, diagonal or "stepped" |
| Crack Width | Very fine (< 1 mm) | Wide (often fits a coin) |
| Depth | Only on the surface of the render | Penetrate the render and the brick |
| Time of Appearance | The first hours/days after application | Months or years later (due to subsidence/earthquakes) |
Prevention is always cheaper and easier than the cure.
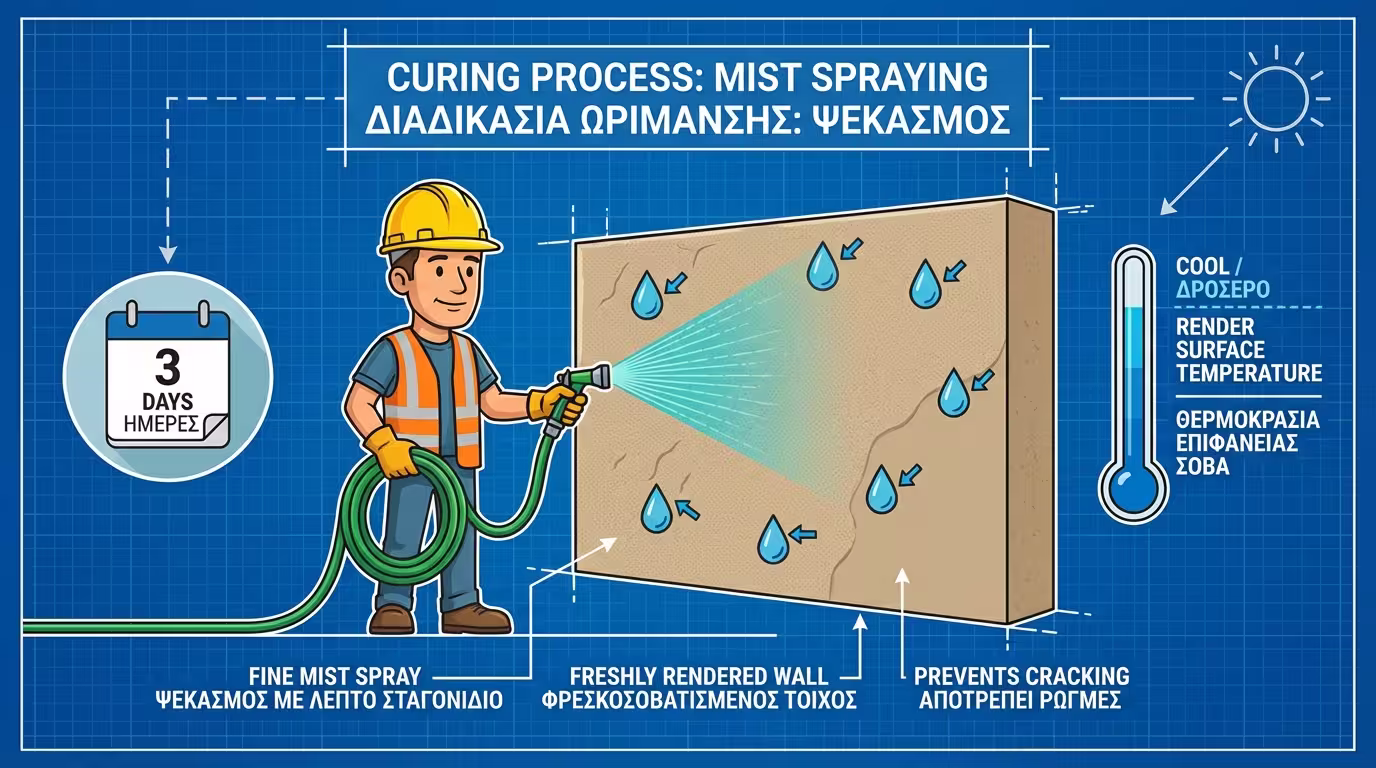
Life-Saving Curing: The best way to prevent shrinkage cracks in the summer, is to keep the render cool. Spray the fresh external render with a hose (as a fine mist, without pressure) 1-2 times a day for the first 3 days. This simple step allows the cement to hydrate properly and eliminates cracking.
If you're making your own mix in a mixer, add polypropylene fibres. These create a 3D invisible mesh inside the mix that absorbs shrinkage stresses. Alternatively, prefer ready-made fibre-reinforced industrial renders.
Don't try to "fill" deep unevenness in the wall with a single, very thick coat of render. The excessive thickness of mortar traps moisture inside it and dries unevenly. Apply the material in layers, obeying the waiting times.
Return to category.
Go to categoryReturn to the central guide.
Go to guide