Plastering Old Stone Walls: Joint Management & Breathability

Restoring a traditional stone house is perhaps the most fascinating yet demanding project in construction. Old stone walls (often 50-60 cm thick) are not just "walls" - they are living organisms built without concrete, using only stone, earth, sand and lime.

If you try to renovate such a wall using the techniques applied in modern apartment blocks, the result will be catastrophic. Stone has its own rules, and the most important of them is called "breathability". Let's see how to properly prepare and plaster a stone wall so it lasts another two centuries.

1. The Golden Rule: The Wall Must "Breathe"

Old stone buildings have no foundation waterproofing. This means they constantly absorb ground moisture (rising damp). The old master builders knew this. That's why they built with lime mortars, which are porous (full of tiny holes). The moisture rose from the soil, passed through the stone joints and evaporated naturally into the air. The house "breathed."

Stone wall cross-section: left lime evaporates - right cement suffocates
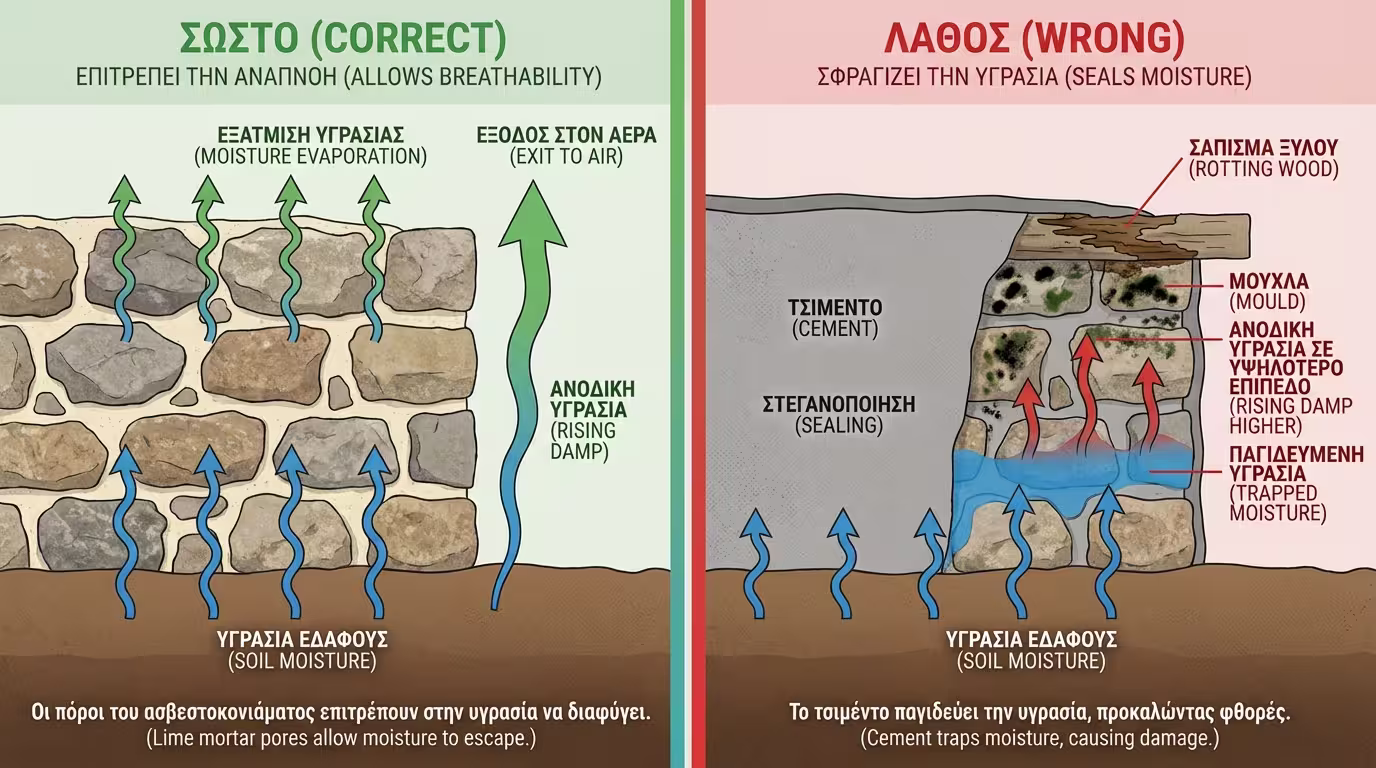
💡 The Cement Crime: In the 1980s and '90s, many "sealed" these houses with strong cement renders. Cement is impermeable. The ground moisture could no longer evaporate - it became trapped inside the wall, dissolved the old earth mortars between the stones, and eventually burst out internally, bringing down the renders and creating extreme mould.

2. Step 1: Exposure and Cleaning (The Deep Scrape)

Before applying any new material, you must heal the "wounds" of the past.

  1. Full Removal of Old Renders: Strip every trace of old cement render or friable material until the stone is completely bare.
  2. Joint Raking (Digging Out): The old bedding mortar between the stones is usually crumbly, like earth. You need to "empty" it. Use a pointed chisel, an old screwdriver, or small mason's tools to dig out the old material to a depth of at least 2 to 4 centimetres (until you hit hard material).
  3. Thorough Washing: Rinse the wall with pressurised water (without excess if the wall is very unstable) to remove all earth and dust from the depths of the joints.
Pointed chisel raking joints 2-4cm deep - bare stone exposed

3. Step 2: Re-Pointing (Filling the Voids)

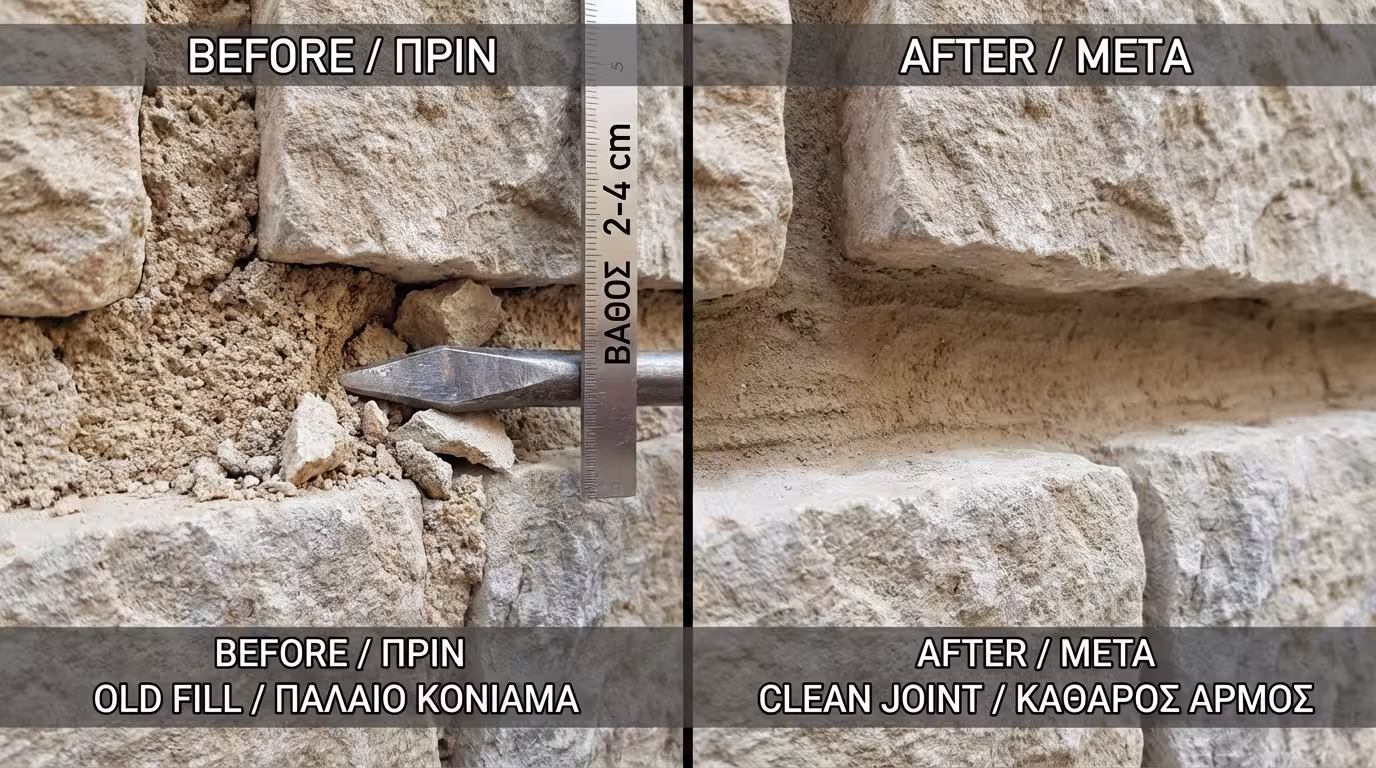
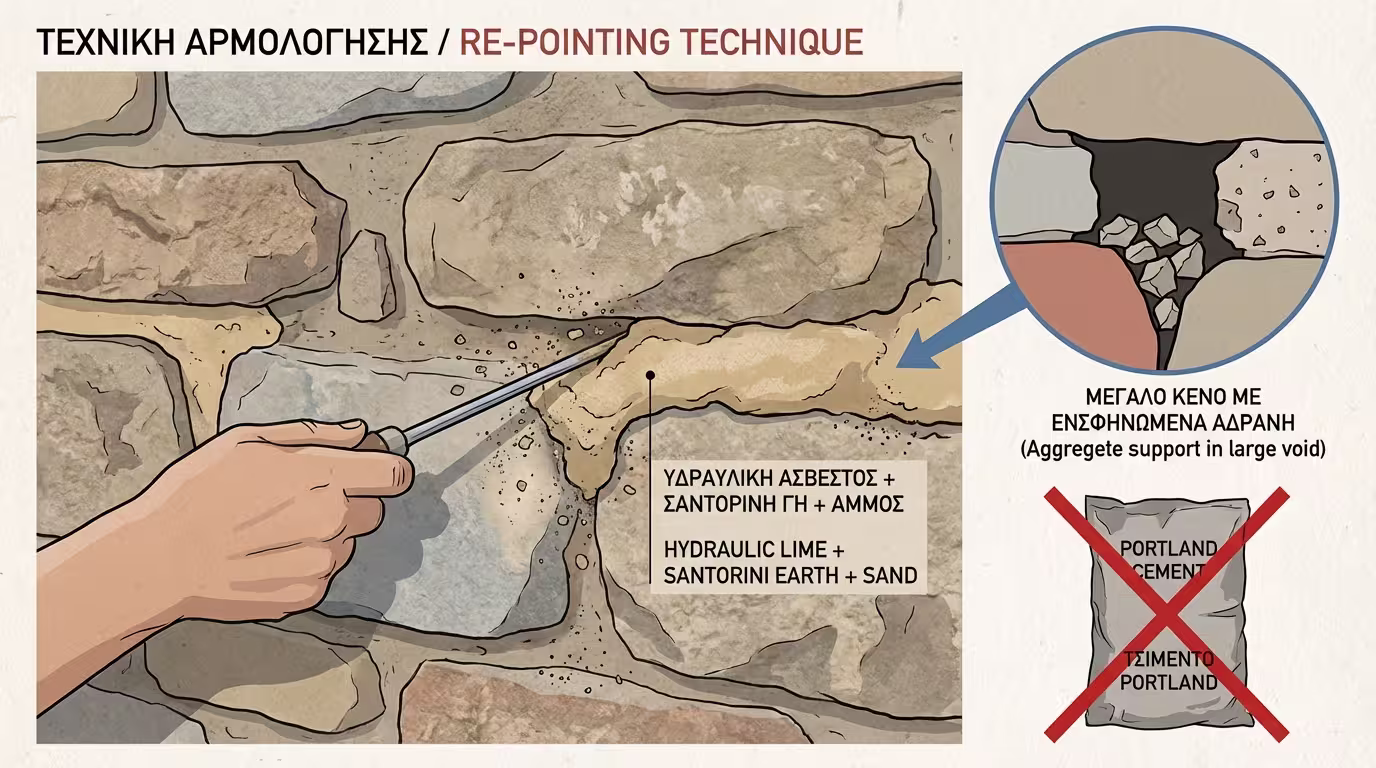
You cannot render a stone wall that has deep cavities. You must first fill the gaps between the stones (re-point it) to stabilise the masonry.

  • Materials: Pure Portland cement is forbidden. Use traditional lime mortars (a mix of hydraulic lime, Santorini earth / pozzolan and sand) or ready-made industrial restoration mortars designed for stone, which offer exceptional breathability and elasticity.
  • Application: With a narrow trowel (pointing trowel), "nail" the material deep into the joints. For large voids, wedge small stones (aggregate) together with the mortar to save material and add mechanical strength.
  • Allow the pointing to dry thoroughly (several days) before proceeding to the next step.
Narrow trowel pressing lime-pozzolan mortar deep into stone joints

4. Step 3: The Rendering Process

Layer cross-section: scratch coat → mesh → macroporous render → slow curing

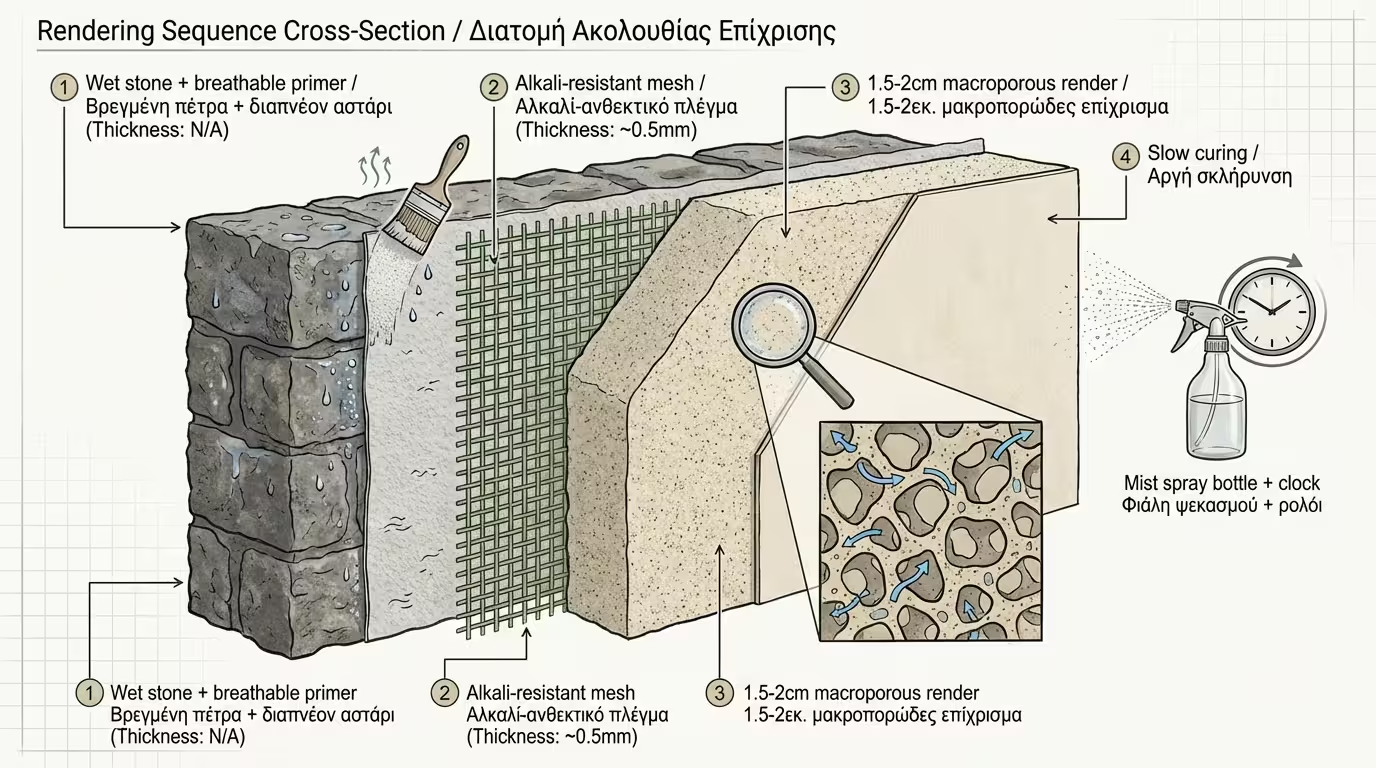
Once the wall is stable and re-pointed, the rendering process is similar to conventional work, but with enormous care over materials.

  1. The Scratch Coat (First Coat): The wall must be thoroughly wetted (so it doesn't pull water out of the mortar too fast). The scratch coat must be made with the same breathable material (lime-pozzolan or a specialist stone primer), leaving a rough, "curly" texture.
  2. Mesh Installation: Because stone walls "bond" differently, installing an alkali-resistant fibreglass mesh (or galvanised metal mesh) in the next mortar layer will prevent cracking by "hugging" the entire masonry.
  3. The Base Coat (Main Render): The second coat is applied (typically 1.5 - 2 cm thick). Here we use macroporous (dehumidifying) renders. Their pores allow moisture to exit outward as water vapour, keeping the stone dry.
  4. Slow Curing (Aftercare): Lime, unlike cement, needs a long time and gradual moisture loss to "petrify" properly. On hot days, you must lightly mist the fresh render for several days (with a spray bottle), to prevent it from "burning" and cracking.

Related Articles

Preview