⬇️ Gravity
Every trowelful of mortar you throw upward, gravity pulls it down. If the mix is slightly too heavy or wet, the render will sag and collapse like a pizza.
In the construction world, there’s an unwritten rule: a good plasterer is judged by the ceiling. Ceiling plastering is considered the tradesman’s “diploma”, combining extreme physical strain with the absolute need for technical precision. Whether you’re a DIYer considering such a project, or a homeowner wanting to understand why this job often costs more, this guide explains exactly what makes the ceiling so uniquely demanding and how you can tame it.
The difficulty is no myth - it's grounded in three very real factors:
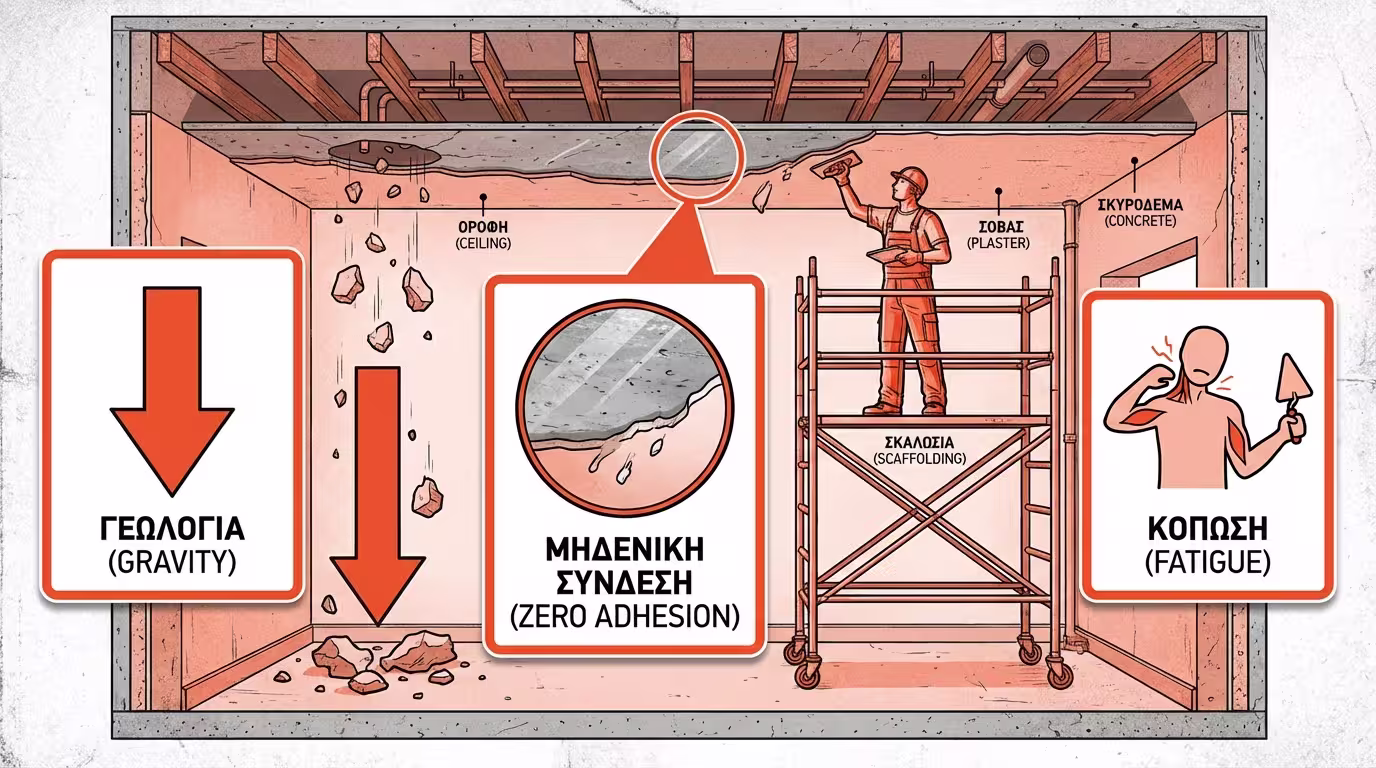
Every trowelful of mortar you throw upward, gravity pulls it down. If the mix is slightly too heavy or wet, the render will sag and collapse like a pizza.
Ceilings are made of concrete cast in smooth steel formwork. They’re glass-smooth and coated with residual release oils.
Working with arms and neck in constant hyper-extension (looking upward) exhausts muscles within minutes. The force you can apply with the trowel drops dramatically.
On a wall, poor priming may take time to show. On a ceiling, poor priming shows in 5 minutes. The substrate must be prepared surgically.
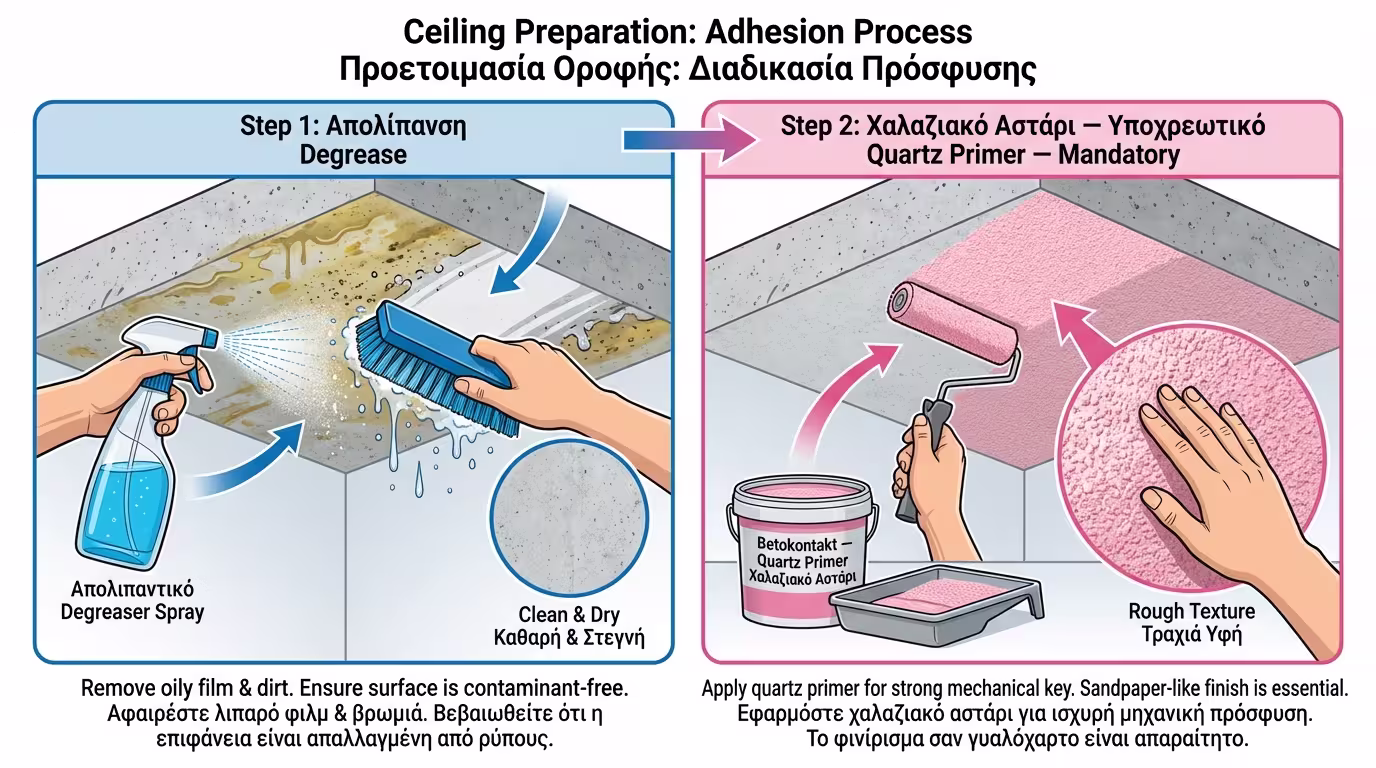
Sweep the ceiling meticulously. If formwork oils are present, wash the area with strong degreaser and water. Dust acts as “Teflon” between concrete and render.
Don’t even think about applying mortar directly to bare concrete. Coat the entire surface with a thick quartz primer (e.g. Betokontakt). Allow 24 hours to dry. When you run your hand across it, the ceiling must feel rough like coarse sandpaper.
Once the primer has dried properly, follow these rules strictly during application:
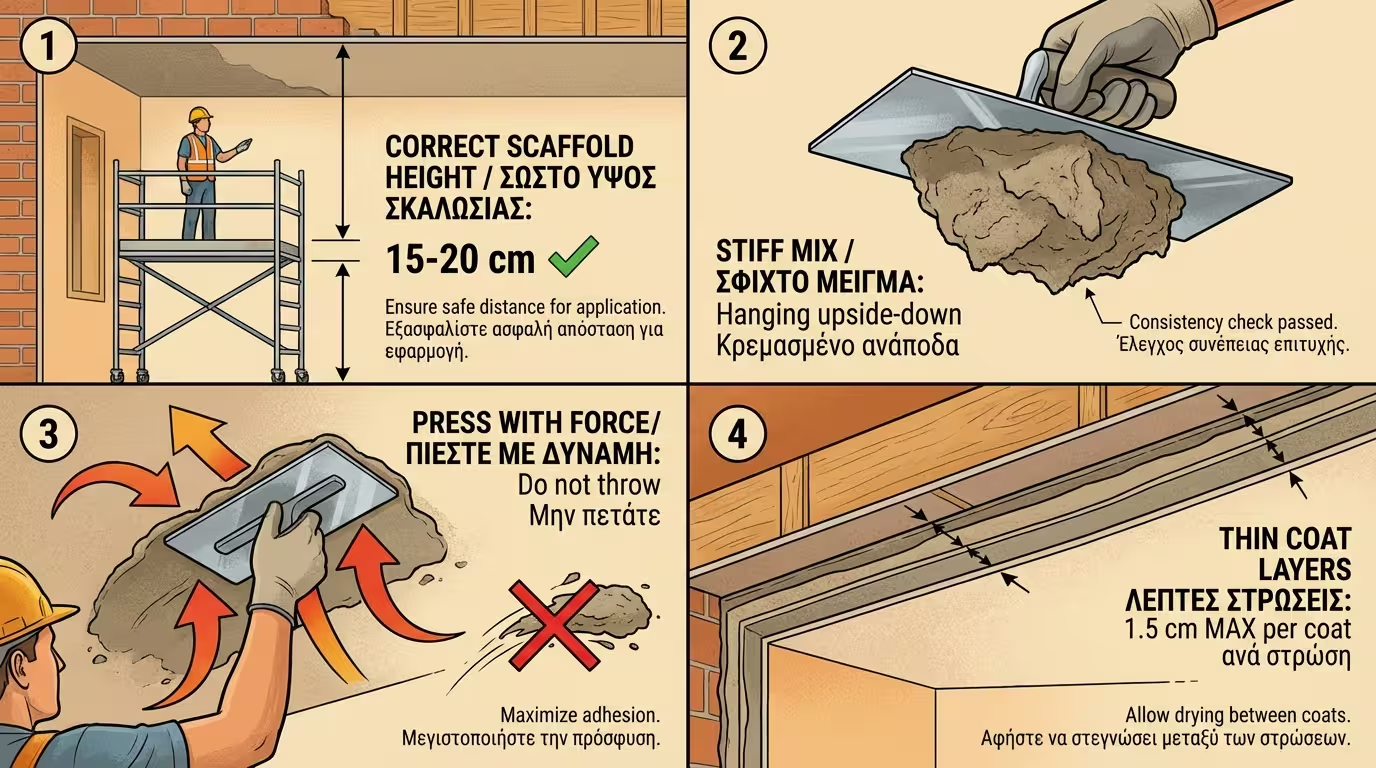
The biggest mistake is working stretched on tiptoe or too hunched over. The scaffold height must position your head roughly 15-20 cm from the ceiling. This gives the perfect lever to apply force with the shoulders, not just the wrist.
The ceiling mix must not be the same as the wall mix. It needs to be slightly “stiffer” (less water) with a little more lime (or special resins) to make it more “tacky.” It must hang upside-down on the trowel without sliding off.
When applying the mortar, don’t just throw it up hoping it sticks. Take the material with the trowel and press it firmly onto the ceiling, dragging the tool. This pressure expels trapped air, creating a suction effect that holds the material in place.
Never try to “fill” a ceiling that needs 3 cm of render in one pass. The weight will collapse it. Apply the first coat (1.5 cm), let it “firm up” (partially dry) and after a few hours or the next day, apply the second.
Before you start plastering 50 square metres of ceiling, consider the alternative. In modern renovations, ceiling plastering is increasingly being replaced by a plasterboard false ceiling. It’s faster, perfectly flat, hides all cables/pipes and allows you to install hidden lighting and insulation. Weigh the cost and effort!

Don’t look up and throw mortar with bare eyes. A mortar droplet containing lime or cement in the eye causes severe corneal chemical burns. Buy clear safety goggles (wrap-around mask type that seal all around).
Wear a hat or beanie. Render dripping into your hair hardens very quickly and is extremely difficult to remove.
When pulling the aluminium straight-edge to level the ceiling, hold it at a 45-degree angle (scraping the material), not perpendicular - otherwise you’ll peel fresh render off the substrate.
The ceiling demands respect. Quartz primer, stiff mix, pressure instead of throwing - and always wear goggles.
Return to category.
Go to categoryReturn to the central guide.
Go to guide