Local Render Replacement: Procedure for a Successful Patch

Whether from an old plumbing leak, a heavy knock while moving furniture, or because you removed an old air conditioner, you're left staring at a "hole" in the wall. The render is missing, the brick is exposed and the room looks like a building site.

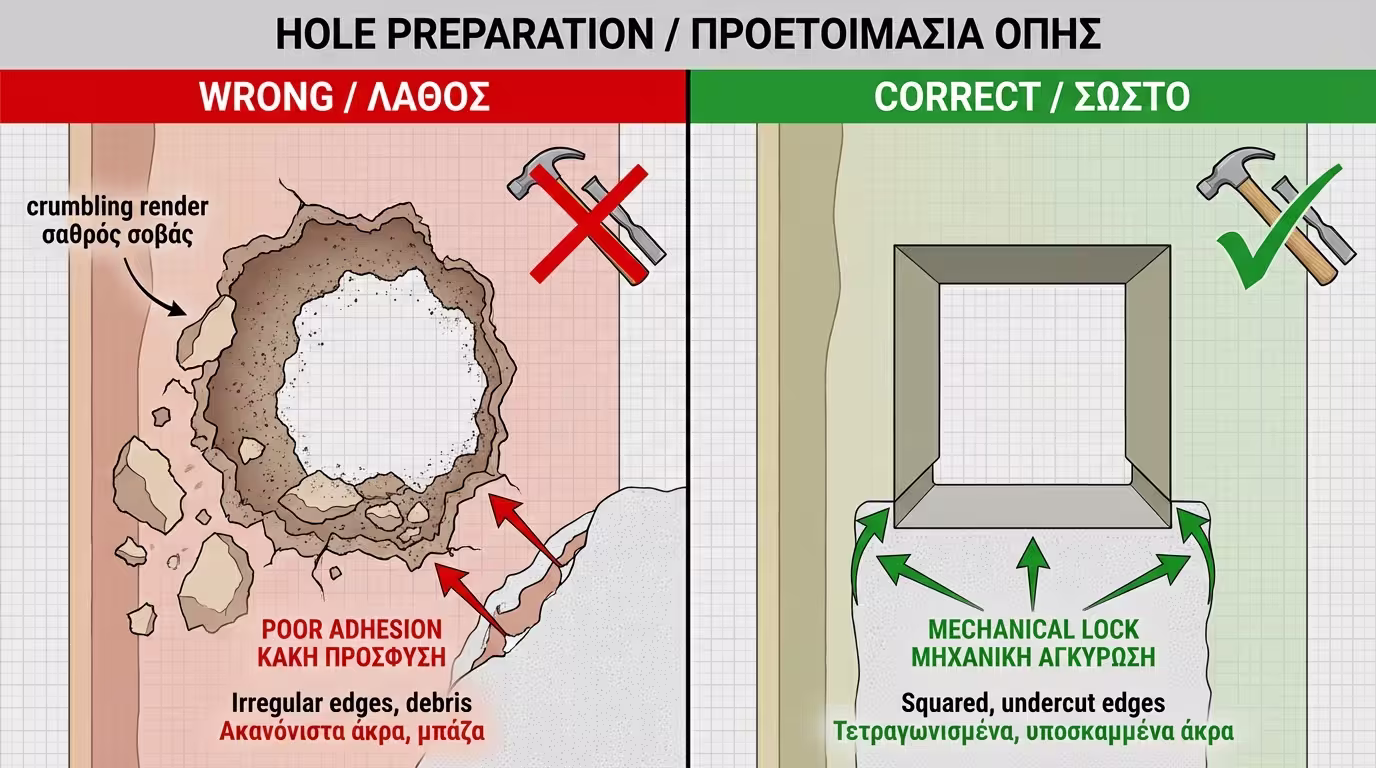
A local repair (the classic "patch") is a textbook job that a determined DIY-er can take on, as long as they know the professionals' secret: success lies in how you join the new material to the old. If you simply throw mortar into the hole, once it dries it will "belly" or crack around the perimeter. Follow these 4 steps for an invisible result.

Step 1: Preparation and "Squaring" the Hole

The biggest mistake is trying to fill a hole that has crumbly, broken edges.

  1. Take a chisel and hammer (or a stiff spatula) and tap around the hole. Remove every piece of old render that sounds "hollow" or crumbles easily.
  2. Squaring: Ideally, try to give the hole a roughly regular, square or rectangular shape. Cut the edges of the old render vertically (at a 90-degree angle) or with a slight inward slope (so the hole is wider at the bottom than at the surface). This will mechanically trap the new material.
  3. Thoroughly sweep away the dust with a brush and spray plenty of water (or apply an acrylic primer) onto the bare brick and the edges of the old render.
Squaring: chisel cuts edges at 90° with slight inward slope for mechanical lock

Step 2: The Base Fill (The Mortar)

If the hole is deep (more than 1.5 - 2 cm) and reaches the brick, you must not fill it all in one go using fine filler or plaster. It will crack during drying. You need "coarse" material for the foundations.

  1. Mix a traditional mortar (sand, cement, lime) or buy a ready-made bag of rapid-setting repair mortar for convenience.
  2. With a trowel, press the mortar firmly into the hole, making sure to fill the corners well under the old render.
  3. The Depth Secret: Do not bring the mortar "flush" (level) with the old wall. Stop the filling approximately 2 to 3 mm deeper than the final surface.
  4. Before it dries, "roughen" the surface of the fresh mortar by making horizontal lines with your trowel (for the next coat to catch) and allow it to dry completely (at least 24 hours).
Rough fill: trowel presses mortar in, stops 2-3mm below surface, scored key lines

Step 3: The Final Finish (The "Marble")

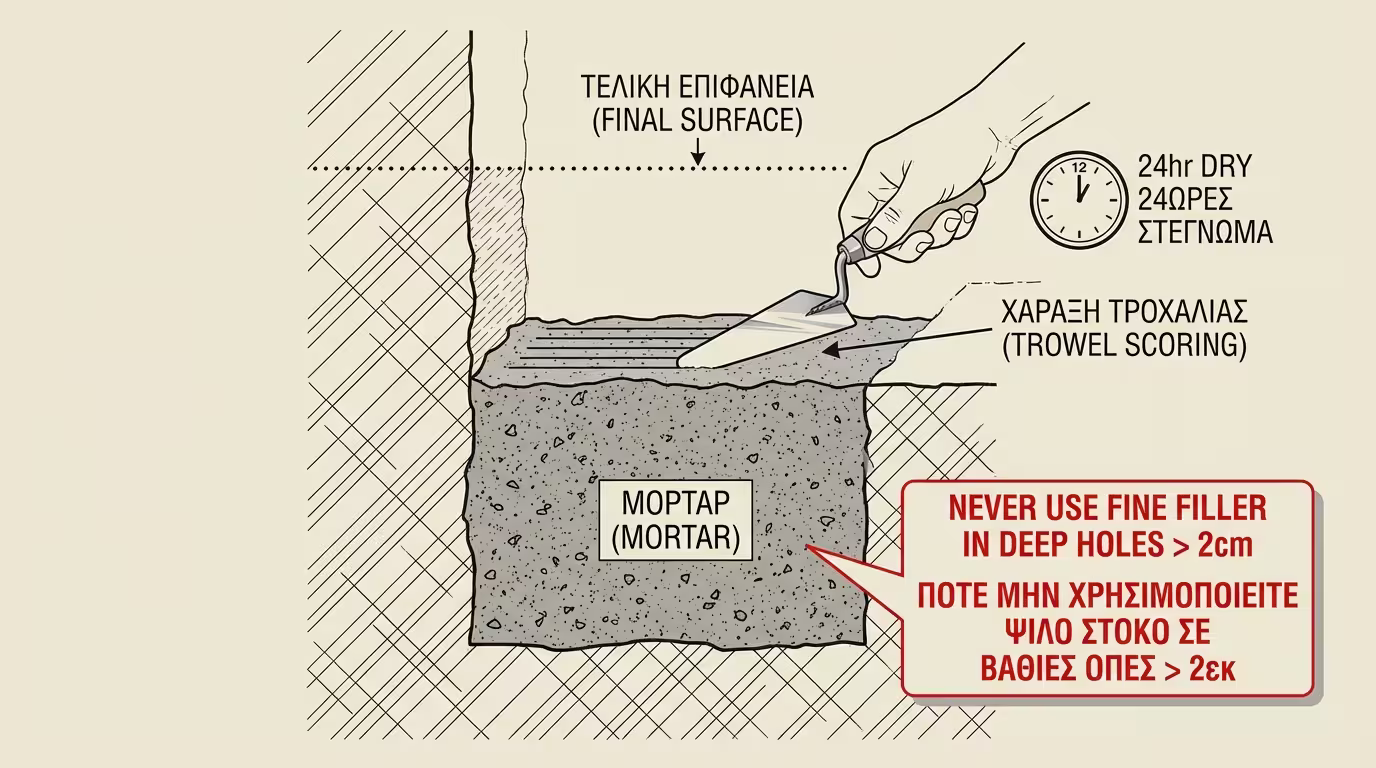
The next day, your base has hardened. Now you will provide the smooth texture.

  1. Lightly dampen the "roughened" fill you made yesterday with a sponge.
  2. Prepare the fine material (marble-finish compound, fine skim-coat filler or ready-made white finishing render).
  3. With a wide, straight spatula, spread the material pressing it. Use the old, surrounding render as a "guide". Rest the spatula on the old wall to the right and left of the hole and "pull" the material to level it perfectly.
Wide putty knife rests on old wall either side as automatic levelling guide

Step 4: "Blending" the Edges (Where skill shows)

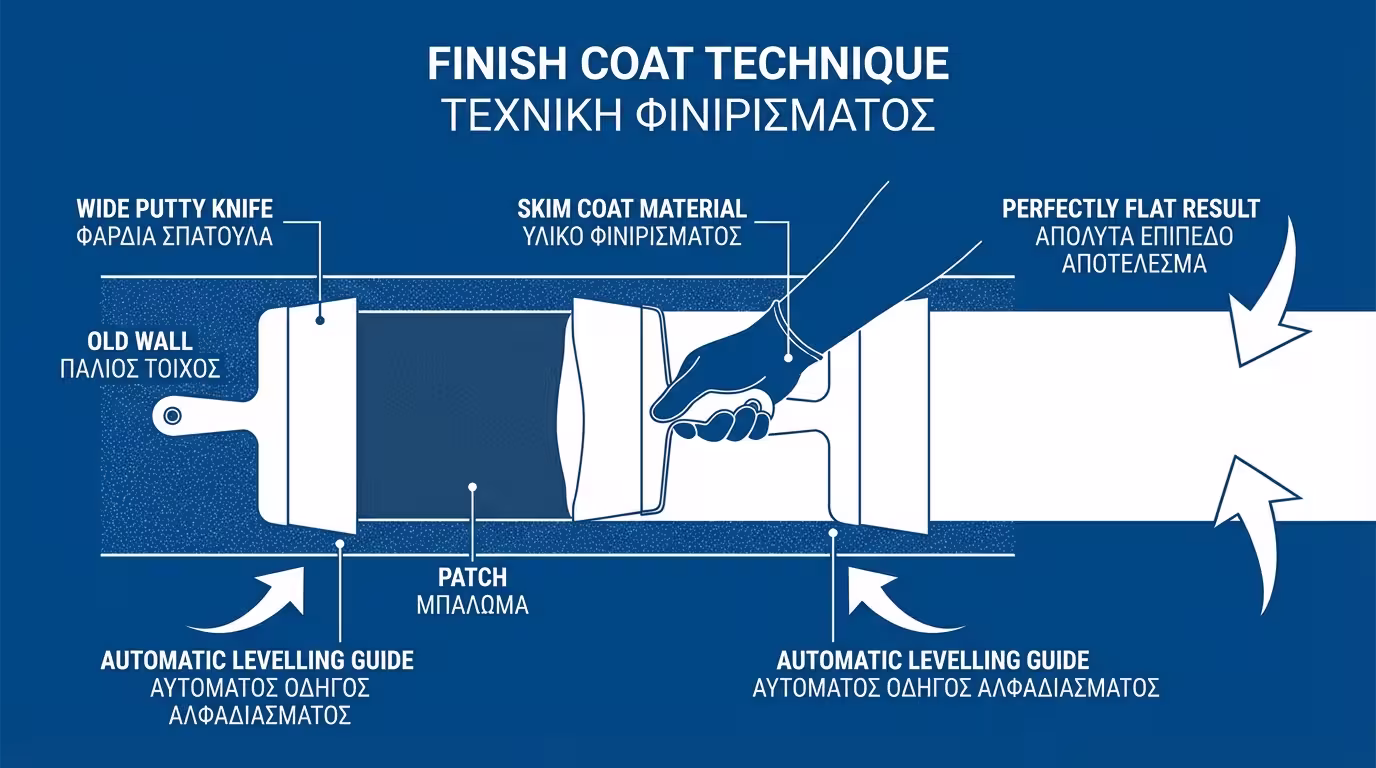
This is the step that separates the amateur from the professional. If you let the patch dry like this, a "step" or a visible line will be created around the junction of new and old material.

Sponge float circular motions at old/new junction: visible seam vs invisible blend
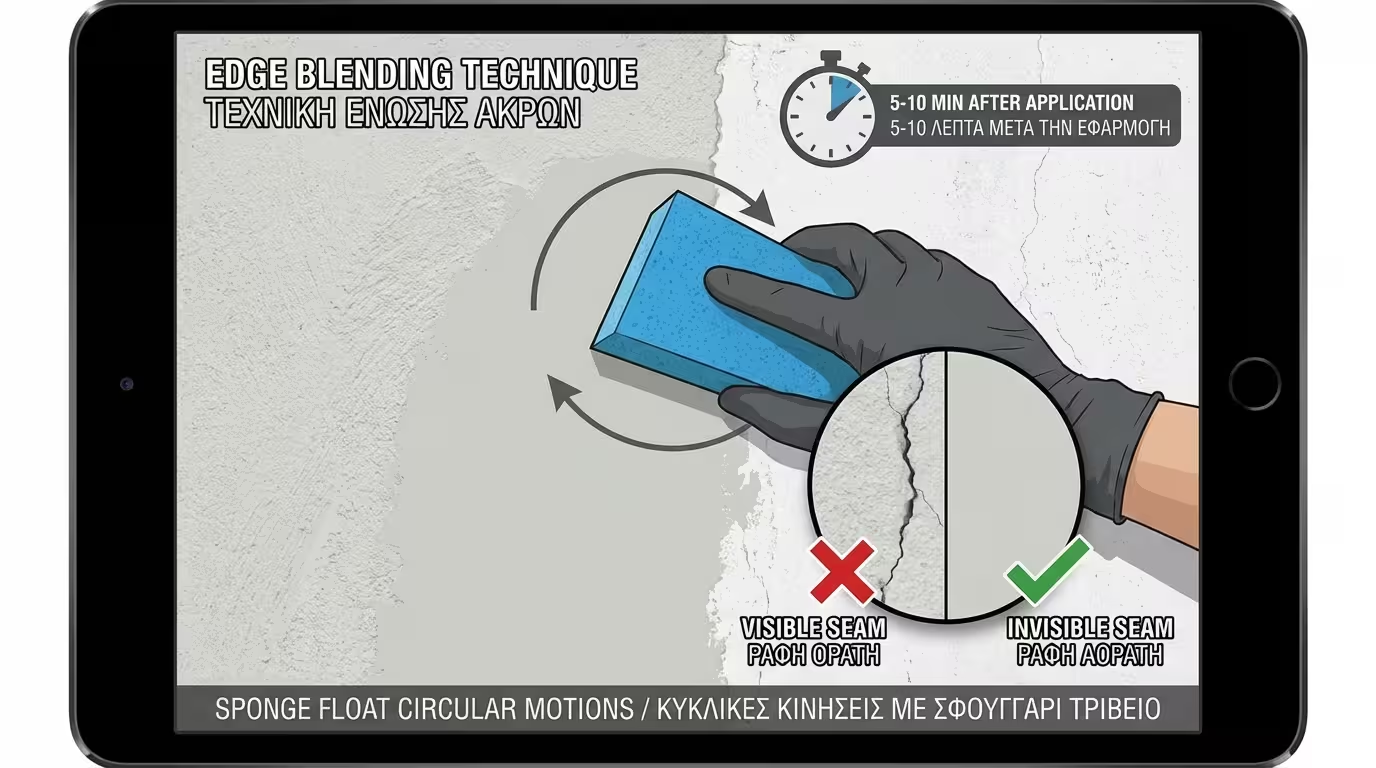
Using a Sponge Float: A few minutes after applying the final material (when it begins to "pull" and lose its shine, but hasn't petrified), grab a sponge float (a float with a hard sponge) or a slightly damp, coarse kitchen sponge.
Make gentle, circular motions exactly on the joint (where the new material meets the old paint). This movement mixes the materials, "erases" the seam and gives the patch the exact same rough texture as the rest of the wall.

When completely dry, apply a coat of primer and paint. Nobody will ever understand there was a hole in that spot!

Related Articles

Preview