1. Masonry (Brickwork)
All walls (bricks, Ytong) must have been built and the required time must have passed so that the building mud has dried and the building has "settled".
The construction and renovation of a building is like a well-tuned orchestra. Every craftsman must enter the space at the right time. A wrong "note" in the schedule means demolition, patching, lost time and, above all, lost money.
Plastering is a "milestone" job. It divides the construction into two phases: the "rough" (concrete, bricks, pipes) and the "fine" (finishes, floors, paints). So that you do not find yourself in the unpleasant position of digging up freshly plastered walls, follow the strict sequence of works below.
The plasterer is the one who will "hide" and seal the frame and networks of the house. That is why, before they bring their machine and bags, the following must have been completed:
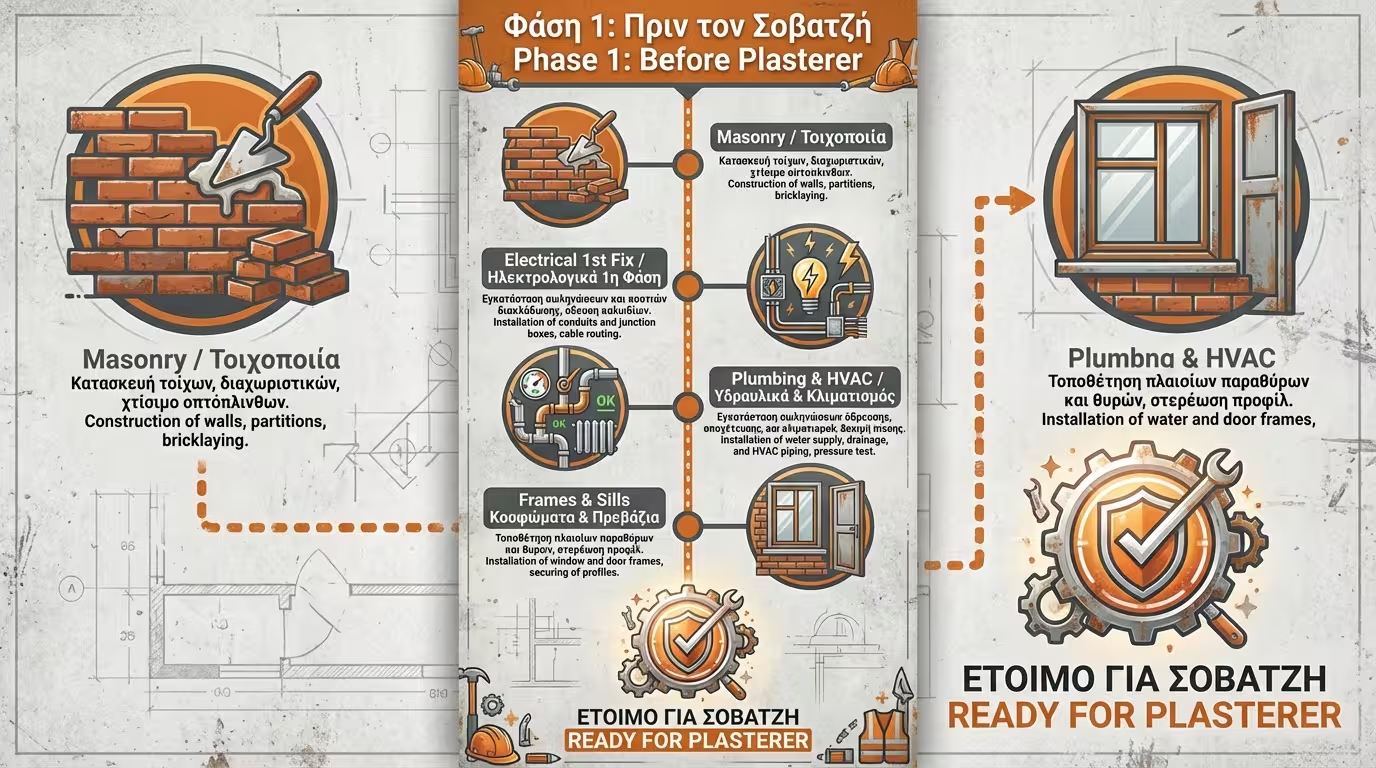
All walls (bricks, Ytong) must have been built and the required time must have passed so that the building mud has dried and the building has "settled".
The electrician must have chased the walls, installed the conduits (cable pipes), the socket/switch back-boxes and the distribution boards. The back-boxes must be firmly fixed with fast-setting gypsum or cement, slightly protruding from the brick, so that they end up "flush" with the future render.
The water supply, drainage, heating (radiators/underfloor) pipes and the A/C condensate drains must have been put in place.
*The Golden Rule:* Before the plasterer closes the plumbing chases, the plumber MUST have done a "pressure test" to ensure there are no leaks.
The metal or wooden sub-frames of the doors and windows must be plumbed and built-in. Also, the marbles on the window sills are usually placed before the final plastering, so that the craftsman can "turn" the render right onto them (reveals) and seal the gaps.
When your space has only bricks, pipes and cables, the plastering crew comes in. Their work is not done in a single day, but also follows an internal schedule:
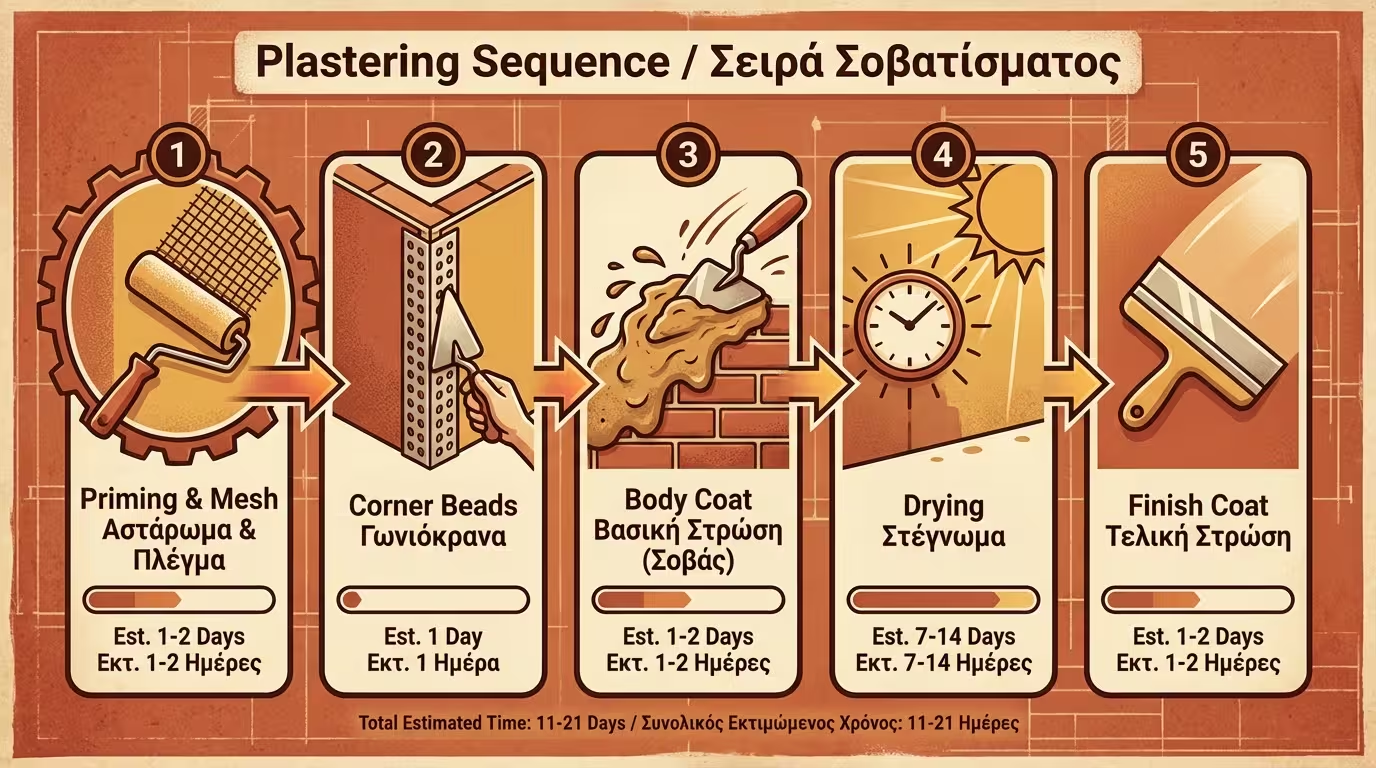
Cleaning, installation of meshes over the electrical/plumbing chases and the concrete-brick joints, and application of a quartz primer on smooth surfaces.
Installation of the metal profiles for plumbing and leveling.
The main layer. This is where the wall gets its volume.
After the body coat, the render must be left to "draw" (lose its moisture and undergo its natural shrinkage) for a few days before the final coat is applied, otherwise it will crack.
The smooth, white layer that prepares the wall for the painter.
Once the plasterer leaves and leaves the project clean, the final stretch begins.
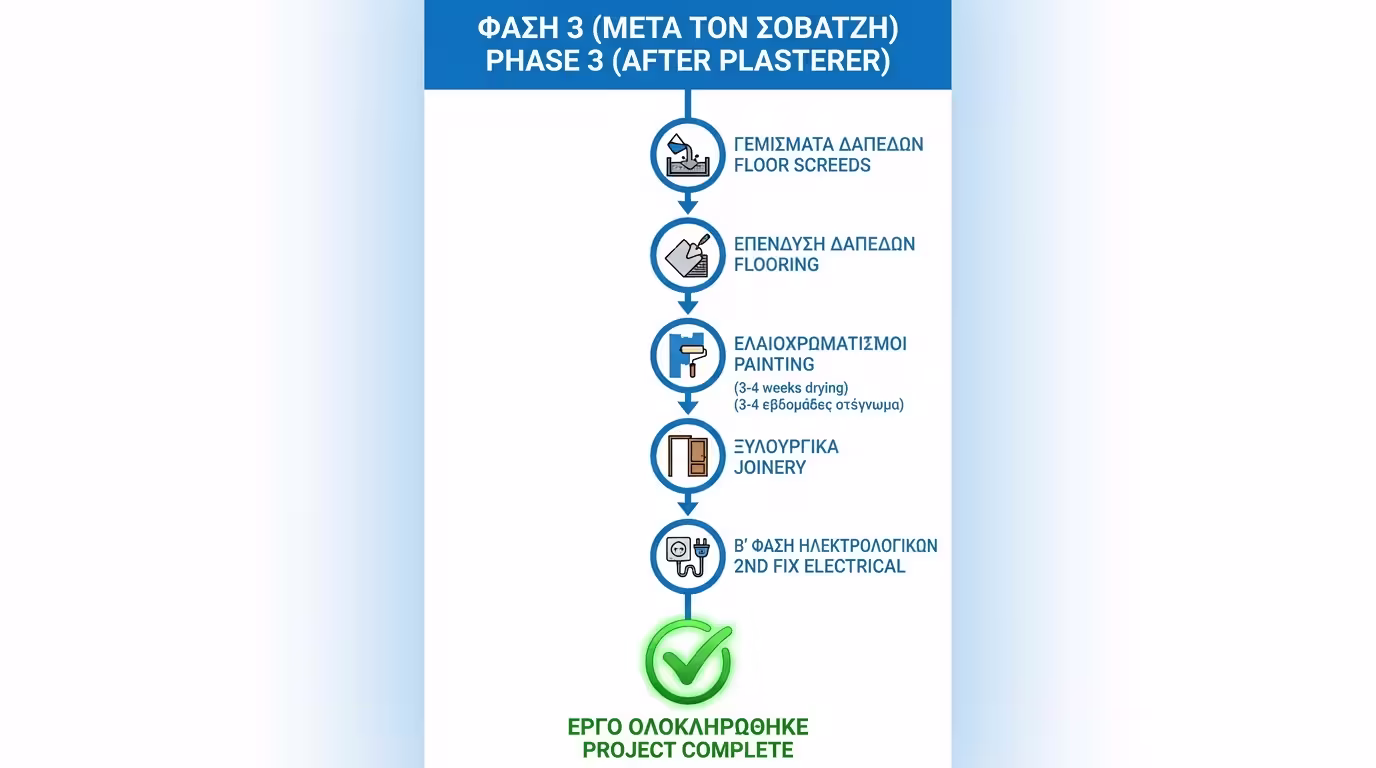
After the walls are ready, the floor screed (the fill) is laid to cover the heating/water pipes and level the floor.
The tiles or glued wooden floors are installed. (Note: Floating laminates are installed at the very end, after painting).
The painter takes over the filling, priming and painting of the walls.
*Important:* The wall must have dried completely. A traditional render needs about 3-4 weeks (depending on the weather) for its moisture to drop below 5%. If painted while damp, the paint will peel off.
They are installed onto the finished, plastered (and often already painted) openings.
The sockets, switches, light fittings, bathroom taps and sanitaryware (toilet, basin) are installed.
⚠️ The Plasterboard Mistake: If you intend to build plasterboard false ceilings, these are always installed AFTER the rendering of the walls. Plastering produces massive levels of moisture in the room (tonnes of water evaporate inside the house). If you have already installed plasterboards, their paper will suck up this moisture, deform and sag before you even move into the house!
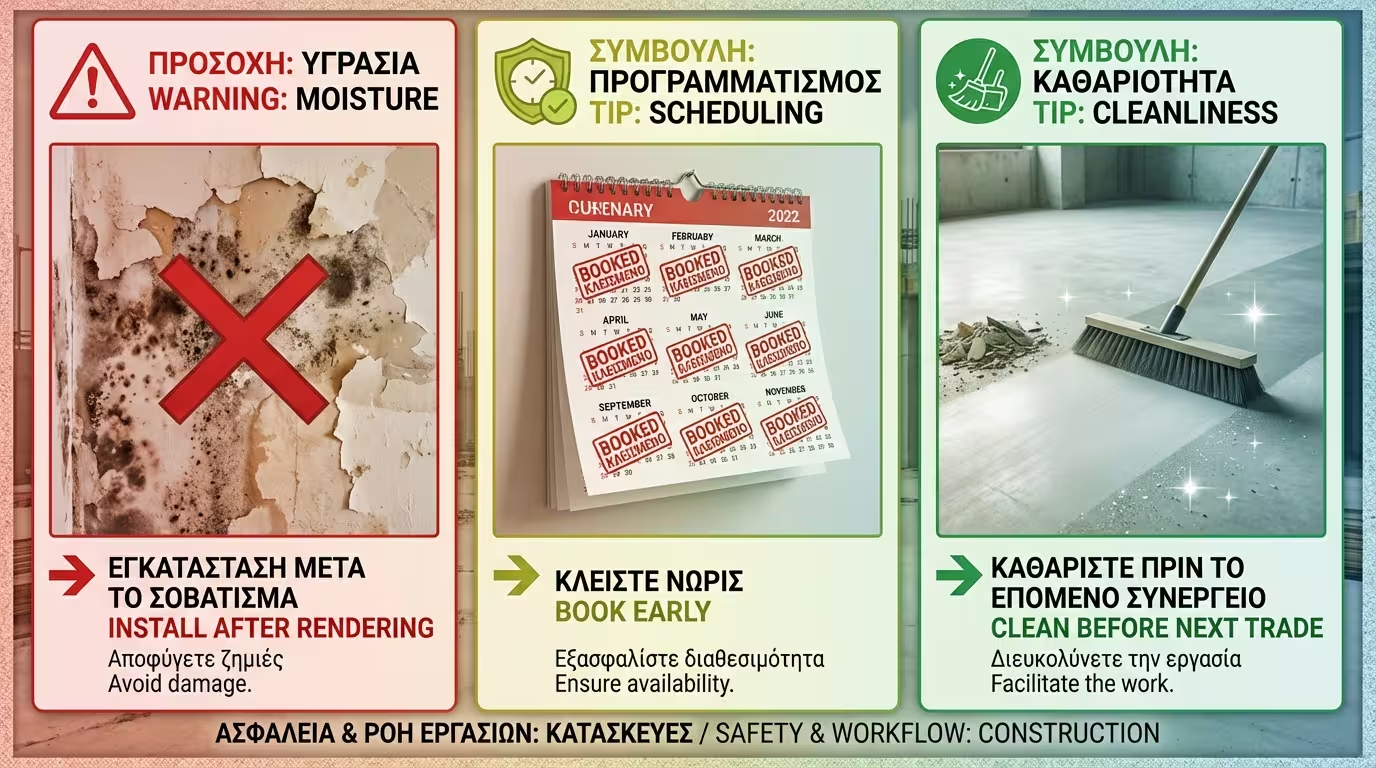
Good plasterers (especially machine crews) are booked months in advance. Do not wait for the bricklayer to finish before you start looking for a crew, because your site will remain "dead" for weeks.
Agree with the plastering contractor that they have an obligation to gather the heavy debris and discarded mud from the floors. If the floor is full of little mounds of dried cement, the screed or tiling crew will charge you extra day-rates to clean it up.
Return to category.
Go to categoryReturn to the central guide.
Go to guide