🧱 Junctions Between Different Materials
Where brick meets a concrete column or beam. Because concrete and brick expand/contract at different rates, their junction will always crack if not bridged with mesh.
A rendered wall may appear rock-solid, but in reality it "moves" constantly. Temperature changes, micro-earthquakes, material shrinkage during curing and ground settlement create enormous internal stresses. When those stresses exceed the render's tensile strength, the result is inevitable: cracks.
To prevent cracking, we use the render's "armour" - fibreglass mesh. Whether you're renovating, building new, or doing a simple patch repair, understanding this material will save you significant future repair costs.
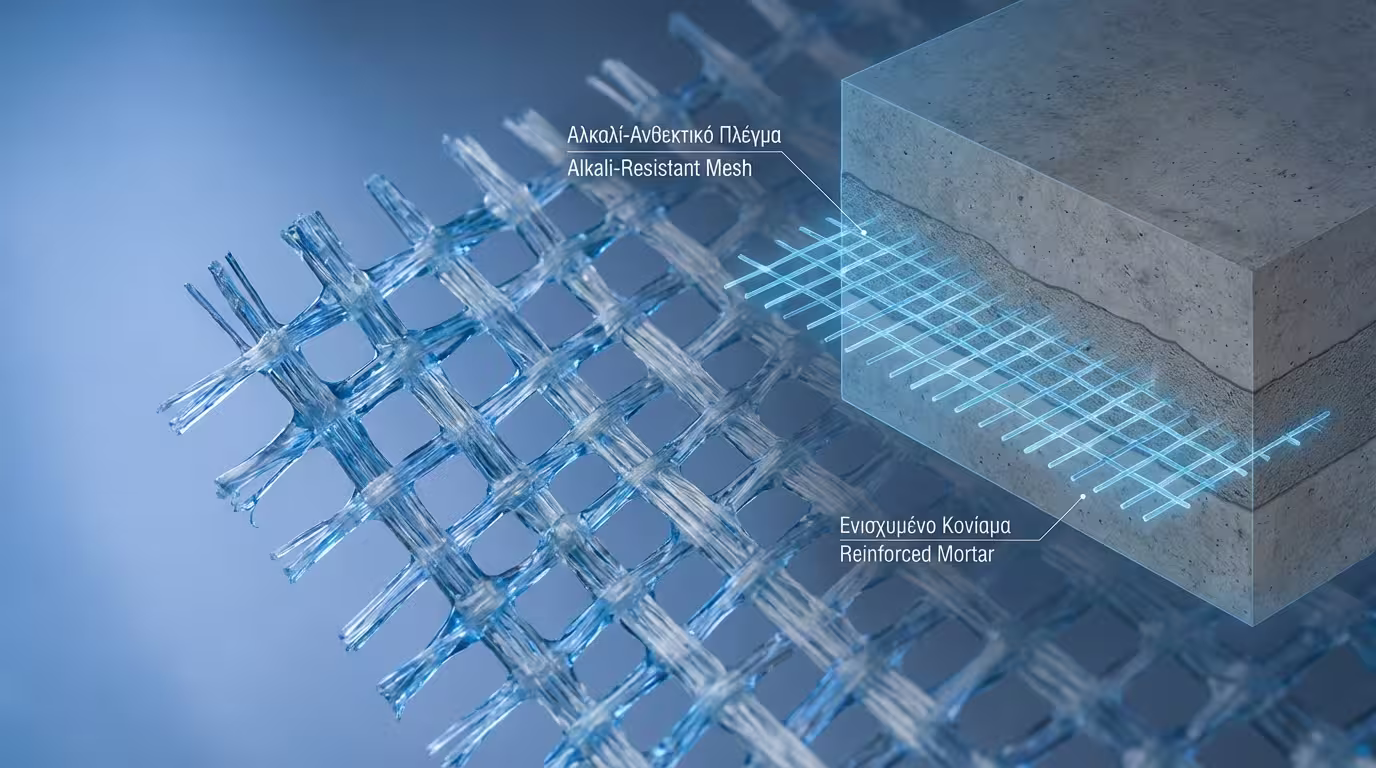
Fibreglass mesh is a woven grid made from glass fibres that have been coated with special resins to make them alkali-resistant. This is critically important: cement and lime have a very high (alkaline) pH. If you embed a cheap, non-certified plastic mesh inside render, the cement will "eat" it (dissolve the fibres) within months, and all crack-prevention is lost. When embedded in render or ETICS adhesive, fibreglass mesh functions exactly like reinforcement (rebar) inside concrete - it absorbs tensile stresses and distributes them across a large area, preventing the material from splitting.
Fibreglass mesh isn't placed randomly. There are 4 points in construction where its absence is considered a serious building defect:
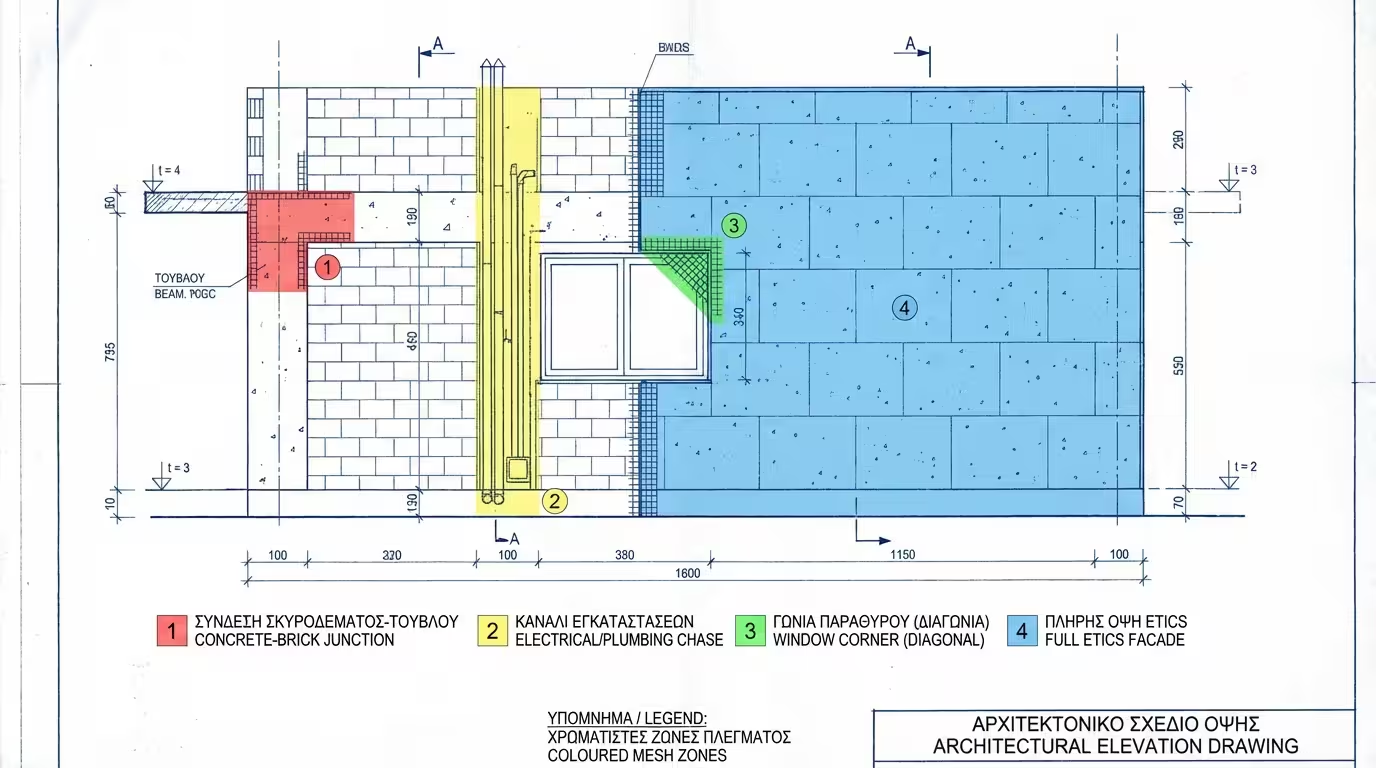
Where brick meets a concrete column or beam. Because concrete and brick expand/contract at different rates, their junction will always crack if not bridged with mesh.
When walls are cut to run pipes or cables and then filled with mortar (patch repair), that spot is the most vulnerable to cracking. The mesh must cover the chase and extend 10-15 cm beyond each side.
Diagonal stresses develop at the corners of openings. Small diagonal pieces of mesh (20×40 cm) are placed there to prevent the render from splitting at the window edges.
On external thermal insulation systems, mesh is applied universally (across the entire building façade) over the insulation boards, since EPS/XPS has no mechanical strength of its own.
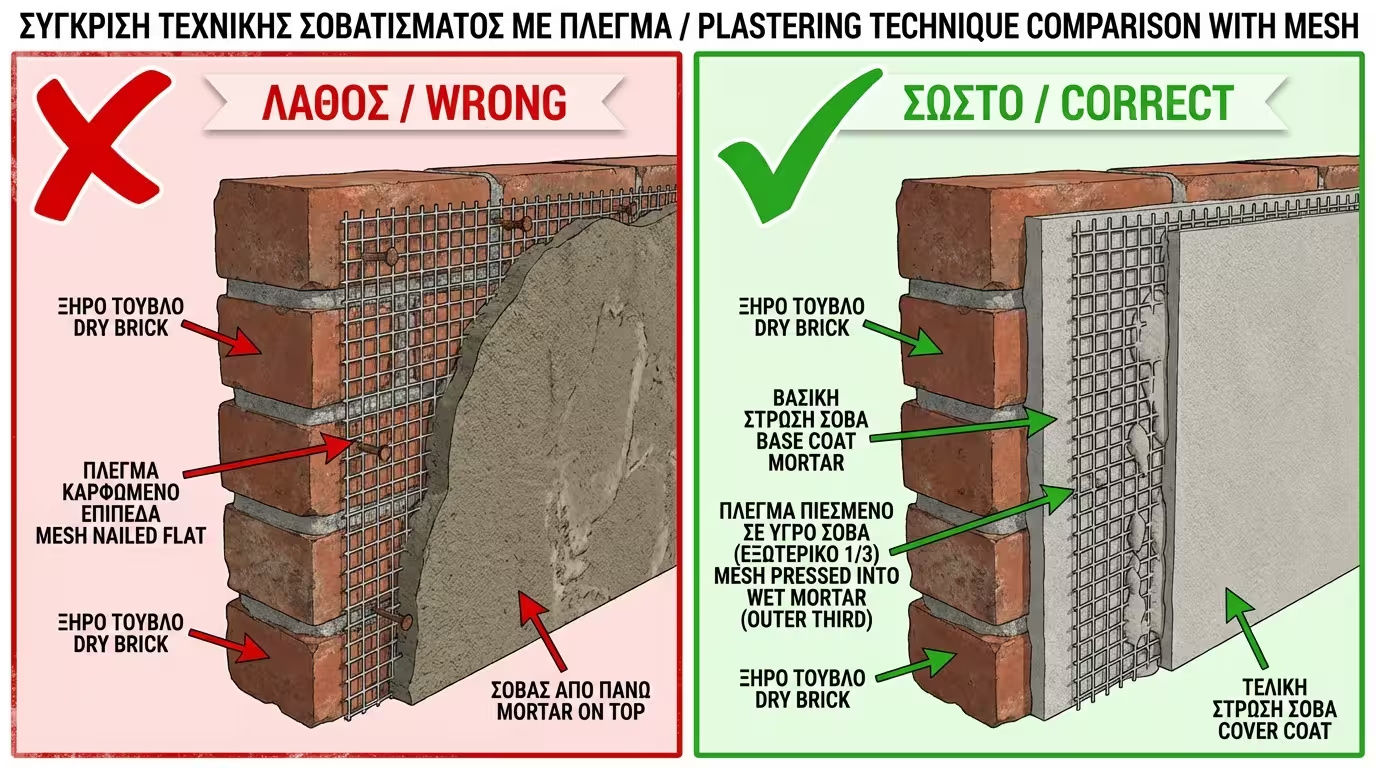
The most common and destructive mistake on building sites (even by experienced tradespeople) is the way the mesh is applied:
The tradesperson nails or staples the mesh to the dry wall and then applies render over it. This is useless. The mesh sticks to the wall, the render sits on top, and no cohesion is created whatsoever.
The mesh must "swim" inside the wet material, ideally in the outer 1/3 of the thickness.
Apply the first (base) layer of render or adhesive to the wall.
While the material is still fresh (wet), place the mesh and press it gently with a trowel so it sinks into the mortar.
Immediately apply a second, thin coat "wet-on-wet" to fully encapsulate the mesh. The mesh must not be visible.
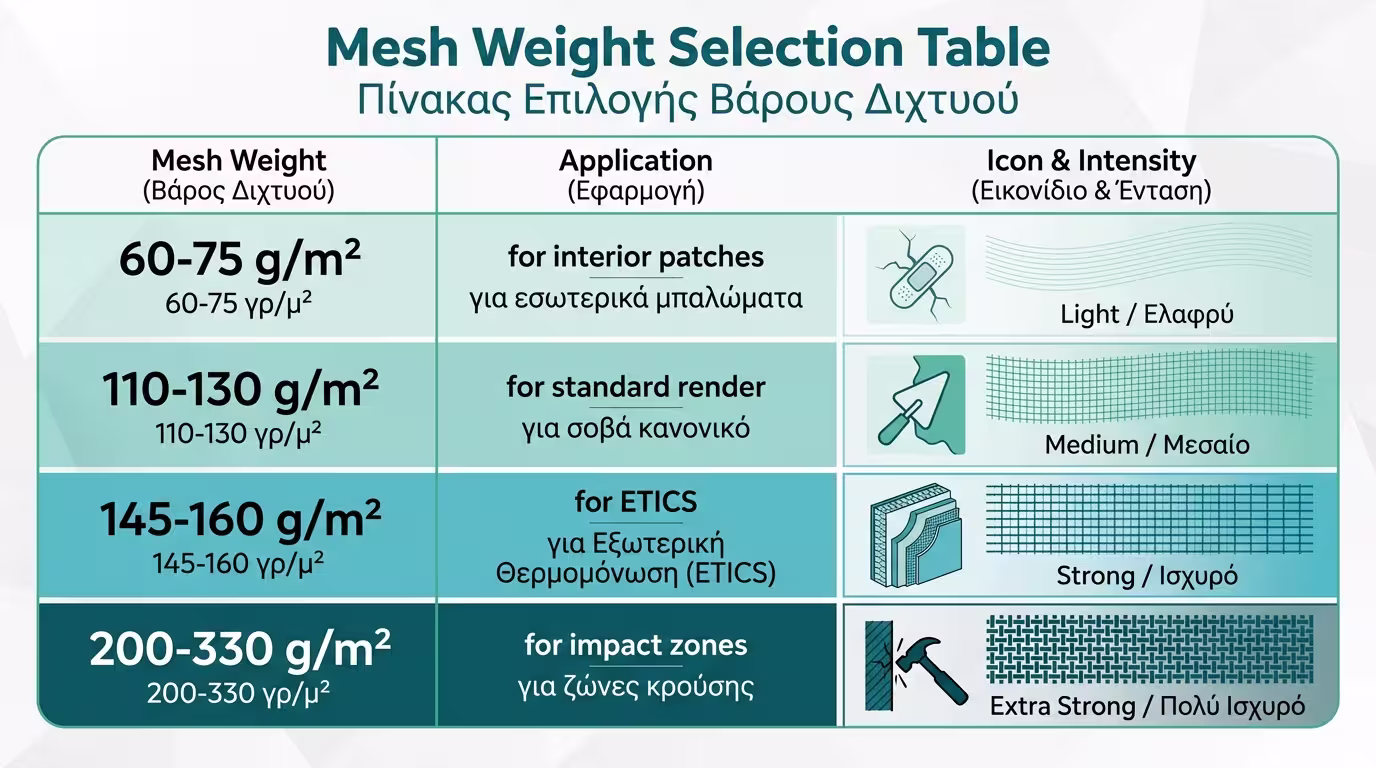
Fibreglass meshes are differentiated primarily by their weight per square metre and the mesh opening size. The heavier the mesh, the stronger the reinforcement.
| Application | Weight | Mesh Size |
|---|---|---|
| Interior patches / crack repair | 60-75 g/m² | 2×2 or 4×4mm |
| Standard render (concrete-brick junctions) | 110-130 g/m² | 5×5mm |
| External thermal insulation (ETICS) | 145-160 g/m² | 4×4 or 5×5mm |
| High-impact zones (ground floor, garages) | 200-330 g/m² (armoured) | 6×6mm |
💡 The Golden Overlap Rule (10 cm): Fibreglass mesh is sold in rolls (typically 1 metre wide). When placing one strip next to another, they must not simply butt up against each other. The second strip must overlap the first by at least 10 centimetres. Without this overlap, the wall will crack precisely along the join line.
Fibreglass mesh cuts easily with a simple utility knife. Prepare your pieces to the correct lengths before you start mixing mortar - once the render starts setting, you won't have time.
If the mesh gets heavily creased during storage, the glass fibres break internally and the spot weakens. Always store rolls upright.
Proper mesh installation costs less than a bag of render - but saves thousands in future crack repairs.
Return to category.
Go to categoryReturn to the central guide.
Go to guide