🔍 Ignored Hairline Cracks
The fine cracks we analyzed in a previous article are the backdoor. If you leave them open in the autumn, they will fill with water in the winter, freeze, and by spring the one-millimetre crack will have become a crater.
Winter is the harshest season for the external facades of a building. If you live in an area where the temperature frequently drops below zero, you may have faced an unpleasant surprise: with the arrival of spring, the external render begins to crack, peel, and fall off in large pieces, revealing the bare brick or concrete underneath.
This phenomenon is called frost spalling. It is not the fault of the render's quality, nor its age. It is the fault of physics and one of nature's most destructive forces: the expansion of water. Let's see how this invisible mechanism works and how you can shield your home.
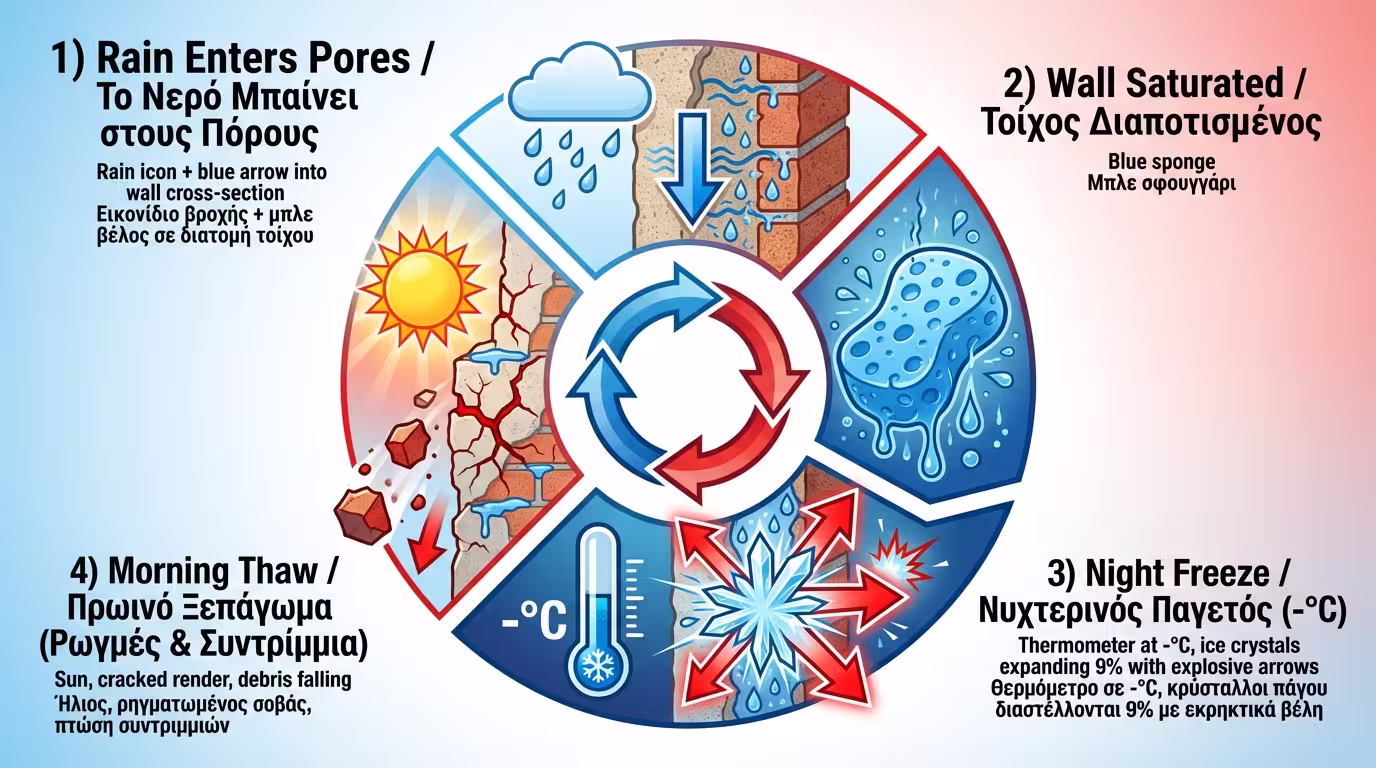
To understand the damage, we only need to remember a basic rule of physics: When water freezes and turns into ice, its volume increases by 9%. So imagine what happens inside your wall:
This process (freezing at night, melting in the morning) is called the Freeze-Thaw Cycle and is repeated dozens of times during a winter.
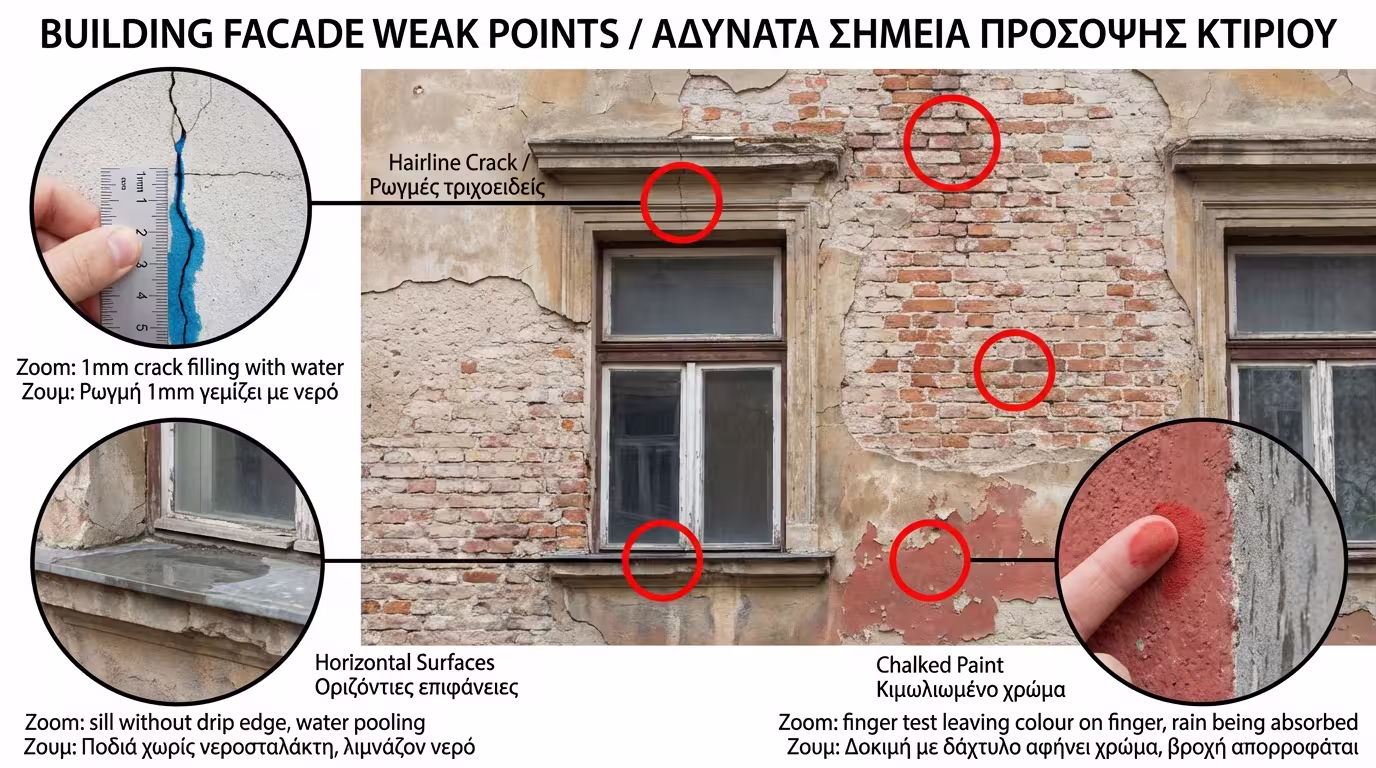
Frost can do no damage to a completely dry wall. The secret to prevention is finding where the water is getting in before the cold weather arrives:
The fine cracks we analyzed in a previous article are the backdoor. If you leave them open in the autumn, they will fill with water in the winter, freeze, and by spring the one-millimetre crack will have become a crater.
Water easily pools on the exposed "caps" of walls, on balconies, and on window sills. If they don't have the correct slopes or if the drip edge (the special groove under the marble that "cuts" the drip) is missing, the water will lick the vertical render, constantly soaking it.
If the external paint has faded (chalking) and lost its resins, it no longer repels water. It acts like a sponge that feeds the render with moisture in every rain.
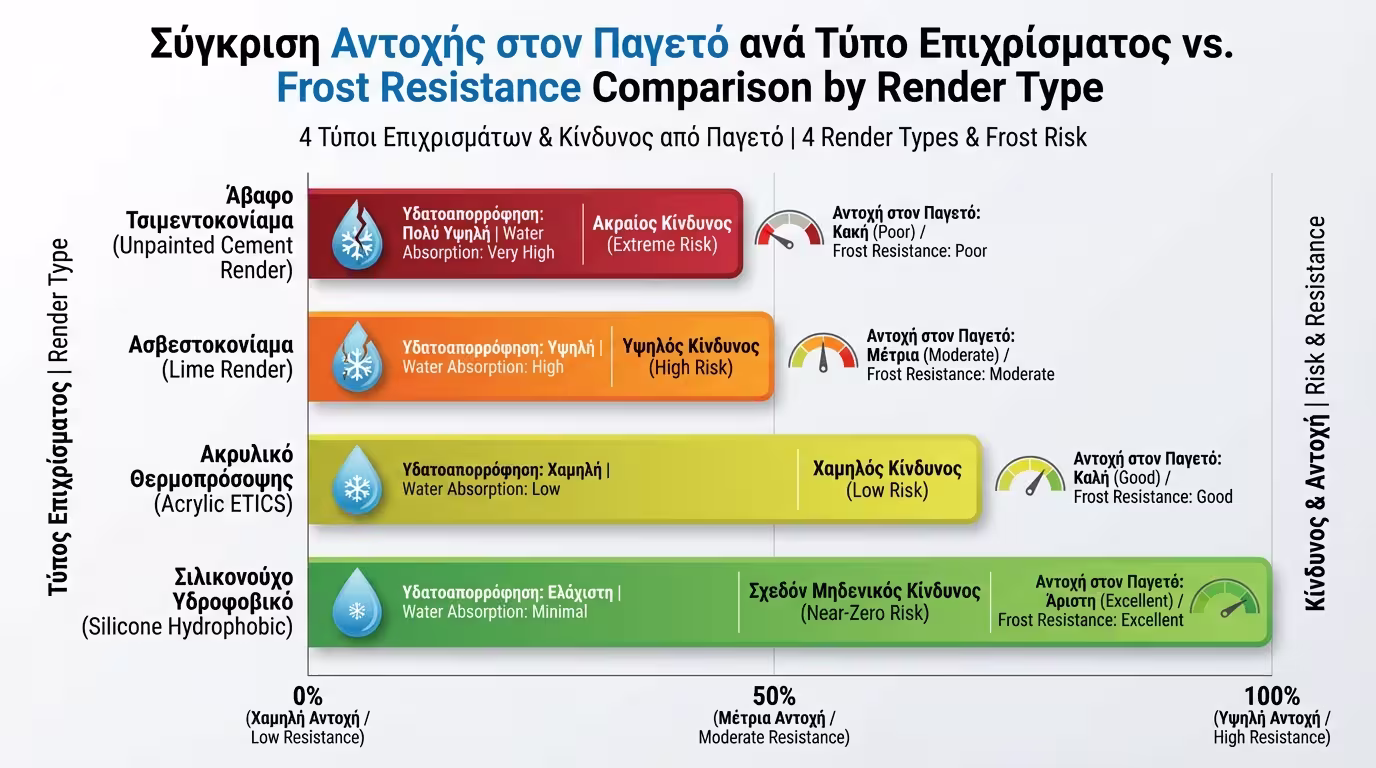
Not all renders react the same way to low temperatures:
| Type of Render / Coating | Water Absorption | Frost Resistance | Spalling Risk |
|---|---|---|---|
| Plain Cement Render (Unpainted) | Very High | Very Low | Extreme |
| Lime Render (Old Buildings) | High (but evaporates quickly) | Medium | High |
| Acrylic Pasty Render (ETICS) | Low | Good (Due to elasticity) | Small |
| Silicone Render (Hydrophobic) | Minimal (Water beads up) | Excellent | Almost Zero |
⚠️ The Rule of the Season: NEVER try to repair external render (or apply fresh mortar) in the dead of winter, when temperatures are below 5°C. The new mortar will freeze before it has time to dry (hydrate) and will be destroyed immediately. Wait for spring!
Before the cold starts, do a visual inspection on the facades of your house. Seal all cracks (even the smallest ones) with an elastomeric polyurethane mastic. If the paint is old and absorbent, apply a transparent siloxane impregnating liquid (waterproofing). This liquid forces the wall to repel water (water rolls off as if on wax), while allowing it to breathe.

If the frost damage is already done:
Return to category.
Go to categoryReturn to the central guide.
Go to guide