🌡️ What Changes with Condensing
The new gas boiler exhausts at only 50-60 °C. At this low temperature, water vapour condenses inside the flue. This water isn't clean - it's highly acidic (like dilute acid, pH ~3.5).
You've decided to get rid of the oil tank and switch to natural gas. Many believe the plumber will simply unbolt the old boiler, bolt on the new one and that's it. If done this way, your home is at risk.
Modern gas boilers use condensing technology - this completely changes the installation requirements. Let's walk through the 4 essential steps.
This is the most common - and dangerous - oversight. Your old oil boiler exhausted flue gases at 200 °C. The chimney (masonry, asbestos pipe, or sheet metal) was designed to handle heat, not moisture.
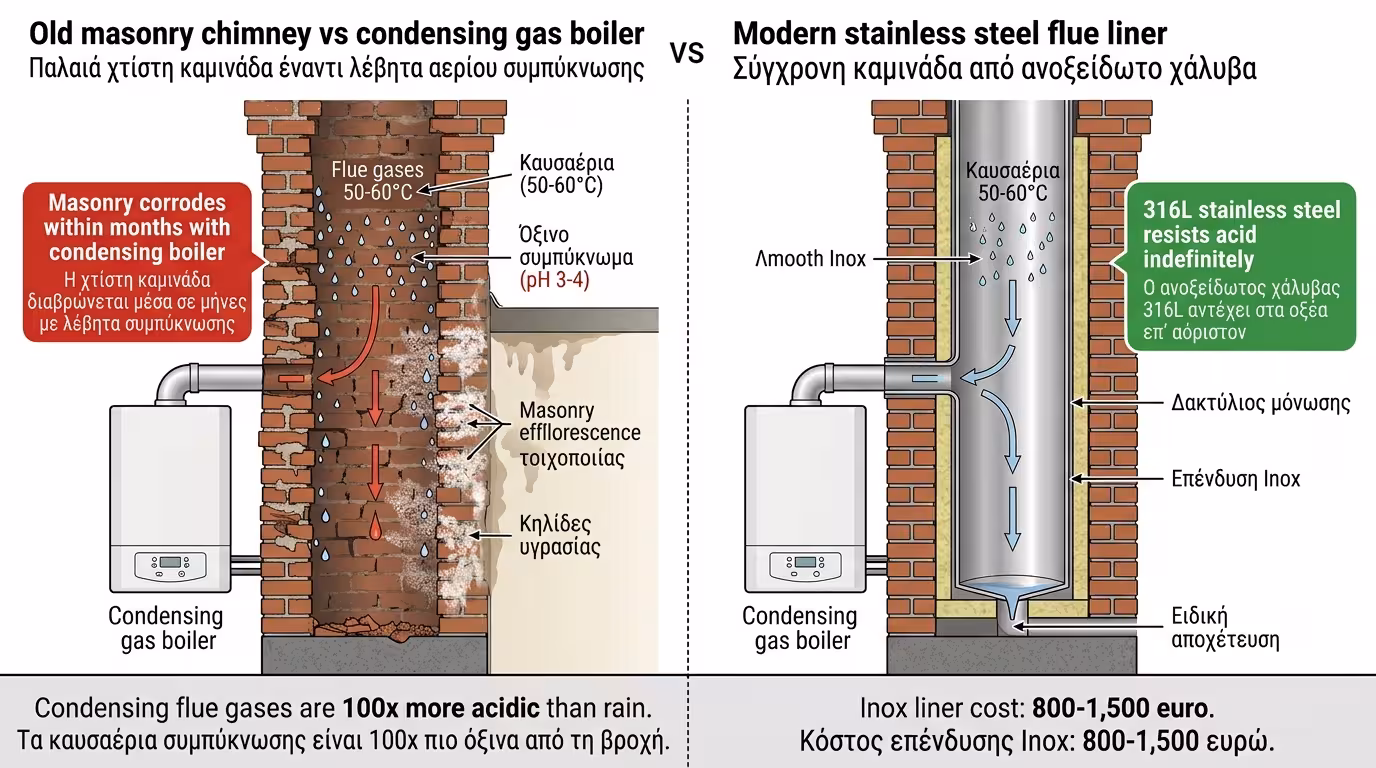
The new gas boiler exhausts at only 50-60 °C. At this low temperature, water vapour condenses inside the flue. This water isn't clean - it's highly acidic (like dilute acid, pH ~3.5).
If you connect the new boiler to the old masonry flue, the acid will start eating away at the mortar and bricks . Within months, the chimney will disintegrate internally and moisture will soak through the walls. Result: mould, crumbling plaster and structural damage.
The installer MUST thread a new flue liner (stainless steel Inox or special PP plastic) inside the old chimney, from the boiler to the rooftop. This material resists acid and protects the building fabric.
Prices range from €300-800 depending on building height (1-5 floors) and material (Inox vs PP). In apartment blocks, co-owner approval may be needed if the flue is shared. Don't skimp - damage without a liner easily exceeds €5,000.
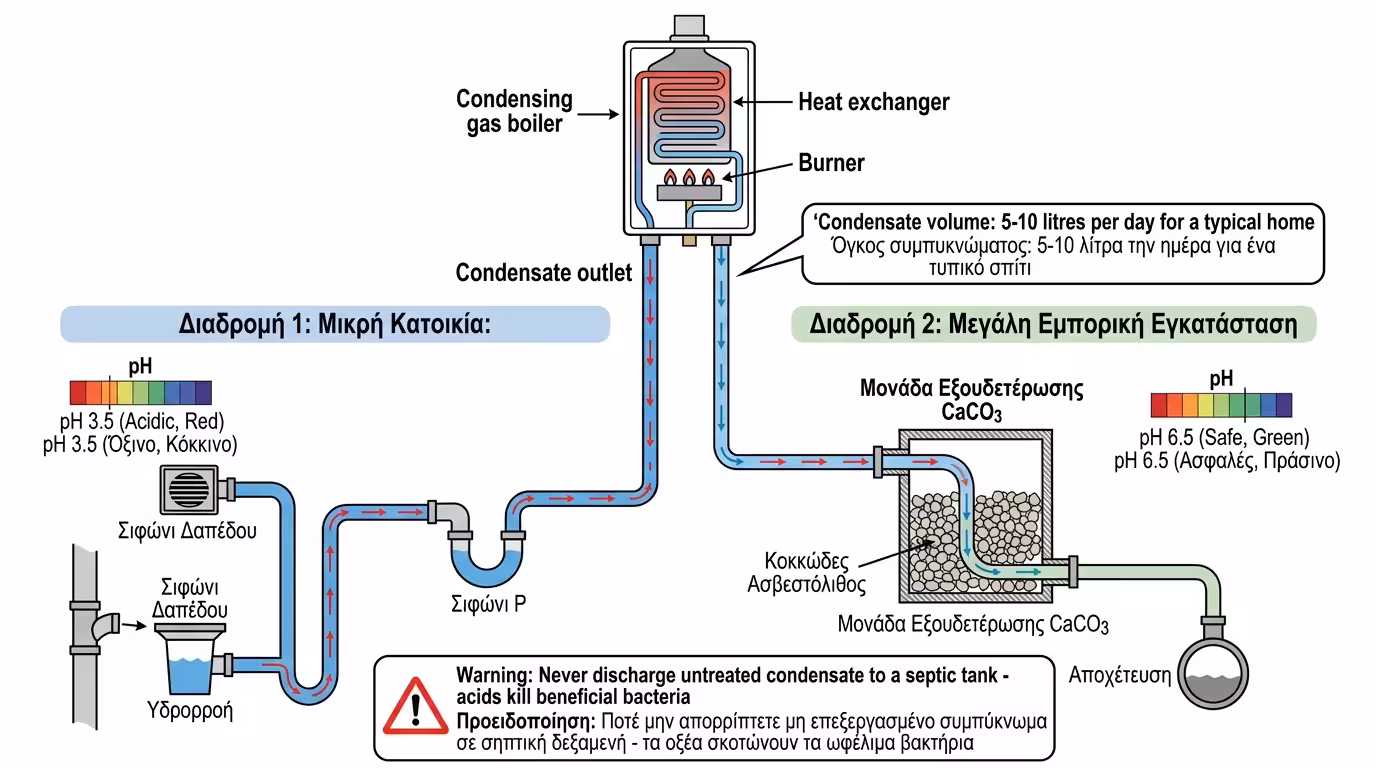
Because the boiler condenses, it produces water. Several litres of acidic water every day. You can't just let it drip onto the balcony - it will destroy tiles and marble.
A new drain pipe must connect the boiler to the nearest drain (balcony siphon or downpipe). The pipe needs a gradient for natural flow and a trap siphon to prevent flue gases from entering the home.
For heavy output, a neutraliser is fitted - a small filter with granular CaCO₃ that raises the water's pH. Cost: €50-100. It protects drain pipes and tiles from acid damage.
A 24 kW boiler in condensing mode produces 2-5 litres/day at full load. A central boiler in an apartment block can reach 20+ litres/day. Proper drainage isn't a "detail" - it's essential.
If the drain pipe runs through an exposed area (e.g. balcony), ensure it has insulation or a heat trace cable . If it freezes, condensate can't escape, the boiler throws an error code and shuts down.
Oil arrived via a hose from the tank. Natural gas comes from the street meter - and requires specialised piping that meets strict safety standards.
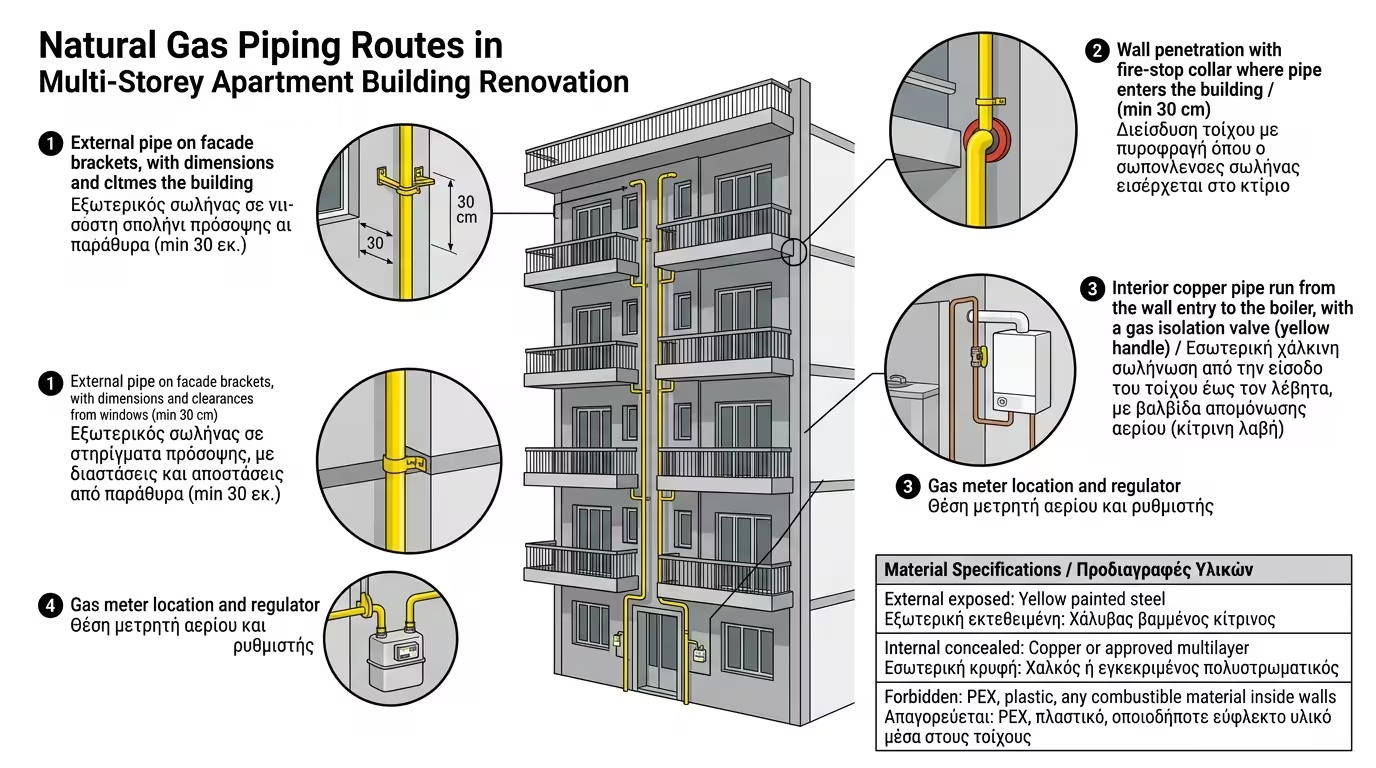
Regulations permit copper pipes (painted the distinctive yellow) or stainless steel tubes. Rubber hoses and plastic are strictly prohibited. Every joint is pressure-tested.
By default, gas pipes must run externally (facade, light well) so any leak is ventilated. If they must pass through an enclosed space, they're enclosed in a secondary ventilation duct. You may see a yellow pipe running on the building's façade.
Before the boiler, a solenoid safety valve is installed that automatically shuts off gas in case of earthquake, fire, or leak. It's linked to a gas detector in the boiler room.
Gas work is permitted only by licensed gas installers (Category E1 or E2). The "local plumber" cannot perform gas brazing - specific certification and insurance coverage are required.
Unlike oil, natural gas requires an approved Mechanical Engineering Study before any work begins. Without it, the supply valve stays closed.
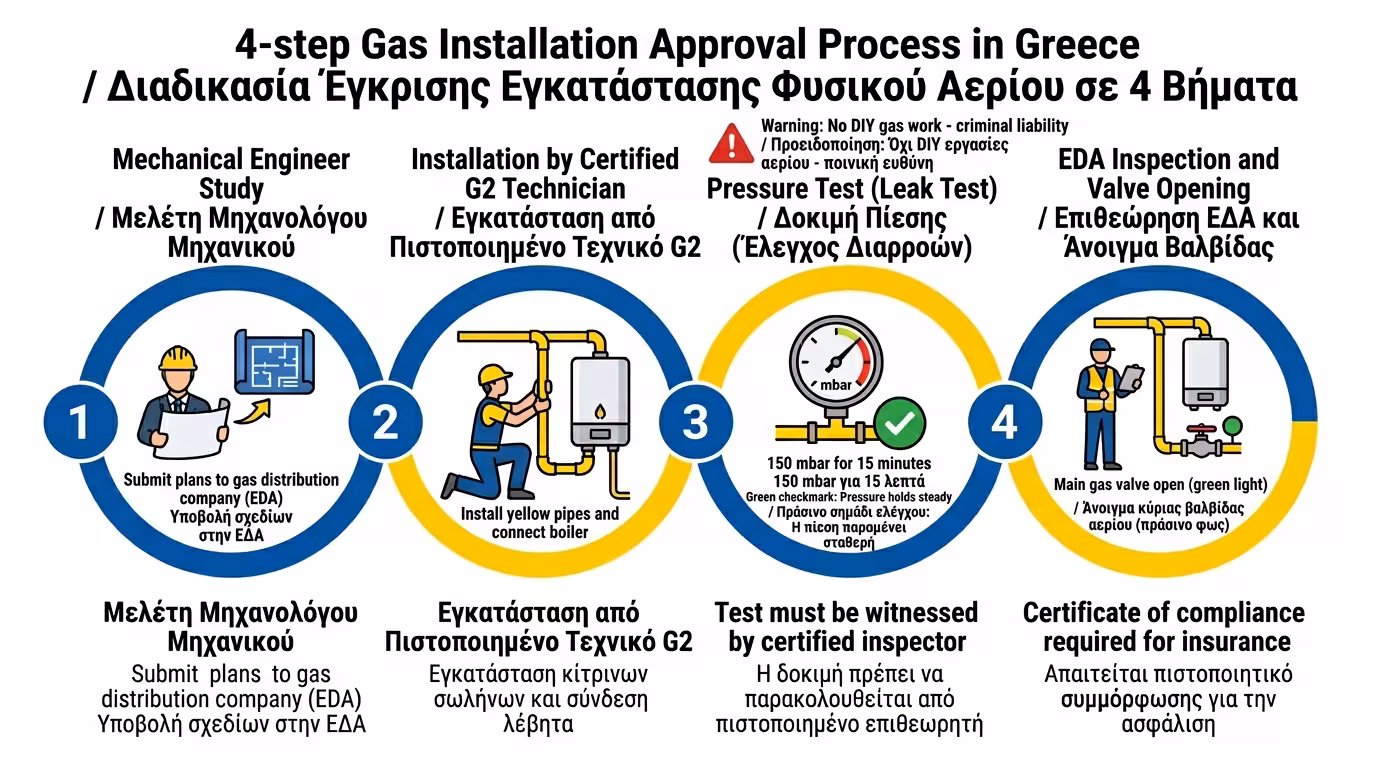
The mechanical engineer designs the pipe routes, boiler position, flue and safety points. Plans are submitted to the Gas Distribution Company (EDA). Work begins only after approval.
After installation, a gas company inspector pressurises the pipework with air (24-bar test). If pressure drops by even 0.1 bar in 30 minutes, there's a leak. The valve isn't opened until it passes 100%.
The study takes 2-4 weeks for approval + 1-2 days installation + 1 day testing/handover. Total: about 1 month from application to warm home. Plan early - don't be caught without heating in November!
Switching to natural gas offers 30-40% savings vs oil, permanent hot water, and cleaner combustion. It requires a stainless steel flue liner, condensate drain, yellow piping and an approved engineering study. Don't cut corners on safety - do it right from the start!
🔑 Step order: Engineering study → Gas company approval → Inox flue liner → Yellow gas piping → Boiler installation → Leak test → Valve opened.
Return to category.
Go to categoryReturn to the central guide.
Go to guide