🌡️ Sensors
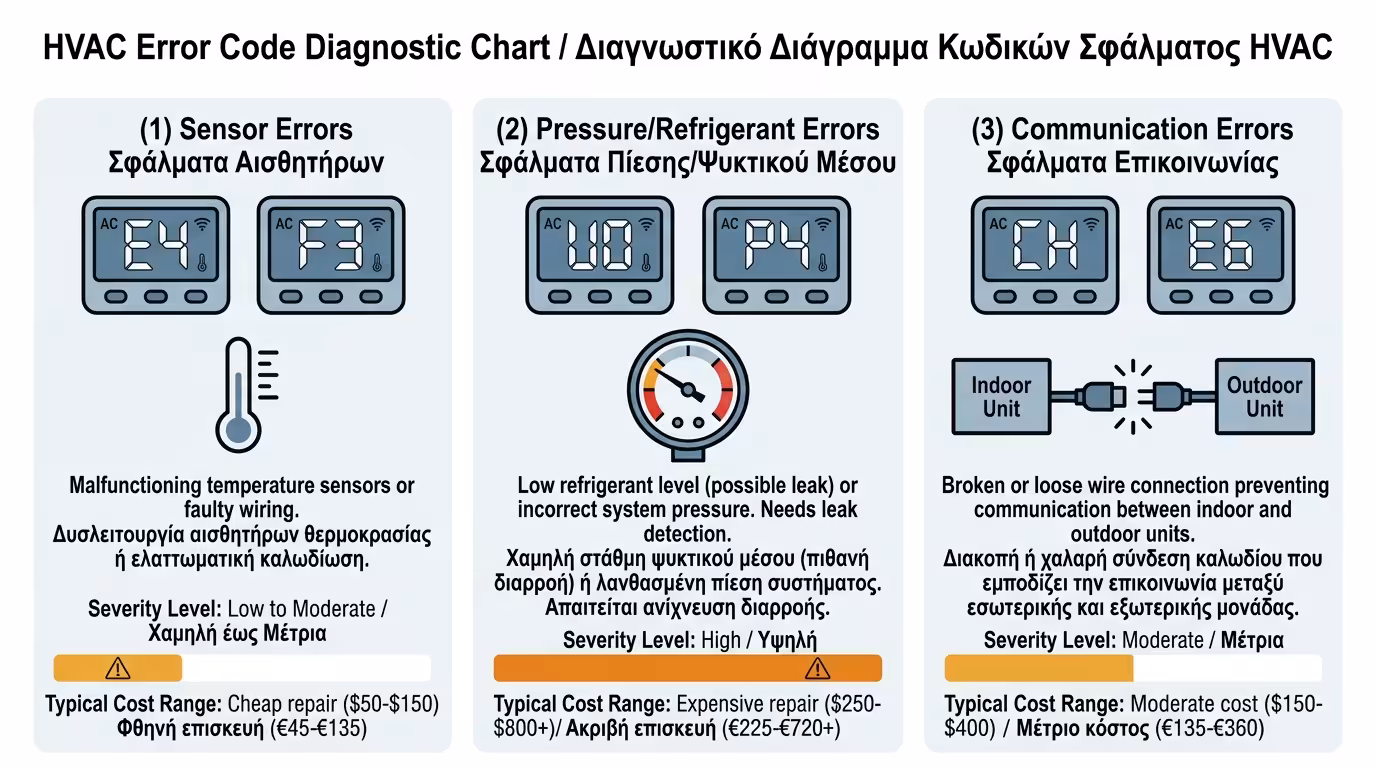
Usually means a small temperature wire has come loose or failed. This is a very cheap repair - a sensor costs a few euros and takes minutes to replace.
We've fixed the plumbing, cleaned the filters, found the leaks. But what happens when the problem isn't mechanical - it's digital?
Suddenly, your air-conditioner or heat pump stops working. The display fills with incomprehensible characters (e.g. E4, U0, CH) or, if there's no display, the LED lights start blinking like a Christmas tree. Let's see how to decode this language and what to tell the technician so you save time and money!
When modern HVAC units fail, they don't just "die". Their circuit boards have dozens of sensors monitoring everything: from refrigerant temperature to fan speed. When something goes wrong, the brain shuts the unit down to protect it and tries to tell you exactly what hurts.
If your unit has a digital display (or a smart thermostat), the fault appears as a combination of letters and numbers. Every brand has its own "code", but errors usually fall into categories.
Usually means a small temperature wire has come loose or failed. This is a very cheap repair - a sensor costs a few euros and takes minutes to replace.
Codes (like the classic U0 on well-known brands) screaming: "I've lost my refrigerant, find the leak!" This requires a refrigeration technician with a refrigerant leak detector.
The indoor unit can't "talk" to the outdoor unit. Usually a cut or loose signal cable - check the connection under the access panels before calling a technician.
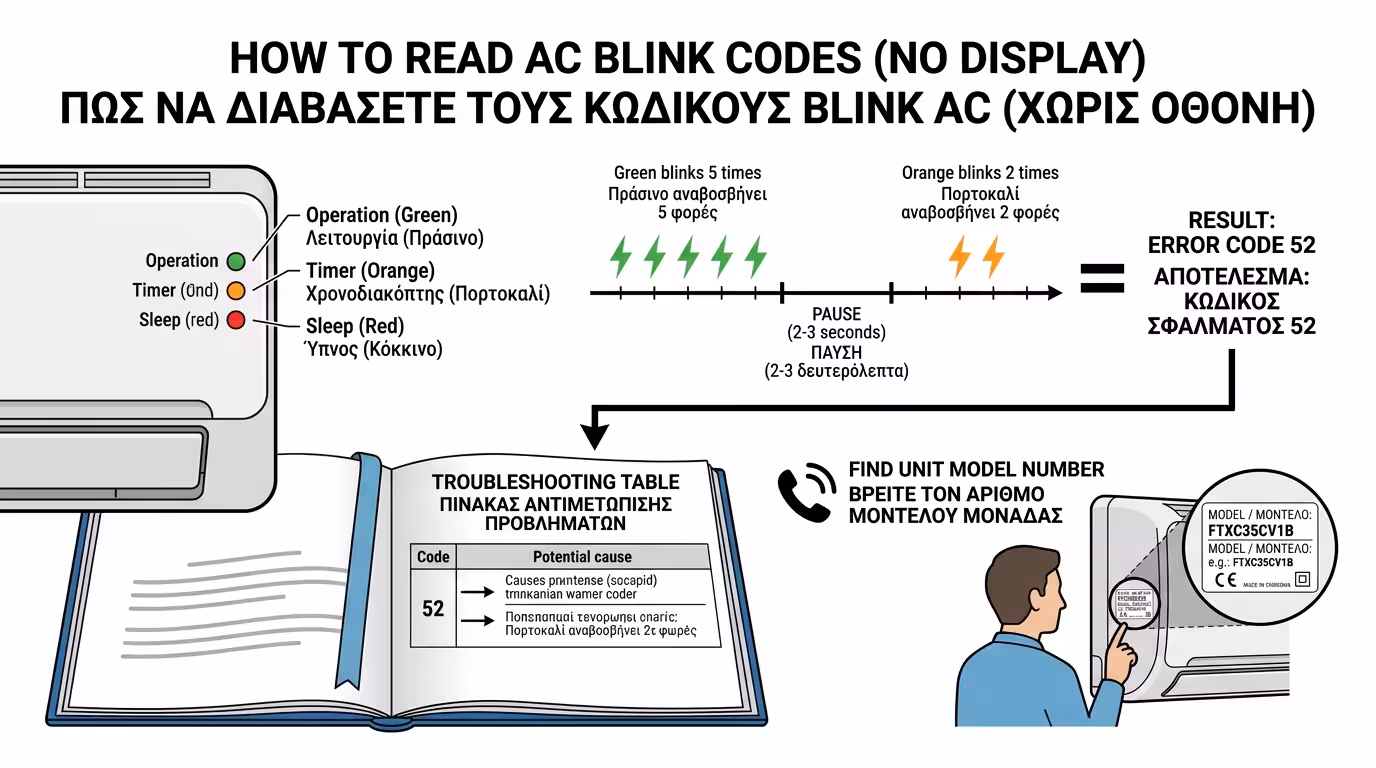
Simple wall-mounted ACs don't have a display to write "Error 5". Instead, the unit communicates through the LED lights (small lamps) on the front panel: Operation, Timer, Sleep.
The brain makes them blink in a specific pattern. For example: the green light (Operation) blinks 5 times, pauses, then the orange light (Timer) blinks 2 times. That translates to error code "52".
Open the user manual left by the installer. In the last pages there's always a Troubleshooting table explaining what each blink combination means.
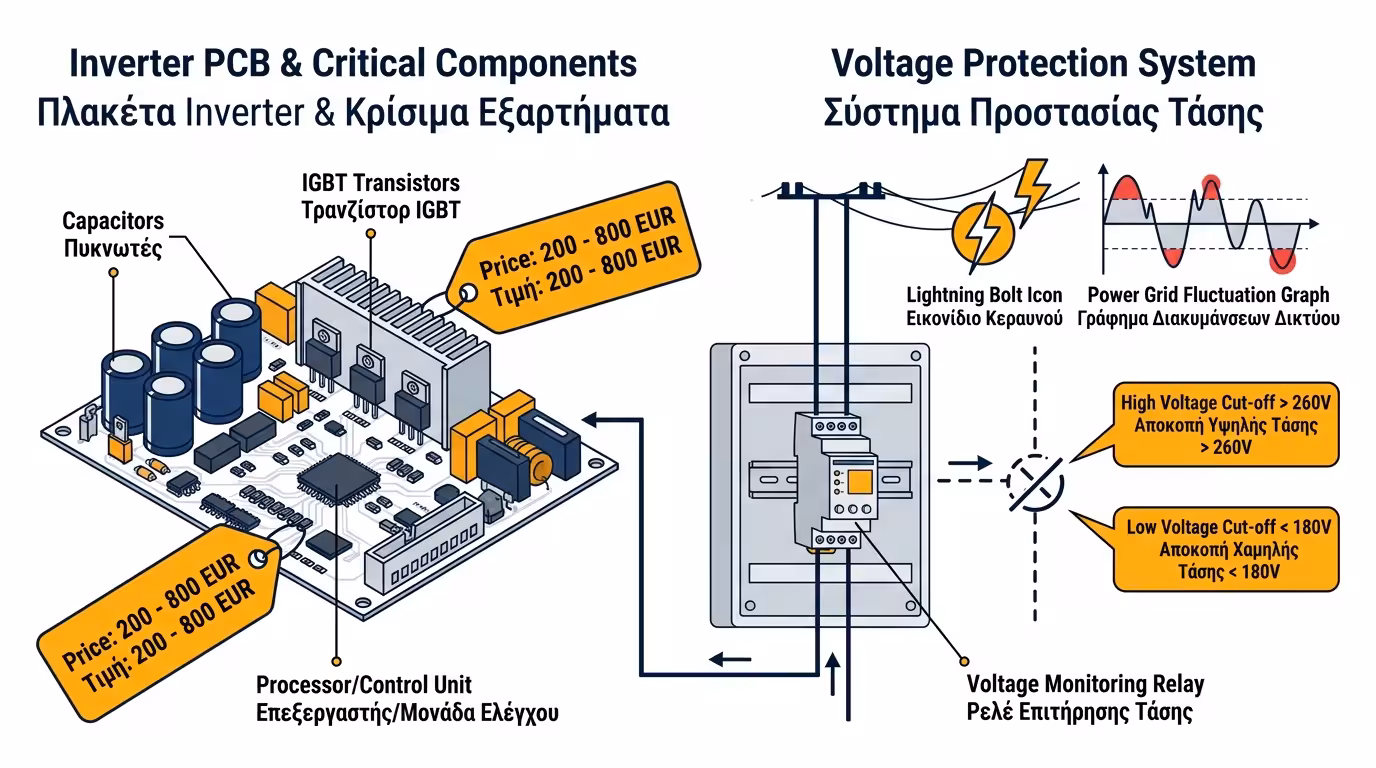
Modern Inverter units are essentially electronic computers. Just as your PC or phone can freeze, the AC's circuit board can also "hang", throwing a false error due to a sudden voltage fluctuation from the grid.
Before calling a technician, perform the ultimate Hard Reset:
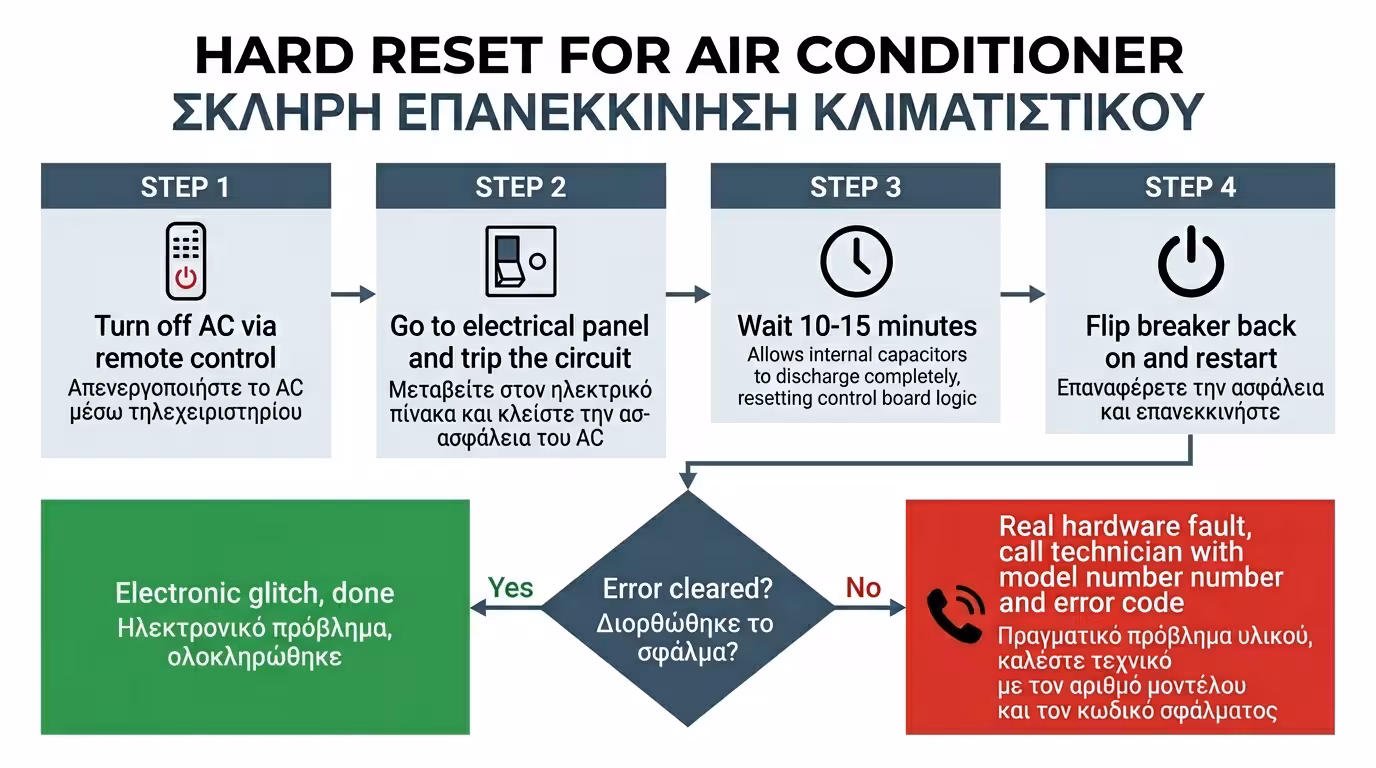
Switch the unit off with the remote control and wait until it stops completely.
Go to the electrical panel and trip the circuit breaker for the AC or heat pump.
This is critical! The capacitors on the board hold charge for several minutes. If you flip it back on immediately, the memory won't have cleared and the error will reappear.
Flip the breaker back on and start the unit. If it works normally, it was just an electronic "glitch". If the light starts blinking again, the fault is real (Hard Fault).
"I have a white 12,000 BTU unit, come and fix it because it's not working." If the tech shows up like this, they'll diagnose the fault and leave to order a part, charging you for two visits!
1. Exact Model: Go to the side (or underneath) of the
indoor unit. There's a silver sticker (Data tag). Read the exact Model
Number (e.g. FTXC35CV1B).
2. Exact Code: "Timer is blinking 4 times" or "It shows
Error P4 on the display".
With these two pieces of info, the technician knows over the phone whether the board has burned out or if it's just a €10 sensor. They arrive at your home already carrying the spare part! One visit, one charge.
The main electronic board (Inverter PCB) is the most expensive spare part - often costing €200 to €800 on large heat pumps. The No.1 "killer" of these boards is voltage surges, sags from the grid, and lightning strikes.
The Ultimate Prevention: If you have an expensive heat pump, ask your electrician to install a Voltage Monitor in the main panel. The moment the grid "goes crazy" and sends 260 Volts to your home, the monitor will instantly cut power to the heat pump, "sacrificing" itself to save your board!
Blinking lights are no reason to panic. They are the diagnosis the unit is handing you on a plate. Perform a Hard Reset by tripping the breaker for 15 minutes. If the problem persists, read the error code from the manual and give the technician the exact details. Knowing the code is your shield against unnecessary charges and time-consuming spare part searches.
Return to category.
Go to categoryReturn to the central guide.
Go to guide