🛡️ Its role
When the temperature rises, the screed slab pushes outward. The tape compresses (instead of the wall taking the force), and once the slab cools, the tape returns to its original shape, like an airbag.
A heated floor never stays still. Every time it heats up and cools down, the screed slab expands and contracts. If this movement has no room to dissipate, it finds its own way out - cracking tiles or lifting the perimeter rows.
The solution is not "stronger adhesive" or "thicker tile". The solution is correctly placed expansion joints, positioned exactly where they need to be, before the tiler even enters the house.
The first joint is not a cut - it is the well-known perimeter tape (polyethylene foam tape) that the installer glues all around walls, columns, staircase bases and door frames, before the thermal screed is poured. This tape acts as a cushion between the plaster (wall) and the slab (floor).
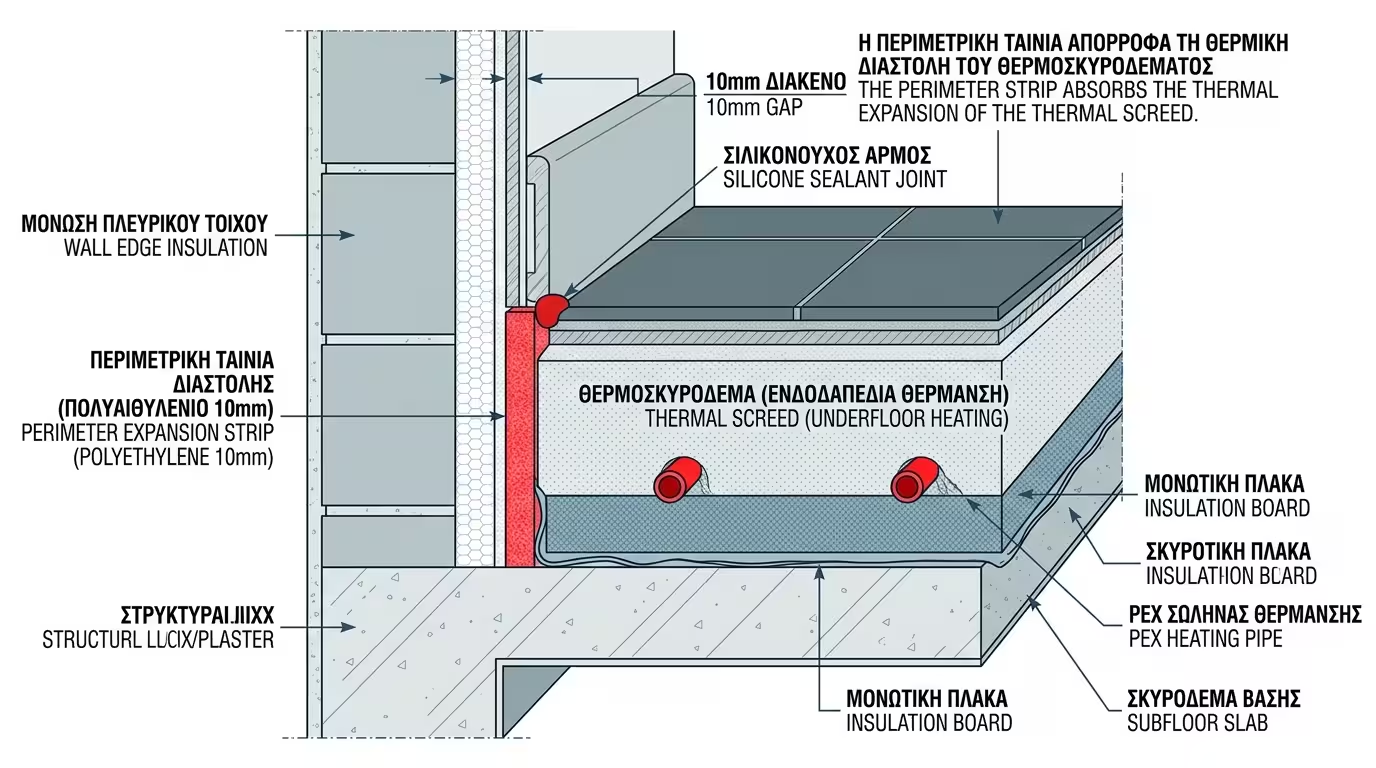
When the temperature rises, the screed slab pushes outward. The tape compresses (instead of the wall taking the force), and once the slab cools, the tape returns to its original shape, like an airbag.
The tape should not be cut low where it is visible - it must be left protruding until the skirting board is fitted. The tape must always sit slightly above the screed surface level. The skirting board then conceals everything aesthetically.
The tape should be at least 8 mm thick (ideally 10 mm). Thinner tapes do not absorb sufficient movement, particularly in large rooms or floors with high supply water temperatures.
All around every vertical element touching the floor: walls, columns, door frames, staircase bases, drain pipes. If the installer misses a spot, the slab will crack precisely at that unprotected point.
Even with perimeter tape in place, a huge 60 or 80 sqm living room as a single screed slab will crack. The regulation states that each screed field must not exceed 40 sqm (in some standards: 6 metres maximum width or length).
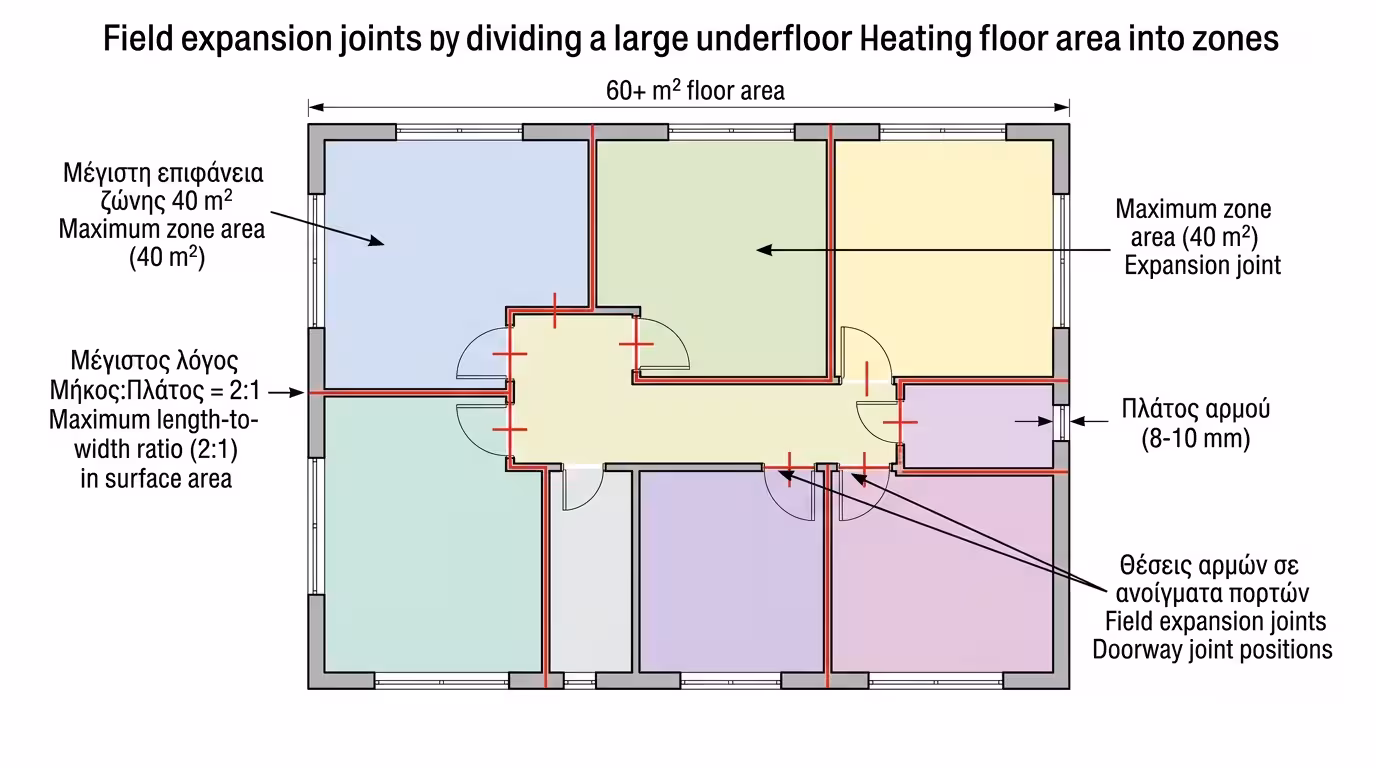
If the floor area exceeds 40 sqm, it must be divided into two or more independent "fields" with expansion joints between them. Each field has its own independent pipe circuit.
The installer places expansion tape vertically inside the slab, cutting it into two independent pieces. The tape must reach all the way down to the insulation. The joint is not done afterwards - it is made before the concrete is poured.
Circuit pipes must never cross diagonally through a field joint. If supply/return pipes must cross (e.g. to reach the manifold), they need corrugated protective sleeves at least 30 cm long on each side of the joint.
Fields should be as square as possible. Elongated fields (e.g. an L-shaped kitchen-corridor) expand asymmetrically and crack. The width-to-length ratio should not exceed 1:2.
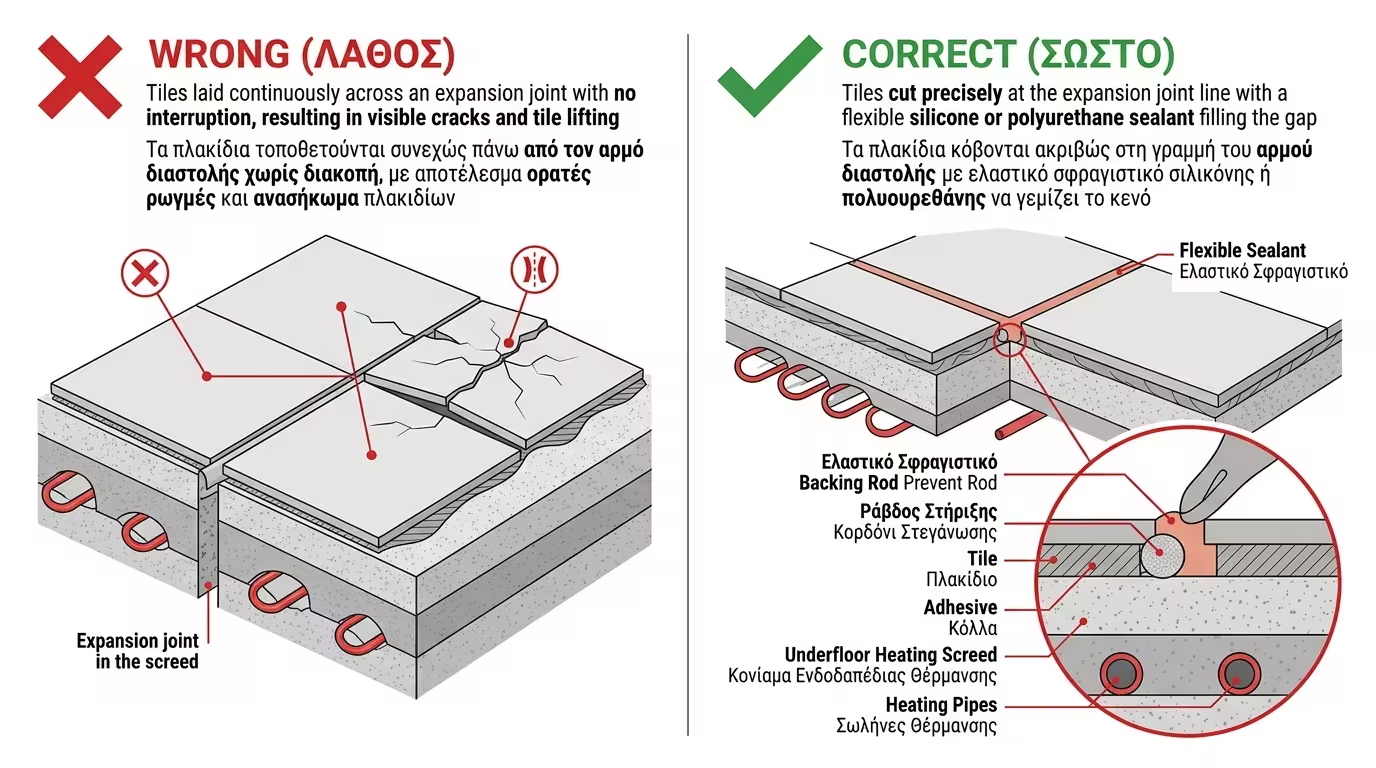
The tiler arrives after the installer. And when the underfloor system is correctly built (with screed joints), the tiler can ruin everything if he fails to respect the joints during tile installation.
The most common "crime": the tiler lays tiles continuously across the joint, connecting two independent fields. The fields will move independently, and the tiles bridging the joint will snap like a biscuit.
Some plasterers press the skirting board directly onto the perimeter tape, neutralising it entirely. The skirting must always be fixed to the wall and must not touch the tile, leaving a small gap.
Even if tiles are cut at the joint line, hard cementitious grout fills the gap, effectively sealing it rigid. The joint must remain free and be filled only with flexible sealant.
Tiles are cut precisely at the expansion joint line. The joint is filled only with flexible silicone or polyurethane sealant (never cementitious grout), so it can follow the movement without cracking.
⚠️ Before the tiler starts, show them the underfloor heating plan with all fields marked. Explicitly request that no joint is bridged with a continuous tile or filled with hard grout.
The expansion joint is not left open. After the tiles are laid, the gap is filled with a flexible sealing material that can follow the movements without cracking. Which material is the right choice?
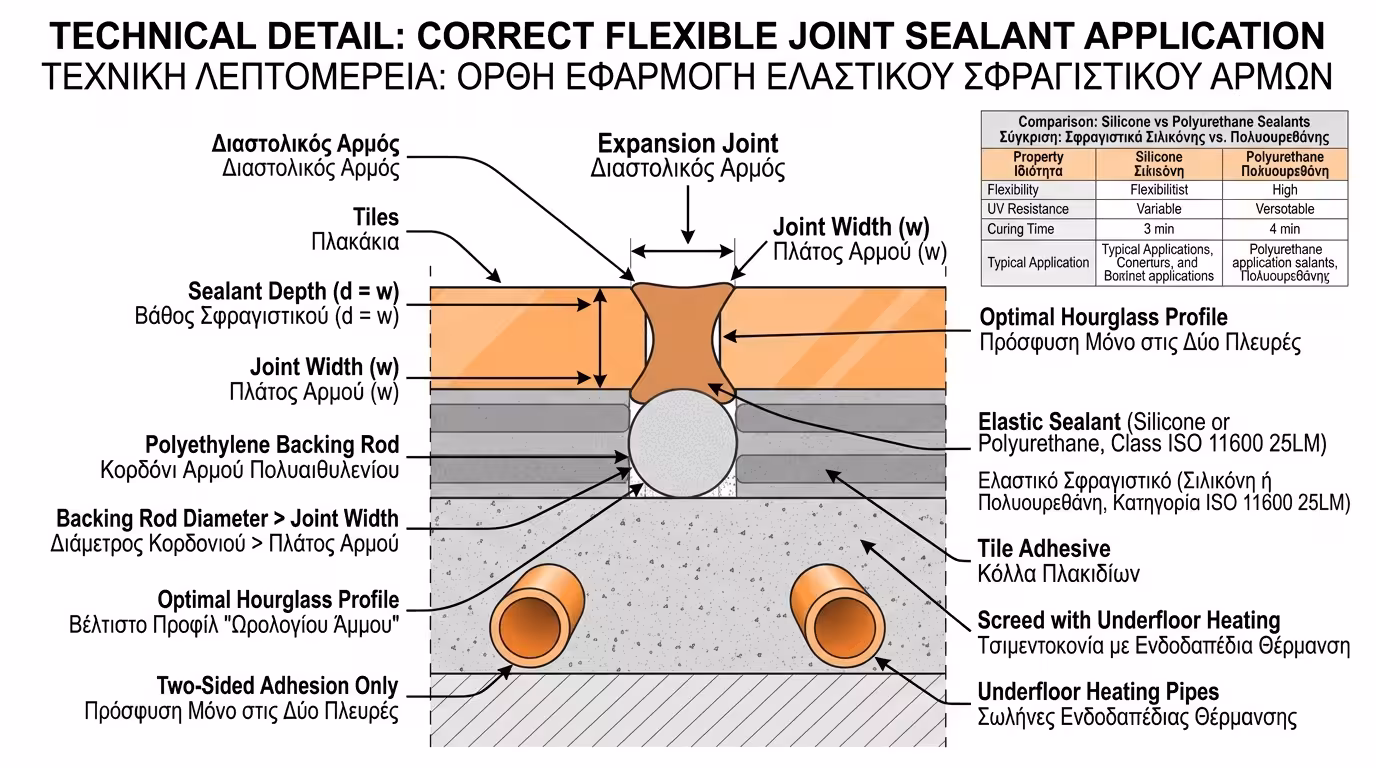
The most common choice. Flexible, waterproof, easy to apply. Ideal for bathrooms and kitchens thanks to its water resistance. Drawback: it cannot be painted easily if you need colour matching.
Excellent elasticity and adhesion even on slightly damp surfaces. Can be painted easily if colour matching is needed. Ideal for large joints in living rooms and high-traffic areas.
Standard cementitious grout (fugenmortel) is hard and rigid. It cannot follow thermal movement. It will crack within the first winter, and the tiles will crack along with it.
The expansion joint in the tiling must be at least 5–8 mm wide. Narrower joints do not allow sufficient elastic movement in the sealant, causing it to crack or debond.
Return to category.
Go to categoryReturn to the central guide.
Go to guide