1️⃣ Grooved insulation board
The insulation board is typically EPS or XPS with pre-routed grooves (channels) into which the pipe sits perfectly. These grooves replace the function of the knob plate used in wet-build systems.
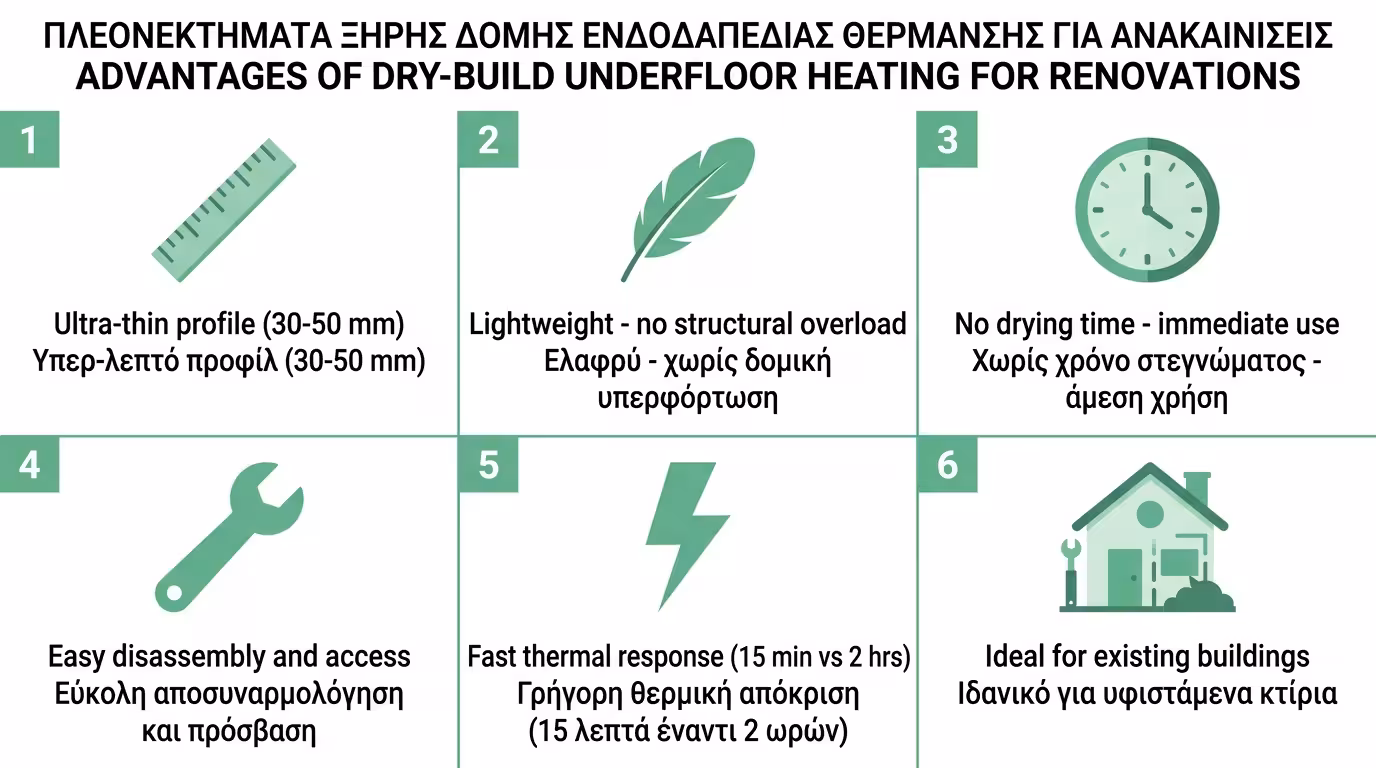
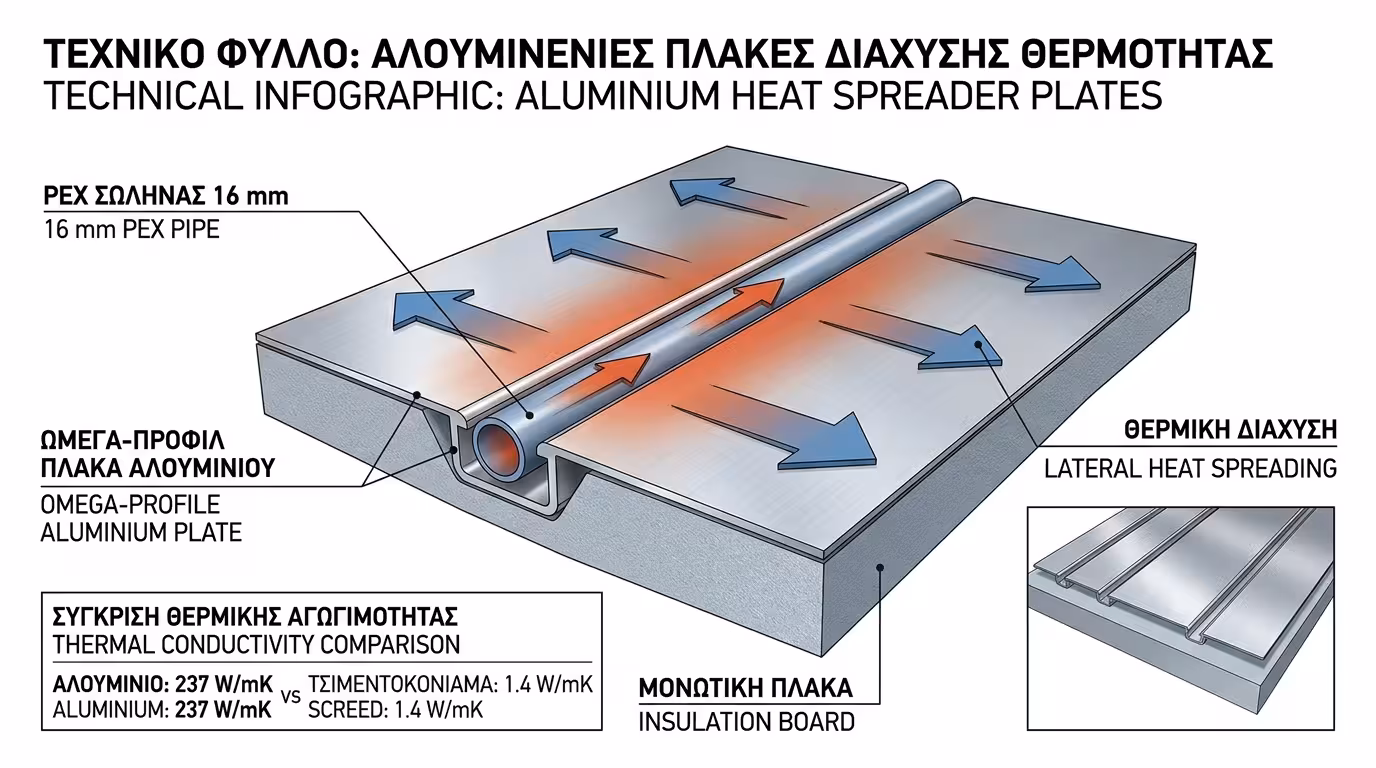
If you are renovating an older home and cannot "lose" 8–10 centimetres of floor height, traditional wet-build underfloor heating simply does not fit. Dry-build systems need only 3 to 5 centimetres, require no thermal screed, and are installed in record time without waiting 28 days for curing.
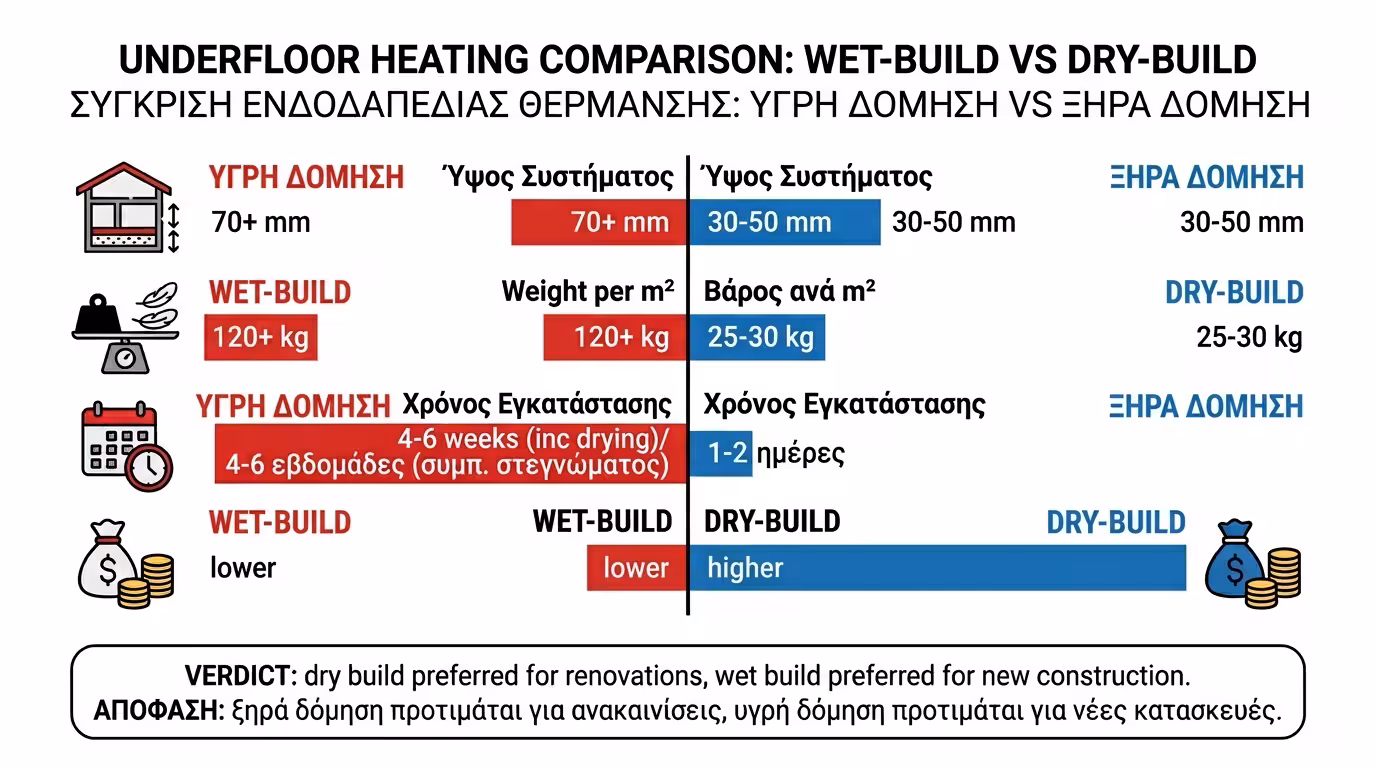
How does it work? Instead of thermal screed, it uses gypsum fibreboard or plasterboard (dry structural panels) and aluminium heat-spreader plates that dramatically boost performance.
Dry-build replaces the thermal screed with a system of dry panels. On top of the insulation (or even on top of an existing floor), specialised insulation boards with grooves are placed into which the pipe snaps together with aluminium heat-spreader plates.
The insulation board is typically EPS or XPS with pre-routed grooves (channels) into which the pipe sits perfectly. These grooves replace the function of the knob plate used in wet-build systems.
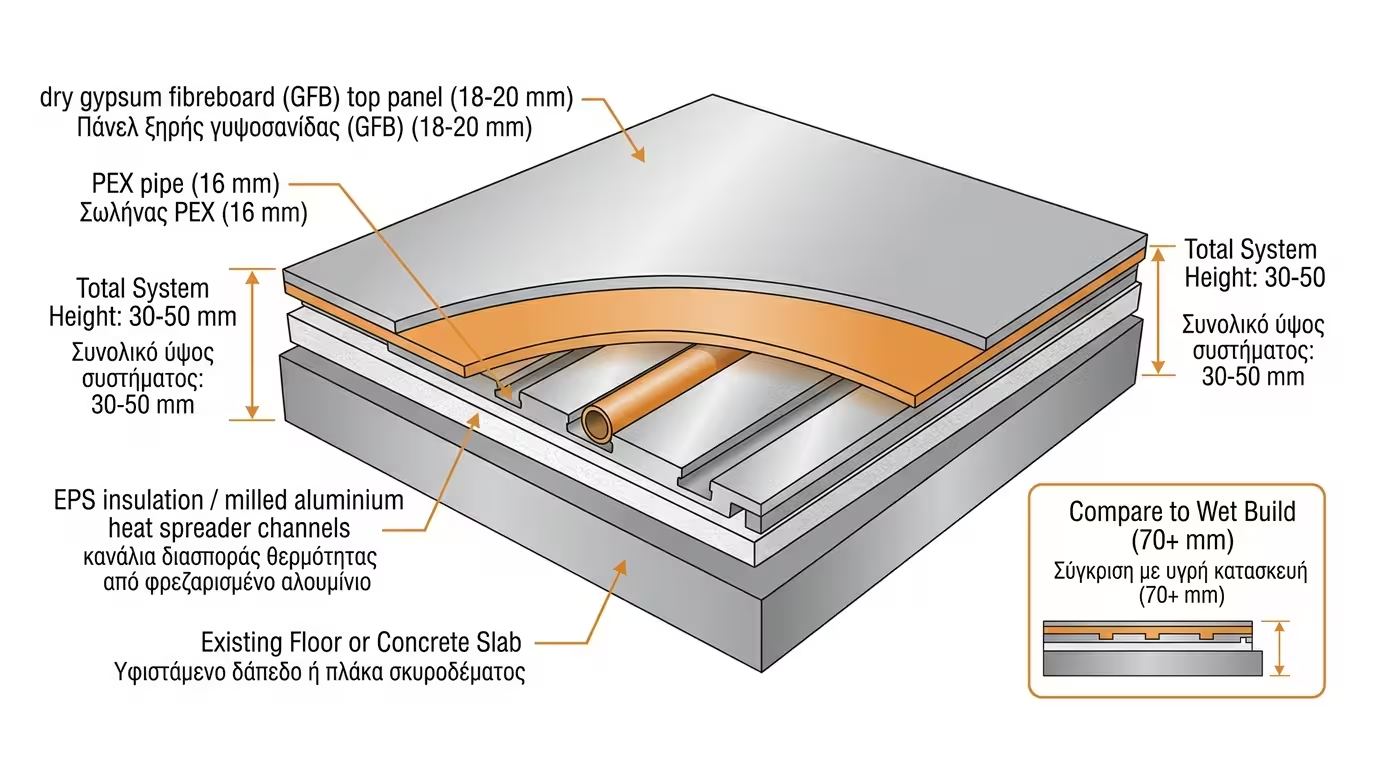
Inside each groove, a thin aluminium heat-spreader plate is placed that "hugs" the pipe. The aluminium grabs the heat from the pipe and distributes it evenly across a large surface area.
On top of the plates, a gypsum fibreboard (Fermacell) or plasterboard panel is laid. This is the "walking surface" that replaces the thermal screed. Tile, laminate or engineered wood is installed directly on top.
The entire system (insulation + pipe + aluminium + fibreboard) requires only 3 to 5 centimetres - half the thickness of wet-build. Ideal for renovations and rooms with low ceiling height.
In wet-build, heat is distributed through the thermal mass of the screed. In dry-build, there is no cement. Without something to replace that role, the heat would remain in a narrow strip above the pipe - creating a terrible "Zebra Effect".
The aluminium plate hugs the pipe and dramatically increases thermal conductivity. It converts a narrow heat strip into a large, uniform emission surface - the pipe effectively "sees" a much larger floor area.
Unlike wet-build (which takes hours), dry-build with aluminium responds in 15–30 minutes. Ideal for homes with irregular occupancy (e.g. an office that cools overnight and needs rapid morning warm-up).
Some "budget" dry-build systems omit the aluminium plates to cut costs. This may save money on installation, but the heat emission performance drops dramatically, creating uneven floor temperatures.
Always choose a system with full-coverage aluminium heat-spreader plates. The plates should cover at least 80% of the floor area for uniform temperature distribution.
Dry-build is not "worse" or "better" than wet-build. It is an alternative solution that solves specific problems - primarily in renovation projects. Let us examine where it excels and where it falls short.
Ideal for renovating older homes where 10 cm of screed does not fit between the floor and the door frame. Also ideal for timber floors (wooden joists) that cannot bear the weight of wet screed.
No cement is poured, so there is zero waiting. Tiles or laminate can be installed immediately after the fibreboard. Ideal when construction timelines are critical (e.g. hotels).
Dry-build weighs less than half compared to a thermal screed system. A critical advantage in older buildings with weak slabs or timber floor structures.
Dry-build stores less heat compared to the large mass of thermal screed. This means the home cools down faster if the Heat Pump is switched off for an extended period.
Aluminium plates and gypsum fibreboards cost significantly more than the materials of a traditional wet-build system. The final cost per sqm can be 30–50% higher.
The final choice does not depend on cost alone. It depends on three critical factors: available height, floor structural capacity and construction time.
In a new home where the architect can design the correct heights from the outset, wet-build wins: cheaper, greater thermal mass, and proven long-term durability.
In an older home with low ceilings, existing doors and timber floors, dry-build is the only realistic option. The 3–5 cm profile fits where 10 cm simply does not.
If you must deliver on a tight schedule (hotels, commercial spaces), dry-build saves 4–6 weeks compared with the curing time of thermal screed.
Dry-build costs €55–85/sqm (materials + installation), whereas wet-build costs €35–55/sqm. The gap narrows when you factor in time savings and avoiding changes to doors and ceiling heights.
💡 If you are renovating and your floor height is limited, do not hesitate - dry-build underfloor heating is a reliable, fast and technologically complete solution. Just ensure the installer uses aluminium heat-spreader plates and proper gypsum fibreboard (at least 18 mm thick).
Return to category.
Go to categoryReturn to the central guide.
Go to guide