🎯 The Goal
If the network withstands this extreme pressure for a sufficient time without dripping and without the gauge needle dropping, the system is 100% safe.
You bought the best pipes. Your plumber is an excellent professional. Everything has been connected meticulously. Yet we are on a construction site. A tiny material defect from the factory, an O-ring that "chewed" during installation, or - most commonly - a labourer who accidentally stepped on the pipe with a sharp tool, is enough to create a microscopic hole.
If that hole is buried under 10 cm of concrete and expensive tiles, the damage that emerges months later (when you turn on the water) will be catastrophic.
To sleep soundly, engineering mandates the Pressure Test (Pressurisation). It is the ultimate simulation of extreme conditions to verify the network's integrity.
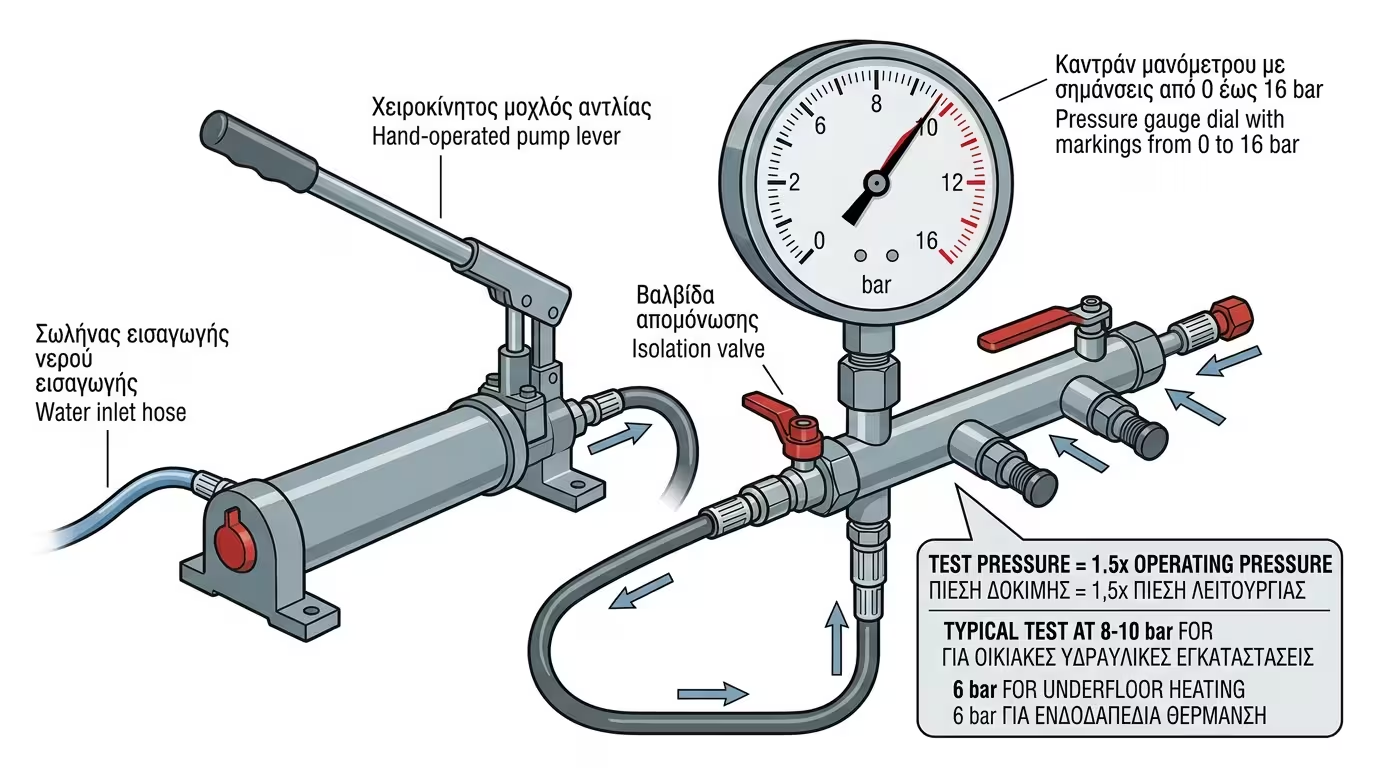
The logic is simple: we fill the entire network (plumbing or heating) with water and, using a special pump (manual or electric), raise the water pressure far above the normal operating pressure of the house.
If the network withstands this extreme pressure for a sufficient time without dripping and without the gauge needle dropping, the system is 100% safe.
The general rule is to pressurise at 1.5 times the maximum operating pressure. For a typical home (mains water at 3–4 bar), testing is usually done at 8 to 10 bar. For underfloor heating, 6 bar is typical.
If you are the homeowner or the supervising engineer, you must be present during this test. Here is what the crew must do:
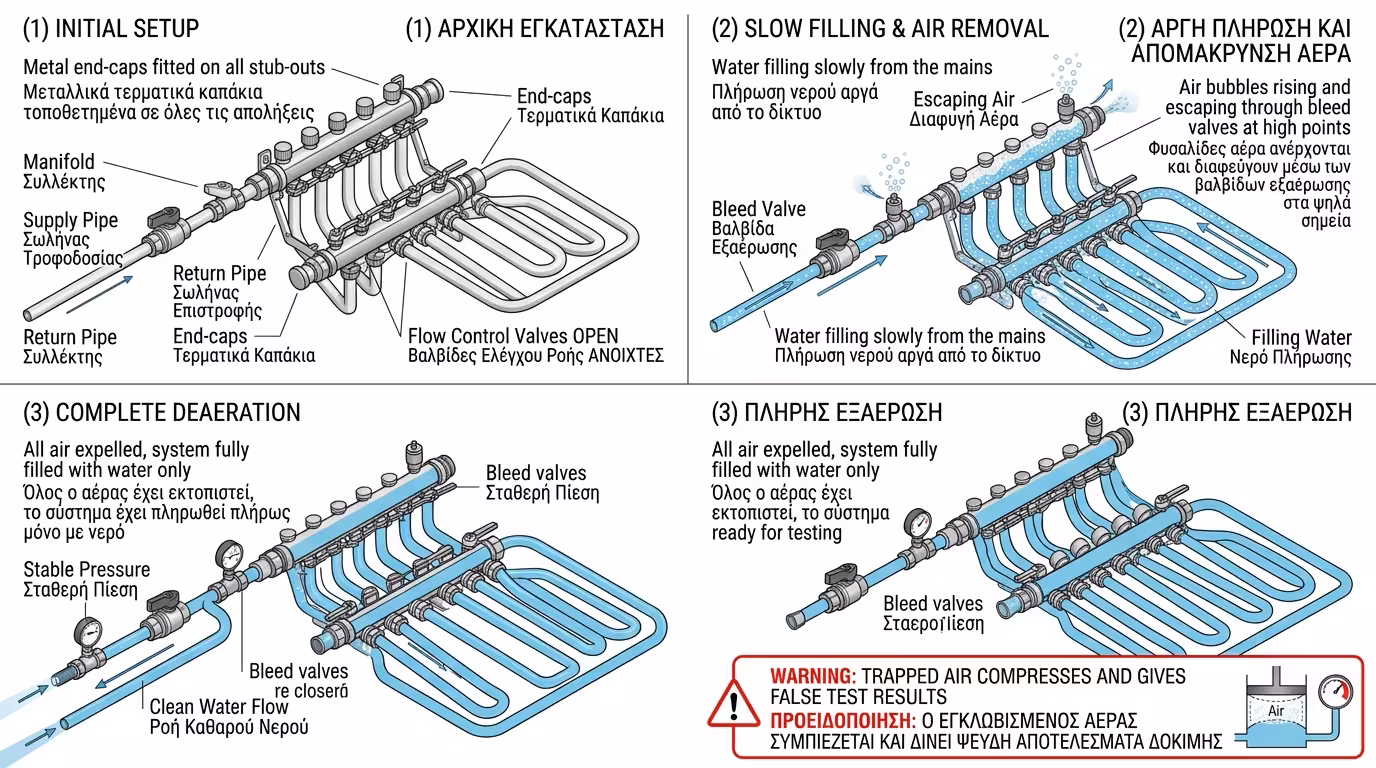
The plumber fits metal caps (end plugs) on all stub-outs in the house (where taps and radiators will later be installed). All manifold valves are confirmed fully open so water can reach everywhere.
The network is connected to the water supply and filled slowly. Critical point: all air must be expelled from the pipes. Air compresses (water does not). If air remains inside the network, the test will give false results.
The plumber connects the test pump to the manifold. Pumping begins (manually if hand-operated) until the gauge reads the target pressure (8–10 bar).
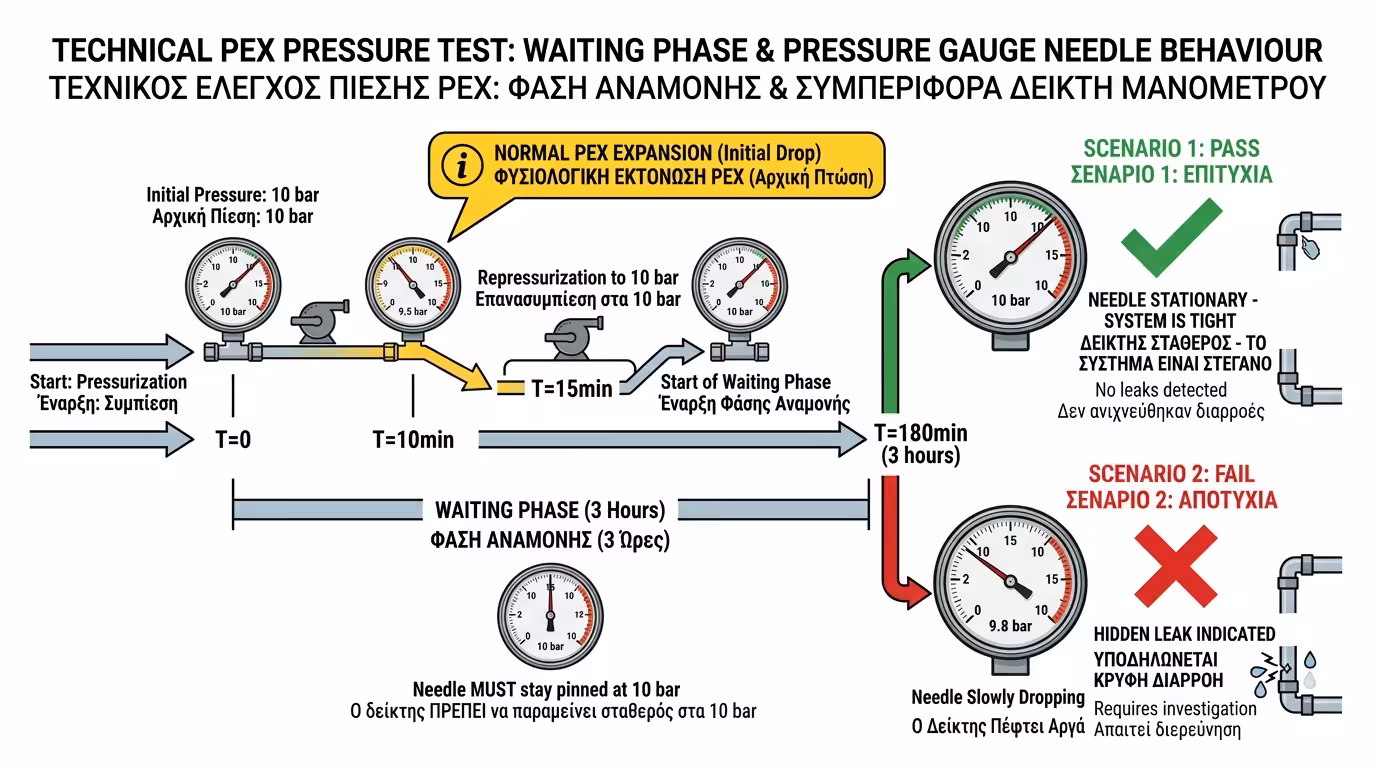
Once the needle reaches 10 bar, the plumber closes the pump valve. Now, everyone watches the gauge.
With plastic pipes (PEX or Multilayer), in the first 10–15 minutes the needle will drop slightly (e.g. from 10 bar to 9.5 bar). This is perfectly normal! The plastic pipe "stretches" (expands) under the enormous pressure, slightly increasing its volume. The plumber re-pumps to bring it back to 10 bar.
From that moment on, the needle must remain absolutely stationary for at least 2–3 hours (ideally, the system is left under pressure for a full 24 hours). If the needle keeps dropping, there is a leak somewhere and the search begins before concrete is poured.
This is the "tip" that distinguishes top-tier construction sites: Do NOT drain the water when the concrete mixer arrives!
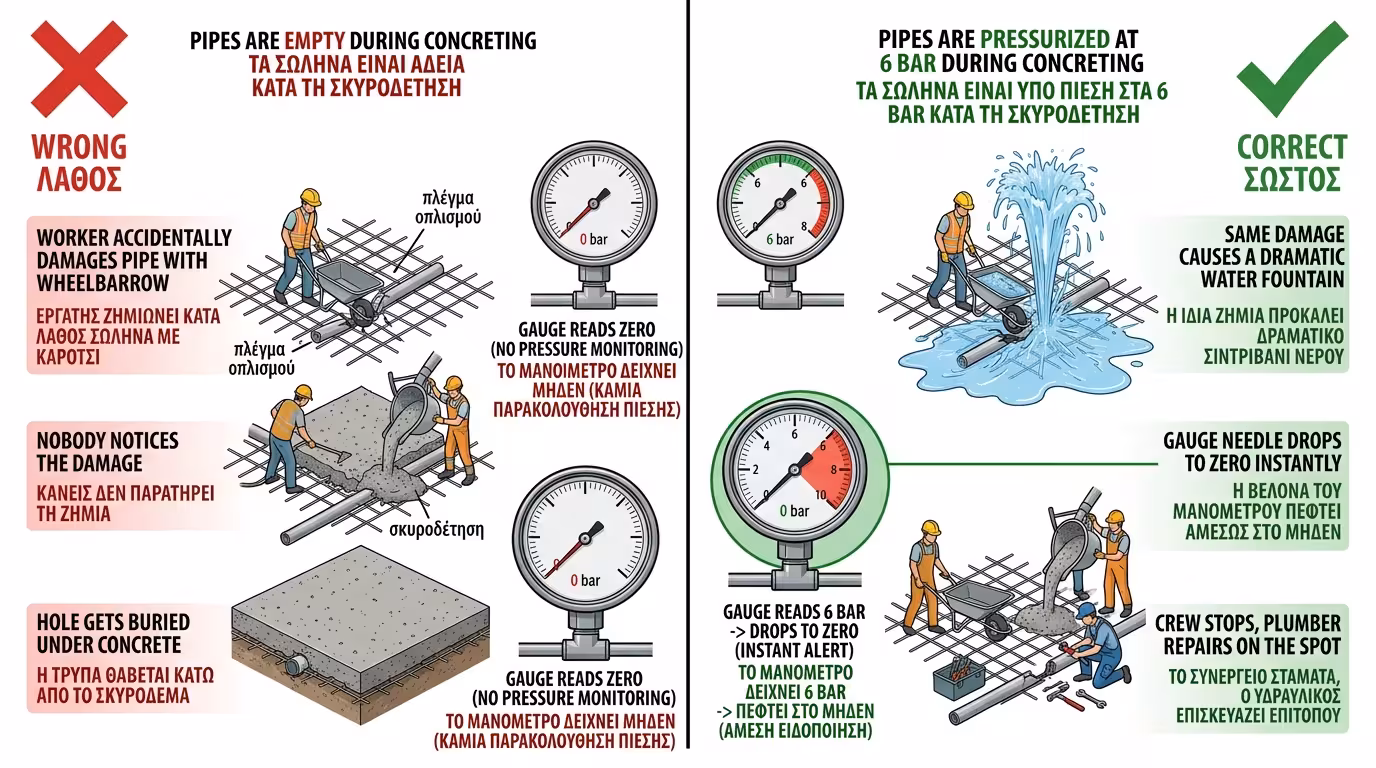
The network must remain filled with water and under pressure (e.g. 6 bar) throughout the entire duration of the concrete or screed pour. The gauge stays connected and visible. During the pour, a labourer with a wheelbarrow, shovel or heavy equipment could accidentally "cut" a pipe.
Nobody will notice and the hole will be buried under the concrete.
The hole will shoot water like a fountain and the gauge needle will instantly drop to zero. The crew stops, the plumber repairs the damage on the spot, and the house is saved.
Yes, it is permitted and is called a "Pneumatic Test". It is usually done in areas with extreme cold. If the network is filled with water in December and the building has no windows yet (shell stage), the water in the pipes can freeze overnight, expand and burst the pipes. In such cases, an air compressor is used instead.
However, water is always preferred where feasible, because it is incompressible (any pressure drop shows immediately on the gauge) and makes the leak visually obvious (you can see the drip).
Never allow your floors or walls to be closed up unless you have seen with your own eyes the gauge needle "pinned" in place. The pressure test is the insurance policy of your plumbing installation.
Now that we have confirmed there are no leaks, we must anticipate something that will happen after the house is occupied: when hot water flows, the pipes will grow! In the next article: Thermal Expansion of Pipes - how it is calculated, why pipes curve like "snakes", and how the correct use of supports and omega (Ω) expansion loops prevents damage.
Return to category.
Go to categoryReturn to the central guide.
Go to guide