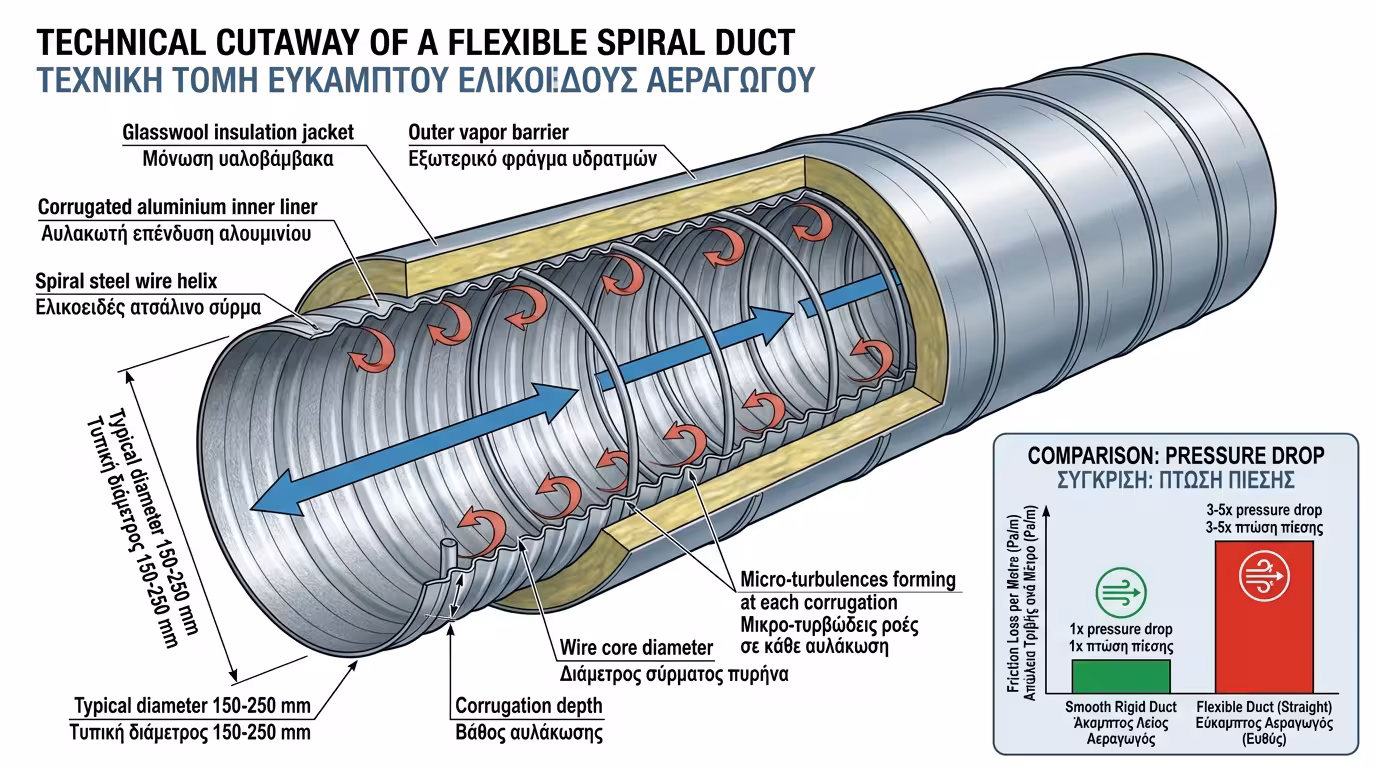
🌪️ Micro-turbulences
Every time air hits the internal corrugations, micro-eddies are created. The air's kinetic energy is lost as friction. In engineering terms, this is called Pressure Drop.
Flexible ducts (commonly called "spiral" or "flex") are perhaps the most misunderstood material in HVAC installations. Made from a spiral steel wire core wrapped in aluminium and fibreglass insulation - they resemble a giant "accordion".
For a rushed installer, the flex duct is a godsend: pull one hose in 2 minutes instead of cutting sheet metal angles. But that is the recipe for absolute disaster. In this guide we explain why - and how to use them correctly.
Inside a rigid duct (sheet metal or PIR panel), the walls are smooth as glass. Air glides freely. Inside a flex duct, the inner wall is covered with corrugations from the wire core - like driving on a potholed dirt road.
Every time air hits the internal corrugations, micro-eddies are created. The air's kinetic energy is lost as friction. In engineering terms, this is called Pressure Drop.
One metre of flexible duct can cause 3 to 5 times greater pressure drop compared to one metre of smooth, rigid duct of the same diameter. It is the worst choice for long runs.
If the installer connects the unit to the diffuser using 6 metres of flex duct, the fan will strain to push air but almost nothing will reach the room. Electricity burns, the room stays hot.
Think of air as a car: on a smooth duct (highway) it cruises freely, while in a flex duct (potholed dirt road) it brakes, bumps and loses speed with every metre.
Flexible ducts are not banned. In fact, they are essential for connecting diffusers - but only if the following rules are strictly followed. Proper application eliminates pressure drop and noise problems.
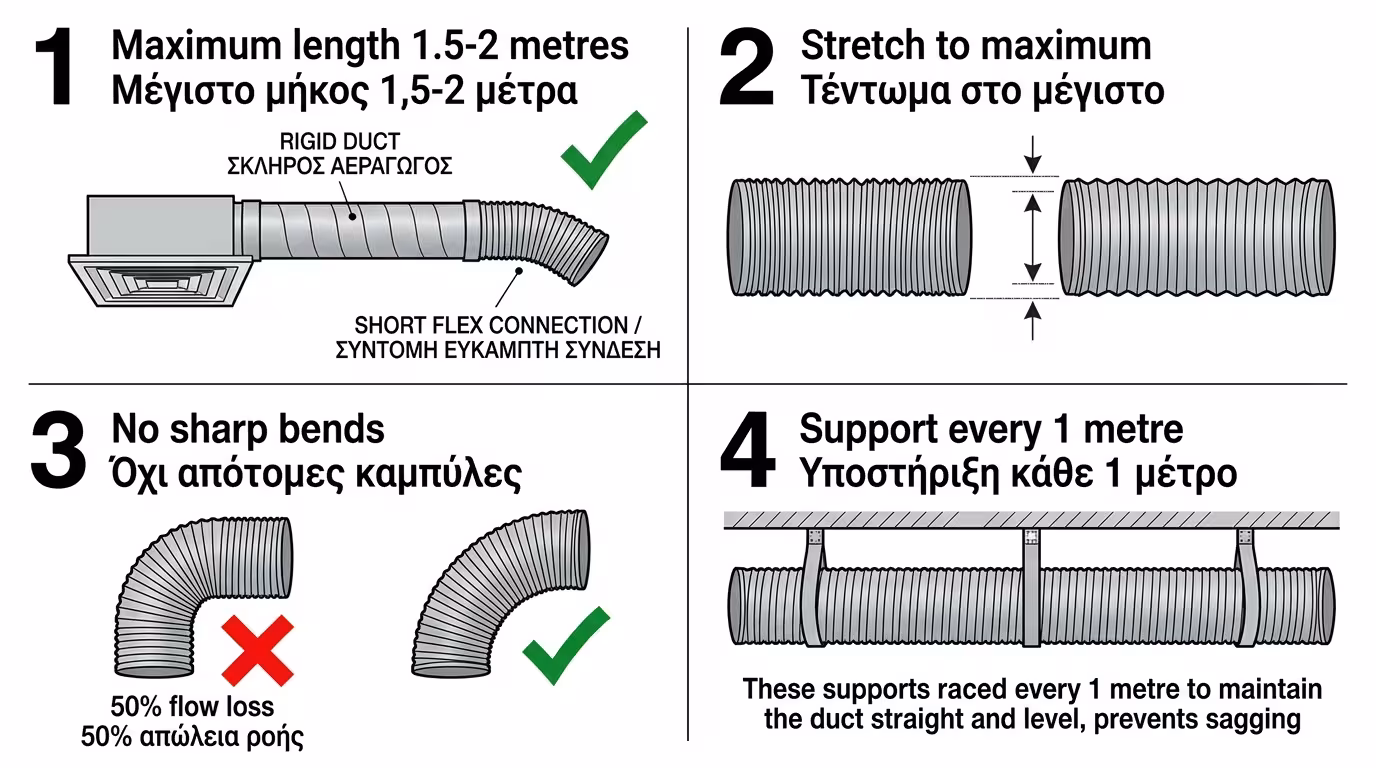
The main rigid duct must reach as close as possible to the diffuser. Flex is used only for the final connection, bridging minor misalignments. Maximum length: 1.5 – 2 metres.
Cutting 2 metres of flex for a 1-metre gap? That is a criminal mistake. When left compressed ("concertinaed"), the corrugations deepen dangerously. It must be fully stretched before cutting and connecting.
If you kink flex duct at a 90-degree angle, you throttle airflow by 50%. Bends must be smooth (open arc). For sharp turns, use a rigid metal elbow then attach the flex after it.
Flex ducts are soft - if left unsupported, they sag under their own weight. This changes their geometry and drops the pressure. Support them with wide straps every 1 metre, keeping them horizontal and straight.
Stretching flex duct isn't a "detail" - it is the single most critical action during installation. A stretched flex behaves almost like a smooth duct, while a compressed one can double or triple the pressure drop.
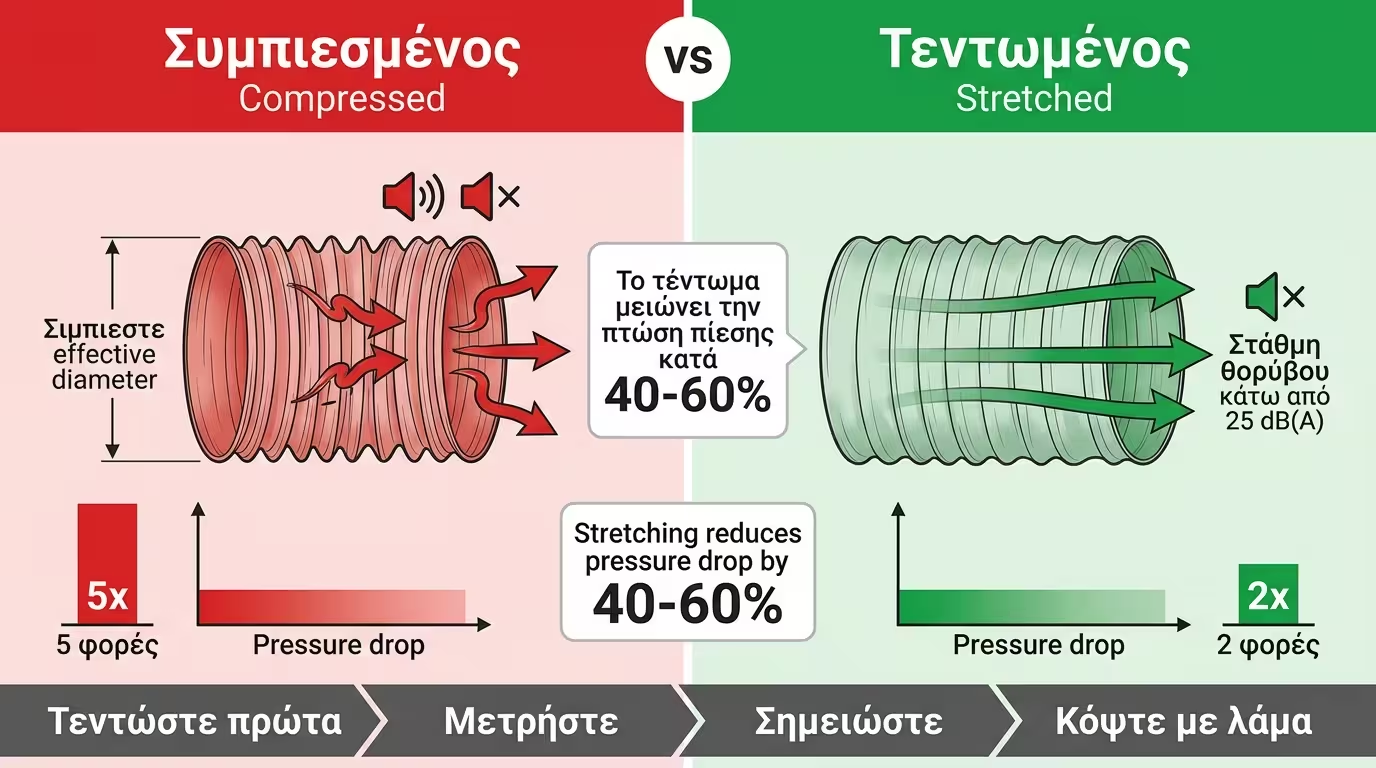
Think of it as a gathered curtain: the material folds, corrugations deepen. Air hits every fold, loses speed and creates noise. The effective cross-section is drastically reduced.
By pulling the flex to its maximum length, corrugations become shallower, the inner surface becomes smoother, and pressure drop decreases by 40-60% compared to the same length compressed.
In a compressed flex, air creates a characteristic humming or whistling sound. In a properly stretched one, noise drops below 25 dB(A) - practically silent in a bedroom.
Stretch first, measure, mark, and cut with a blade at the mark. Never leave excess "just in case". Every extra centimetre of compressed length means lost pressure in the room.
A flex duct hanging like a "belly" between two support points isn't just ugly - it is a throttle point for the air. Proper support is just as important as stretching itself.
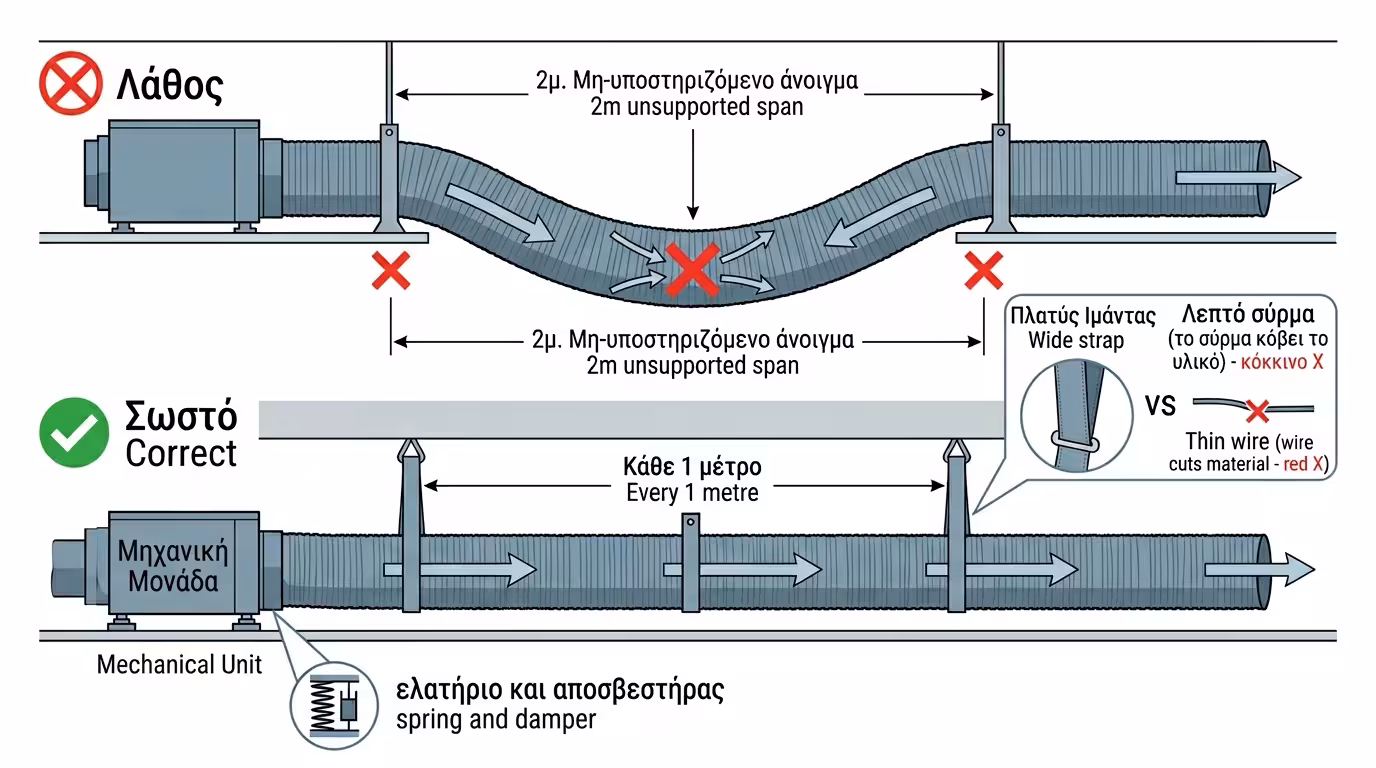
Use wide installation straps - never wire or thin tape that cuts into the material. The strap cradles the duct without strangling or deforming it.
Supports are placed every 1 metre maximum along the flex duct. If the gap is larger, gravity creates a belly and air brakes at the low point.
An important advantage of flex: it absorbs machine vibrations. Like an "anti-vibration connector", it prevents vibration transmission to plasterboard - as long as it isn't stretched excessively tight.
If you see your installer running metres upon metres of flex duct across the ceiling void, stop them immediately. Only a final 1-1.5 metre connection at each diffuser - the rest must be rigid ductwork.
💡 Flex duct is a necessary evil. Excellent for diffuser connections and vibration absorption - but nothing more. Correct use = cool room. Wrong use = "why isn't the space cooling down?"
Return to category.
Go to categoryReturn to the central guide.
Go to guide