🐛 DIY: Hole Injection
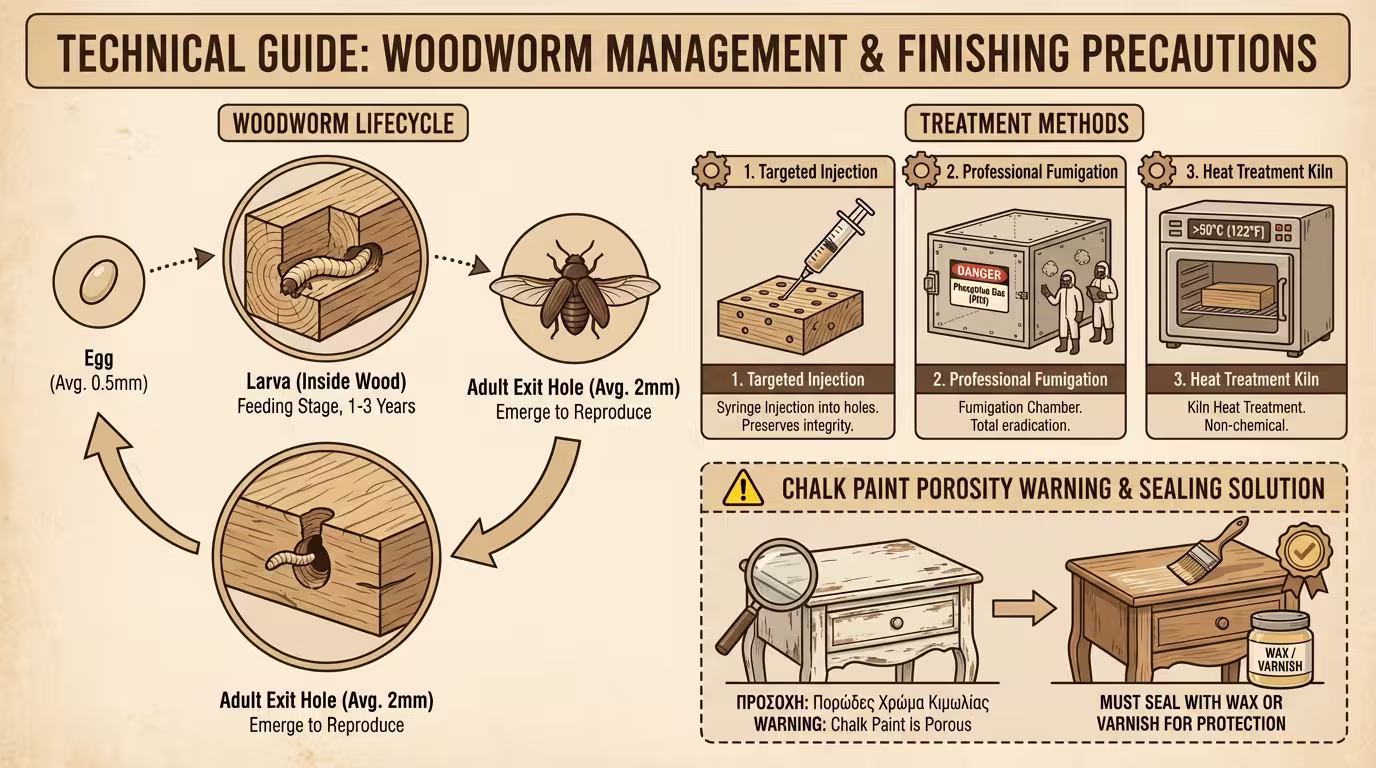
Surface insecticide isn't enough - larvae live inside the wood. Inject specialised treatment (or paraffin) with a syringe into each hole and seal them with wax or filler to trap the fumes.
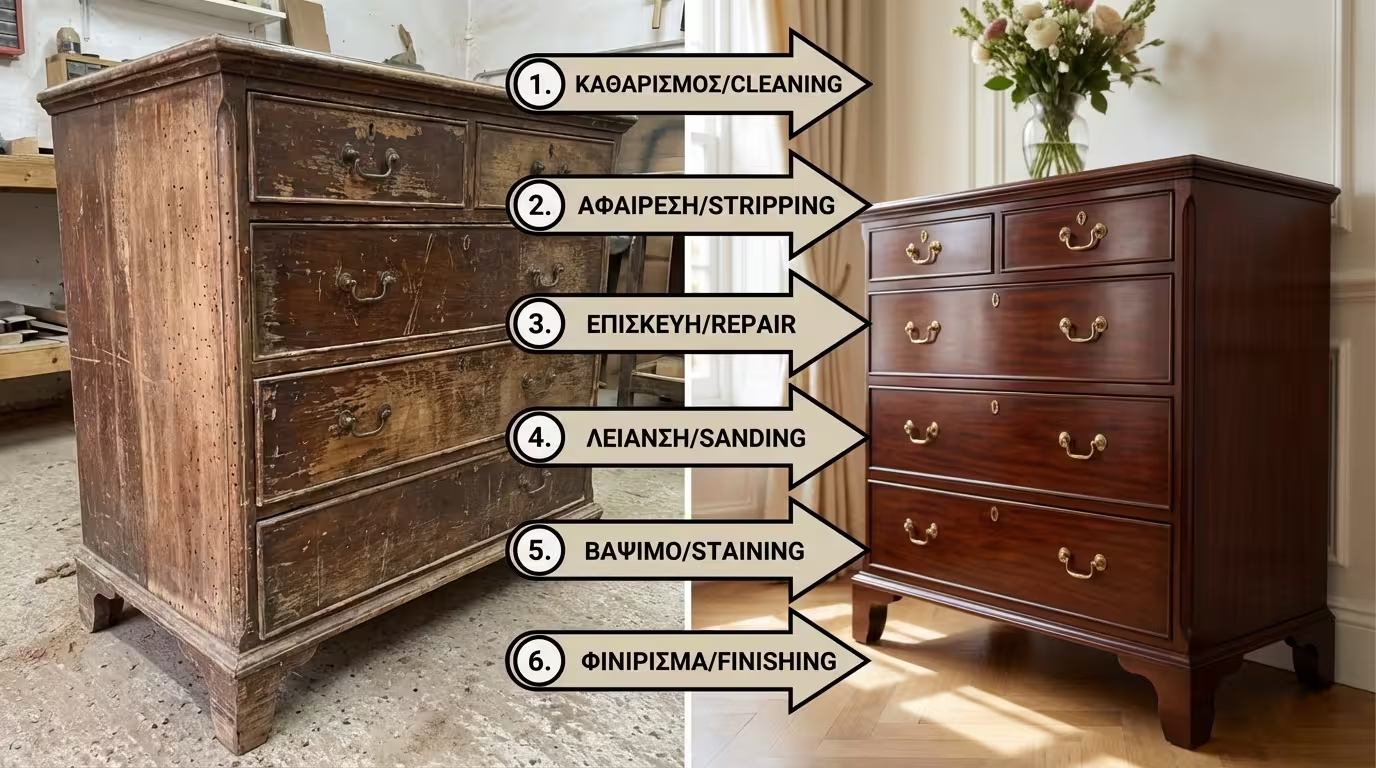
An old, worn piece of furniture isn't destined for the skip. With proper technique and the right materials, a battered dresser or grandmother's armchair can become the stunning centrepiece of your living room.
Before any aesthetic work, check the wood's "health". Small, perfectly round holes on the surface and traces of fine dust (like powder) on the floor indicate wood-boring insects (woodworm).
Surface insecticide isn't enough - larvae live inside the wood. Inject specialised treatment (or paraffin) with a syringe into each hole and seal them with wax or filler to trap the fumes.
For severe infestations: fumigation (phosphine gas) or heat treatment in specialised chambers (>50°C) that kills eggs and larvae throughout the wood mass.
For classic furniture: PVA (Yellow Glue) for clean wood-to-wood bonds. Polyurethane (PU) glue if there are gaps or the piece is exposed to moisture. For antiques, traditional Hide Glue remains the only reversible professional option.
If the wood is "punky" or crumbly due to old woodworm damage or rot, use an epoxy wood hardener. It penetrates the fibres and turns them into a solid mass capable of holding screws or filler.
If the furniture has old, flaking varnish or thick layers of paint, the bare wood must be revealed:
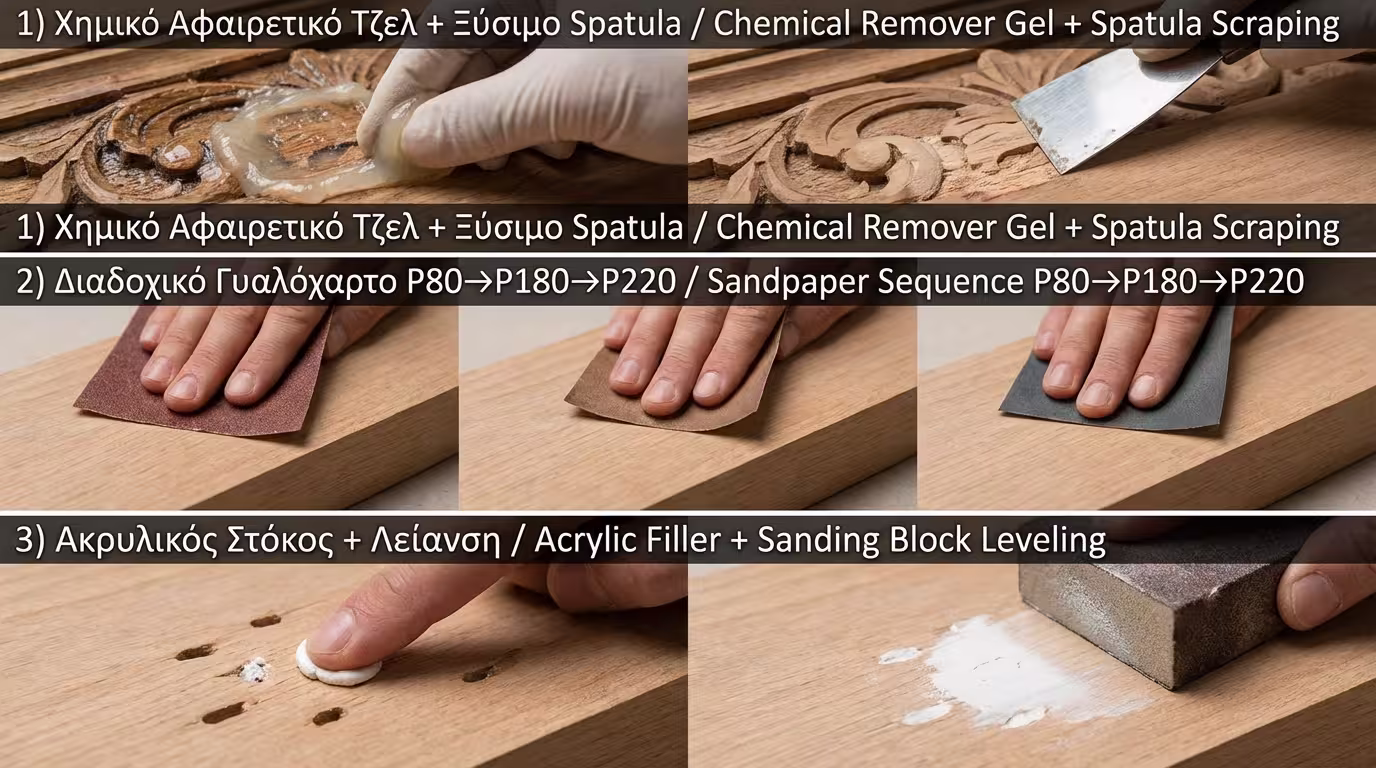
The safest method - especially for carved pieces. Apply, wait 15-30 minutes, scrape carefully with a spatula.
Start P80-100 (bulk removal) → finish P180-220 (velvet-smooth). Never skip grit numbers.
Acrylic wood filler for deep scratches, cracks, woodworm holes. After drying → local sanding to level.
The preparation depends on the desired end result:
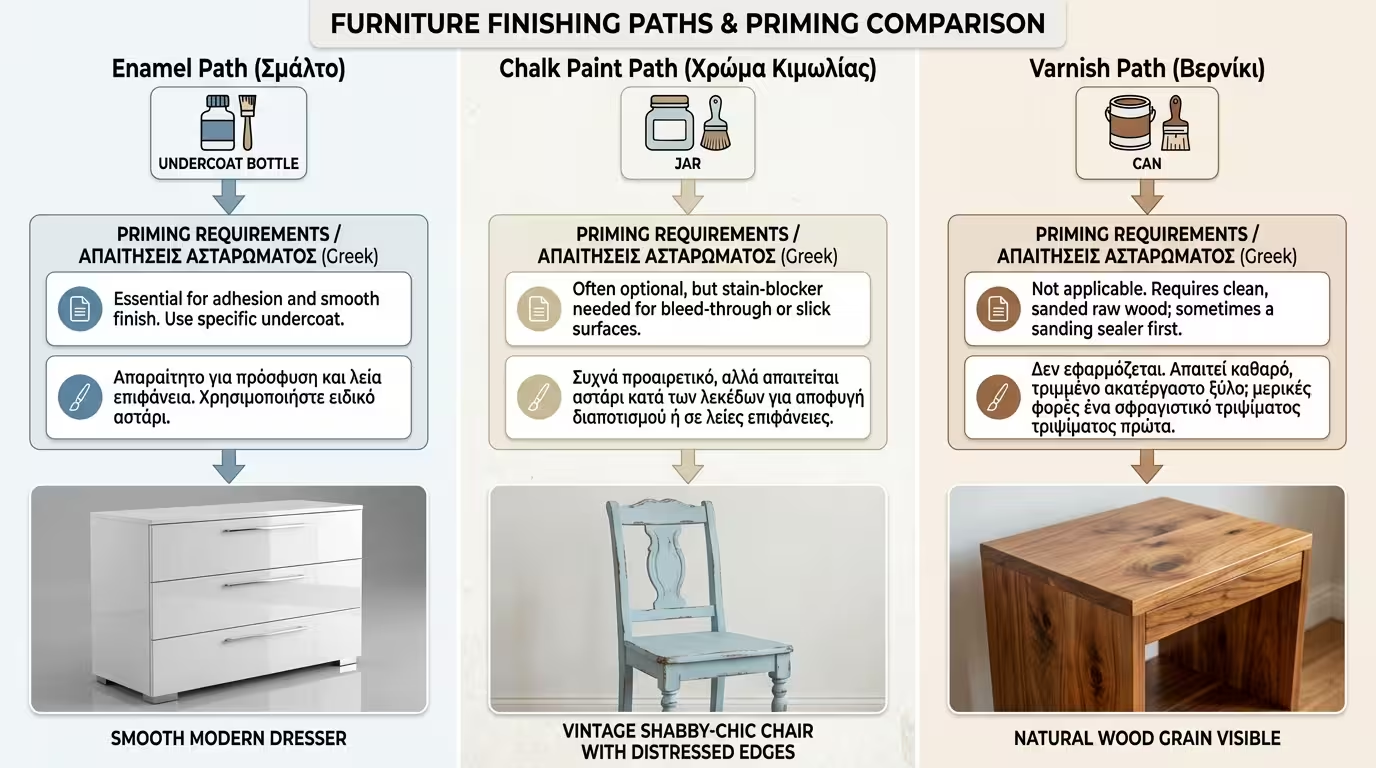
Undercoat first - fills micro-pores, blocks tannins, strong adhesion. Ideal for cabinets, children's furniture. Smooth, hard, washable finish.
No sanding, no primer needed - just a clean surface. For Shabby Chic: paint 2 coats, then lightly sand edges/corners to reveal the wood underneath.
Transparent wood preservative first for fungal protection, then final lacquer coat. Highlights the grain.
If you used Chalk Paint (extremely porous), you must seal it:
Irresistible, velvety retro look. Dark waxes (brown, black) create stunning "patinas" in carvings. Downside: no stain/water resistance, needs frequent renewal.
Hard, washable film - the only choice for dining tables, nightstands, kitchen cabinets. Built to last.
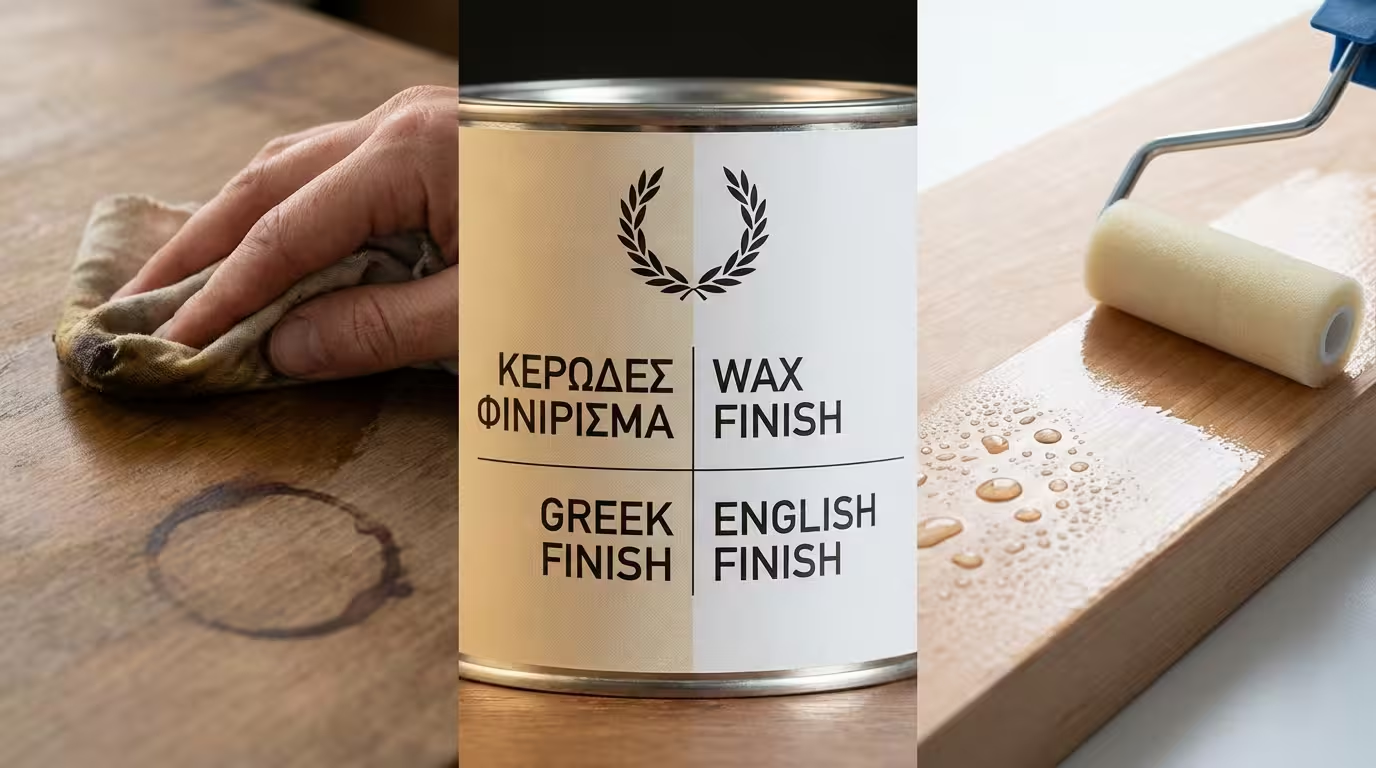
💡 "Wax Finish" water-based varnishes - applied like varnish, top-tier protection, but dry to a completely matte, velvety feel like traditional wax. The ideal compromise!
Critical details for professional painters and demanding DIYers:
Surface insecticide won't reach larvae inside. Professional fumigation (phosphine) or heat treatment in chambers >50°C required. After treatment, seal all exit holes to prevent new egg-laying.
Equilibrium Moisture Content: Don't paint furniture moved from a damp basement to a dry living room. Allow 10-15 days to acclimatise, otherwise shrinkage will crack the new finish.
底部 Technical Tip: In restoration, the glue joint must be stronger than the wood itself. Use clamps for at least 12-24 hours, ensuring zero gap in the joint.
Return to category.
Go to categoryReturn to the central guide.
Go to guide